
Loading ...
Loading ...
Loading ...
23WWW.SENIXTOOLS.COM
7. Tighten the bar mounting nuts to fix the clutch cover
(Fig. 35).
8. Pull the saw chain along the top of the guide bar by
hand from one end to the other, several times. The
chain should feel tight but still move freely.
Fig. 35
Fig. 36
Fig. 37
Saw chain sharpening may be required:
- after damp wood is cut (mealy sawdust),
- when handling the product becomes difficult (pulls to
the left or right),
- when the saw chain is blunt (excessive force is
required to penetrate the wood), or obviously
damaged.
Never saw with a blunt chain. The saw chain is blunt if
you have to push the product into the tree and the chips
are very small.
1. Have the saw chain sharpened professionally at
an authorized service center or sharpen the chain
yourself by using a proper sharpening kit. Also
observe the sharpening instructions supplied with
the sharpening kit.
2. The height difference between the tooth and the
ridge is the cutting depth. When sharpening the saw
chain you have to consider the following points:
- File angle
- Cutting angle
- File position
- Diameter of round file
- File depth
3. To sharpen the chain proceed as follows:
- Use protective gloves.
- Ensure the chain is correctly tensioned.
- Engage the chain brake to lock the chain on the
bar.
Only sharpen the saw chain yourself if you are trained
and have experience! Use proper tools to sharpen the
saw chain!
A file guide is available from most reputable tool
merchants and is the easiest way to hold the file at the
correct position.
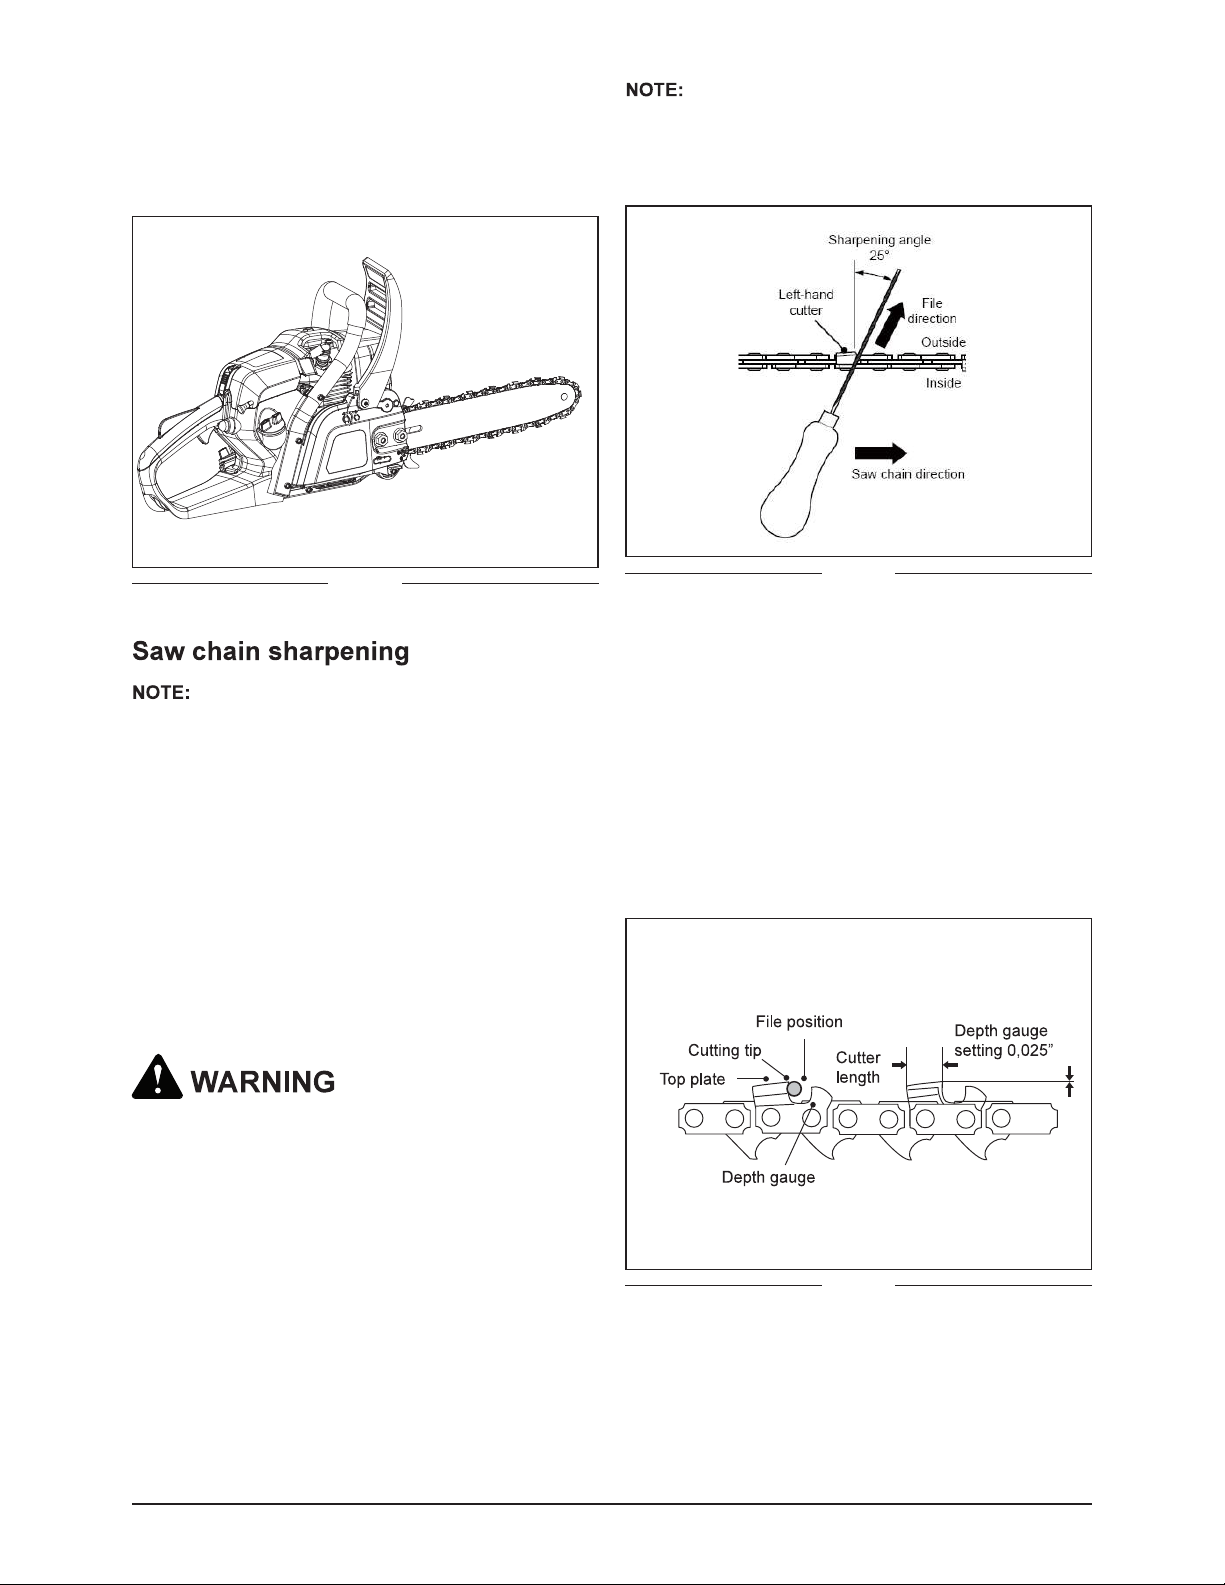
4. File at an angle perpendicular to the bar, and at an
angle of 25° to the direction of travel(Fig.36).
5. File each tooth from the inside towards outside only.
File one side of the chain first than turn the saw
around and repeat the process.
6. Sharpen each tooth equally by using the same
number of strokes.
7. Keep all cutter lengths equal. Check the safety
depth gauge height every 5 sharpenings. If the
depth gauges are also trimmed it is essential that
the original profile be restored.
8. Use a depth gauge measuring instrument to
check the height of the depth gauge. Depth gauge
measuring jigs are available from most reputable
tool merchants (Fig.37).
Loading ...
Loading ...
Loading ...