Loading ...
Loading ...
When assembling your steam mop, there may be a little water in or around the water tank.
This is because we test all our steam mops before you buy them, so you get a quality
Shark
®
Steam & Scrub steam mop.
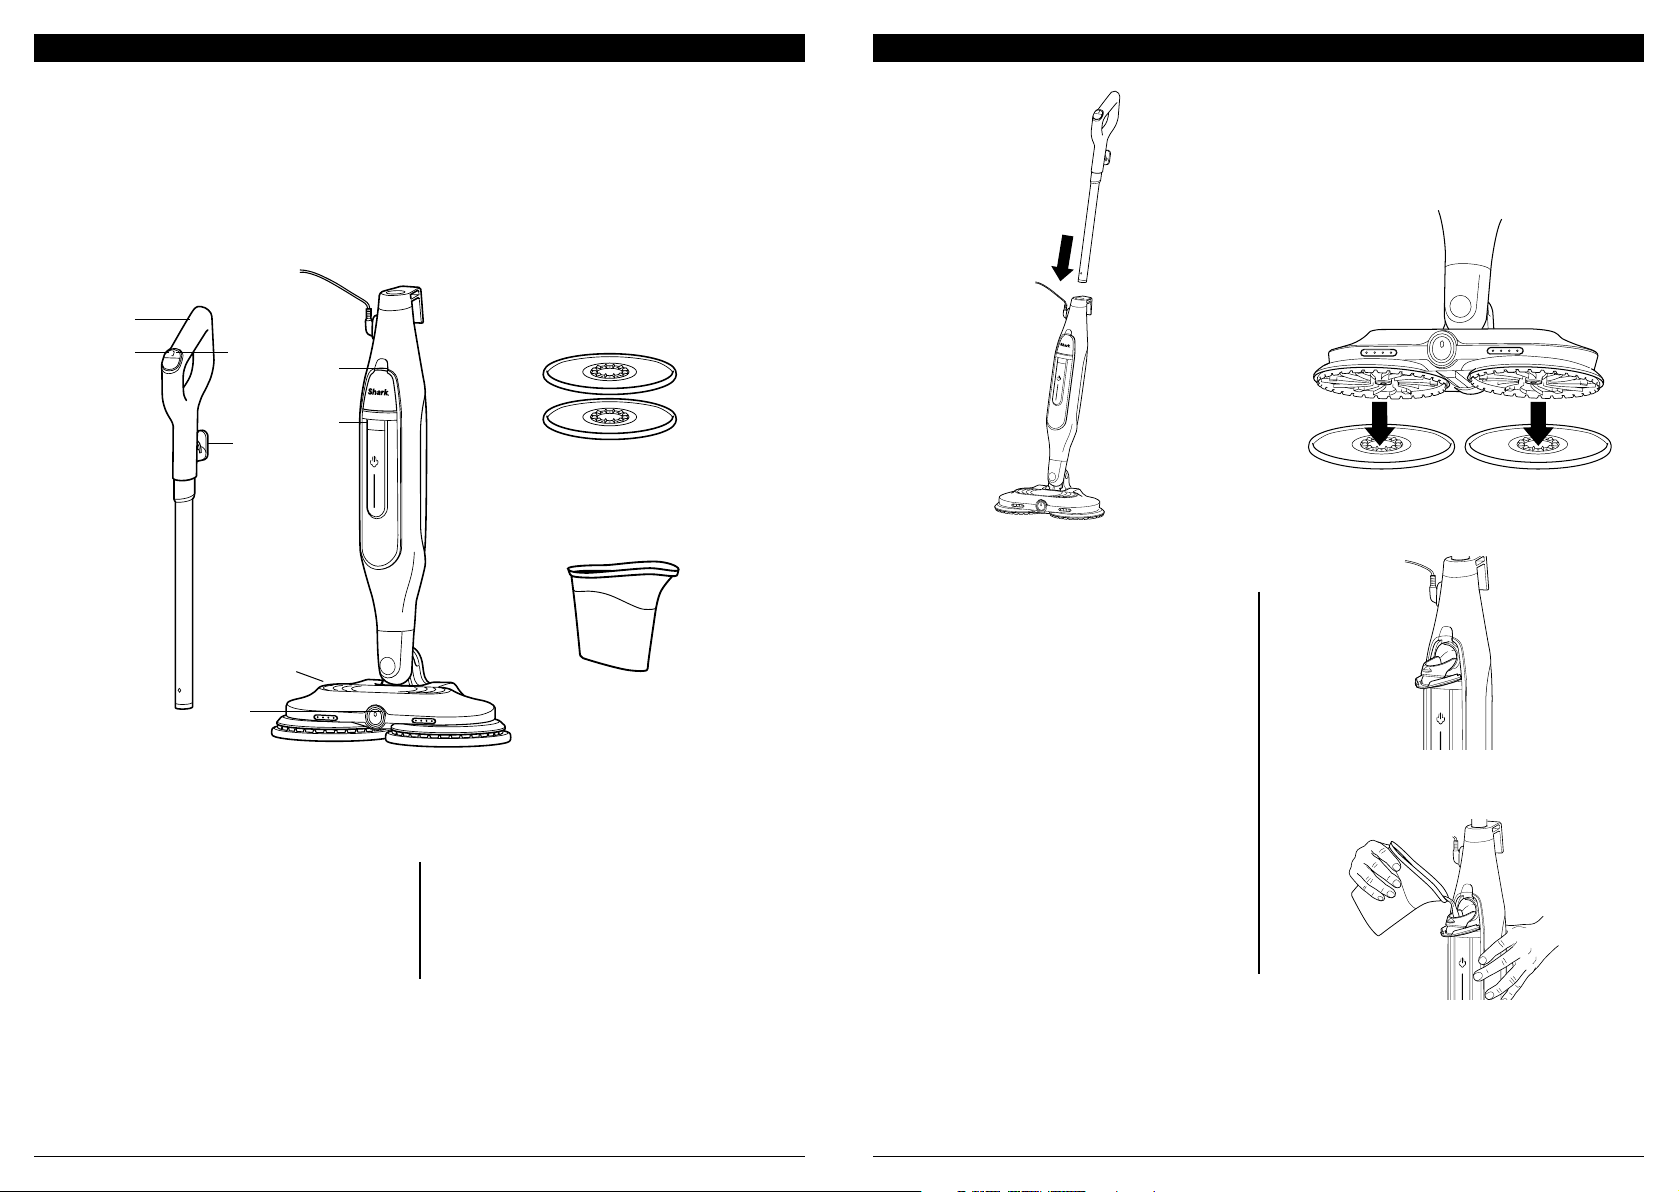
a Steam Mop Handle
b Quick-Release Cord Holder
c Steam Mop Body
d Mop Head
e Water Tank Lid
f Steam Blaster
g Dirt Grip® Soft Scrub Pads
h Filling Flask
i Steam Blaster Button
j Mode Button
STEAM MOP ASSEMBLY
1 Insert the mop handle into the steam mop
body until it clicks into place. (fig. 1)
2 To attach the Dirt Grip Soft Scrub Pads,
place BOTH pads flat on the floor with the
plastic rings facing up. Align the indent
on the rotating discs on the bottom of
the mop head with the plastic rings on
the pads, then gently lower the mop head
onto the pads, pressing until the pads are
secured. (fig. 2)
3 Unplug the steam mop before refilling the
water tank. To open the water tank, pull the
lid down. (fig. 3).
4 Use the filling flask to pour distilled water
into the tank (fig. 4). Make sure not to
exceed the Max Fill line. When finished,
close the tank lid firmly. Add ON LY water
to the tank. Chemicals or cleaning solutions
(including vinegar) may damage the steam
mop and could be unsafe for you and your
family.
fig. 1
a
i j
b
h
c
e
g*
f
d
fig. 2
fig. 4
fig. 3
*Number of pads included
in the box is dependent on
the model.
sharkclean.comsharkclean.com
GETTING STARTED ASSEMBLING YOUR STEAM & SCRUB
Loading ...
Loading ...
Loading ...