Loading ...
Loading ...
Loading ...
9
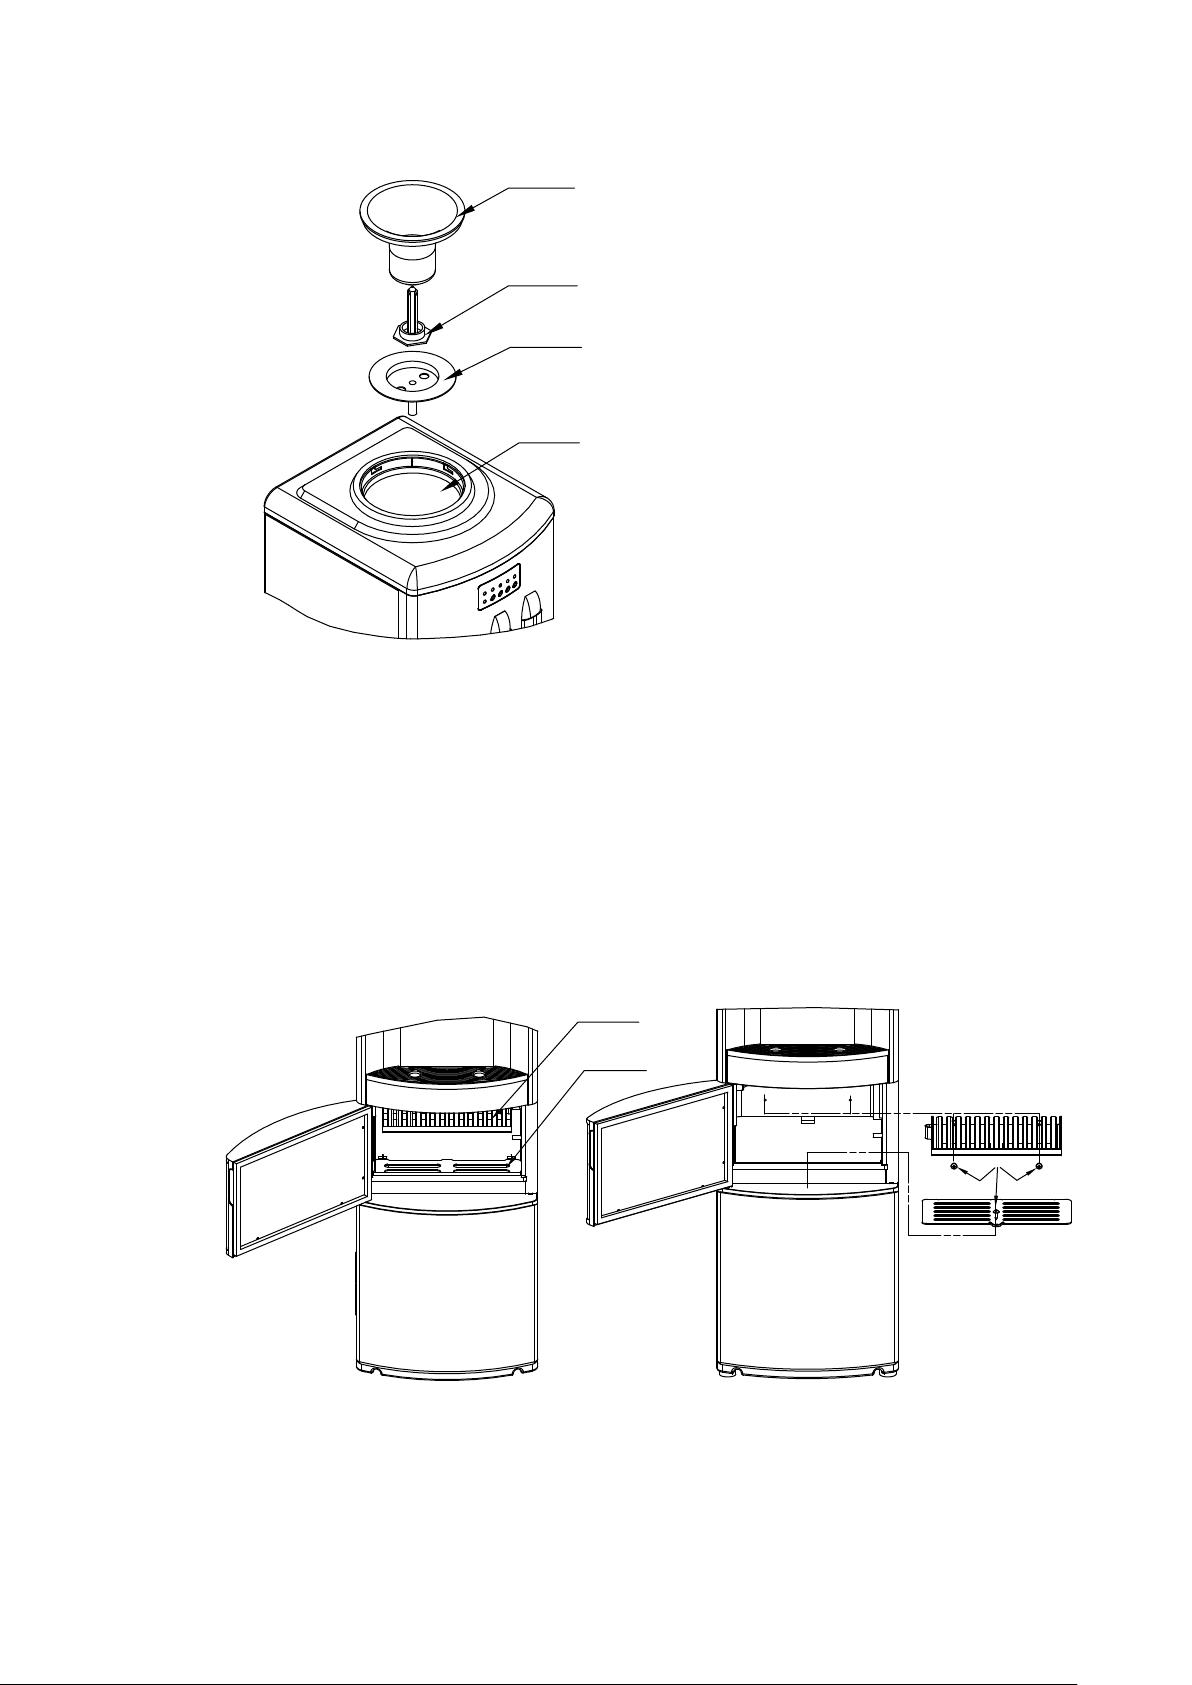
system (smart device) counterclockwise and pull it u p.
Smart Device
Smart Core
Water separator
of the cold tank
Cold Tank
Take apart the non-spill system (smart device and smart core s howed in above figure), then
proceed to wa s h it with the dish washing fluid, rinse it and reas s emble. Empty the both tanks (hot
and cold) by unplugging the drain cap of the hot tank at the bac k of the unit. Next to clean the
inside parts of the water dispenser system, use vinegar or a 2% citric acid solution to remove
mineral scaling ca used by the water. Rinse it well, then open the drain cap for hot tank to get the
water out.
Put all of the p arts back, secure ly fasten the drain cap. It is important to let the unit dry
for two hours before plugging it back in. And install back the bottle receptacle (smart d evice).
For the ice-making chamber, remove the ice and water separator and ice storing plate by
unscrewing the screw according following figure.
Ice and Water
Separator
Ice Storing
Plate
Screw
Then was h inside parts of ice-making chamber with the dish washing fluid, rinse it, and open
the drain cap for ice dispenser at the back to get the water out. Rinse it for several times, then
securely fasten this drain cap. To the removed ice and water separator, ice storing plate, put it
into the dish washing fluid to clean it. Then rinse it and dry it. After drying, install both of
Loading ...
Loading ...
Loading ...