Loading ...
Loading ...
Loading ...
Basic operation en
7
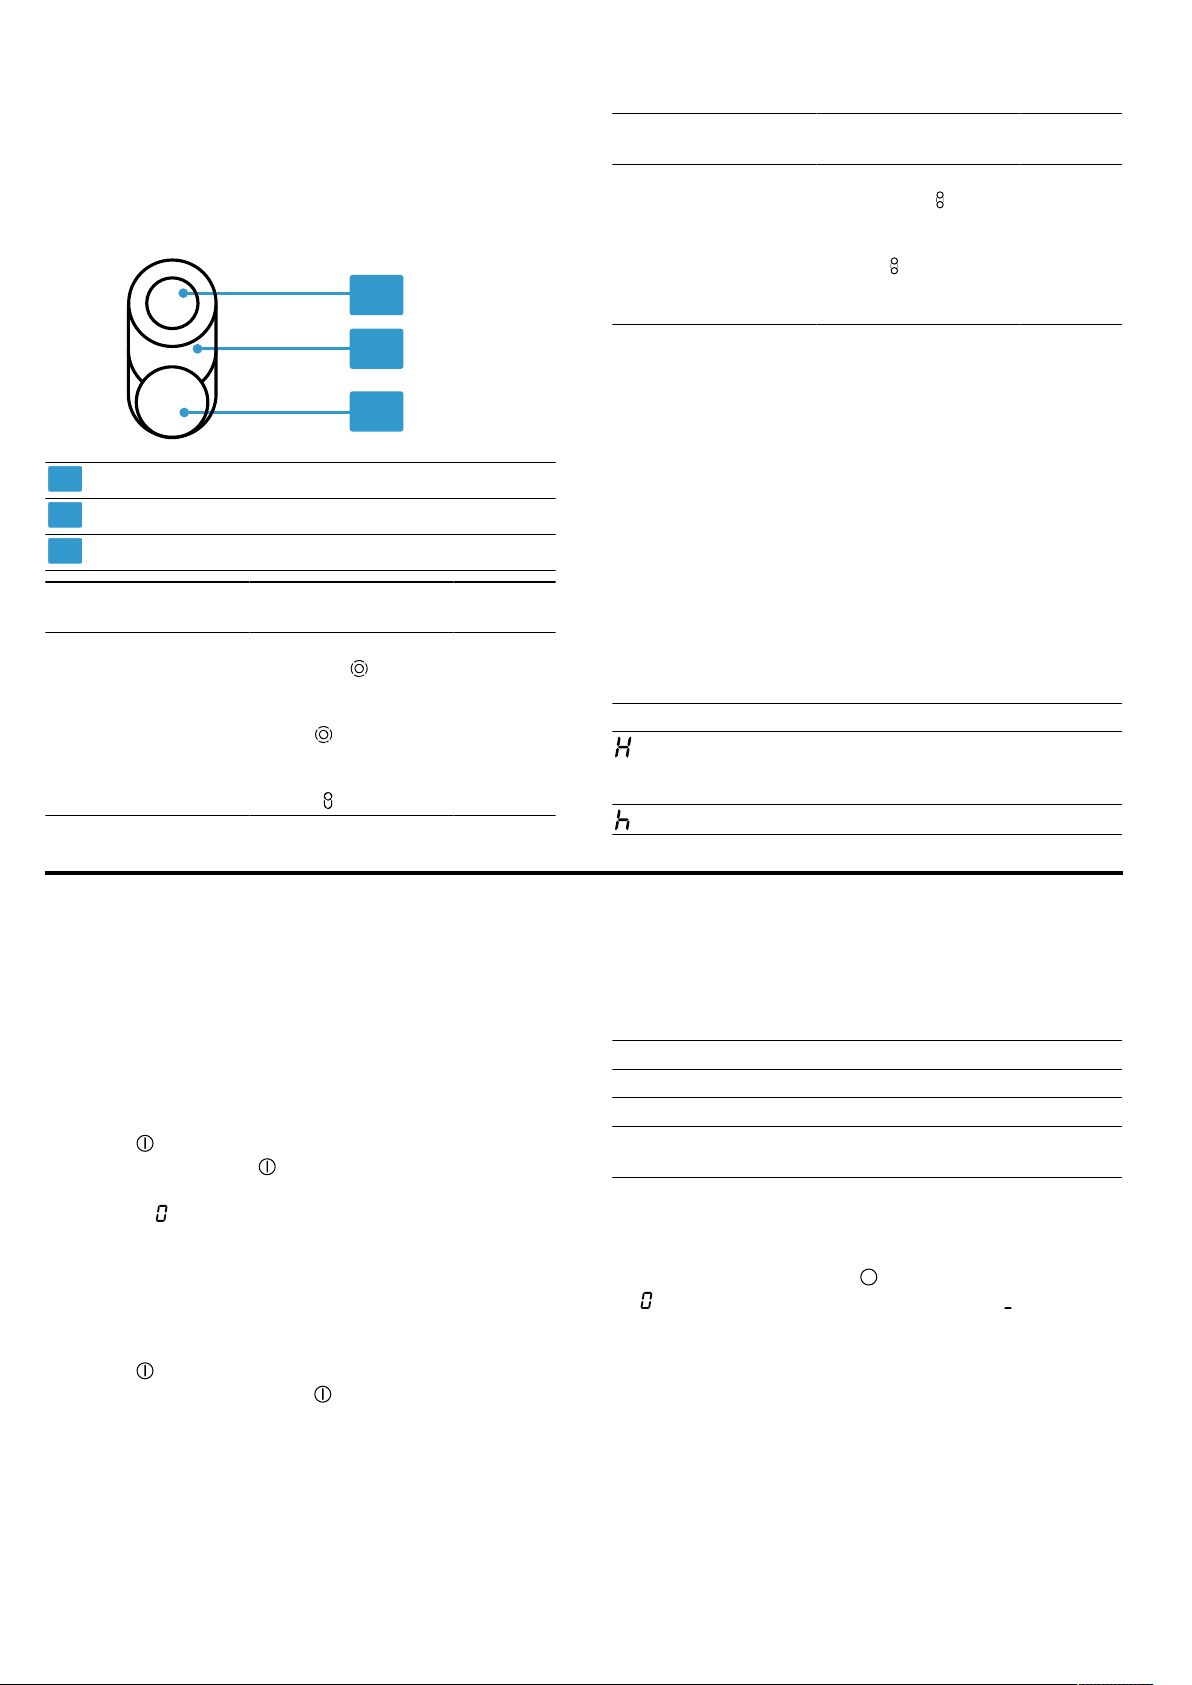
Combi-cooking zone
The combi-cooking zone allows you to combine the
single-circuit and the dual-circuit hotplate with the
bridge heating element. The two hotplates can also be
operated independently of each other.
2
3
1
1
Single-circuit hotplate
2
Dual-circuit hotplate
3
Bridge heating element
Combination Activation Suitabil-
ity
Small extended
cooking zone: com-
bination of 2and3
Select hotplate 2
and touch .
The second filament
circuit is activated.
Touch again.
The small extended
cooking zone is ac-
tivated. lights up.
Small
roaster
Small
teppan-
yaki.
Combination Activation Suitabil-
ity
Large extended
cooking zone: com-
bination of
1and3and2
Select hotplate 1 or
2 and touch .
The large extended
cooking zone is ac-
tivated. lights up.
Large
roaster
Large
teppan-
yaki
Large
grill plate
The small extended cooking zone (2and3) and the
single-circuit hotplate (1) can also be operated inde-
pendently with different heat settings. This produces dif-
ferent temperature areas, for example for the large
roaster, the teppanyaki or the grill plate.
With the small extended cooking zone you can fry one
food while simultaneously using the single-circuit hot-
plate to keep another warm.
Tip:Suitable cookware is available from customer ser-
vice or our online-shop.
4.5 Residual heat indicator
The hob has a two-stage residual heat indicator for
each hotplate. Do not touch the hotplate while the re-
sidual heat indicator is lit up.
Display Meaning
The hotplate is so hot that you can
keep small dishes warm or melt cook-
ing chocolate.
The hotplate is hot.
5 Basic operation
5.1 Switching the hob on or off
The main switch is used to switch the hob on and off.
If you switch the appliance back on again within
4seconds after switching off, the hob will start up with
the previously stored settings.
5.2 Switching on the hob
▶
Touch .
a The light bar above lights up brightly.
a The displays for the controls and the heat setting
displays light up.
a The hob is ready for use.
5.3 Switching off the hob
The hob will switch off automatically when all hotplates
have been switched off for a while (10-60seconds).
▶
Touch .
a The indicator lamp above goes out.
a The displays go out.
a All hotplates are switched off.
a The residual heat indicator remains on until the hot-
plates have cooled down sufficiently.
5.4 Setting the hotplates
To set a hotplate, it has to be selected.
Select the required heat setting on the control panel.
Heat setting
1 Lowest setting
9 Highest setting
. Every heat setting has an intermediate
setting, e.g. 4. .
5.5 Selecting heat settings
Requirement:The hob is switched on.
1.
Select the hotplate with .
a lights up in the heat setting indicator. lights up
under the heat setting indicator.
Loading ...
Loading ...
Loading ...