Loading ...
Loading ...
Loading ...
14
English
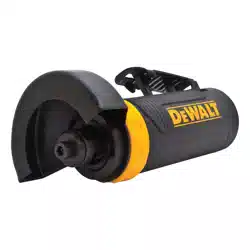
Cutting Wheel Assembly Continued
•Positionacutting wheel (D) onto the tool.
•Holdingthespindle (F) with the supplied wrench (L), replace
the washer (C) and hex head screw (B) until tightened.
WARNING: Make sure cutting wheels are securely fastened.
Loosecuttingwheelscouldcomeoffthetoolwhenoperatingand
cause serious injury.
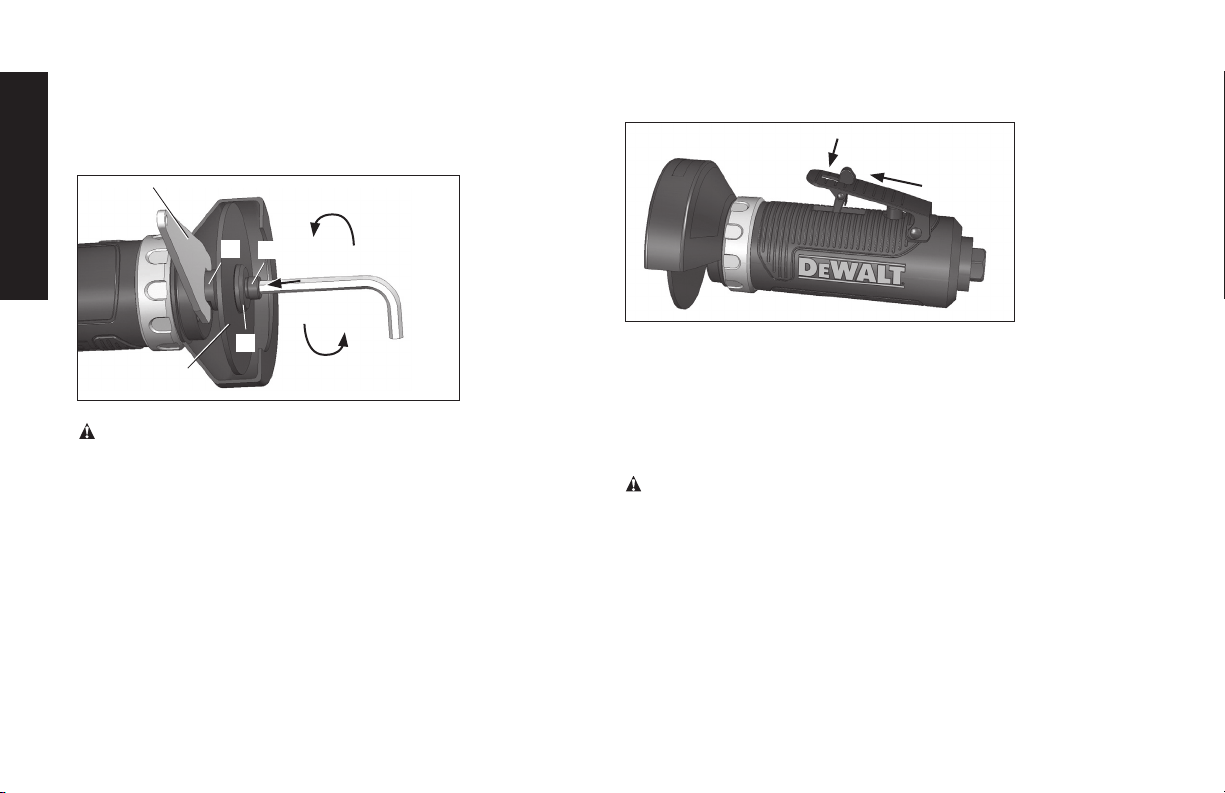
OPERATING PROCEDURES
START-UP (FIG. 1, PG. 2)
•Connectthetooltoairsourcewiththehoseofrecommendedsize.
•Turnontheaircompressorandallowtheairtanktobefilled.
•Settheaircompressorregulatorto90PSI.Thisairtooloperates
at a maximum of 90 PSI air pressure.
•Whilepushingthesafety lever forward (1), depress
the trigger(2) to start operating the tool.
NOTE: The spindle revolves at full speed when the trigger is
fully depressed. As thumb is raised the self releasing
trigger closes, slowing down the spindle and allowing the
operator to choose the best speed and power for the job.
When the trigger is completely released it cannot be
depressed again until the safety release is disengaged.
CAUTION: DO NOT place any portion of the body in line with
the cutting wheel while it is rotating.
SHUT-DOWN (FIG. 1, PG. 2)
•Releasethetriggerinordertostopthetool.
•Whenjobiscompleted,turnofftheaircompressorandstore
the air tool after lubrication. For safety, put the tool
on a hanger or on a soft flat pad when not in use.
•Whenchangingcuttingattachments,alwaysdisconnectthe
air supply to avoid injury.
LOOSEN
FASTEN
1
2
B
C
F
L
D
Loading ...
Loading ...
Loading ...