
Technical Support and E-Warranty Certificate www.vevor.com/support
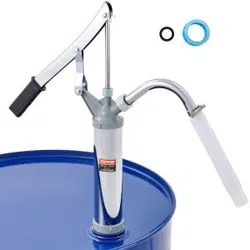
DRUM PUMP
USER MANUAL
Model:YOILP-HG0015A,YOILP-D490
We continue to be committed to provide you tools with competitive price.
"Save Half", "Half Price" or any other similar expressions used by us only represents an
estimate of savings you might benefit from buying certain tools with us compared to the major
top brands and doses not necessarily mean to cover all categories of tools offered by us. You
are kindly reminded to verify carefully when you are placing an order with us if you are
actually saving half in comparison with the top major brands.

- 1 -
Have product questions? Need technical support? Please feel free to
contact us:
CustomerService@vevor.com
NEED HELP? CONTACT US!
This is the original instruction, please read all manual instructions
carefully before operating. VEVOR reserves a clear interpretation of our
user manual. The appearance of the product shall be subject to the
product you received. Please forgive us that we won't inform you again if
there are any technology or software updates on our product.
DRUM PUMP

- 2 -
1. Read carefully and understand all ASSEMBLY AND OPERATION
INSTRUCTIONS before operating.
2. Failure to follow the safety rules and other basic safety precautions
may result in serious personal injury.
GENERAL SAFETY RULES
1.Select the appropriate product type according to the liquid type.
2.Always keep hazardous, flammable or combustible liquids, other fuels
and cleaners out of reach of children. Keep stored hazardous, flammable
or combustible liquids far from open flames or heat.
3.A maintained fire extinguisher should be kept nearby when working with
hazardous, flammable or combustible liquids.
4.Adequate ventilation is essential! Clean up all spills immediately when
pumping or handling flammable liquids.
5. ABSOLUTELY NO SMOKING!
6. DO NOT use torches or apply fire or flames to this pump, pump
components or any containers used with this pump.
7.Be sure that the discharge line is secure before pumping. An insecure
discharge line may slide, possibly causing personal injury and/or property
damage.
8. Over-tightening non-metallic fittings will strip threads. Once fitting is
“hand tight” turn one more full rotation, this is usually enough to prevent
leaking. Thread sealant can be used on all threaded joints, including the
delivery spout.
9.Before each use, check hoses for weak or worn spots. Check the
security of all connections.
10.Regularly inspect the pump and components, performing routine
maintenance when required.
11.Dispel all liquids from the pump and components before performing
routine maintenance.
SAVE THESE INSTRUCTIONS

- 3 -
MODEL AND PARAMETERS
Model
YOILP-HG0015A
YOILP-D490
Max. Flow Rate
280ml per time
300ml per time
Style
Hand Press Type
Hand Press Type
Available Drums
5~55gal
NPT2,NPT1.5
5~55gal
NPT2,NPT1.5
Material
PP, ABS
Steel
Application
Used for Acids and Alkali,
Urea, Water,DEF(Not for
all kinds of oil)
Used for Diesel,
Kerosene, Machine oil
(Not for gasoline,paint
and water)
- 4 -
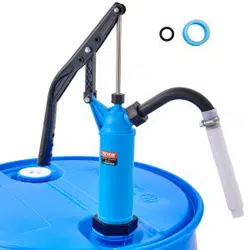
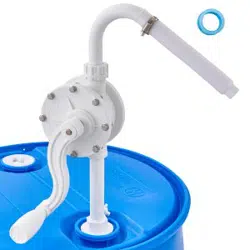
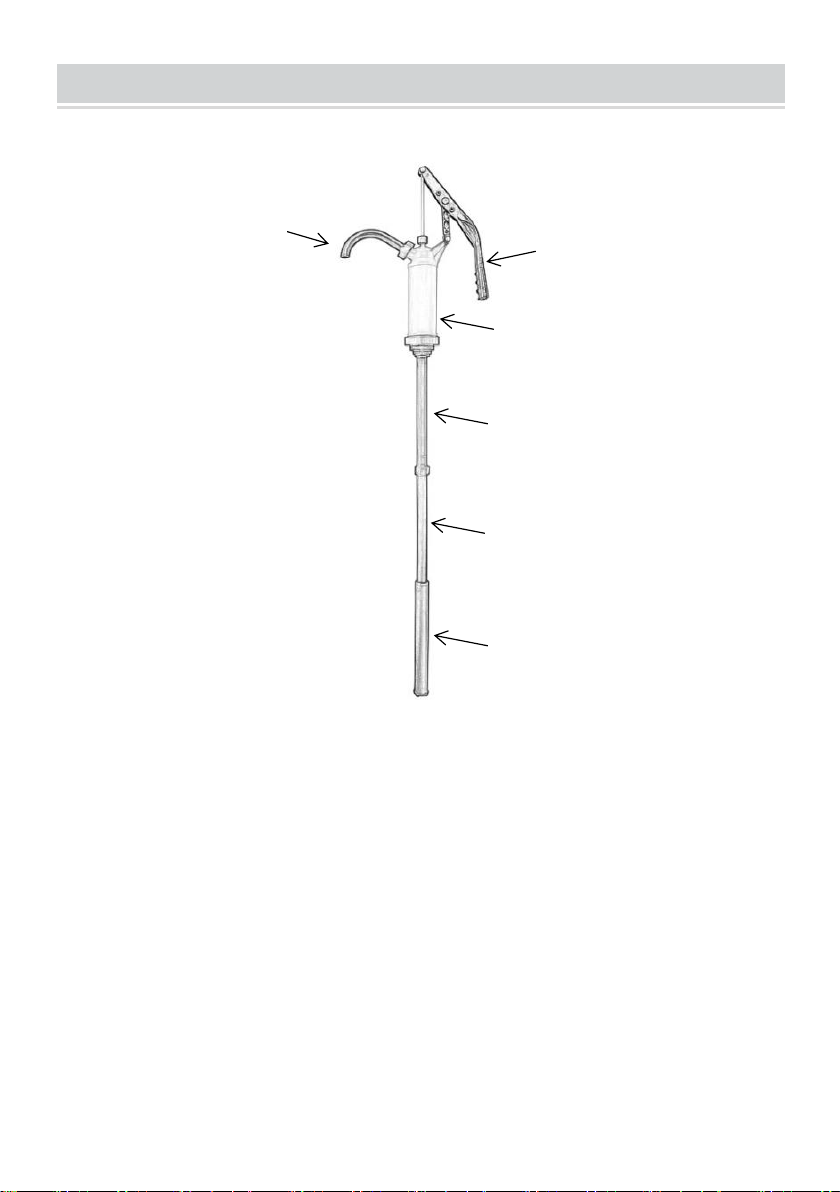
STRUCTURE DIAGRAM
1. Discharge Spout
2. Handle
3. Pump Body
4. Suction Tube Extension
5. Suction Tube w/Strainer
6. Base Suction Tube
2
1
3
4
5
6
- 5 -
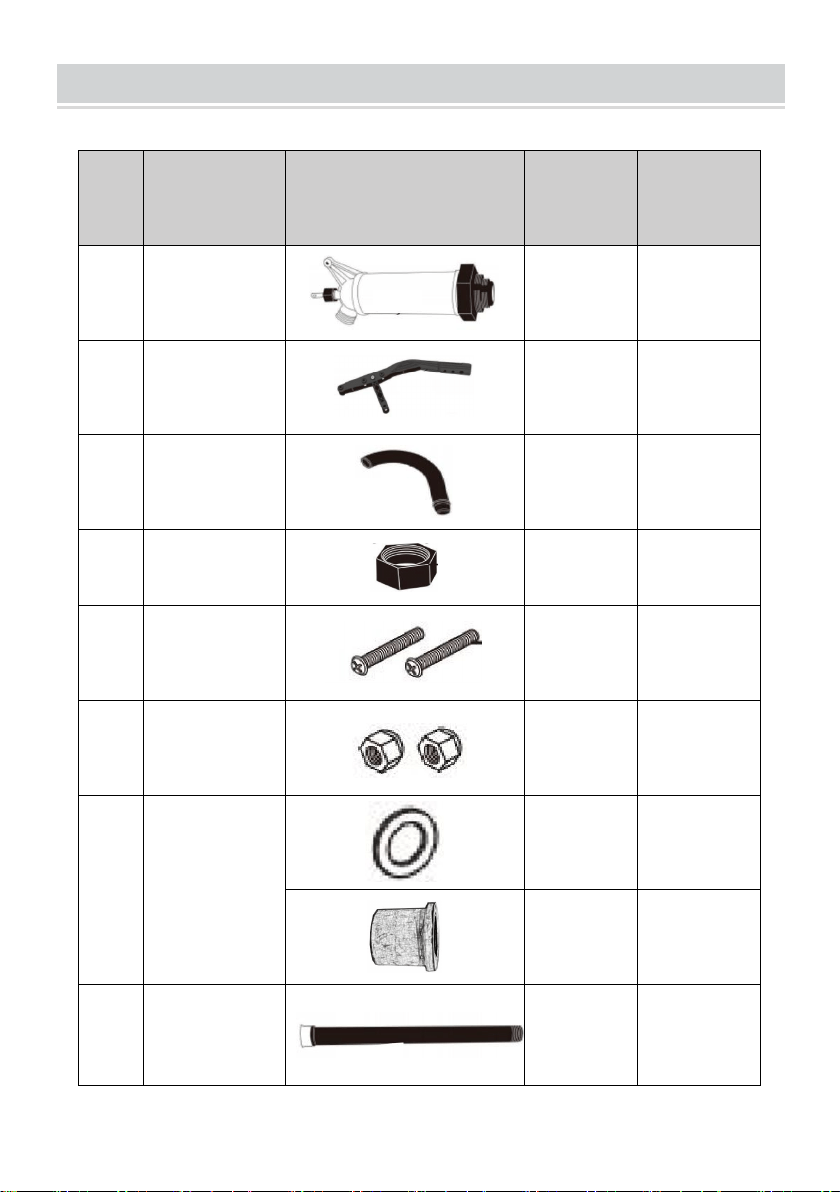
COMPONENTS
NO.
Name
Picture
Qty of
YOILP-H
G0015A
Qty of
YOILP-D4
90
1
Pump Body
1
1
2
Handle
1
1
3
Discharge
Spout
1
1
4
Retainer
Nut
1
1
5
Machine
Screw
2
2
6
Lock Nut
2
2
7
Gasket
/
1
1
/
8
Suction
Tube with
Strainer
1
1
- 6 -
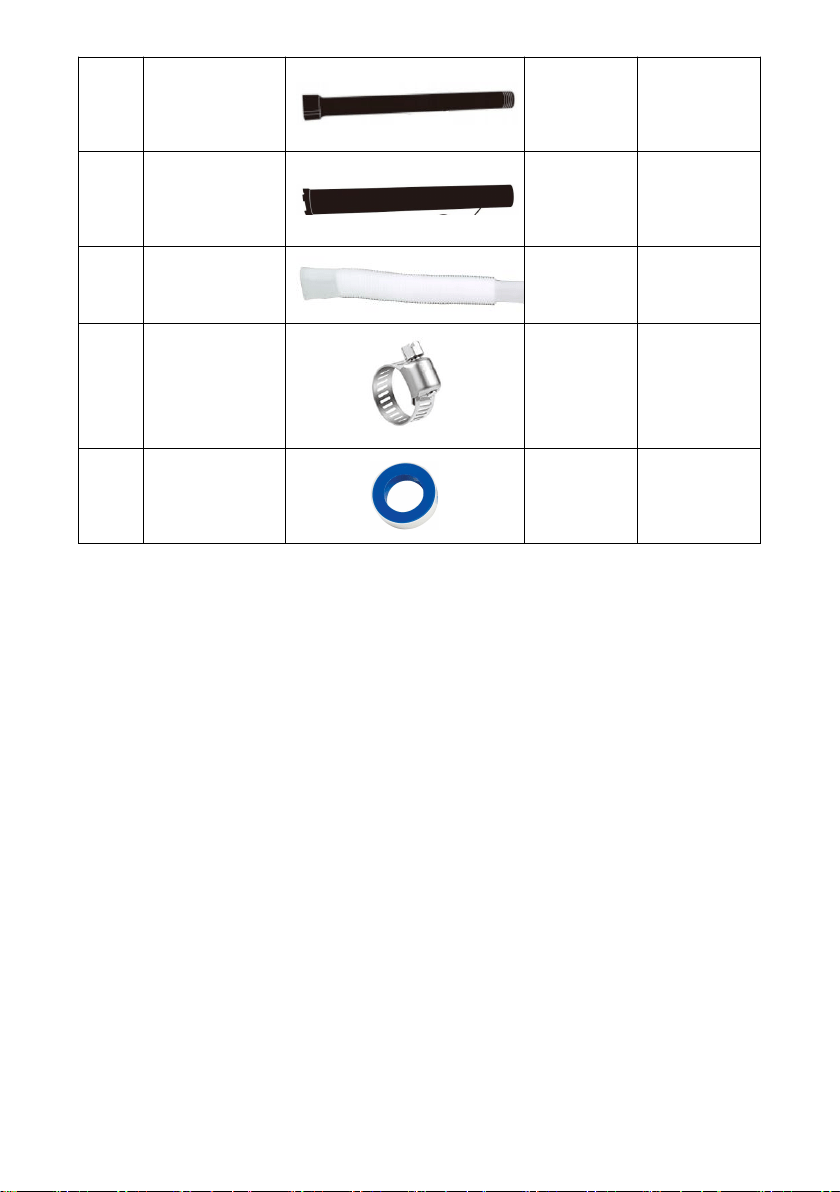
9
Suction
Tube
Extension
1
1
10
Base
Suction
Tube
1
1
11
Hose
1
1
12
Clamp
1
1
13
PTFE
Tape
1
1

- 7 -
ASSEMBLY
Installation Preparation:
1. Please prepare a carpet or mat to protect your floor you need to spread
out all the accessories.
2. Please prepare gloves to avoid being scratched by sharp parts that
may occur during installation.
3. Please open all the boxes to check that the accessories are complete
and in good condition.
4. If you need to use power tools to install this product, please set the
speed to low speed in advance.
Step1
:
Read and understand instructions before beginning. Flush with
water prior to use. Use PTFE tape on all plastic threaded joints.
Connect the Handle (2) to the Pump Body (1) and lift the rod with
Machine Screws (5), Lock Nuts (6) and Washers (7).
- 8 -
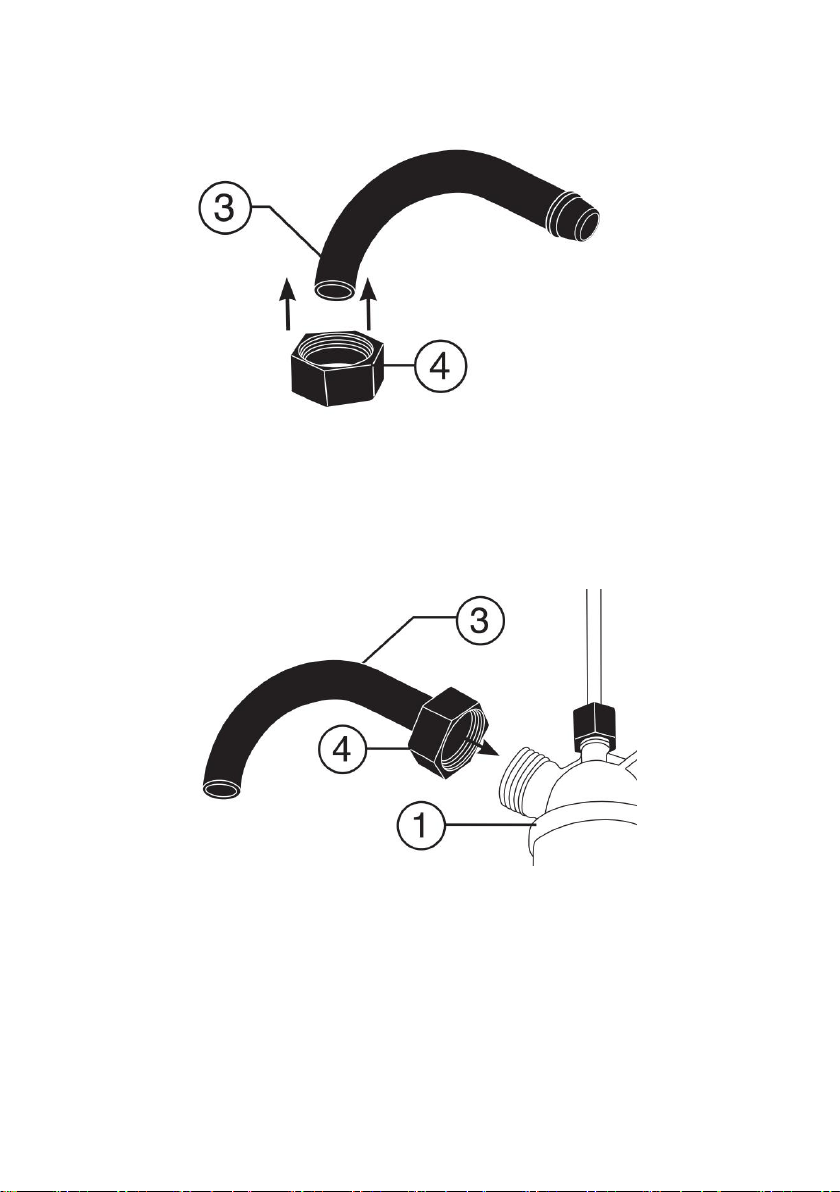
Step2: Slide Retainer Nut (4) onto Discharge Spout (3).
Step3
:
Attach Discharge Spout (3) onto Pump Body (1) using Retainer
Nut (4). Make sure to use PTFE tape.
Step4
:
Attach Suction Tube Extension (9) to bottom of Pump body (1).
Make sure to use PTFE tape.

- 9 -
Step5:Insert Suction Tube with Strainer (8) through Base Suction Tube
(10),and then attach Suction Tube with Strainer (8) into Suction Tube
Extension(9) . Make sure to use PTFE tape.(It's already assembled)
Note:The whole suction tube can be retractable through the base suction
tube.
Step6:If necessary, the hose can be connected to the discharge spout and
locked with a clamp,as shown below

- 10 -
Operation:
— Determine the proper length of the suction tube for your application and
attach to the pump.
— Insert the suction tube through the bung hole located on the container
lid
,
attach the bung nut located on the bottom of the pump to the
container lid.
— Pump the handle several times to prime the pump.
— Continue pumping until the desired volume of solution is delivered.

- 11 -
Above is the YOILP-HG0015A installation,and the installation of the
YOILP-D490 is the same as that of YOILP-HG0015A.

- 12 -
MAINTENANCE
1. After each use of the product, it is recommended to clean it and keep it
dry.
2. When using this product to extract a variety of liquids, it is
recommended to clean this product before extracting another liquid.
3. If the pump has not been used for an extended length of time, or has
had low usage the pump should be flushed and cleaned.
Gasket replacement operation:
a.Remove the handle screw(1)
b.Remove the nut(2)
c.Replace the gasket(3)
d.Then install the above nuts, screws.

- 13 -
TROUBLESHOOTING
THE PUMP IS NOT WORKING
1. Check the suction tubes to be sure they are airtight. The pump will not
pump if the suction tube allows air to enter. Thread sealing PTFE tape is
recommended during assembly.
2.Rinse pump with water or the appropriate solution in regards to what
was just pumped. Some chemicals may harden or cause the internal parts
to swell, this prohibits the operation of the pump. You may need to open
the pump body and clean the internal parts. While inside, visually review
the vane for chemical permeation or swelling. If this has occurred replace
the pump.
Sanven Technology Ltd.
Address: Suite 250, 9166 Anaheim Place, Rancho Cucamonga, CA 91730
Made in China