Home
Bookmarks
Home
MOTU
MOTU 4370 User Manual
Page 117
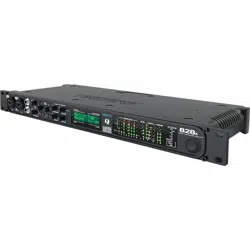
MOTU 4370 828x Professional 28x30 Audio Interface with Thunderbolt Technology
User Manual - Page 117
For 4370.
PDF File Manual
,
126 pages
,
Read Online
|
Download pdf file
Part 1 Getting Started
Quick Reference: 828x Front Panel
Quick Reference: 828x Rear Panel
Quick Reference: MOTU Audio Console
1 About the 828x
Overview
The 828x Rear Panel
28 inputs and 30 outputs
Analog
Precision Digital Trimâ¢
Mic/guitar sends
Main Outs
Optical
S/PDIF
MIDI I/O
On-board SMPTE synchronization
Word clock
Punch in/out
Hybrid Thunderbolt/USB 2.0 connectivity
The 828x Front Panel
Mic/guitar inputs with preamps
Mic/guitar input overload protection
Headphone output and main volume control
Programmable backlit LCD display
Metering section
16-bit and 24-bit recording
CueMix FX 32-bit floating point mixing and effects
Host Audio Software
2 Packing List and System Requirements
Packing List
Windows System Requirements
Please register today!
3 Installing the 828x Software
Overview
Installation
Run the MOTU Audio installer
MOTU Audio drivers
ASIO
WDM
MOTU Audio Console
MOTU MIDI Driver
CueMix FX
MOTU SMPTE Console
4 Installing the 828x Hardware
Overview
Connect the 828x interface
Should I use Thunderbolt or USB 2.0?
If you are connecting with Thunderbolt
USB 3.0, USB 2.0 and USB 1.1
If you are connecting with USB 2.0 or 3.0
Connect audio inputs and outputs
Mic/guitar inputs with preamps
Quarter-inch analog
Mic/guitar/instrument sends
XLR main outs
Optical
S/PDIF
Connect MIDI gear
One-way MIDI connections
Connecting additional gear with MIDI THRUs
Connect a foot switch
A typical 828x setup
Operating the 828x as a converter
Making sync connections
Do you need to synchronize the 828x?
Situations that require synchronization
Synchronization is critical for clean digital I/O
Be sure to choose a digital audio clock master
Syncing to SMPTE timecode
Syncing S/PDIF devices
S/PDIF devices with no word clock
S/PDIF devices with word clock
Syncing word clock devices
Donât chain word clock
Forcing a 1x word out rate
Part 2 Using the 828x
5 MOTU Audio Console
Overview
Accessing the 828x settings
General tab settings
828x tab settings
âGeneralâ tab settings
Sample Rate
Master Clock Source
Samples Per Buffer
Use stereo pairs for Windows audio
Use WaveRT for Windows audio
Enable Pedal
828x tab settings
Phones Assign
Optical input/output
Main Out Assign
Return Assign
Word Out
6 Front Panel Operation
Overview
Mic/guitar inputs
MAIN VOLUME
Phones
Meters and status LEDs
Mic/guitar inputs meters with V-Limit⢠compressor
Push-button rotary encoders
Multi-function LCD display
Parameter âzoomingâ
Three global menus
828x SETUP menu
LCD Contrast
Save/Name Preset
Load Preset
All Notes Off
Factory Defaults
Audio menu
ADAT SMUX Type
CueMix menu
CueMix mixer basics
CUEMIX menu organization
Navigating the four main menus
The IN (inputs) menu
The OUT (Outputs) menu
The MIX (Mixes) menu
The REVERB menu
Inputs menu
Outputs menu
Mixes menu
Reverb menu
Stand-alone operation
7 Configuring Host Audio Software
Overview
Preparation
Run MOTU Audio Console
Sample rate
Master Clock Source
Samples Per Buffer
Phones Assign
Optical input and output
Main Outs Assign
Return Assign
Reverb return
Choosing the MOTU Audio driver
Digital Performer
Pro Tools
Cubase and Nuendo
Live
Reason and Record
Reaper
SONAR
Sound Forge
Other audio software
Reducing latency
Working with 828x inputs and outputs
Number of channels
Mix1 1-2 return bus
The âPhones 1-2â output
Audio Input and output names
Processing live inputs with host plug-ins
Working with CueMix FX mixing and effects
Synchronization
Synchronizing digital audio connections
Resolving directly to time code (with no synchronizer)
Using a foot switch
8 Reducing Monitoring Latency
Overview
Monitoring live input
Adjusting the audio I/O buffer
Lower latency versus higher CPU overhead
Transport responsiveness
Effects processing and automated mixing
CueMix FX hardware monitoring
Two methods for controlling CueMix FX
Using the CueMix FX app
Controlling CueMix FX from your audio software
9 CueMix FX
Overview
A 16-bus mixer with EQ, compression and reverb
Advantages over host-based mixing and processing
Opening CueMix FX
CueMix FX basic operation
Eight stereo mix busses
Many inputs to one output pair
Viewing one mix bus at a time
Each mix bus is independent
Input channels
Output channels
Channel focus and settings
Global reverb processor
Other features
Widening the CueMix FX window
The Mixes tab
Viewing a mix
Naming a mix
Assigning a mix bus output
Bus fader
Bus mute
Bus level meter
Bus reverb send/return
Input section
Input channel focus
Input pan section
Input fader and mute/solo
The Inputs tab
Input tab settings are global
Signal flows from top to bottom
Input name
Input channel focus
Mono/stereo pairing
Invert phase
Input trim
Input EQ and dynamics
The Outputs tab
Signal flows from top to bottom
Output name
Output channel focus
Output EQ and Dynamics
Output reverb send/return
Talkback/Listenback
Monitor group assign
The Channel Settings section
The Channel tab
The EQ tab
Vintage EQ
Enabling EQ
Vintage EQ Quick reference
How the vintage EQ works
EQ filters
EQ filter styles
Low pass and high pass filters
The Dynamics tab
Enabling Dynamics
Compressor
Leveler
The Meters tab
The Reverb tab
Enabling reverb
Routing inputs, busses and outputs to the reverb processor
Reverb sends
Reverb returns
Split point
Primary controls
Early reflections
Reverb design
The Monitor Group
Assigning outputs to the monitor group
Monitor group presets menu
Monitor group meters
DSP meter
Solo light
Talkback and listenback
Hardware setup
Talkback / Listenback Mic Input
Talk / Listen output
Talkback / Listenback Monitor Dim
Engaging/disengaging Talkback and Listenback
Controlling Talkback and Listenback volume
Shortcuts
File menu
Saving and loading hardware presets
Peak/hold time
Mix1 Return Includes Computer
Hardware follows CueMix Stereo Settings
Edit menu
Undo/Redo
Copying & pasting (duplicating) entire mixes
Clear Peaks
Devices menu
Audio analysis tools
Choosing channels for audio analysis
Scoping host software audio output
FFT and Spectrogram display
Filter display options
FFT display
Spectrogram
Opening the FFT Analysis window
View controls
Horizontal controls (frequency axis)
Vertical controls (amplitude axis)
Spectrogram controls
The info box
Oscilloscope
Opening the oscilloscope
Choosing a channel to display
View controls
Horizontal controls (time axis)
Vertical controls (amplitude axis)
Waveform Recognition
Trigger
Measurement information
Ideas for using the Oscilloscope
X-Y Plot
Metering
Opening the X-Y Plot
Choosing a channel pair to display
View controls
Horizontal and vertical controls
Persistence
Using the XY Plot
Phase Analysis
Correlation Meter
Opening the Phase Analysis
Choosing a channel pair to display
View controls
Horizontal and vertical controls
Filters
Using the Phase Analysis
Tuner
Opening the Tuner
Choosing a channel to tune
Tuner controls
Tuning stereo signals
Configurations menu
Modifying a configuration
Saving a CueMix FX configuration as a hardware preset
Saving a hardware preset as a CueMix FX configuration
Talkback menu
Phones menu
Control Surfaces menu
Application follows control surface
Share surfaces with other applications
CueMix Control Surfaces
10 MOTU SMPTE Console
Overview
MOTU SMPTE Console
Clock/Address
Frame Rate
Reader section
Status lights
SMPTE source
Freewheel Address
Freewheel clock
Stop Freewheeling
Generator section
Level
Tach light
Destination
Stripe
Regenerate
Setting up for SMPTE time code sync
Resolving Cubase or Nuendo to time code
Part 3 Appendices
A Troubleshooting
Customer Support
Replacing Discs
Technical Support
B Audio I/O reference
Overview
Inputs at 1x sample rates
Inputs at 2x sample rates
Inputs at 4x sample rates
Outputs at 1x sample rates
Outputs at 2x sample rates
Outputs at 4x sample rates
Index
Page 117/126
Page 1
Page 2
Page 3
Page 4
Page 5
Page 6
Page 7
Page 8
Page 9
Page 10
Page 11
Page 12
Page 13
Page 14
Page 15
Page 16
Page 17
Page 18
Page 19
Page 20
Page 21
Page 22
Page 23
Page 24
Page 25
Page 26
Page 27
Page 28
Page 29
Page 30
Page 31
Page 32
Page 33
Page 34
Page 35
Page 36
Page 37
Page 38
Page 39
Page 40
Page 41
Page 42
Page 43
Page 44
Page 45
Page 46
Page 47
Page 48
Page 49
Page 50
Page 51
Page 52
Page 53
Page 54
Page 55
Page 56
Page 57
Page 58
Page 59
Page 60
Page 61
Page 62
Page 63
Page 64
Page 65
Page 66
Page 67
Page 68
Page 69
Page 70
Page 71
Page 72
Page 73
Page 74
Page 75
Page 76
Page 77
Page 78
Page 79
Page 80
Page 81
Page 82
Page 83
Page 84
Page 85
Page 86
Page 87
Page 88
Page 89
Page 90
Page 91
Page 92
Page 93
Page 94
Page 95
Page 96
Page 97
Page 98
Page 99
Page 100
Page 101
Page 102
Page 103
Page 104
Page 105
Page 106
Page 107
Page 108
Page 109
Page 110
Page 111
Page 112
Page 113
Page 114
Page 115
Page 116
Page 117
Page 118
Page 119
Page 120
Page 121
Page 122
Page 123
Page 124
Page 125
Page 126
Contents
Table of Contents
Search
Previous
Next
Troubleshooting
Bookmarks
Loading ...
Loading ...
Loading ...
Pa
r
t
3
Appendic
es
Loading ...
Loading ...
Loading ...
File type: PDF
File name: 76578803_4370.pdf
File size: 6.6 MB
File Language: English
Pages: 126
Author: MOTU
File created: 2014-01-29
Published:
2023-09-04
Updated: 2023-09-04
Download File
Table of Contents
×
Part 1 Getting Started
5
Quick Reference: 828x Front Panel
7
Quick Reference: 828x Rear Panel
8
Quick Reference: MOTU Audio Console
9
1 About the 828x
11
Overview
11
The 828x Rear Panel
12
28 inputs and 30 outputs
12
Analog
12
Precision Digital Trimâ¢
13
Mic/guitar sends
13
Main Outs
13
Optical
13
S/PDIF
13
MIDI I/O
13
On-board SMPTE synchronization
13
Word clock
13
Punch in/out
14
Hybrid Thunderbolt/USB 2.0 connectivity
14
The 828x Front Panel
14
Mic/guitar inputs with preamps
14
Mic/guitar input overload protection
14
Headphone output and main volume control
14
Programmable backlit LCD display
14
Metering section
14
16-bit and 24-bit recording
15
CueMix FX 32-bit floating point mixing and effects
15
Host Audio Software
16
2 Packing List and System Requirements
17
Packing List
17
Windows System Requirements
17
Please register today!
17
3 Installing the 828x Software
19
Overview
19
Installation
19
Run the MOTU Audio installer
19
MOTU Audio drivers
20
ASIO
20
WDM
20
MOTU Audio Console
20
MOTU MIDI Driver
20
CueMix FX
20
MOTU SMPTE Console
20
4 Installing the 828x Hardware
21
Overview
21
Connect the 828x interface
21
Should I use Thunderbolt or USB 2.0?
21
If you are connecting with Thunderbolt
21
USB 3.0, USB 2.0 and USB 1.1
22
If you are connecting with USB 2.0 or 3.0
22
Connect audio inputs and outputs
23
Mic/guitar inputs with preamps
23
Quarter-inch analog
24
Mic/guitar/instrument sends
25
XLR main outs
25
Optical
25
S/PDIF
26
Connect MIDI gear
27
One-way MIDI connections
27
Connecting additional gear with MIDI THRUs
27
Connect a foot switch
27
A typical 828x setup
28
Operating the 828x as a converter
29
Making sync connections
30
Do you need to synchronize the 828x?
30
Situations that require synchronization
30
Synchronization is critical for clean digital I/O
30
Be sure to choose a digital audio clock master
30
Syncing to SMPTE timecode
31
Syncing S/PDIF devices
32
S/PDIF devices with no word clock
32
S/PDIF devices with word clock
32
Syncing word clock devices
33
Donât chain word clock
33
Forcing a 1x word out rate
33
Part 2 Using the 828x
35
5 MOTU Audio Console
37
Overview
37
Accessing the 828x settings
37
General tab settings
37
828x tab settings
37
âGeneralâ tab settings
38
Sample Rate
38
Master Clock Source
38
Samples Per Buffer
40
Use stereo pairs for Windows audio
41
Use WaveRT for Windows audio
41
Enable Pedal
41
828x tab settings
41
Phones Assign
41
Optical input/output
41
Main Out Assign
41
Return Assign
41
Word Out
42
6 Front Panel Operation
43
Overview
43
Mic/guitar inputs
43
MAIN VOLUME
43
Phones
44
Meters and status LEDs
44
Mic/guitar inputs meters with V-Limit⢠compressor
44
Push-button rotary encoders
45
Multi-function LCD display
45
Parameter âzoomingâ
45
Three global menus
45
828x SETUP menu
46
LCD Contrast
46
Save/Name Preset
46
Load Preset
46
All Notes Off
46
Factory Defaults
46
Audio menu
46
ADAT SMUX Type
46
CueMix menu
47
CueMix mixer basics
47
CUEMIX menu organization
47
Navigating the four main menus
47
The IN (inputs) menu
47
The OUT (Outputs) menu
48
The MIX (Mixes) menu
49
The REVERB menu
49
Inputs menu
50
Outputs menu
50
Mixes menu
51
Reverb menu
51
Stand-alone operation
51
7 Configuring Host Audio Software
53
Overview
53
Preparation
53
Run MOTU Audio Console
53
Sample rate
53
Master Clock Source
53
Samples Per Buffer
54
Phones Assign
54
Optical input and output
54
Main Outs Assign
54
Return Assign
54
Reverb return
54
Choosing the MOTU Audio driver
54
Digital Performer
55
Pro Tools
55
Cubase and Nuendo
55
Live
55
Reason and Record
56
Reaper
56
SONAR
56
Sound Forge
57
Other audio software
57
Reducing latency
58
Working with 828x inputs and outputs
58
Number of channels
58
Mix1 1-2 return bus
58
The âPhones 1-2â output
58
Audio Input and output names
58
Processing live inputs with host plug-ins
58
Working with CueMix FX mixing and effects
59
Synchronization
59
Synchronizing digital audio connections
59
Resolving directly to time code (with no synchronizer)
59
Using a foot switch
59
8 Reducing Monitoring Latency
61
Overview
61
Monitoring live input
62
Adjusting the audio I/O buffer
63
Lower latency versus higher CPU overhead
64
Transport responsiveness
64
Effects processing and automated mixing
64
CueMix FX hardware monitoring
64
Two methods for controlling CueMix FX
64
Using the CueMix FX app
65
Controlling CueMix FX from your audio software
65
9 CueMix FX
67
Overview
67
A 16-bus mixer with EQ, compression and reverb
67
Advantages over host-based mixing and processing
68
Opening CueMix FX
68
CueMix FX basic operation
68
Eight stereo mix busses
68
Many inputs to one output pair
68
Viewing one mix bus at a time
68
Each mix bus is independent
68
Input channels
68
Output channels
68
Channel focus and settings
68
Global reverb processor
69
Other features
69
Widening the CueMix FX window
69
The Mixes tab
70
Viewing a mix
70
Naming a mix
70
Assigning a mix bus output
70
Bus fader
70
Bus mute
71
Bus level meter
71
Bus reverb send/return
71
Input section
71
Input channel focus
71
Input pan section
71
Input fader and mute/solo
71
The Inputs tab
72
Input tab settings are global
72
Signal flows from top to bottom
72
Input name
72
Input channel focus
73
Mono/stereo pairing
73
Invert phase
73
Input trim
73
Input EQ and dynamics
73
The Outputs tab
74
Signal flows from top to bottom
74
Output name
74
Output channel focus
75
Output EQ and Dynamics
75
Output reverb send/return
75
Talkback/Listenback
75
Monitor group assign
76
The Channel Settings section
76
The Channel tab
76
The EQ tab
78
Vintage EQ
78
Enabling EQ
78
Vintage EQ Quick reference
79
How the vintage EQ works
79
EQ filters
80
EQ filter styles
80
Low pass and high pass filters
84
The Dynamics tab
84
Enabling Dynamics
84
Compressor
85
Leveler
85
The Meters tab
87
The Reverb tab
87
Enabling reverb
87
Routing inputs, busses and outputs to the reverb processor
88
Reverb sends
88
Reverb returns
88
Split point
88
Primary controls
88
Early reflections
88
Reverb design
89
The Monitor Group
89
Assigning outputs to the monitor group
89
Monitor group presets menu
89
Monitor group meters
89
DSP meter
90
Solo light
90
Talkback and listenback
90
Hardware setup
90
Talkback / Listenback Mic Input
90
Talk / Listen output
90
Talkback / Listenback Monitor Dim
90
Engaging/disengaging Talkback and Listenback
91
Controlling Talkback and Listenback volume
91
Shortcuts
91
File menu
92
Saving and loading hardware presets
92
Peak/hold time
92
Mix1 Return Includes Computer
92
Hardware follows CueMix Stereo Settings
92
Edit menu
92
Undo/Redo
92
Copying & pasting (duplicating) entire mixes
92
Clear Peaks
92
Devices menu
93
Audio analysis tools
93
Choosing channels for audio analysis
93
Scoping host software audio output
93
FFT and Spectrogram display
93
Filter display options
93
FFT display
94
Spectrogram
94
Opening the FFT Analysis window
94
View controls
94
Horizontal controls (frequency axis)
95
Vertical controls (amplitude axis)
95
Spectrogram controls
95
The info box
96
Oscilloscope
96
Opening the oscilloscope
96
Choosing a channel to display
96
View controls
96
Horizontal controls (time axis)
97
Vertical controls (amplitude axis)
97
Waveform Recognition
97
Trigger
98
Measurement information
99
Ideas for using the Oscilloscope
100
X-Y Plot
102
Metering
102
Opening the X-Y Plot
102
Choosing a channel pair to display
103
View controls
103
Horizontal and vertical controls
103
Persistence
104
Using the XY Plot
104
Phase Analysis
105
Correlation Meter
105
Opening the Phase Analysis
105
Choosing a channel pair to display
105
View controls
105
Horizontal and vertical controls
107
Filters
107
Using the Phase Analysis
107
Tuner
109
Opening the Tuner
109
Choosing a channel to tune
109
Tuner controls
109
Tuning stereo signals
109
Configurations menu
110
Modifying a configuration
110
Saving a CueMix FX configuration as a hardware preset
110
Saving a hardware preset as a CueMix FX configuration
110
Talkback menu
110
Phones menu
110
Control Surfaces menu
111
Application follows control surface
111
Share surfaces with other applications
111
CueMix Control Surfaces
111
10 MOTU SMPTE Console
113
Overview
113
MOTU SMPTE Console
113
Clock/Address
113
Frame Rate
113
Reader section
114
Status lights
114
SMPTE source
114
Freewheel Address
114
Freewheel clock
114
Stop Freewheeling
115
Generator section
115
Level
115
Tach light
115
Destination
115
Stripe
115
Regenerate
115
Setting up for SMPTE time code sync
115
Resolving Cubase or Nuendo to time code
115
Part 3 Appendices
117
A Troubleshooting
119
Customer Support
119
Replacing Discs
120
Technical Support
120
B Audio I/O reference
121
Overview
121
Inputs at 1x sample rates
121
Inputs at 2x sample rates
121
Inputs at 4x sample rates
121
Outputs at 1x sample rates
122
Outputs at 2x sample rates
122
Outputs at 4x sample rates
122
Index
123
Search:
×
Search