Loading ...
Loading ...
Loading ...
www.petsafe.net
9
EN
FR
ES
Use a
₇
⁄ ₆₄” (2.5 mm) drill bit to drill pilot holes through T-brackets and into the Patio Panel at the top and
bottom. Attach the T-brackets to the patio panel with two M4 x 10mm sheet metal screws.
Step 4
Install Lock
Prior to installation and drilling, consult your sliding glass door manufacturer’s
warranty. Unauthorized changes or modifications may void the warranty. Installing
screws into vinyl door frames or door jambs may crack the vinyl.
DO NOT DRILL INTO GLASS.
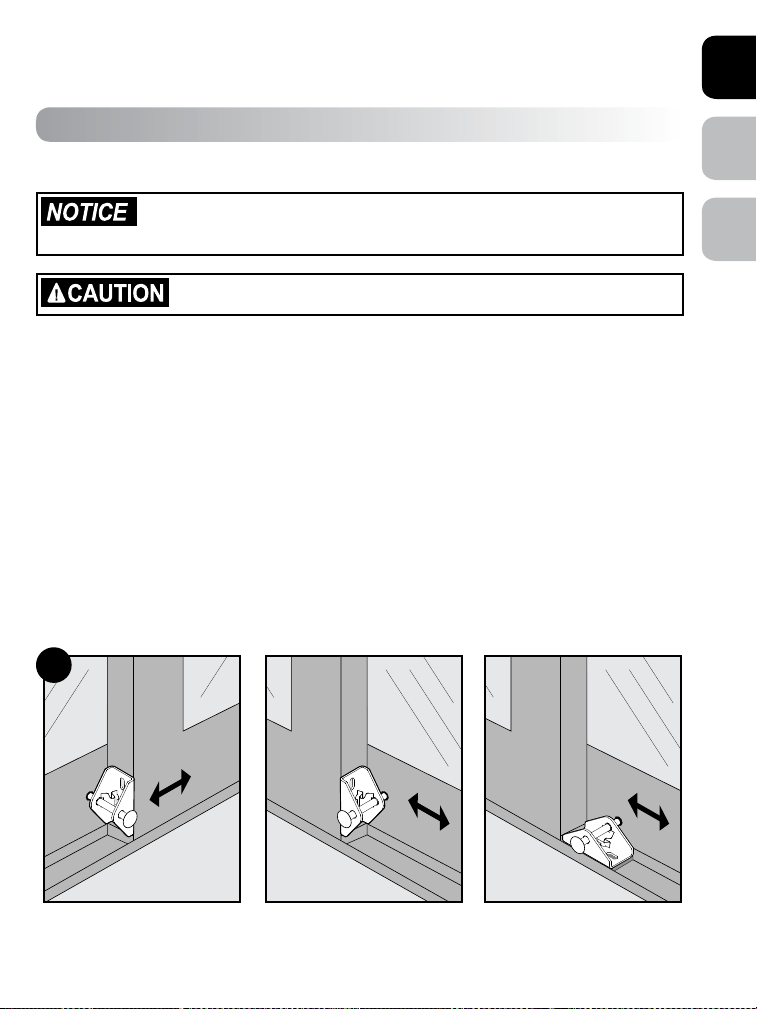
1. Close the sliding glass door tightly against the Patio Panel. Position the latch at the bottom or top
of your existing sliding glass door. With locking bolt in the retracted position, pointed toward the
sliding glass door or stationary wall. Leave approximately
₁
⁄₈” clearance between the locking bolt tip
and rail.
2. Holding the lock firmly in place, mark screw holes and mark center of locking bolt in rail of sliding
glass door or stationary window.
Note: Inspect location of drill marks to make sure they will not be in contact with glass on either
the sliding glass door or the Patio Panel when drilling.
3. Drill two pilot holes for attaching the latch,
₉
⁄ ₆ ₄” (3. 5 mm) fo r al umi nu m sl id in g gl as s do or s an d
₇
⁄ ₆₄” (2.5 mm) for wood or vinyl sliding glass doors. Drill a ¼" hole for locking bolt.
4. Attach latch with tow #8 x ½" sheet metal screws. DO NOT OVERTIGHTEN.
Helpful Tip: If overtightening results, and you have stripped the connection, move the latch slightly up
or down and re-drill mounting holes. Another option is to drill existing holes to a larger size and install
plastic anchors. Plastic anchors can be purchased at any local hardware or home improvement store.
Latch Assembly on
sliding door
Latch Assembly on
stationary window
Latch Assembly in
lower track
4A
Loading ...
Loading ...
Loading ...