Loading ...
Loading ...
Loading ...
www.petsafe.net
6
ENFR
ES
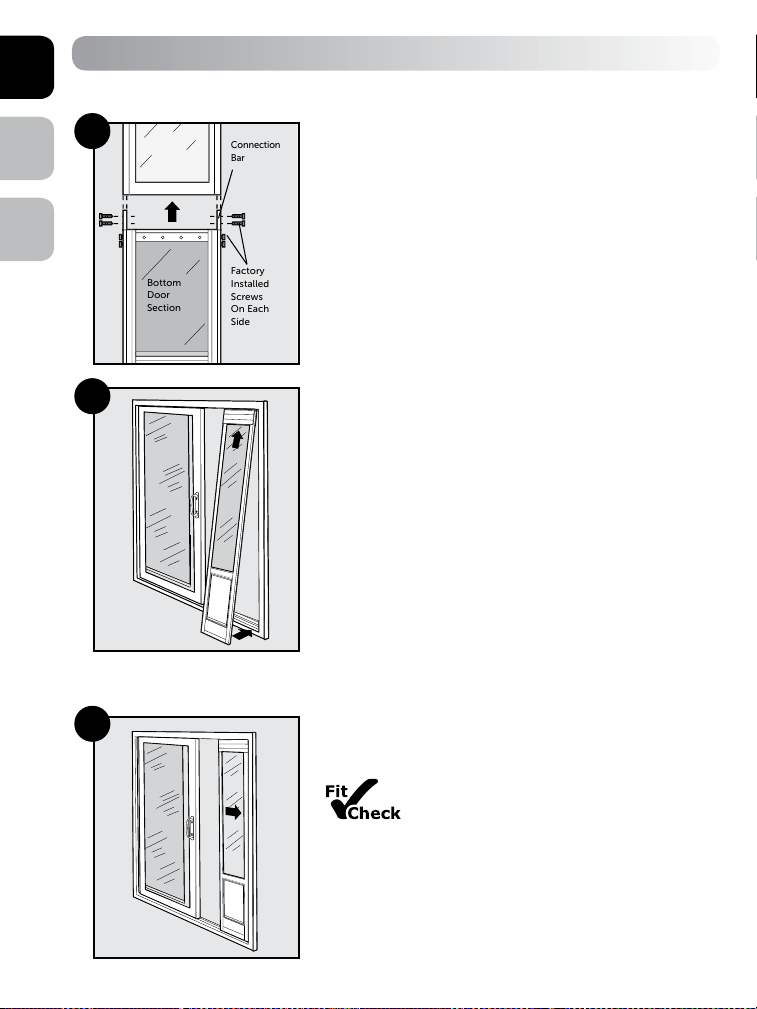
Step 2
Install Patio Panel
2A NOTE: If you purchased a 96” Patio Panel, first assemble
the bottom section to the top section before proceeding with the
installation. Remove the four factory installed screws from sides
of connection bars on bottom door section. Align and slide
connection bars on bottom section into top section. Reinstall
and tighten the four screws through the four pre-drilled holes on
sides of top door section into the connection bars.
NOTE: Remove all packaging materials, including cardboard
inserts inside the height adjuster.
2B The Freedom
®
Patio Panel Pet Door inserts into the opening
in your sliding glass door against the doorjamb. Your sliding
glass door will close against the Patio Panel.
With sliding glass door open, insert top of Patio Panel with
height adjuster into upper door track on interior side of sliding
glass door. Lift up and position bottom of Patio Panel into lower
door track on interior side of the sliding glass door. Ensure
the side of the Patio Panel showing flap screw heads is on the
interior side of your sliding glass door.
NOTE: You may need to pull down the height adjuster to fit the Patio Panel in your sliding glass door
track. Firmly pull down one side and then the other.
2C Move the Patio Panel against the door jamb.
The Patio Panel should fit flush against the door
jamb without any gaps. Make sure the height adjuster is fully
extended and not tilted to one side. Ensure you are satisfied with
the fit of the Patio Panel before drilling.
Bottom
Door
Section
Factory
Installed
Screws
On Each
Side
Connection
Bar
2A
2C
2B
Loading ...
Loading ...
Loading ...