Loading ...
Loading ...
2
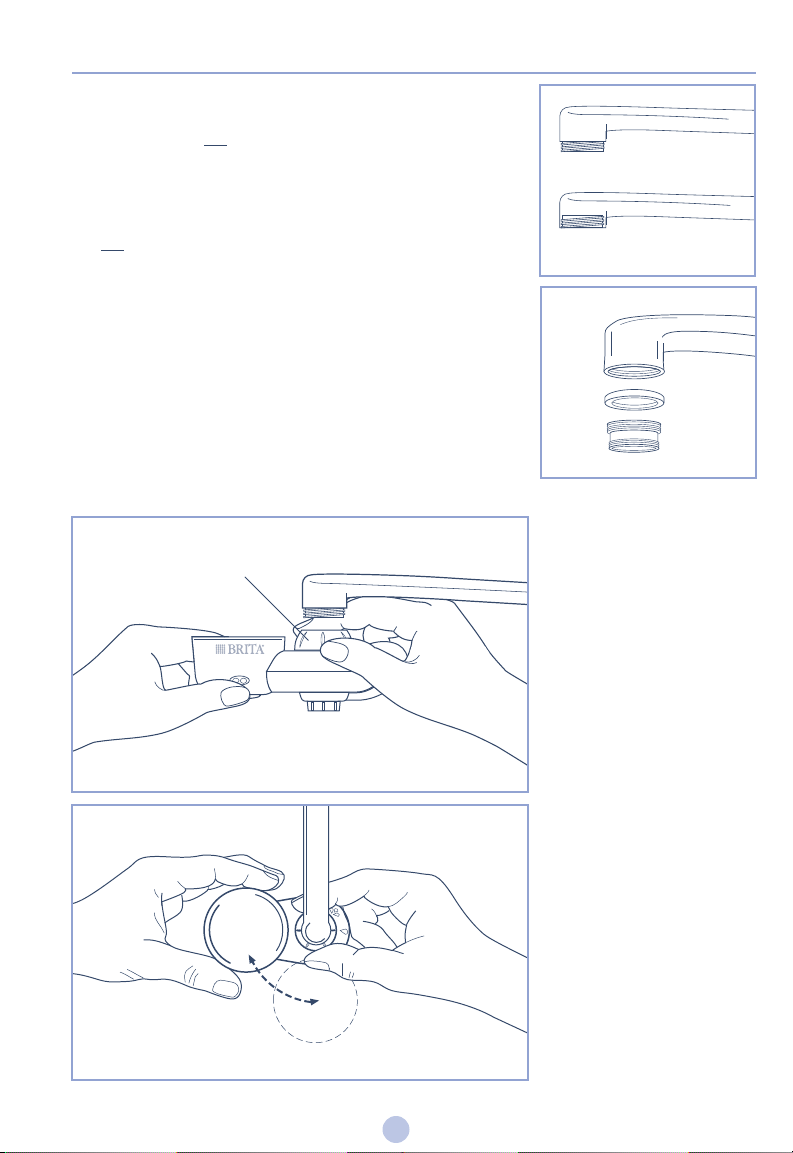
STEP 2: Determine if you need to use an adapter.
If your faucet has threads on the outside:
You most likely will not need to use an adapter. Attempt to attach
the system directly to your faucet. If it does not fit, please contact
us at 1-800-24-BRITA (U.S.) or 1-800-387-6940 (Canada).
Proceed to Step 3.
If your faucet has threads on the inside:
You will need to use one of the adapters and corresponding
washers provided. Select the proper adapter and washer that fit
onto your faucet. If neither adapter fits, please contact us at 1-800-
24-BRITA (U.S.) or 1-800-387-6940 (Canada).
Place the washer into the recessed end of the adapter. Twist the
adapter (counterclockwise) onto your faucet and tighten by hand
until snug. If difficult to tighten, insert a coin into the notch in the
bottom of the adapter and twist until snug. Make sure it is leveled,
and don’t force it to fit. Caution: Using pliers to tighten the adapter
may damage the threading.
NOTE: The Brita® Faucet Filtration System cannot be attached to faucets with a
built-in spray feature at the end of the faucet.
STEP 3: Attach the
base system to your
faucet.
Position the base system so
that the filter cup is on the left
side of your faucet and the
Filter Replacement Indicator is
facing you. Twist the mounting
collar onto the faucet and
tighten by hand until snug.
Do not tighten with pliers.
Do not over-tighten. Make sure
it is leveled, and don’t force it
to fit.
If you are having difficulty,
rotate the base system
backward and forward while
further tightening the mounting
collar.
Side View
Top View
Mounting Collar
Threads Outside – Likely No
Adapter Needed
Threads Inside – Use an Adapter
Washer
Adapter
Damaged threading on faucet
may cause fit issues. Please
contact us at 1-800-24-BRITA
(U.S.) or 1-800-387-6940
(Canada) if you need any
assistance.
Loading ...
Loading ...
Loading ...