Loading ...
Loading ...
Loading ...
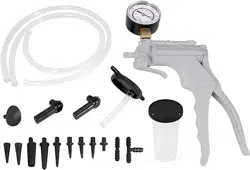
1. Attach a 3” Vacuum Hose (5) to the bottom of the Jar Lid (2a). (See Figure A.)
2. Attach a 23” Vacuum Hose (4) to the top of the Jar Lid (2a) marked “TO PUMP”. Then, attach the
other end of the 23” Vacuum Hose to the Brake Bleeder/Vacuum Pump (1). (See Figure A.)
3. Firmly attach the Jar Lid (2a) to the Reservoir Jar (3). (See Figure A.)
4. Remove the cap from the vehicle’s master cylinder, and check to make sure the master cylinder is
full of brake uid. If not full, ll the master cylinder to capacity with clean, new brake uid. (Use only
the kind of brake uid recommended by the vehicle manufacturer.)
5. NOTE: Determine the proper brake bleeding sequence from your vehicle service manual (i.e., right
rear wheel, left rear wheel, right front wheel, left front wheel).
6. Connect the 23” Vacuum Hose (4) to the remaining port on the Jar Lid (2a) and then connect the
other end to the Brake Bleeder Screw Adapter (9).
7.Squeeze the Handle of the Brake Bleeder/Vacuum Pump (1) a few times to create a vacuum
in its Reservoir Jar (3). NOTE: The Gauge on the Brake Bleeder/Vacuum Pump should read at
approximately 10 in/Hg. Do not exceed 20 in/Hg. A greater vacuum could damage the vehicle’s
brake system.
8. Once the Brake Bleeder/Vacuum Pump (1) is ready, check for leaks at the Reservoir Jar (3) and
at all Vacuum Hose (4, 5) connections. If there is a leak, release the vacuum in the Brake Bleeder/
Vacuum Pump with the Vacuum Release Control. CAUTION! NEVER remove the Jar Lid (2a) before
releasing the vacuum in the Brake Bleeder/Vacuum Pump. Correct the leak, and once again create a
vacuum in the Brake Bleeder/Vacuum Pump to approximately 10 in/Hg.
9. Open the vehicle’s wheel caliper bleeder screw, and allow brake uid to ow into the Reservoir Jar
(3). Then, retighten the wheel caliper bleeder screw after bleeding.
10. Release the vacuum in the Brake Bleeder/Vacuum Pump (1) with the Vacuum Release Control.
Then, disconnect the Brake Bleeder Screw Adapter (9) from the vehicle’s wheel caliper bleeder screw.
11. NOTE: When necessary, release the vacuum in the tool and empty its Reservoir Jar (3) of old
brake uid. To assist in transport, this set includes a leak-resistant Lid (2b) without hose connections.
After the brake uid is disposed of properly, resume bleeding the brakes.
12. Remove the cap from the vehicle’s master cylinder, and rell the master cylinder back to its normal
capacity with clean, new brake uid. Then, replace the cap on the master cylinder.
13. Proceed to the vehicle’s next wheel, and perform the same steps as above.
14. When nished using the Brake Bleeder/Vacuum Pump, clean the tool and store it in a clean, dry
location out of reach of children.
15.
WARNING! Before driving the vehicle, carefully check for leaks and test for proper
brake operation.
ASSEMBLY AND OPERATING INSTRUCTIONS
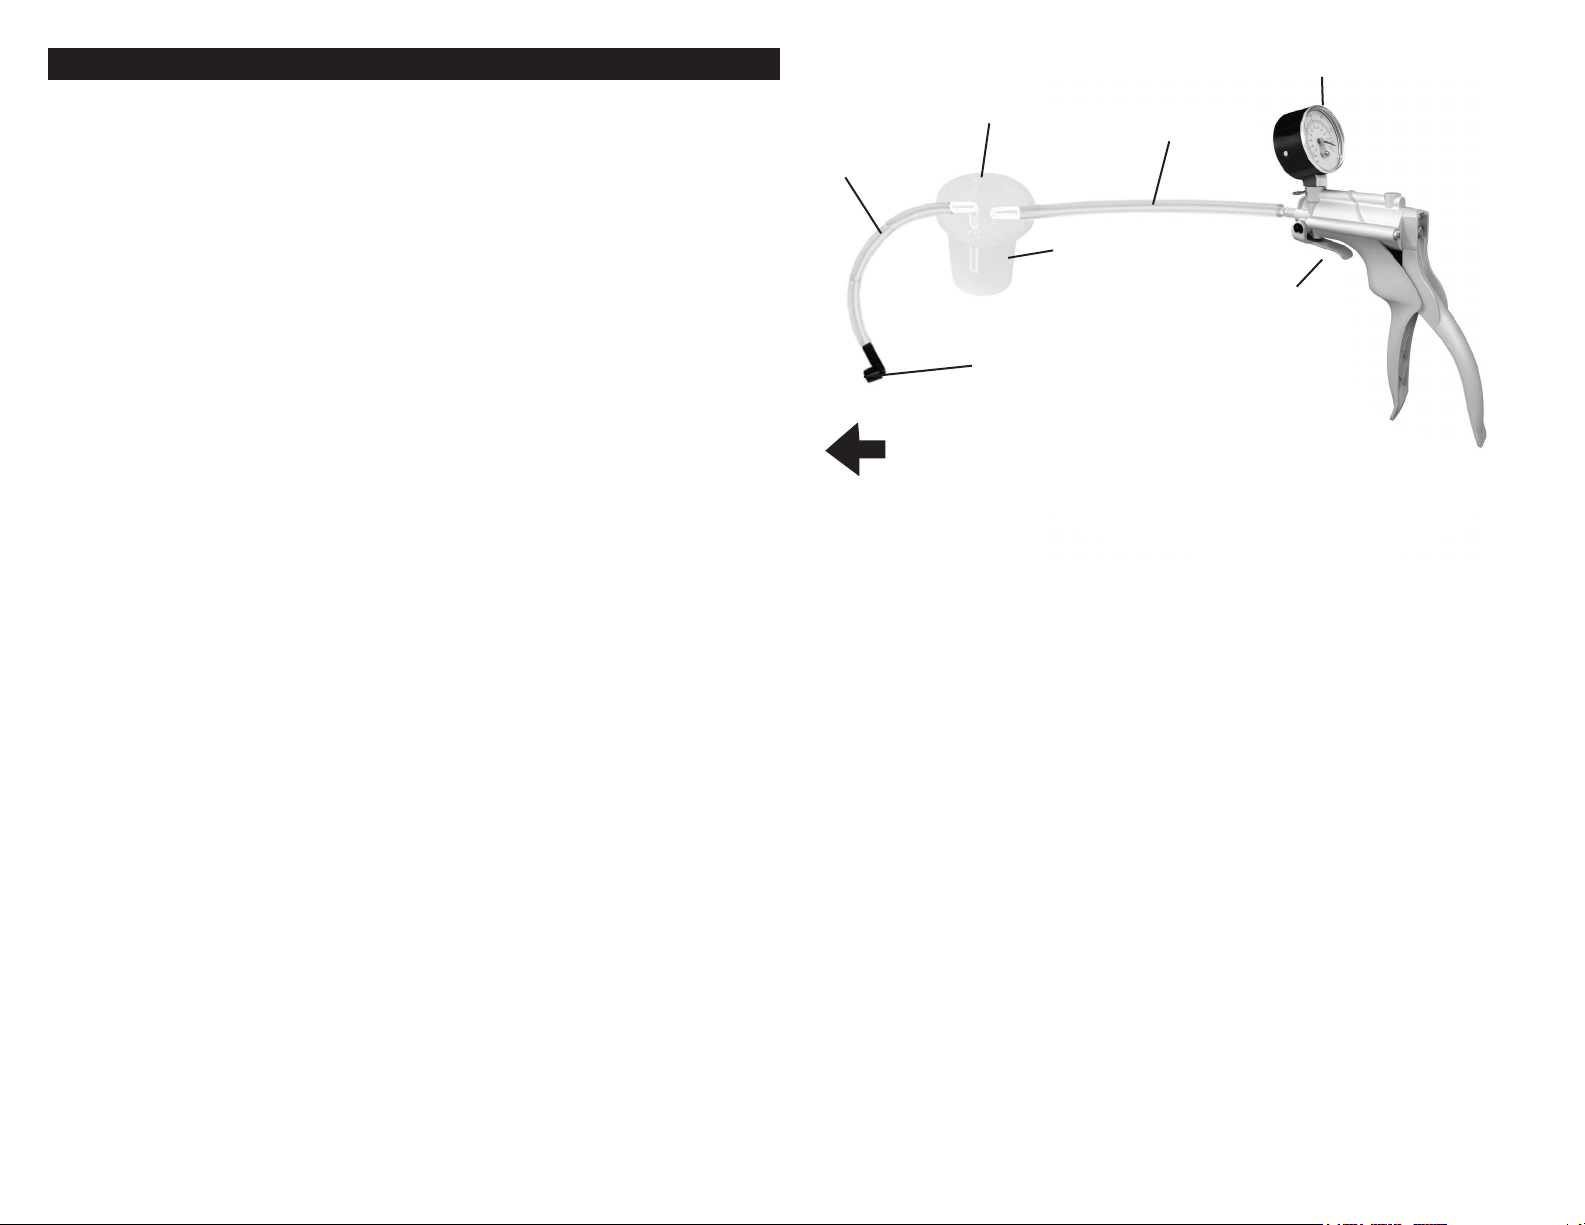
Figure A
3"
VACUUM
HOSE (5)
JAR LID (2a)
23" VACUUM
HOSE (4)
GAUGE
VACUUM
RELEASE
CONTROL
BRAKE BLEEDER
SCREW ADAPTER (9)
TO WHEEL CALIPER
BLEEDER SCREW
RESERVOIR
JAR (3)
4
5