Loading ...
Loading ...
Loading ...
Proper Cutting Stance
Weight should be balanced with both feet on
solid ground.
Basic Cutting Procedure
Slowly swing trimmer side-to-side as shown.
To convert for maintenance edging, turn off the tool. Holding
the trimmer with one hand by the auxiliary handle, grasp the
collar and push in the direction of arrow and rotate the trimmer
head a half turn until it stops, release your hand. (Rotate clock-
wise when viewed from the switch end). The tool is locked in
the edger position. Rotate the wire edge guide forward and
down into place before edging.
To operated as a maintenance edger, position trimmer above
sidewalk as shown.
Return to trimming position by turning the tool off, push in
direction of arrow and rotating the trimmer head counter clock-
wise until it stops. When using the tool in the trimmer mode
you may choose to fold the wire edge guide out of the way.
WARNING: Do not trim near electrical wires.
LINE FEEDING
The nylon line will feed automatically when trimmer is started
each time, and be cut automatically to the maximum length
when the switch is turned on.
Your trimmer uses .065” (1.65mm) diameter nylon line to cut
grass and weeds quickly and easily. In time, the tip of the
nylon line will become worn and the auto feed mechanism
will automatically feed and trim a fresh length of line. The
cutting line will wear faster if the cutting is done along
sidewalks or other abrasive surfaces or if heavier weeds are
being cut. The line will extend approximately ¼ in. with each
stop and start of the switch trigger until the line reaches the
the cutting blade on the guard. Do not bump unit on
ground in attempt to feed line or for any other purpose.
If your trimmer line hits sharp or abrasive objects, such as
stones, metal pieces, or concrete, the trimmer line can be cut
too short to continue trimming. In this case, you can
manually extend the line:
1. REMOVE THE BATTERY PACK.
2. Press the line-feeding button with one hand while pulling
the line out with the
other.
3. Press the button
repeatedly to release
line to the proper length.
Each press of the button
will release
approximately 1/4 inch
of line. (Note: Release
only enough line to
extend just beyond the
blade. If too much line is
released, the blade will be unable to cut it to the correct
working length and it may become tangled on the
rotating shaft.)
4. Install the battery pack.
5. Restart the trimmer and return to normal operation.
OPERATING
Cutting Instructions
Line-Feeding
Button
Pull
Replacing Spool/ Rewinding Spool
REPLACING SPOOL / CLEARING JAMS AND TANGLED
LINES
From time to time, especially when cutting thick or stocky
weeds, the line feeding hub may become clogged with sap or
other material and the line will become jammed as a result. To
clear the jam, follow these steps.
- Turn off the trimmer and remove the battery.
- Press the release tabs on the line spool retainer and remove
the cover by pulling it straight off.
- Lift the spool of nylon line out of the hub and clear any
broken line or cutting debris from the spool area.
- In case of jams and tangled line, unwrap about one foot
(30cm) of line to ensure that it is undamaged. If it is OK,
rewind it and insert the line ends through the eyelets in the
spool hub. Pull the line through the hole to maintain tension
while placing the spool down in to the hub
with the notched side exposed.
- Press the spool cover down GENTLY and
rotate it until you feel it drop into place.
(When in place, the spool will freely turn a
few degrees left and right.)
- Snap the spool cover back on, insert the
battery and turn the tool on. In a few seconds
or less you’ll hear the line being cut
automatically to the proper length.
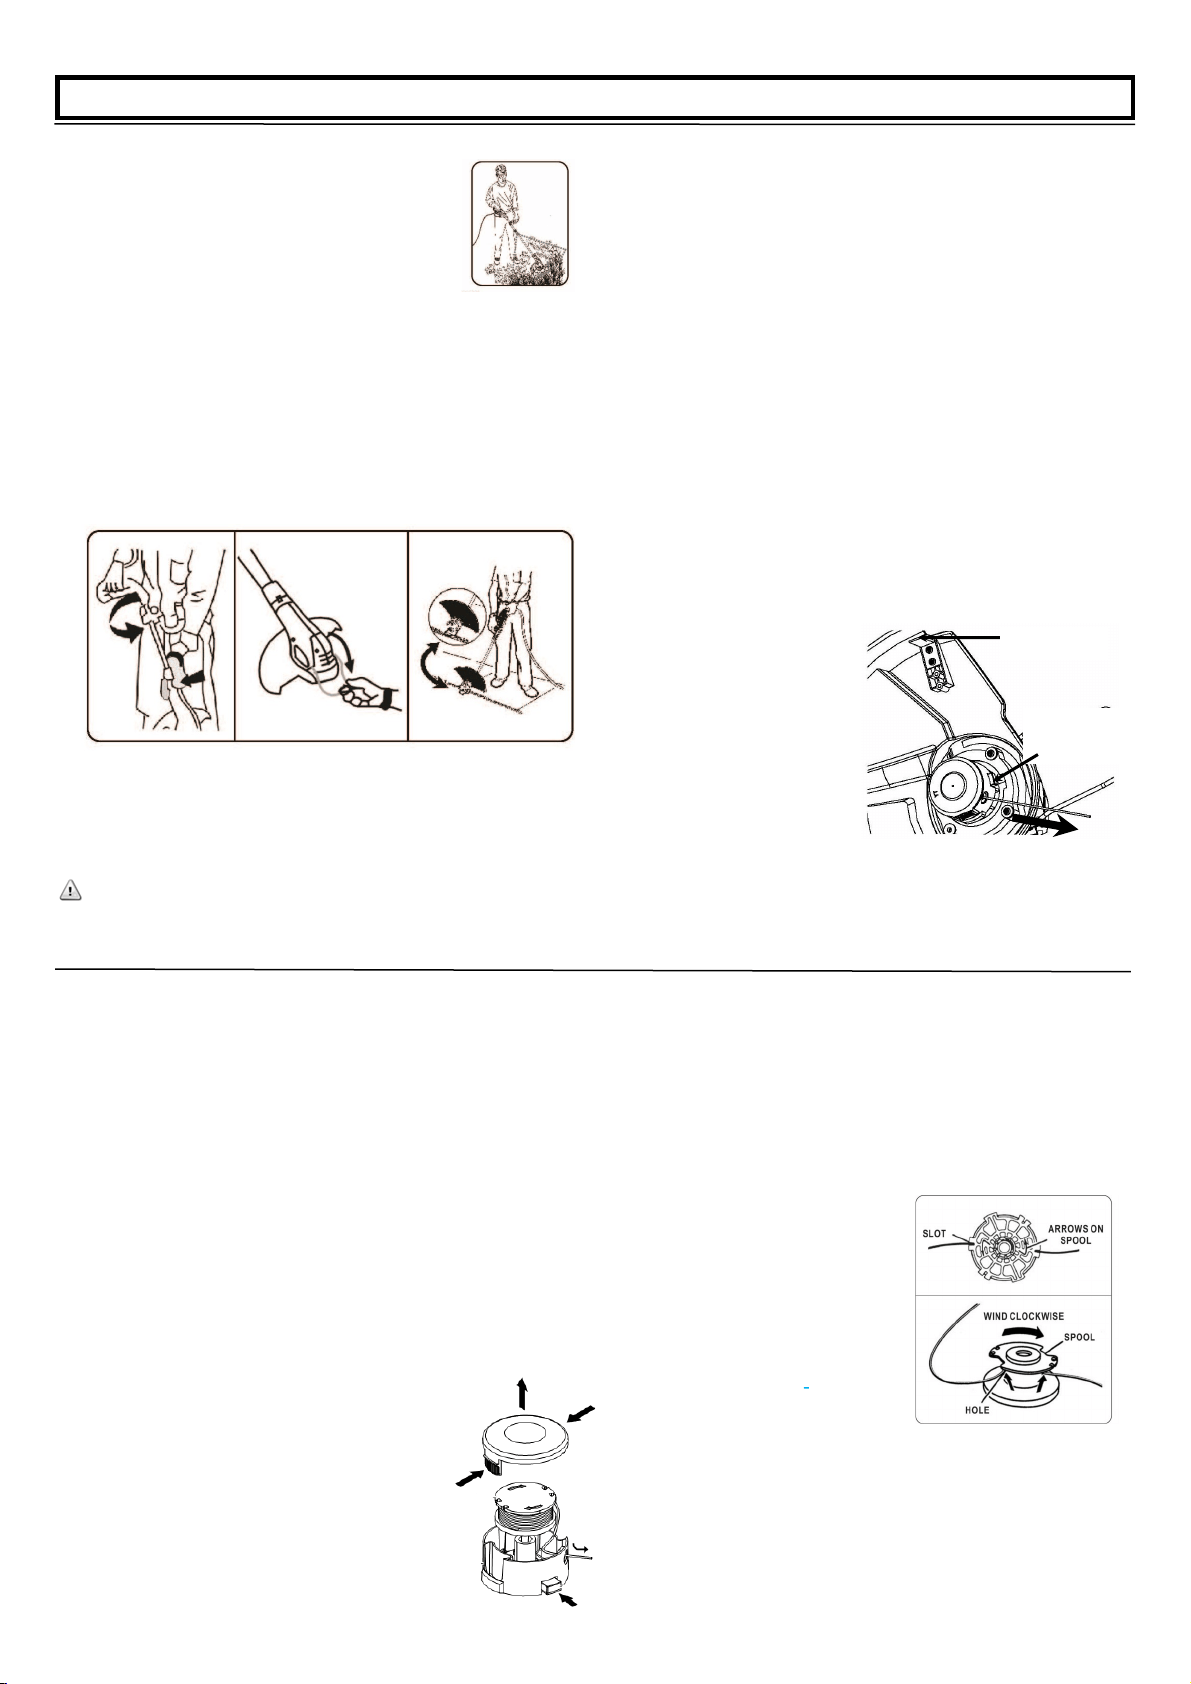
REWINDING SPOOL FROM BULK LINE
(USE ONLY .065” DIAMETER LINE)
To install bulk line, follow these steps:
• Turn off the trimmer and remove the battery.
• Press the release tabs on the line spool cover and
remove the cover by pulling it straight off. Remove the
spool from the tool and remove and discard all line on
the spool.
• Insert one end of the bulk line
into the hole in the spool.
• Hold the line in the hole and
pull the rest of the line through
the slot in the spool as shown.
• Snugly and evenly wind the
bulk line onto the spool clock-
wise in the direction of the
arrow on the spool until it is
nearly full.
• Insert the line end through the
eyelet in the spool hub. Pull the line through the hole to
maintain tension while placing the spool down into the
hub with the notched side exposed.
• Press the spool down GENTLY and rotate it until you
feel it drop into place. (When in place, the spool will turn
a few degrees left and right freely.)
• Snap the spool cover back on, insert the battery and turn
the tool on. In a few seconds you’ll hear the nylon line
being cut automatically to the proper length.
Cutting Blade
Release
Tabs
5
Model LST02010
Loading ...
Loading ...
Loading ...