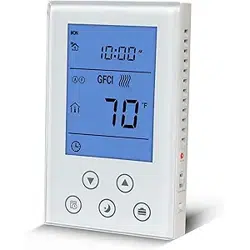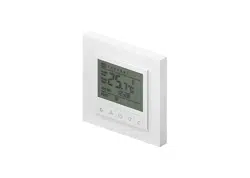

Smart Underfloor Thermostat
Setting up your LifeSmart Smart Underfloor Thermostat
User Guide Version 1.0
Simply Brilliant

PRODUCT INTRODUCTION
Combine the LifeSmart Smart Underfloor Thermostat with
your LifeSmart Smart Station and other devices to make your
life simple, and to let our monitor, control and even automate
your home or office environment. Perfectly integrated into the
home thermostat solution, it provides the most comfortable
home warmth in the cold winter.
Product Features:
1. Auto keypad lock to prevent kids from false operation
2. You can either control it manually or use programmed schedule to
turn it ON/OFF
3. Different temperatures can be set for up to 6 different time periods
4. 3 schedule templets : Week days + Weekend (5+2) Mode, Mon.-Sat. +
Sun. (6+1) mode and Everyday (7) to choose from
5. Fire-Retardant plastic martial made, stylish and safe

SPECIFICATIONS
POWER
MAXIMUM LOAD
INTERVAL
TEMPERATURE ACCOUNTED
BUILT-IN SENSOR
EXTERNAL SENSOR
AC 100-250V
10A
0.5℃/Step
0.1℃
NTC Thermistor B=3380 10k@25℃
Monitor Range 0-40℃ Setting Range 5-35℃
NTC Thermistor B=3380 10k@25℃
Monitor Range 0-95℃ Setting Range 0-90℃
0℃’ will be shown on screen if the temperature monitored is or below 0℃
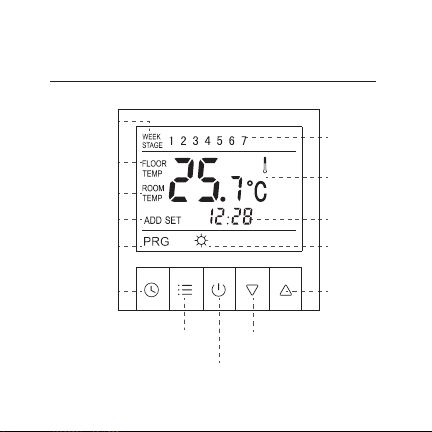
Smart Underfloor Thermostat
Up
Week / Stage
Value
Heating
DownMenu
System Clock
Programmed
Mode
Address Setting
ON/OFF
Time
Monitored
Temperature
Room
Temperature
Floor
Temperature
Week / Stage
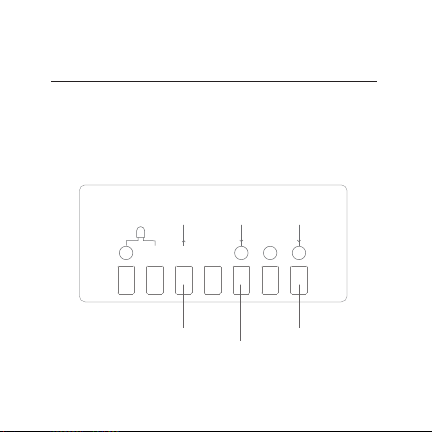
WIRE OPERATIONS
Please install wires in strict accordance with the wiring layout
on the back of the power box. Or we won’t be responsible
for the damage of the product.
Live Wire
Neutral Wire
Valve Open
7
1234
56
零
火
阀开
R25C/
10K3380

Separate the outer frame and the thermostat;
Separate the power box bottom with iron stand and the panel
with the display screen;
Install wires in strict accordance with the wiring layout on the
back of the power box;
Fix the iron stand of the power box to embedded bottom case
with screws;
Put the outer frame on and place the panel into the power box.
Remove the outer frame and the panel;
Remove all the screws and pull out the thermostat.
LifeSmart Smart Underfloor Thermostat is a high precision electronic
apparatus. Please treat carefully.
PRODUCT INSTALLATION
1
2
3
1
2
4
5
HOW TO INSTALL
HOW TO UNINSTALL
Power on, press and hold “ ” for at least 5 seconds until
the indicate light flashes, then click “Start Pairing”.
Smart Thermostat starts pairing. When it’s connected, click
“Confirm” to finish pairing.
If pairing is failed, please repeat the steps above until pairing
is successful.
App Installation
1
2
3
Get LifeSmart by scanning the QR code below:
Parent Control
Press and hold “ ”and“ ” for 2 seconds, the
keypad will be locked. To unlock it , press and hold
“ ”and“ ” for 2 seconds again.
OPERATIONS
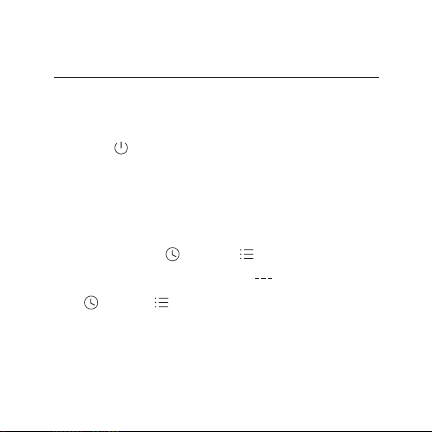
Turn ON/OFF
Press “ ” to turn ON/OFF. Room temperature and
‘OFF’ will be shown when it’s turned off.
2
1
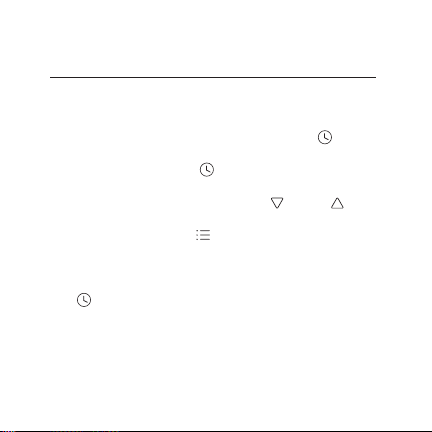
System Clock Setting
To set or adjust system clock, press and hold “ ” for 5
seconds to enter. Press “ ” to choose a flashing option
from Week, Hour, Minute, then press “ ” or “ ” to
adjust the value. Press “ ” to jump back to previous
option anytime during setting up. Press
“ ” again to finish clock setting.
OPERATIONS
3

Switch Between Manual/Programmed Control
Press “ ” to switch.
Manual Control
Thermostat follows your instant input to control the
temperature. PRG or STAGE VALUE won’t be shown on screen.
Programmed Control
Thermostat automatically function with high performance of
energy saving following programmed schedules. PRG will be
shown on screen when programmed control is activated.
WEEK and STAGE VALUE will be shown in flash alternately in
5 seconds interval, and number from 1 to 7 indicates Monday
to Sunday or pre-set time period.
OPERATIONS
4

Choose from 3 different monitor methods upon 2 sensors
to gain the best experience you require. Enter System
Menu to set up.
Monitor Method (IN)
The internal sensor monitors room temperature. “ROOM
TEMP” and room temperature value will be shown on
screen, target temperature and current time value will be
shown in flash alternately in 5 seconds interval.
Monitor Method (OUT)
The external sensor monitors floor temperature. “FLOOR”
and floor temperature value will be shown on screen.
MONITOR METHOD AND DISPLAY

Monitor Method (ALL)
Both internal and external sensor work together to monitor
room and floor temperatures. If a temperature excursion of
underfloor heating is detected, the thermostat shuts down
the heating automatically. Press “ ” and “ ”
together to view floor/room temperature, with “FLOOR”
or “AIR” shown in flash alternately in 5 seconds interval.
MONITOR METHOD AND DISPLAY

You can easily set up different time periods to allow the
thermostat to operate the programmed control automatically,
once for all. There are up to 6 time periods and 3 schedule
templets including Week days + Weekend (5+2) Mode, Mon.-Sat.
+ Sun. (6+1) mode and Everyday (7) to choose from. Each time
period consists of duration data and a temperature input.
TIME PERIOD SETTING
Press and hold “ ” for 5 seconds to enter time period
setting. Then press “ ” again to choose a flashing option
from Hour, Minute and Temperature.
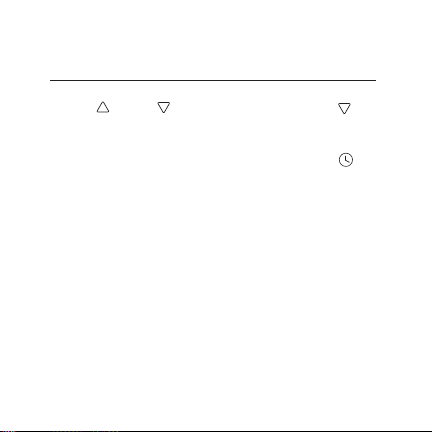
Press “ ” or “ ” to adjust the value. Press “ ” to
jump back to previous option anytime during setting up. If you
want to delete a time period setting, press and hold “ ”
until “OFF” can be read on screen.
TIME PERIOD SETTING

TIME PERIOD SETTING
Weekdays + Weekend (5+2) Mode is in default. Detailed data is
below. You can customise the time period anytime.
e.g. The unit in grey indicates: Thermostat works with 5+2 mode. If it’s
anytime between 08:00 and 11:30 on a Weekday morning, then the screen
will read Stage 2, TEMP 16℃
5+2 Mode ID P1 P2 P3 P4 P5 P6
Start Time
Temperature
Start Time
Temperature
Mon. - Fri.
Sat. & Sun,
06:00 08:00 11:30 12:30 17:00 22:00
22℃ 16℃ 16℃ 16℃ 22℃ 16℃
06:00 08:00 11:30 12:30 17:00 22:00
22℃ 16℃ 16℃ 16℃ 22℃ 16℃

Enter System Menu
Press “ ” and then“ ” within 1 second when the
thermostat is off (“OFF” can be read on screen) to enter
system menu.
Press“ ” and “ ” or “ ” to choose and
adjust the options and values.
Warning
System menu contains very important configurations,
please do not edit any of them. In which case, you don’t
SYSTEM MENU SETTING
SHOWN ON
SCREEN
OPTION
Backlight OFF ON: always on
OFF: auto
You can edit the backlight
duration on Auto
Turn on and remain the same
state before power cut when
power back on; or stay OFF
Anti freeze in water piped
system when turned on
Temperature correction if a
measurement error occurs
ON: same state
before power cut OFF:
power off
ON: Frost proof on OFF:
Frost proof off
OFF
OFF
-2.5℃ -5 - 5℃
Frost Proof
Temperature
Correction
State after
Power Cut
DEFAULT RANGE DESCRIPTION
To save new setting, you have to go through ALL options and then
quit the menu. Please refer to the sheet below to view the options.
SYSTEM MENU SETTING

SYSTEM MENU SETTING
Internal Sensor
Hysteresis
1℃ 0.5 - 4℃
0.5 - 5℃
40 - 80℃
1 - 255
5+2
6+1
7
In
Out
All
Value of internal sensor hysteresis
Value of external sensor hysteresis
5+2: weekdays+weekend mode
6+2: mon-sat + sun mode
7: mon-sun mode
Please refer to Monitor Method
pages for details
Temperature limitation of
external sensor when on ALL
Restore to Factory Default
3℃
5+2
50℃
INMonitor Method
Top Temperature
Network Address
Restore to Factory
Default
External Sensor
Hysteresis
Programmed
Time Period Mode

Q & A
1
2
3
4
5
Please check if the power is on.
Wiring is wrong. Please check the layout again.
No read on screen if the temperature is not in working
temperature range.
Wrong or poor connection between power box and the
main panel
Damage or failure of the product. Please install carefully
to prevent it.
Why can’t I read anything on screen?

Please avoid any strong physical impact onto the screen.
Why is there a fracture of the screen of my thermostat
Check if there is any heating object around. If so, remove
Why is the screen blank?
Check if the panel is installed properly. Please adjust the
Why can’t I read the full text on screen?
Please check if the cable of the backlight is connected and
not damaged.
Why the backlight is not on?
Q & A

Check if you have already chose Backlight On in system
setting. Or a damage has occurred to the backlight chip.
Why is the backlight always lit?
Er0
Internal sensor failure. Check if the sensor is damaged during
installation.
Er1
External sensor failure. Check if the sensor is damaged during
installation.
External sensor not connected under Monitor Method ALL.
What does Er0 / Er1 mean?
Q & A

If your questions cannot be found above, please consult our customer
service team.
1
2
3
If the temperature is or below 0℃, the thermostat will only
read 0℃ on screen.
Is it normal that a “0℃” is always read on the screen?
The thermostat should NOT be placed in confined spaces
or stagnant air.
The thermostat should NOT be placed near any heat
source or under direct sunlight.
Check if the screws are placed tight at the back of the
product.
Why is there an obvious error on monitoring temperature?
Q & A

Thank you for purchasing this LifeSmart product. In order to
protect your right, please read the following content carefully:
The warranty period of our company’s products is one year
from the date of purchase or longer if local laws impose a
longer minimum term, in which case the minimum term is the
warranty period. During the warranty period. any faults caused
by the product itself for quality problems that arise under
Please contact our customer service team before you send over for
replacement through 400-886-1911
Power Bottom BoxPanel with screen
Screws patch
WARRANTY DESCRIPTION
IN YOUR PACKAGE
1
1
1
User Guide
1

The following conditions are not covered by
Product failure or damage caused by installation, use, and
maintenance that is not in accordance with the product instructions;
Products beyond the warranty period;
Products that have the barcode tampered with or removed;
Devices that have been tampered with or customised outside of
LifeSmart Terms of Service as on the LifeSmart APP and website;
User-Caused damage. such as inappropriate voltage input, high
temperature, accidental spillage, physical damage, etc;
Product failure or damage caused by force majeure such as
earthquakes, fires or floods; Product failure or damage caused by
other problems except the product itself.
ATTENTION
QC
PASS
TECH SUPPORT
Email:
Telephone:
400-886-1911
QQ:
4008861911
Website
www.ilifesmart.com

LifeSmart is a trademark of Hangzhou LifeSmart Technology
Co., Ltd. As for the trademarks, product logos and product
names from other companies presented within this manual,
they are possessed by their own right holders. Without our
written permission, no entity or individual shall extract, copy
or disseminate in part or the whole of the manual contents in
any form. Due to product version upgrades or other reasons,
content of this manual may change. Our company reserves
the right to change the contents of this manual without any
notice. This manual is used only for instructional purposes.
We strive to provide accurate information in this manual, but
DECLARATION

we are not able to ensure that the content of this manual is
current. Statements, information and advice in this manual do
not constitute any expressed or implied assurance. Updated
manuals are available on our website at www.ilifesmart.com or
by contacting our Happiness Team.
DECLARATION

www.ilifesmart.com