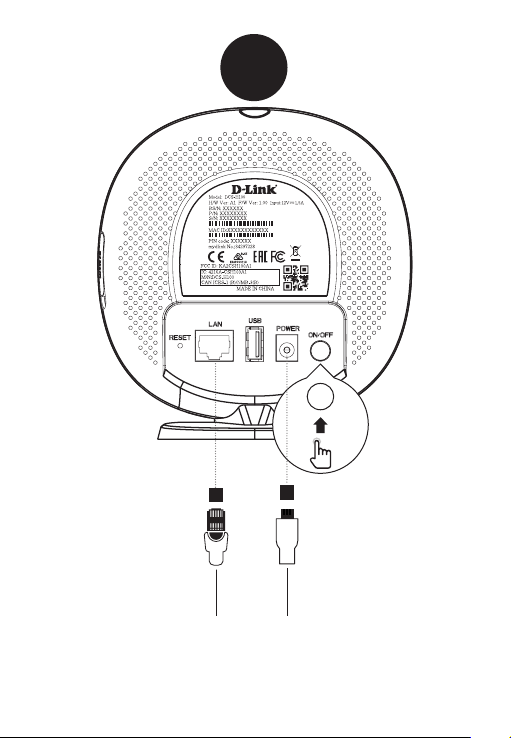
1
Plug the supplied Ethernet cable from your router or gateway into
the port marked 'LAN'.
Plug the power adapter into the hub. Make sure the power button is
pressed down into the 'ON' position.
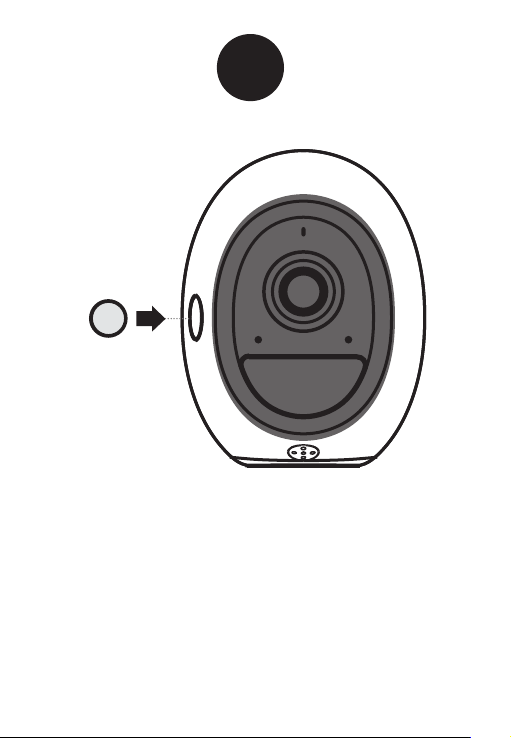
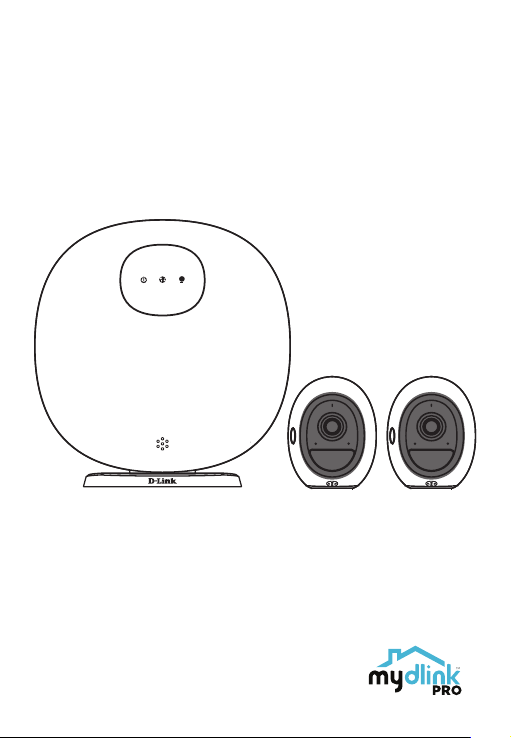
2
Once the hub has powered up, press the SYNC button on each
camera to power them on.
SYNC
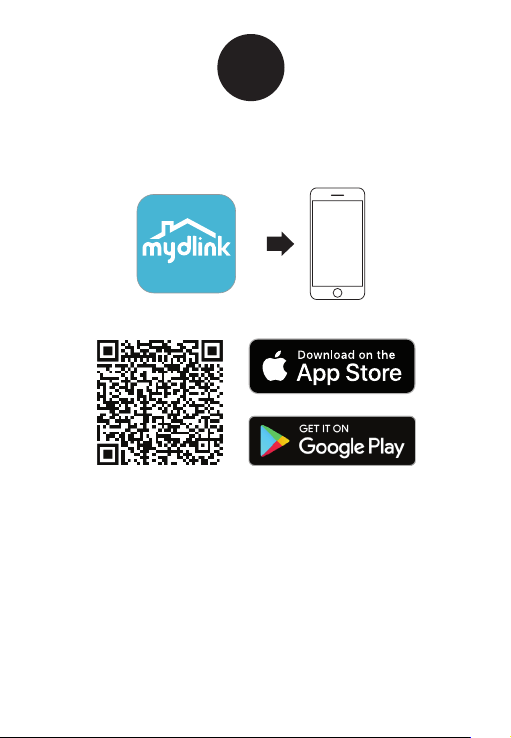
3
Scan the QR code above to download the mydlink app for your
Android or iOS device.
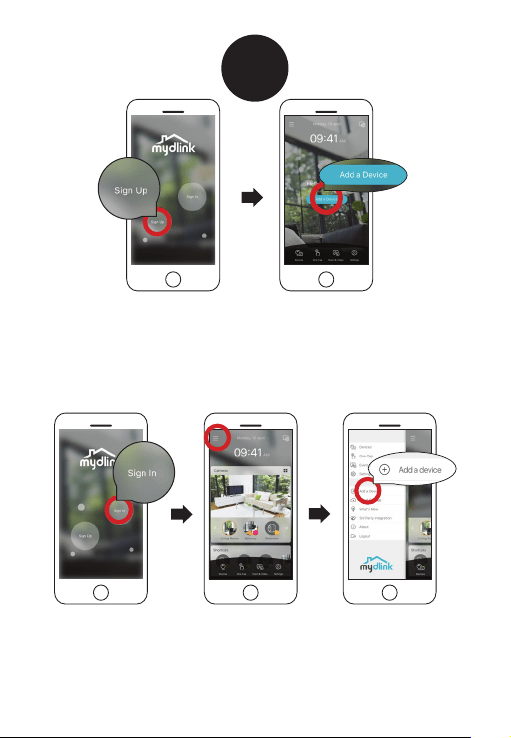
4
Existing Users:
Sign in using your mydlink account and tap the icon at the
top-left, then tap Add a Device to start the setup wizard.
Continue to follow the onscreen instructions.
OR
New Users:
Tap Sign Up to register for a mydlink account, then tap
Add a Device to install your camera. Continue to follow the
onscreen inscructions.
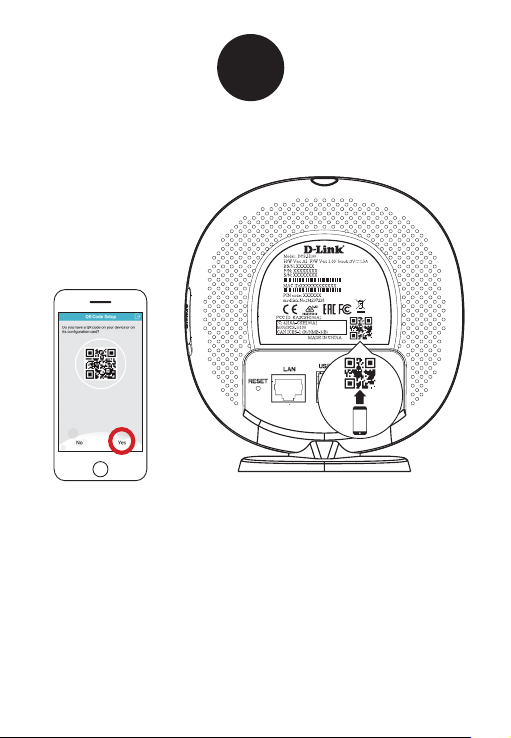
5
When prompted, select "Yes" to scan the QR code on the back of the
hub, then continue to follow the onscreen instructions to complete
the setup process.
Note: Please ensure that your mobile device is connected to the Wi-Fi
network of the router that you connected the hub to.
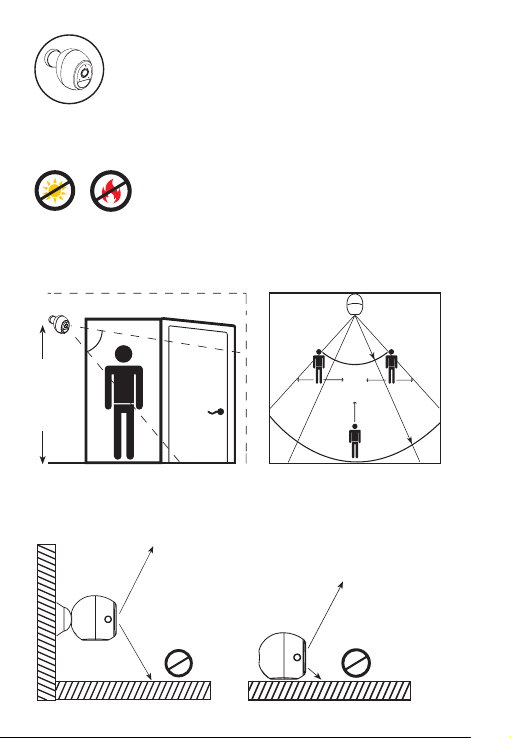
Camera Placement Precautions
Improper Placement:
Do not place the camera directly on top of a surface or in a spot
where there is something directly below it, obstructing its view
.
Caution:
Please make sure that the camera is
not directly facing the sun or a source
of heat.
Proper Placement:
Place the camera at least 2.2 m (7 ft) or higher from the ground. The
minimum recommended viewing distance for the motion detection
is 60 cm (24 in), and the maximum is 7.5 m (25 ft).
2.2 m
(7 ft)
64°
60 cm
(24 in)
min
115°
7.5 m
(25 ft)
max
good detection
poor detection
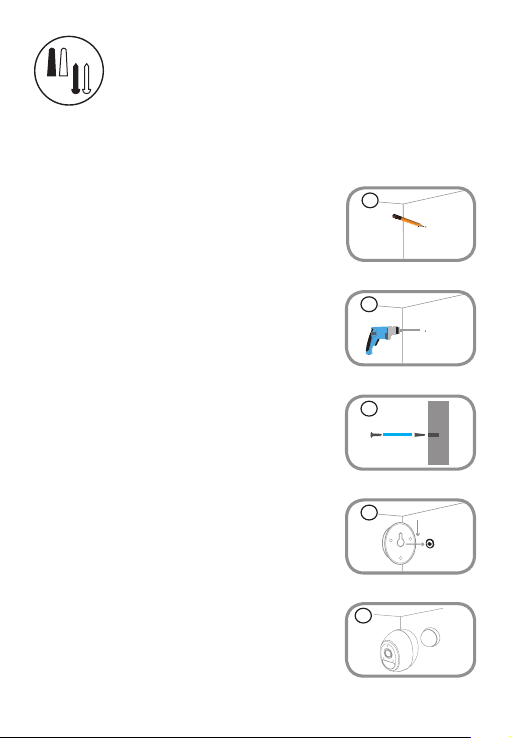
Step 1:
Identify and mark the location where you want to
install the bracket, assuring that it is at least 20 cm
from the ceiling.
Step 2:
Using a 6 mm drill bit, drill a 25 mm deep hole over
the mark. For a plaster, drywall, or concrete wall,
insert the plastic anchor to support the screw rst.
Step 3:
Twist the supplied screw into the wall or anchor,
making sure to leave enough clearance between the
screw head and the wall.
Step 4:
Align the screw with the largest hole on the snap
mount. Slide the mount down to lock it into place.
Step 5:
Attach the back of the camera to the mount. Adjust
the angle as desired.
Camera Mounting Instructions
5
Snap Mount
1
2
3
4
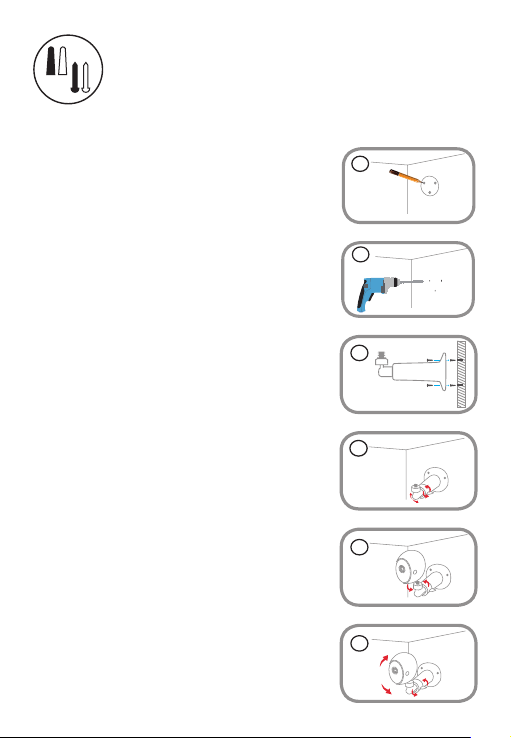
Step 1:
Place the mount at the desired location, assuring
that it is at least 20 cm from the ceiling. Use a pencil
to mark the holes.
Step 2:
Using a 6 mm drill bit, drill two 25 mm deep holes
over the pencil marks. For a plaster, drywall, or
concrete wall, insert the plastic anchors to support
the screws rst.
Step 3:
Place the mount over the holes that are in the wall.
Make sure to align the mount holes with the holes
in the wall. Use the supplied screws to attach the
mount to the surface of the wall.
Step 4:
Rotate the wing nut counterclockwise with your
ngers to slightly loosen it. Then move the bracket
to the approximate desired position.
Step 5:
Screw the camera onto the mounting screw by
tightening the plastic nger nut.
Camera Mounting Instructions
Threaded Mount
Step 6:
Adjust the angle of the arm on the mounting bracket
as required. Tighten the wing nut to lock the
camera's position into place.
1
2
3
4
5
6
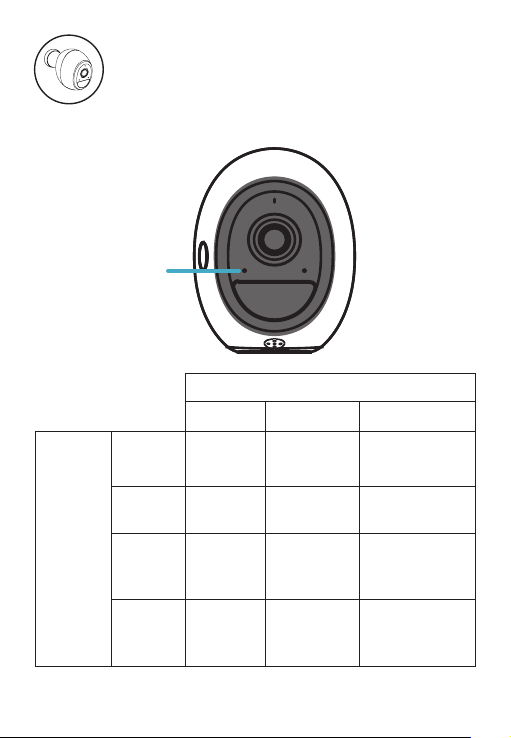
Camera LED Information
DCS-2800LH
Status LED
Color
Green Orange Red
Behavior
Solid
Motion
detected
Fully
charged
Malfunction
Solid for
10 sec.
Pairing
complete
N/A
Pairing failed /
Unpaired
Blinking
every
1 sec.
Currently
pairing
Charging
Updating
firmware
Blinking
every
30 sec.
N/A
Less than
10% battery
Lost wireless
connection
?
Frequently Asked Questions
1) What can I do if my camera is not working properly or I’m
having problems setting it up?
Reset the hub by pressing the Reset button for 10 seconds using a
paper clip, assuring that all the LEDs turn off briefly after releasing the
button. Then try setting it up again in the mydlink app.
In addition, please verify that:
• your Internet connection is active on your router.
• your router’s Wi-Fi is turned on.
• the camera’s battery has enough power.
• your mobile device is connected to the same Wi-Fi network of the
router that you connected the hub to.
2) How do I see my camera feed or adjust its settings?
You can access your camera by tapping the menu icon
in the top-
left corner of the main menu, select Devices, then select Camera. In the
selected device group page, you can select the specific camera in the
carousel by tapping its icon.

Minimum Requirements
To install this product, you will need:
• An 802.11 g/n wireless router
• An Internet connection
• The latest version of the mydlink app from the App Store or
Google Play. Please refer to the app's store page to check whether
your device is compatible.
• An e-mail account (required to register for mydlink service)

Version 1.00 (AU)_90x130
2018/09/28
Copyright ©2018 All rights reserved. D-Link and the D-Link logo are registered trademarks
of D-Link Corporation or its subsidiaries. Product specifications, size and shape are subject to
change without notice, and actual product appearance may differ from that depicted on the
packaging. Visit dlink.com for more details.
Support
For toubleshooting tips and more information, visit:
support.dlink.com
Technical Support
Australia:
Tel: 1300-700-100
24/7 Technical Support
Web: http://www.dlink.com.au
E-mail: support@dlink.com.au
New Zealand:
Tel: 0800-900-900
24/7 Technical Support
Web: http://www.dlink.co.nz
E-mail: support@dlink.co.nz
Wire-Free Camera Kit
Quick Start Guide
DCS-2802KT