
Loading ...
Loading ...
Loading ...
38
Assembly Instructions
Appendix
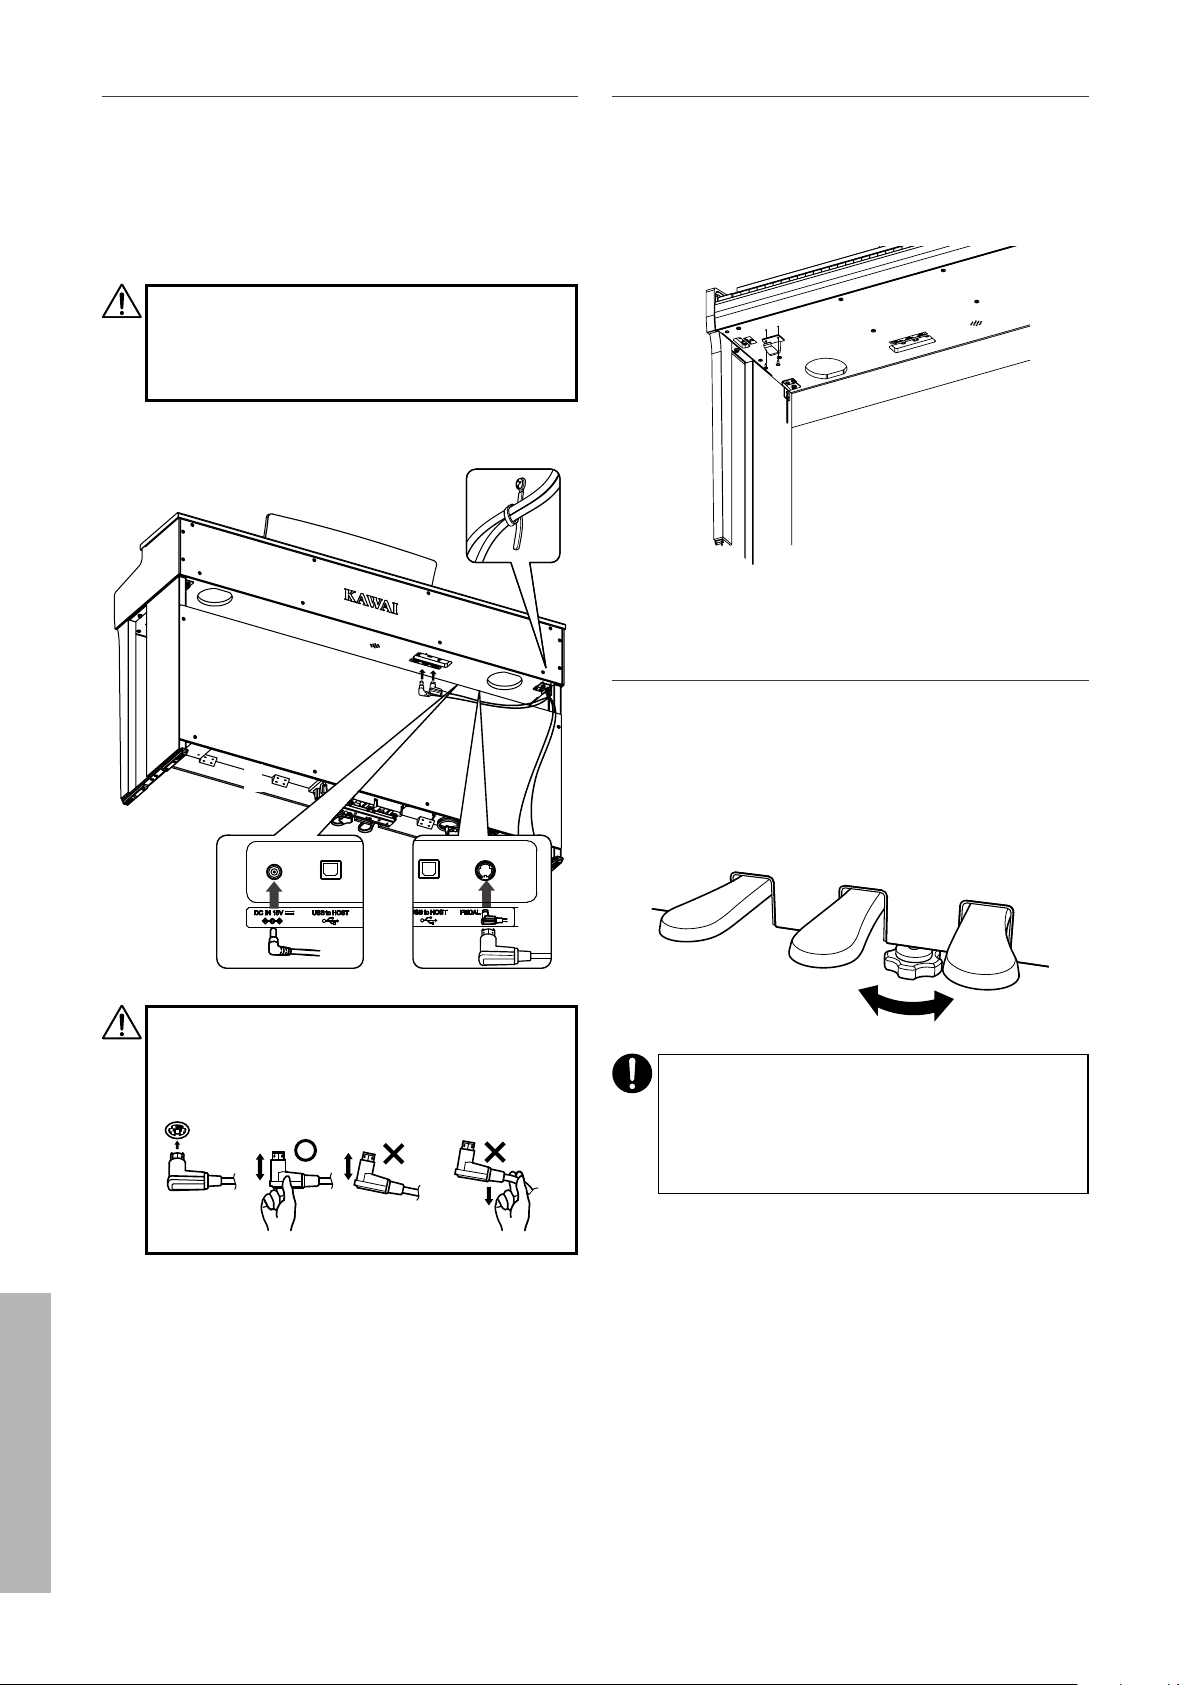
5. Connecting the cables
① Pass the pedal cable extended from E through the gap of D
to the rear side of the instrument and insert the cable to the
pedal connector on the bottom of A.
② Plug the AC adaptor into the power cord and insert it into
the [DC IN] jack.
③ Use the binders to secure the cables connected to B.
• Be careful with the orientation of the connector
parts.
• Plug the connector straight in. Forcibly inserting it
could lead to a malfunction.
③
①
②
E
A
C
Insert the plug straight in at the correct angle. Avoid
applying excess force on it. Not doing so could bend
the pins or damage the plugs.
Do not bend Do not pull
the cable
Keep the correct
angle
6. Attaching the headphone hook
Attach the headphone hook to the hole shown in the fig-
ure, using the two tapping screws (4 x 14 mm) provided in
the same bag.
7. Rotating the adjustor
Make sure to rotate the adjustor on the rear side of E until
the adjustor touches the floor. Depending on the material
and condition of the floor, stepping on the pedal may gen-
erate frictional noises between the pedal and the floor. If
this happens, please use a felt or carpet pad between the
floor and the adjustor to fill the gap.
Using the instrument with the adjustor lifted o the
floor or forcibly pressed against the floor could cause
the pedal base to break.
When moving the instrument, make sure to lift it o
from the floor without dragging it.
Loading ...
Loading ...
Loading ...