Loading ...
Loading ...
Loading ...
10
Preparation
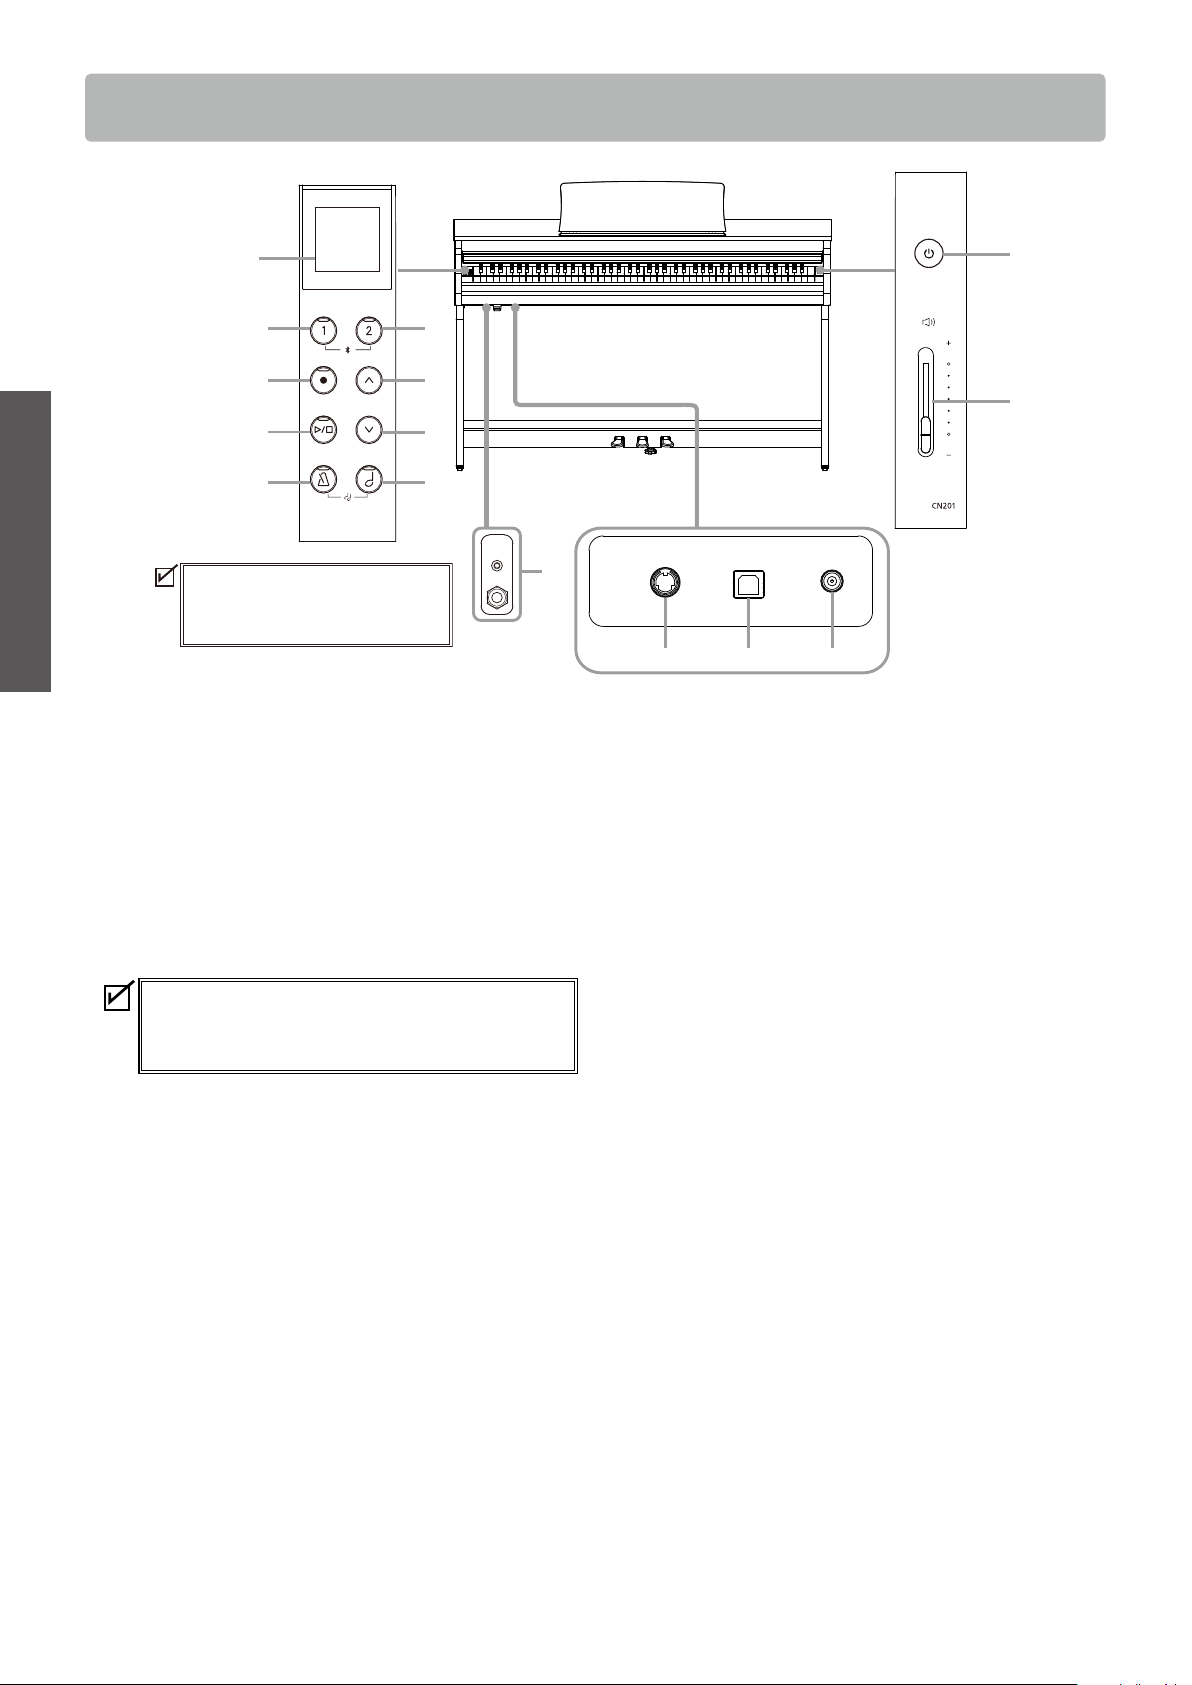
Part Names and Functions
Part Names and Functions
③
④
⑥
⑩
⑦
⑧
⑪
⑨
⑤
⑮
⑫ ⑬ ⑭
①
②
In market locations where Bluetooth
functionality is not available, the
Bluetooth mark will not be printed.
① [POWER] button
This button is used to turn the power on/o. Be sure to turn
o the instrument after playing.
② [MASTER VOLUME] slider
This slider controls the volume output from the head-
phones or built-in speakers.
③ Display
It shows the function names and setting values.
A protective plastic film is attached to the display
during production. Please remove this film before
attempting to play the instrument.
④ [1] button
This button is used to select functions shown on [1].
⑤ [2] button
This button is used to select functions shown on [2].
⑥ [REC] button
This button is used to record performances.
⑦ [PLAY/STOP] button
This button is used to play/stop recorded performances
and Internal Songs such as those stored in Lesson.
⑧ [UP] button
This button is used to move the menu up or increase the
setting values.
⑨ [DOWN] button
This button is used to move the menu down or decrease
the setting values.
⑩ [METRONOME] button
This button is used to turn the metronome function on/o
and adjust its tempo, time signature, and volume settings.
⑪ [SOUND SELECT] button
This button is used to select sounds.
⑫ [PEDAL] connector
This connector is used to plug the pedal cable attached to
the pedal unit.
⑬ [USB to HOST] port
This port is used to connect the instrument to a computer
using a USB ‘B to A’ type cable in order to send and receive
MIDI data.
⑭ [DC IN] jack
This jack is used to connect the AC adaptor.
⑮ [PHONES] jacks
These jacks are used to connect stereo headphones to the
instrument, allowing headphones with a stereo mini phone
plug and headphones with a stereo standard plug to be
connected at the same time.
Loading ...
Loading ...
Loading ...