Loading ...
Loading ...
Loading ...
7
Parts and Features
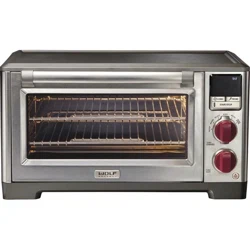
1. Control Panel Display: The display will show oven temperature
and timer settings, probe temperature settings, error
messages, toast slices and shade selections, icons for probe
and convection cooking, and the Wolf Gourmet logo when in
sleep mode.
2. Probe Button: Press the PROBE button to cook by temperature.
A probe takes the guesswork out of knowing when food is
properly cooked in ROAST or BAKE mode.
3. Convection Button: Press CONV if convection heating is
desired. Convection uses forced hot air to speed the baking/
roasting process for faster, more even cooking.
4. START/STOP Button: Press the START/STOP button to start
and to turn OFF the oven mode selected. The light will be
illuminated in red and a chime will sound when the cycle is started. START/STOP also is
used to engage or turn off the timer.
5. Selector Bezel: Rotate selector bezel to desired cooking mode: PROOF, WARM, ROAST,
BAKE, BROIL, or TOAST/BAGEL.
6. Temperature/Darkness Knob: Use this knob to set the temperature in WARM, ROAST,
BAKE, and BROIL cooking modes and shade of toast when using TOAST/BAGEL mode.
Turn the knob to the right to increase or to the left to decrease.
7. Time/Slice Knob: The TIME/SLICE knob can be used as a timer or to select the number
of slices to toast. Turn the knob to the right to increase time and number of slices or to the
left to decrease. Turn all the way to the left to choose STAY ON mode.
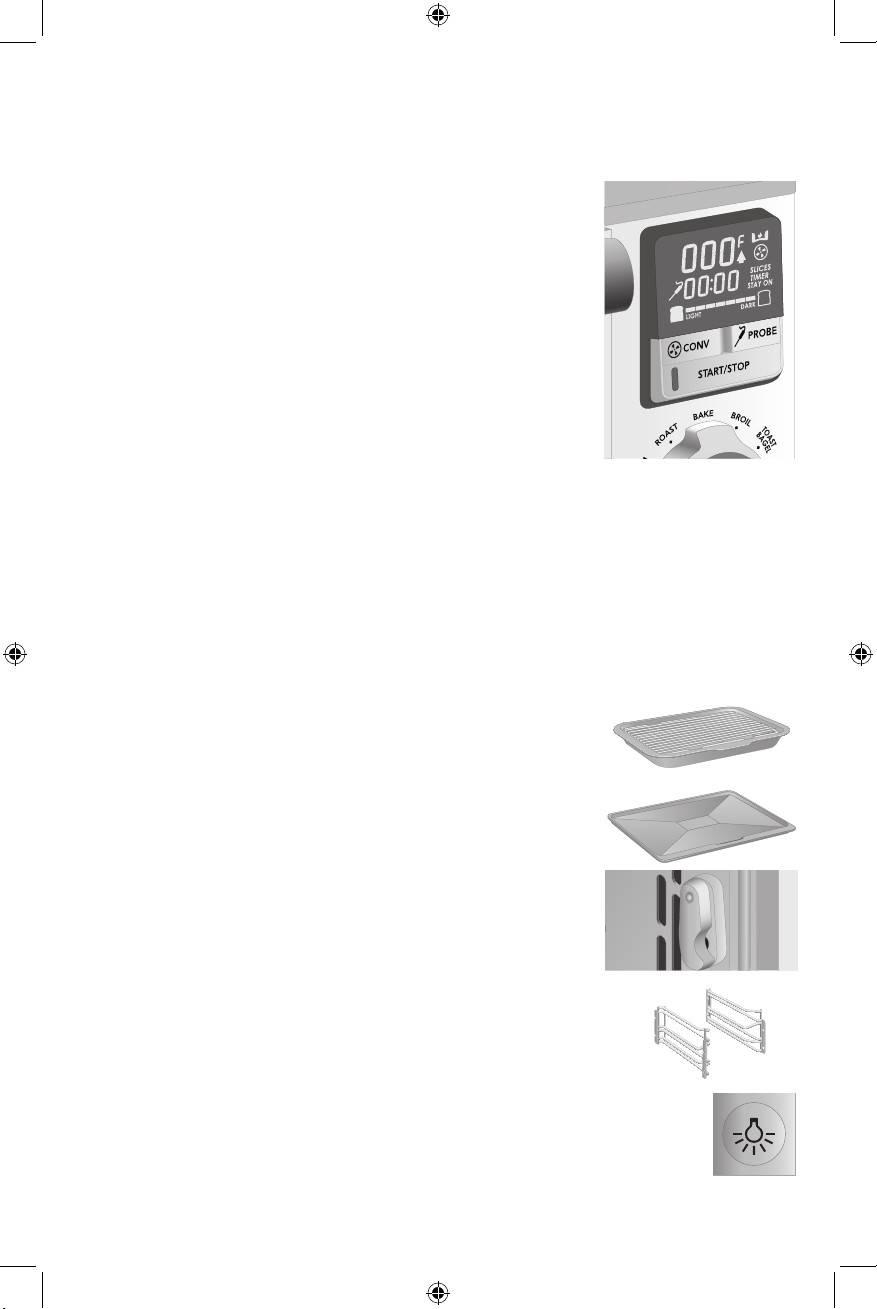
8. Baking Pan With Broil Rack: The baking pan with broil rack can
be used separately as a baking pan and cooling rack or together
as a broiler pan.
9. Oven Racks: The removable oven racks have an opening
towards the front for easy removal. Insert the rack or racks in any
of the three positions inside the oven.
10. Slide-Out Crumb/Drip Tray: The full-size crumb/drip tray slides
out of the oven for easy cleanup.
11. Probe: Insert the plug end (11a) into the probe jack located
on the wall of the oven. The long, thin pointed end of the
probe (11b) is the temperature probe which is inserted into the
thickest area of the food away from any bones or fat to measure
internal temperature and ensure perfectly cooked food.
12. Probe Jack: The probe jack located on the right side wall of the
oven is equipped with a cover to keep the connection clean
between uses. Simply use the plug end of the probe to slide the
cover aside while inserting the end into the jack.
13. Side Rack Guides: Located on the left and right side inside the
oven. The guides are removable for easy cleaning.
14. Oven Light Button: Press the oven light button to turn the oven light on and
off. The light makes viewing the food easy.
Loading ...
Loading ...
Loading ...