Loading ...
Loading ...
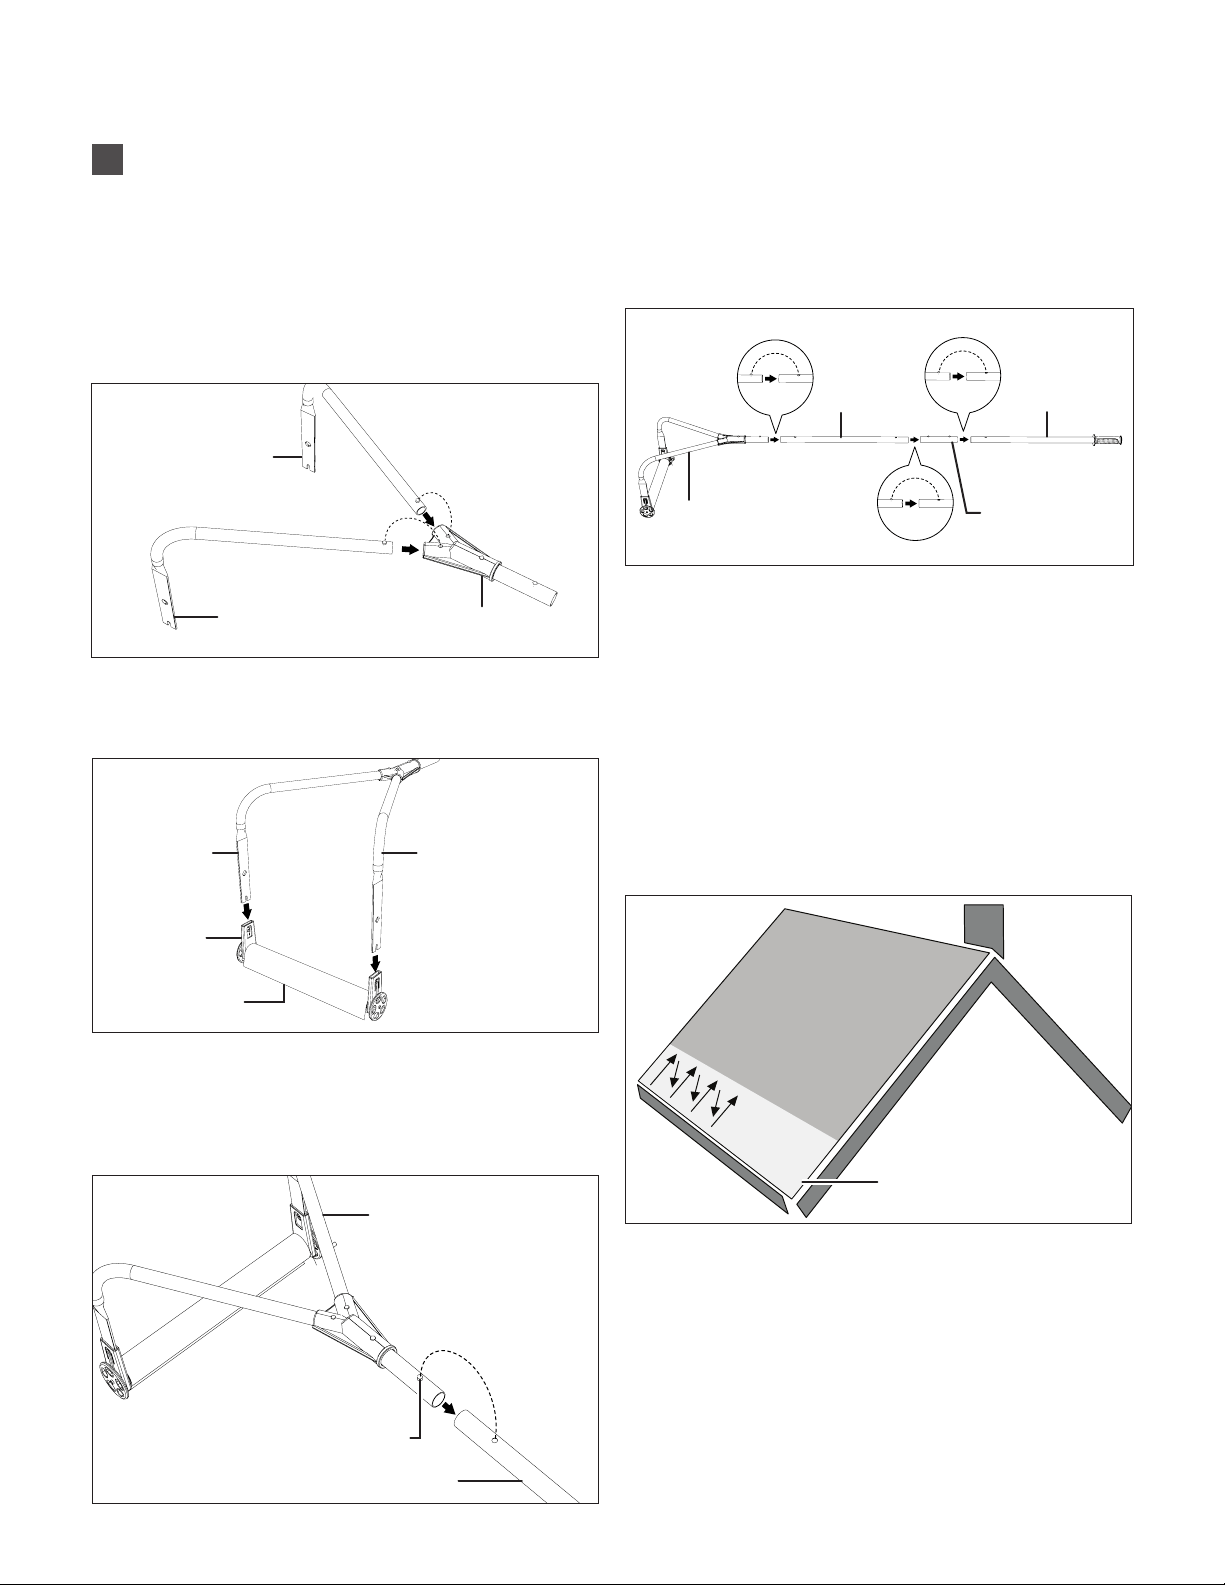
Assembling the Roof Rake
1. Connect right and left frames to the handle frame adapter.
Depress the small buttons at the end of the frames to t
the frames in the adapter. Make sure the small buttons
pop up in the holes on the adapter so the assembly is
secured (Fig. 1).
2. Insert the at ends of the left and right frame into the
grooves on the connectors next to wheels on the slide
assembly. Push rmly to secure (Fig. 2).
3. To connect the roof rake head with the pole handle,
depress the small button at the end of the roof rake head
assembly and insert into the pole handle. Make sure the
small button pops up in the hole on the pole handle so the
assembly is secured (Fig. 3).
4. If additional reach is needed, attach the provided pole
extensions between the pole handle and the rake head
assembly. Use the included pole couplers to connect pole
extensions (Fig. 4).
NOTE: Make sure the pole handle is the last piece of the
assembly.
NOTE: Make sure the small buttons pop up in the hole on
the pole so the assembly is secured.
Operation Tips
1. Make sure the roof rake is securely connected. Starting
with the rst 1- 2 feet of snow on the lower edge of the
roof, place the frame at the lower roof edge with the
terylene slide hanging down. Slowly roll the frame up the
roof. The terylene slide will follow under the snow. The
snow will slide down the slide (Fig. 5).
NOTE: Only connect the minimum number of pole
extensions needed to reach the edge of the roof. This will
minimize the weight of the roof rake and reduce the eort
required in the initial stage.
Fig. 1
Left frame
Right frame
Handle frame adapter
Fig. 2
Slide assembly
Connector
Right frame Left frame
Fig. 3
Roof rake head assembly
Pole handle
Button
Fig. 4
Roof rake
head assembly
Pole
extension
Pole
coupler
Pole
handle
1 - 2 Ft
Fig. 5
3
EN
Loading ...
Loading ...
Loading ...