Portable Air Conditioner
SLPAC805W
Compact Home A/C Cooling Unit with Built-in Dehumidifier
& Fan Modes, Includes Window Mount Kit (8,000 BTU)

www.SereneLifeHome.com
2
Read all instructions carefully before setting up and operating the unit.
Please keep this instruction manual for future reference. This manual is designed
to provide you with important information needed to setup, operate, maintain
and troubleshoot your portable air conditioner. Failure to follow these instructions
may damage and/or impair operation and void the warranty.
CONTENTS
User Tips
Precautions
Safety Warnings
Tips
Product Overview
Main Components
Control Panel and Remote Control
Operation
Place and Install
How to Operate
Clean and Maintenance
Drainage
Body Clean
Common Failures and Diagnosis
Intelligent Error Detection
Troubleshooting
Features and Technical Specs
3
5
8
9
10
11
15
16
16
18
19
20
www.SereneLifeHome.com
3
USER TIPS
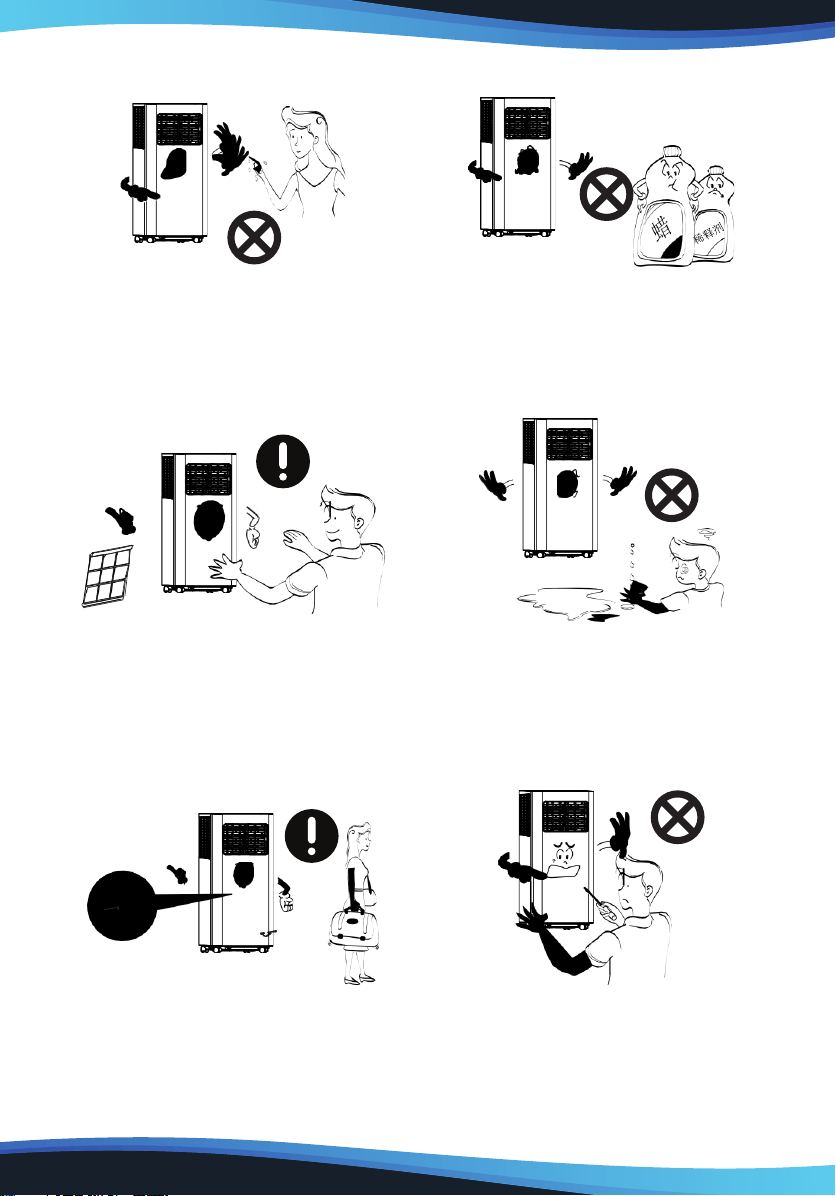
Please avoid such operations, in case of any safety and health risks.
Such instructions are to be followed, for safety and health concerns.
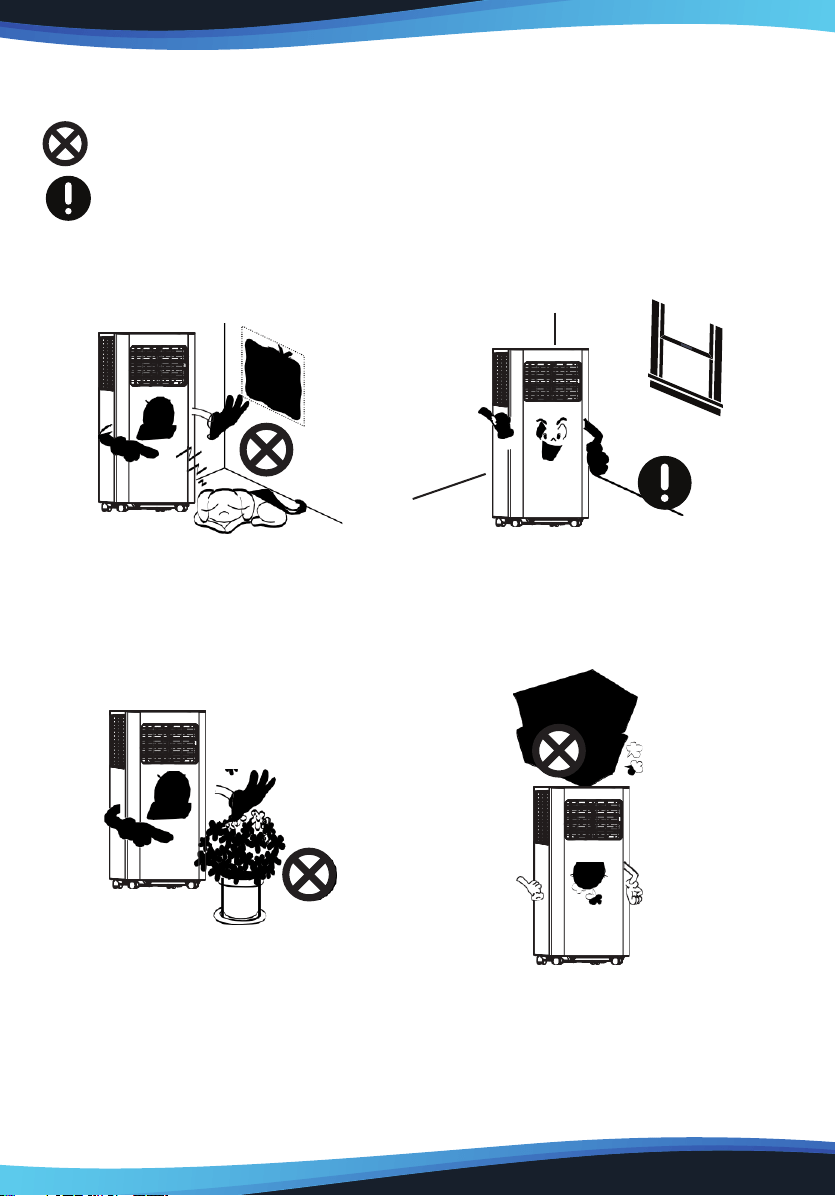
PRECAUTIONS
For household use only
For indoor use only;
please place the A/C in a dry
environment.
In case of a blocked air
exchange, never stack any
items around the machine.
To avoid damages, never place
any heavy items on the machine.
www.SereneLifeHome.com
4
Do not operate the machine
with wet hands or in a humid
environment.
Please wipe the machine with a
soft cloth, instead of wax, diluent
or irritant detergent.
Clean the lter once every two
weeks
For your health, never drink
condensed water discharged
from the machine.
Please unplug the power cord,
if the machine will not be
used for a long time.
Non-professionals are not
allowed to dismantle or repair
the machine.
www.SereneLifeHome.com
5
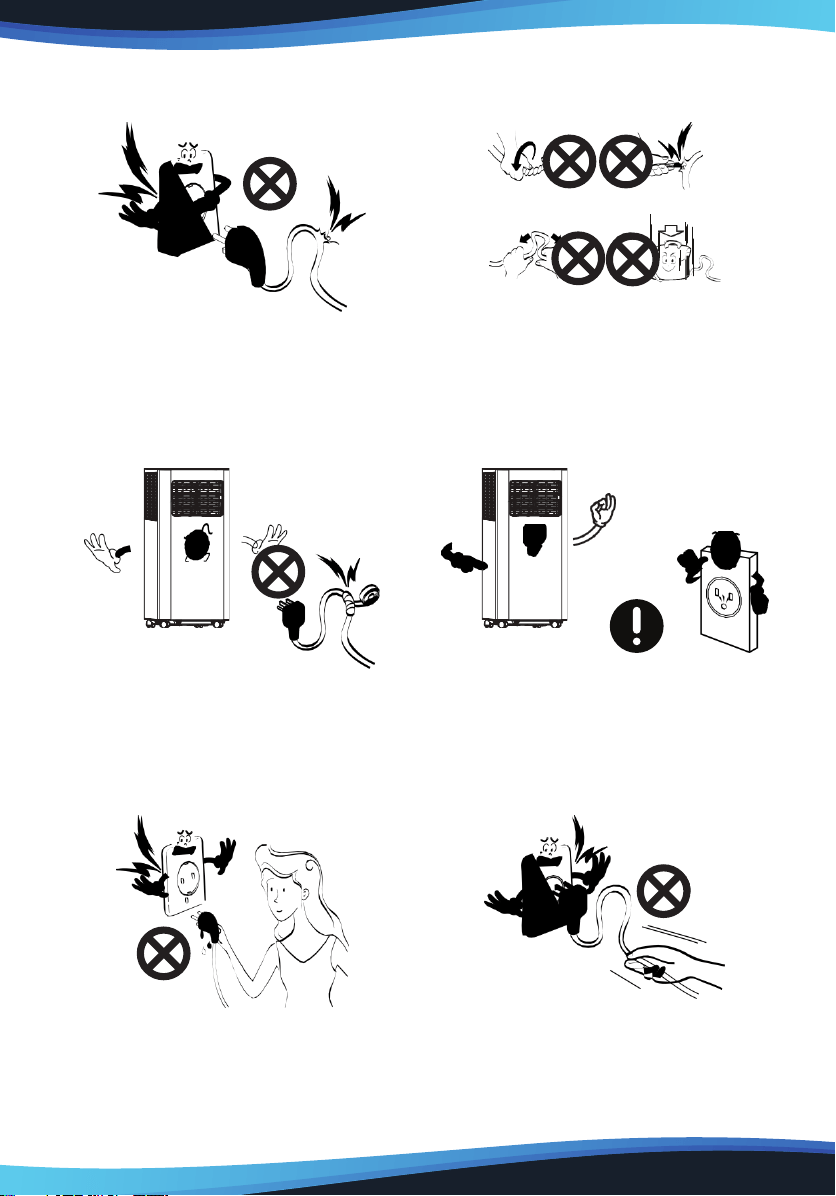
SAFETY WARNINGS
Damaged power cord or plug
shall not be used. Never plug
to a loose socket.
Never damage the power cord, or
use unlicensed power cord. Make
sure voltage is right.
Do not modify or extend the
power cord.
A grounded outlet is suggested
for the machine.
In case of electric shock, never
plug/unplug with wet hands.
To unplug, pull the plug end
instead of wires.
www.SereneLifeHome.com
6
Never control on/o status by
directly plugging/unplugging.
Please turn o the machine
before unplugging.
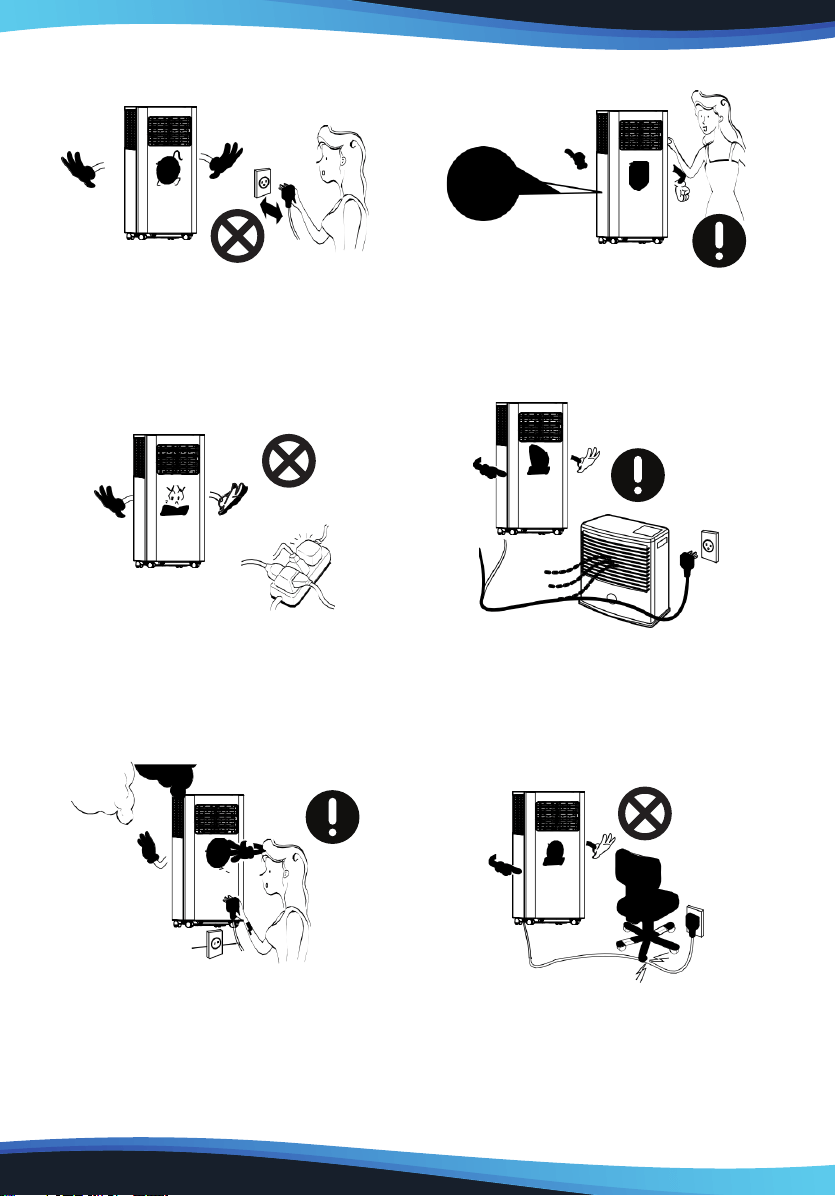
Never overload the socket. Keep away from heat sources
or direct sunlight exposure.
If there is any actue noise,
smell or smoke, turn o and
unplug for diagnosis.
In case of electric shock, never
damage the power cord by
placing heavy objects on it.

www.SereneLifeHome.com
7
Never insert ngers or any
hard objects into the louver.
Keep electrical parts away from
water.
If water enters, turn o and unplug
in time; and call for check and
repair from a professional.
Please turn o and unplug before
wiping, cleaning or replacing
components.
If gas leakage happens, open the
window for ventilation before
plugging the machine.
The appliance can be used by
children of or above 8 years old and
persons with reduced physical,
sensory or phycological capabilities,
if they have been given supervision
and instruction concerning proper
use and hazards of the appliance.
www.SereneLifeHome.com
8
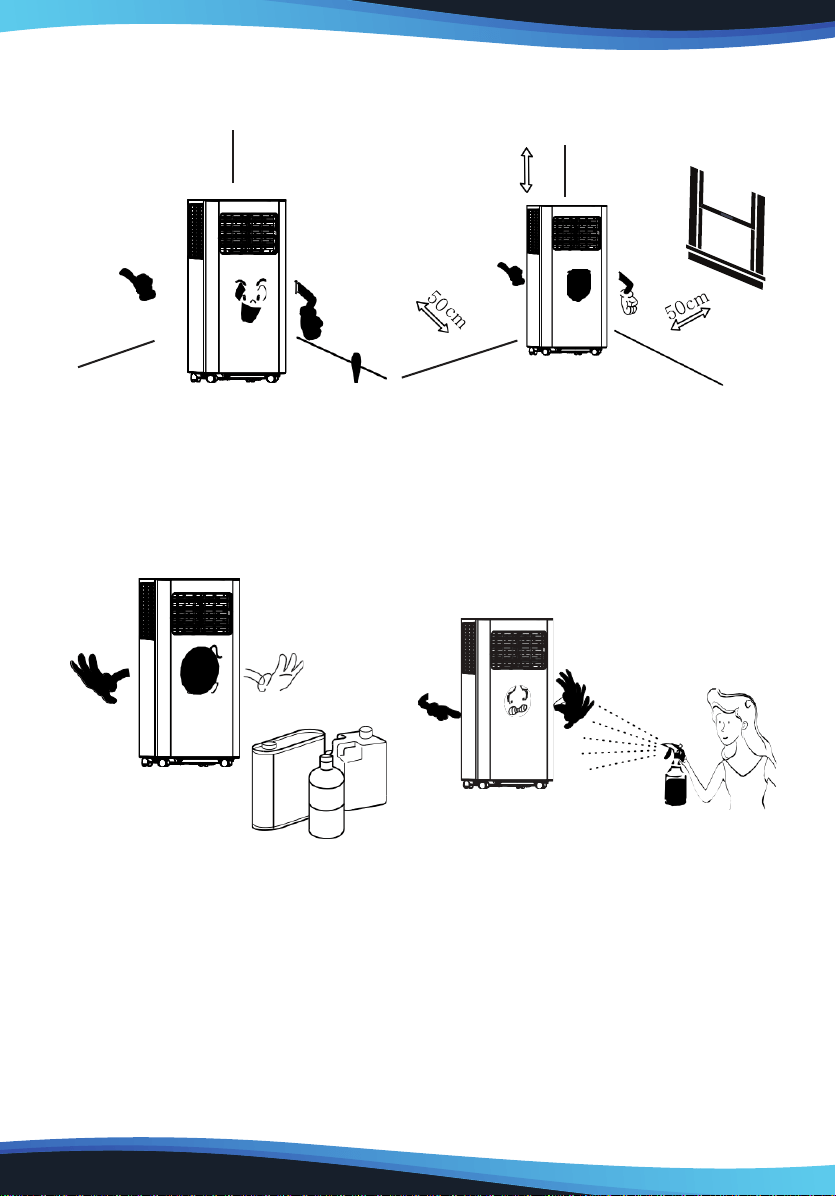
For a proper work of compressor,
place the machine vertically on
an even ground.
For a proper ventilation, keep
the machine at least 50cm from
objects nearby.
Never use the appliance near
gasoline or other ammable
objects.
Keep the appliance from spraying
agent or any solvent,or plastics
may deform and electrical parts
may even be damaged.
50cm
TIPS
www.SereneLifeHome.com
9
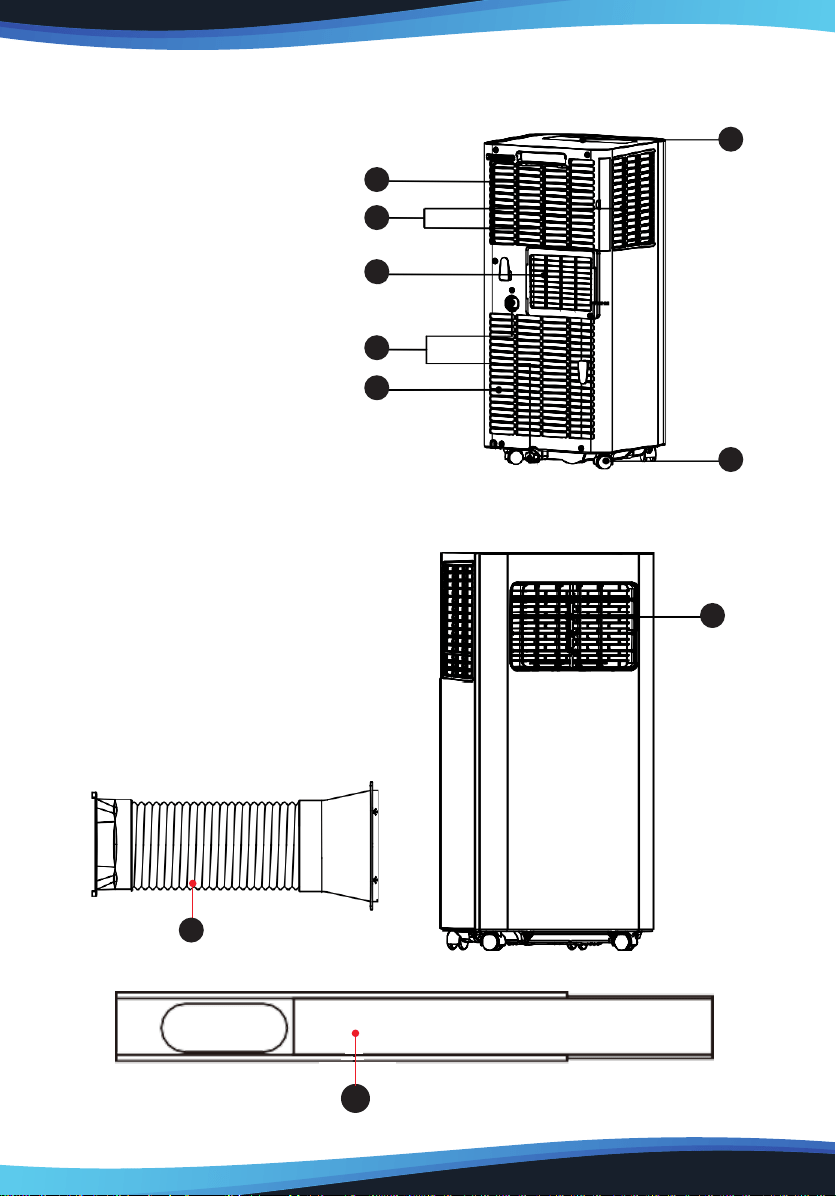
PRODUCT OVERVIEW
Main Components
1. Handle
2. Air Inlet Grille (Up)
3. Control Panel
4. Casters
5. Louver
6. Air Outlet Grille
7. Drainage Hole
8. Air Inlet Grille (Down)
9. Air Exhaust Duct Assembly
10. Window Sealing Kit
9
10
3
4
1
2
6
7
8
3
4
5
5
10
9
www.SereneLifeHome.com
10
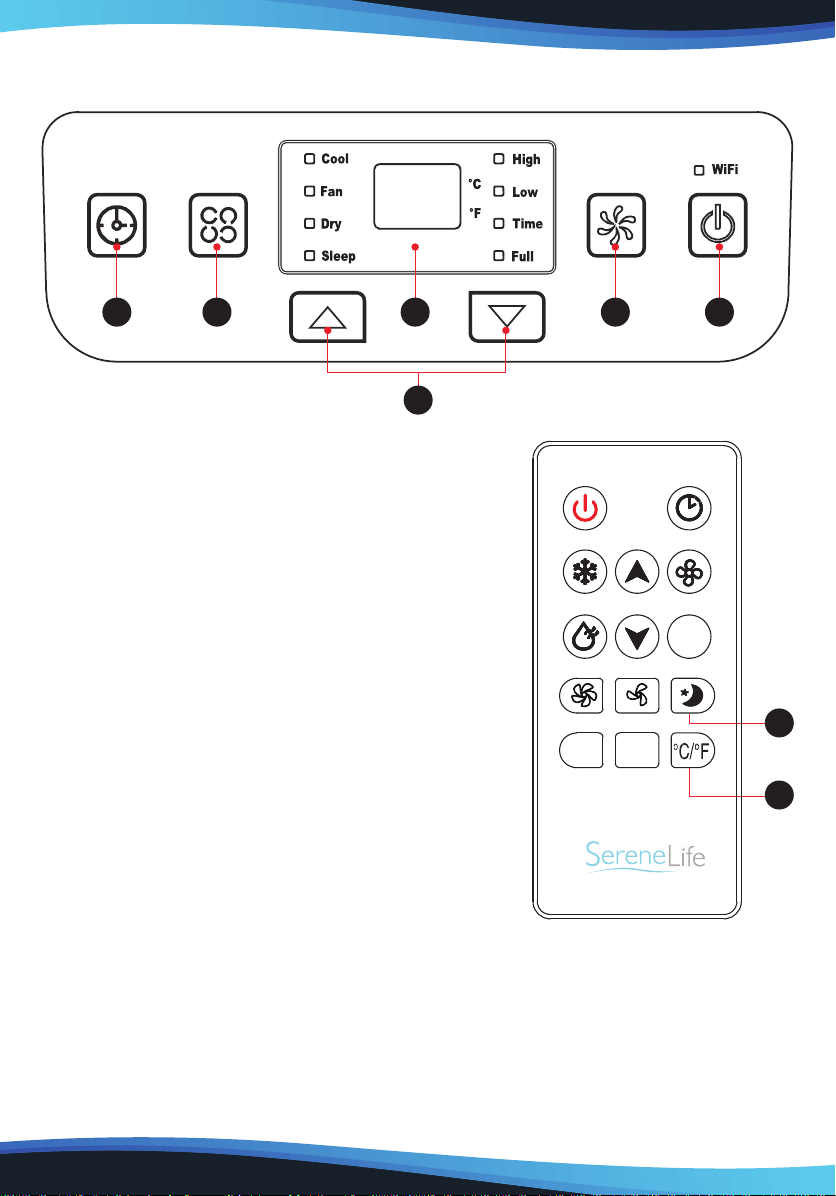
1. Power Button
Press the button for ON/OFF
2. Fan Speed Button
Press the key to choose high/low speed
3. UP/Down Button for Temperature and Timer
Under cooling mode, press the keys could
increase or decrease setting temperature;
In timer mode, press the keys to set time
powering ON. By pressing the keys together,
switch between °C and °F can be made.
4. Mode Button
Press the key to choose cooling, fan, dry.
5. Timer Button
Press the key at standby mode would set ON
time Press the key at ON mode would set OFF
time
6. Temperature and Timer Display
The window will indicate temperature and time.
7. Temperature Switch Button
The button is to switch between °C and °F
8. Sleep button
The button is to choose sleep mode.
CONTROL PANEL AND REMOTE CONTROL
10
5 4 6 2 1
8
7
www.SereneLifeHome.com
11
OPERATION
Place & Install
Place
• Place the machine on the horizontal oor
near the window.
• For proper ventilation and best machine
performance, keep the appliance at least
50cm from objects nearby.
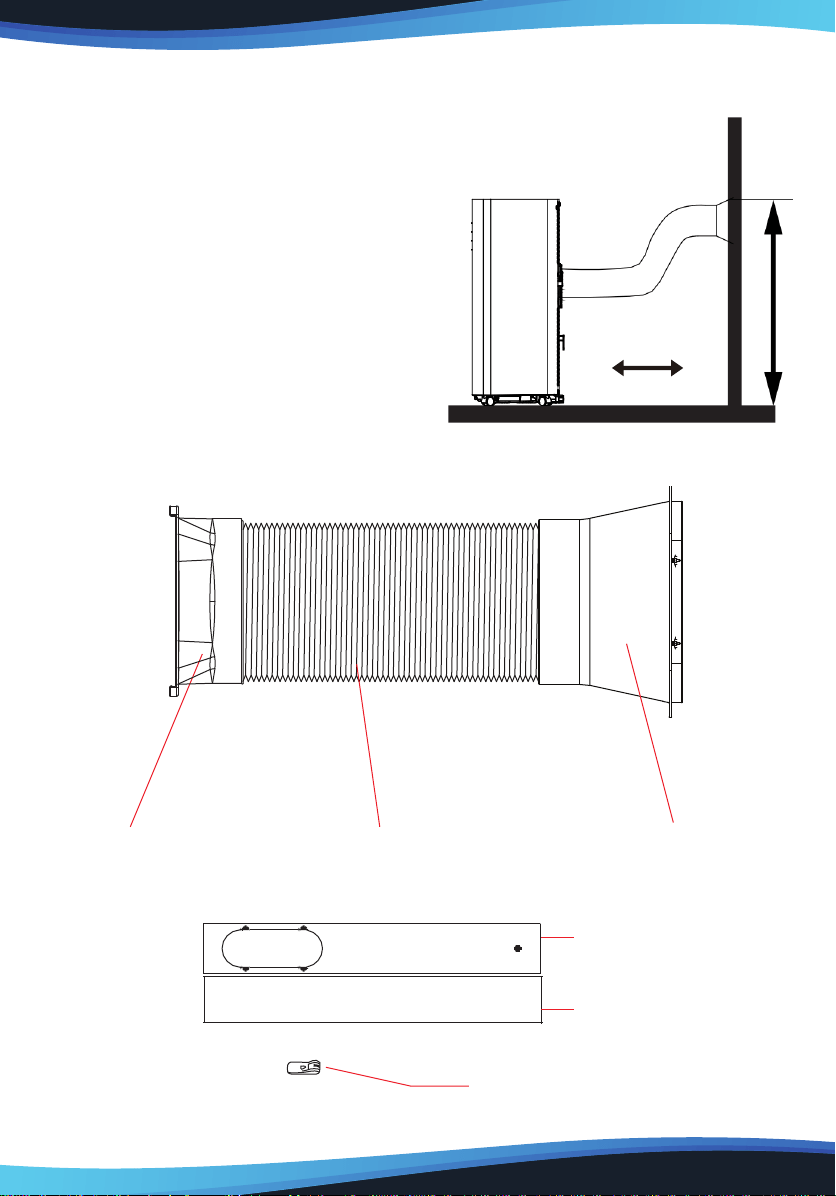
Install
Air Exhaust Duct Assembly
9
10
Best Install
50cm
90cm
Connector Air exhaust duct Flat nozzle
Clip-xture Type
Plate #1
Plate #2
Clip
www.SereneLifeHome.com
12
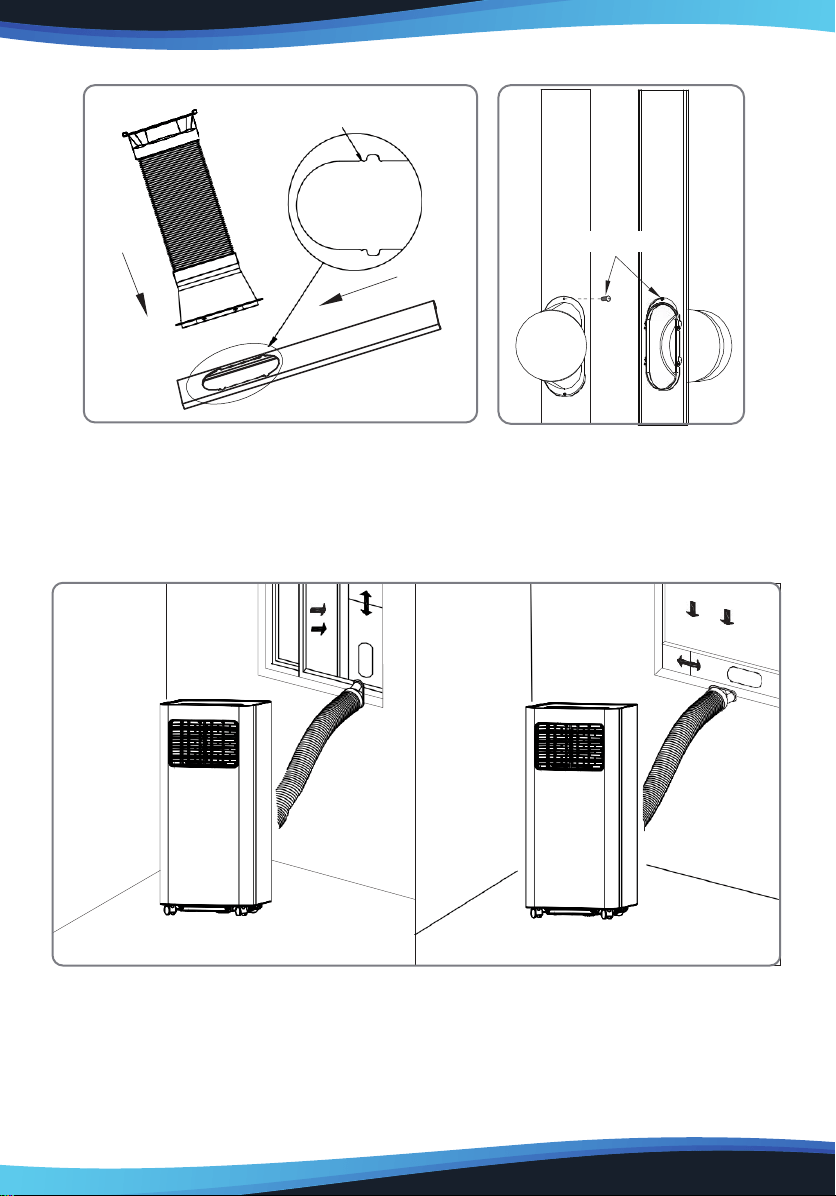
Step 1:
Clip-xture Type
1. Measure window size;
2. Adjust Length of the plate according
to window size;
3. Lock the plate
Step 2:
Fix the plate to window
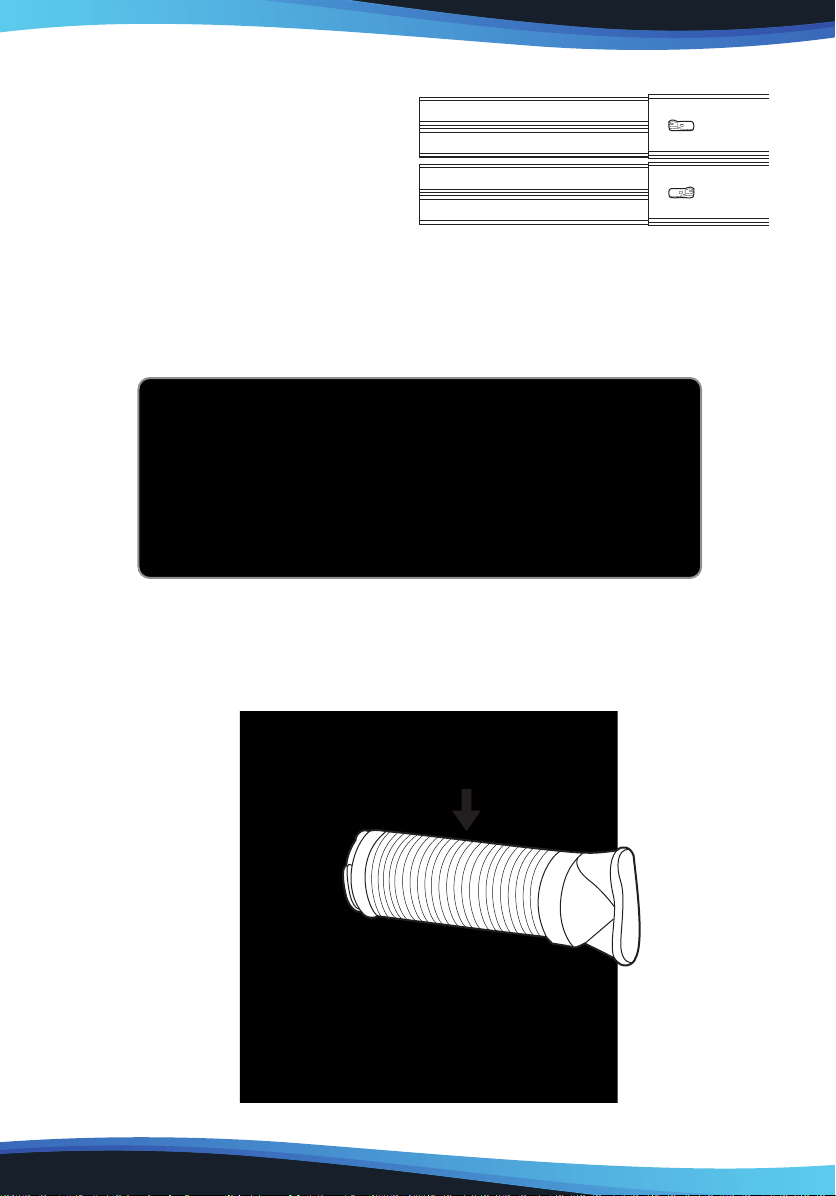
Step 3:
Swirl the exhaust pipe assembly (exhaust tting
end) into the rear panel outlet (counterclockwise).
www.SereneLifeHome.com
13
Step 4:
Insert the exhaust pipe assembly (exhaust port end) into the window seal panel
assembly and screw it up.
Impression Drawing of Completion
9
10
screw
little breach
1.Plug in rst
2.Slide to buckle in
www.SereneLifeHome.com
14
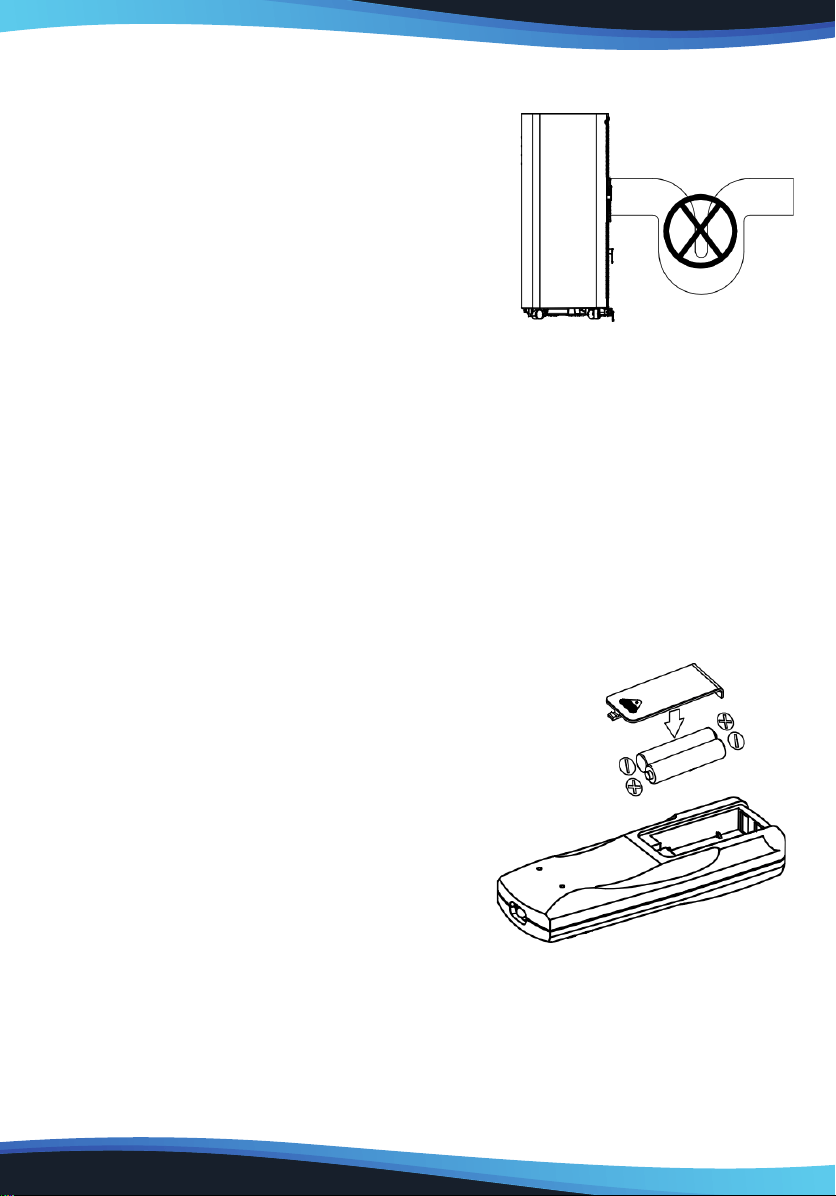
Incorrect installation
• It’s important to keep the exhaust duct smooth.
Incorrect installation will aect work of the A/C.
• Prevent the exhaust duct from sharp bending.
• Ensure air can ow smoothly in the duct.
Warning
The exhaust duct is designed especially for this model. Don’t replace or lengthen it;
otherwise, it will result in failure.
Notice:
The air exhaust duct can stretch up to 1500mm. To avoid bending, stretch it as
short as possible
REMOTE CONTROL
Please install the battery correctly before using the remote control.
The specic steps are as follows:
1. Slide to open the battery cover on the back;
2. Insert 2*AAA(DC1.5V) new batteries and
install electrodes correctly when inserted;
3. Fit the batteries in place.
Warning:
1. Only AAA DC 1.5V batteries are allowed, never use chargeable batteries or other
types of batteries.
2. Replace both batteries; never mix new battery with old one.
3. Please remove batteries if the appliance is not to be used for a long time.
www.SereneLifeHome.com
15
Warning:
1. Never use leaked batteries;
2. Chemicals in batteries could result in such health
hazards as burns. If liquid in batteries splashes to
skin or clothes, please wash with clean water in time.
If batteries are swallowed, please rinse mouth
immediately with clean water and then go to the
doctor.
HOW TO OPERATE
Cooling Mode
• Under cooling mode, cooling indicator will light on.
• Temperature Setting is from 60°F to 86°F.
• Press Fan Speed Button to choose from low/high
fan speed.
Fan Mode
• Under Fan mode, indicator will be on.
• Press Fan Speed Button to choose from low/high fan speed.
• Temperature cannot be set under this mode.
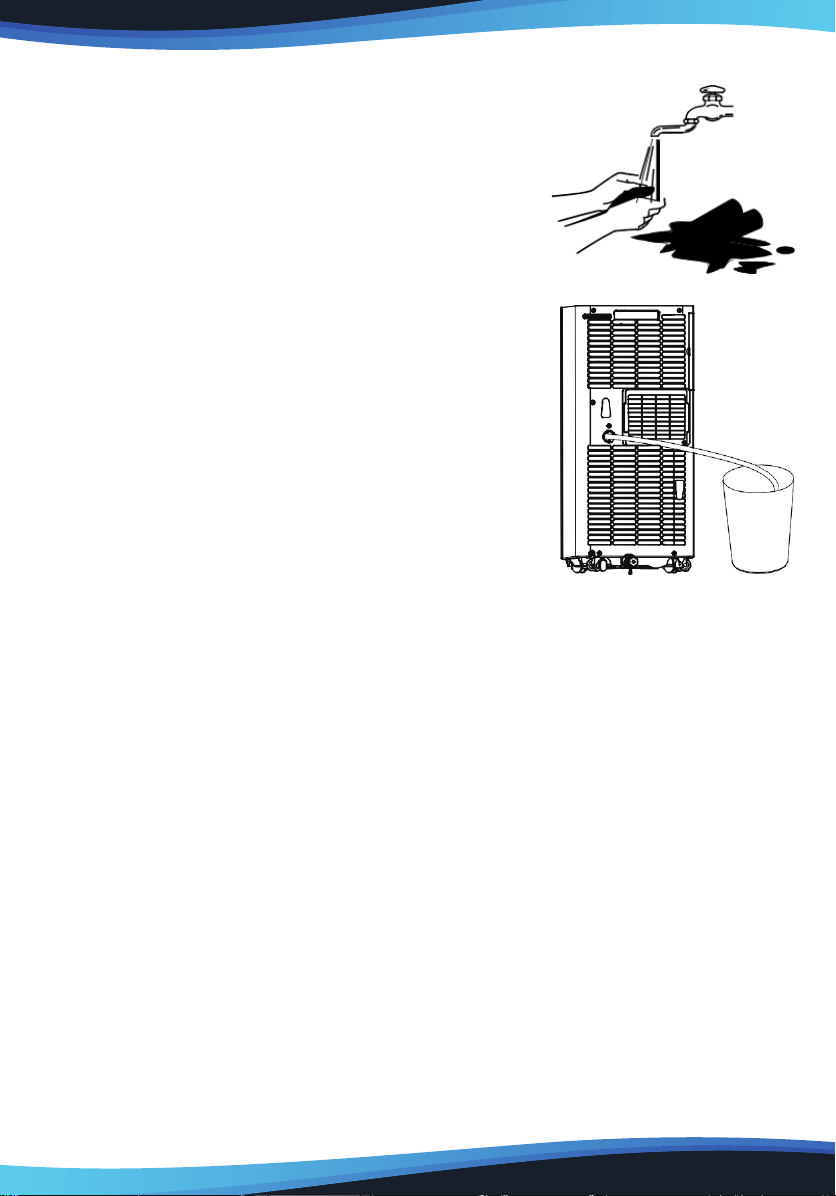
Dry Mode
• Dry indicator will be on under this mode.
• Remove water plug (see right), insert one end of pipe to drainage hose, the
other end would be in water tank or water channel.
• If ambient Temp. ≥17°C or 62°F compressor starts and follow below sequence:
if ambient Temp. ≤15°C or 59°F compressor stops; when it reaches ≥17°C,
compressor starts again. (There would be a 3-min delay for compressor protection)
• Fan runs with a xed low speed.
• Temp. is xed.
Notes: Under dry mode, please dismantle air exhaust duct, or performance will be
aected and water full alarm “FL” will buzz.)
Heating Mode (not available for cooling only model).
• Under this mode, heating indicator will light up.
• Press UP/DOWN button to select Temp. between 16°C to 30°C (60°F to 86°F)
• Press Fan Speed button to set low/high speed.
9
10
www.SereneLifeHome.com
16
TIMER MODE
• In standby mode, press Timer button to set ON time. A range of 0 to 24 Hours
could be set with UP/DOWN button. Timer indicator will light up in this mode.
• Under running state,press Timer button to set OFF time. A range of 0 to 24Hours
could be set with UP/DOWN button. Timer indicator will light up inthis mode.
CLEAN AND MAINTENANCE
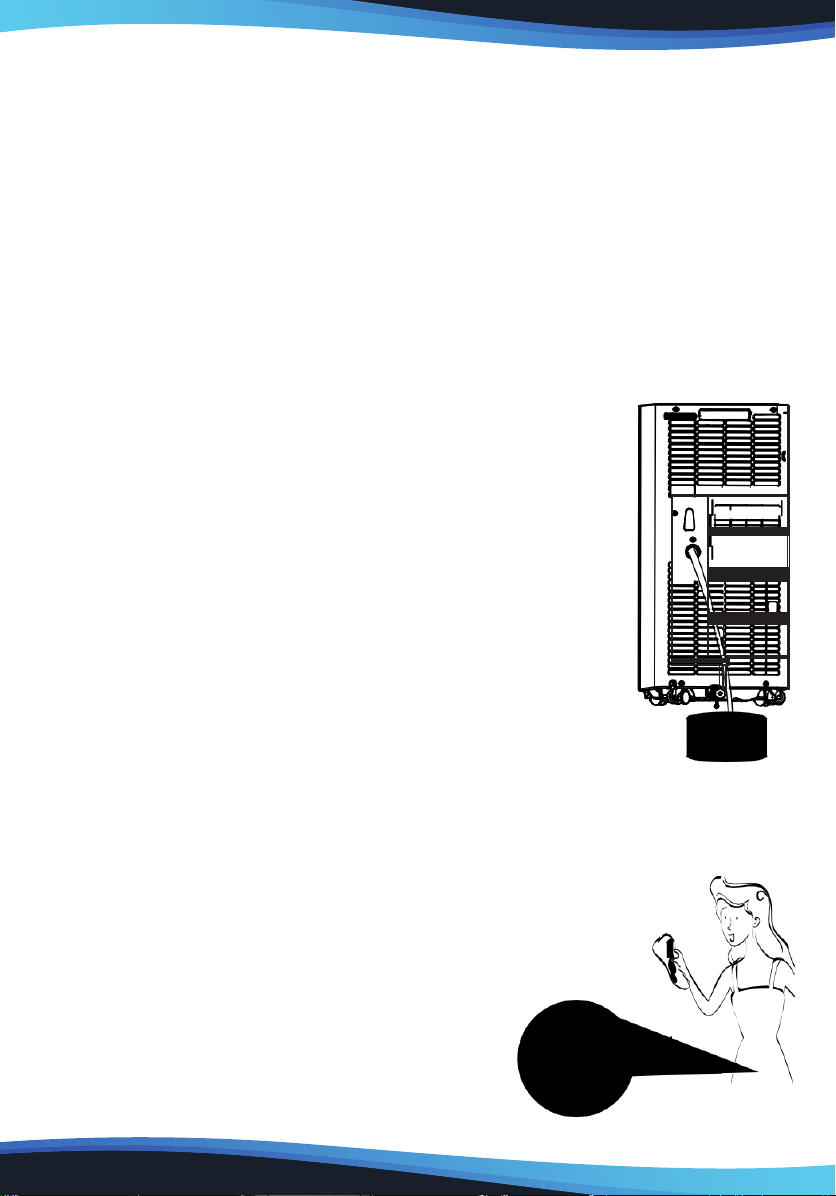
Drainage
With self-evaporating system, the appliance could perform better and save energy
in a way of cooling down condensor by reusing condense water.
The appliance would display “FL” with buzz sound, if built-in
water container is full. After compressor stops, please drain
water as follows:
1. Unplug and dismantle air exhaust duct;
2. Move the appliance to a right place;
3. Pull out the water plug, and drain all water;
4. Re-insert the water plug;
5. Re-install the air exhaust duct, restart the appliance.
MAINTENANCE
Warning:
In case of electric shock, turn o and unplug before repair or maintenance.
Body Clean
1. Unplug before cleaning.
2. Clean with soft and half-wet cloth.
In case of damage to appearance or the appliance,
never use chemical reagent, such as benzene,
alcohol and gasoline.
3. Never let splash water enter the appliance.

www.SereneLifeHome.com
17
Filter is to be cleaned once every two weeks. If air quality indoor is poor, it has
to be washed more often, or performance of the appliance would be lowered
due to blocked lter screen. Please follow below instructions for cleaning:
Take o air-inlet grille as indicated in the photo; pull out the lters.
Clean the lter in 40°C or 104°F warm water or water with neutral detergent;
dry the lter in a cooling area.
Re-install the lter and grille after drying completed; restart the appliance.
Warning:
Do not wash with lter in water above 40°C (104°F) or with irritating detergent
such as alcohol, gasoline and benzene. In case of deformation, lters are to be
kept away from heat sources and dried naturally in a cooling area. Never operate
the appliance when lter is not installed.
9
10
2 1
If lter is dirty, clean in 40°C
(104°F) warm water or in
water with neutral deterget.
If lter is not that dirty, clean the
dust with a vacuum cleaner.
www.SereneLifeHome.com
18
Seasonal Maintenance
If the appliance will not be in use for a long time,
please maintain by following below steps:
1. Pull out water plug for drainage.
2. Run in Fan mode for at least 2 hours to dry
internal parts.
3. Turn o and unplug.
4. Clean the lter and reinstall.
5. Dismantle the air exhaust duct and keep it well.
6. Take o batteries.
7. Wrap the appliance in a plastic bag and
keep in a dry and cooling place
If the appliance haven't been used for a long time,
please pay attention to the following when to be
used again:
1. Make sure water plug and lter are installed.
2. Never use damaged power cord; Check before use.
3. Insert batteries.
4. Assemble other parts according to the instruction.
COMMON FAILURES AND DIAGNOSIS
Intelligent Error Detection
Error-detecting code Multi-functional defection
E1 Error of the coil’s temperature sensor
E2 Error of indoor temperature sensor
E4 Anti-freezing protection: temperature of the coil is too
low and the whole A/C is o. When temperature excesses
8°C (46.4°F), the protection is released and previous
working state is recovered.
www.SereneLifeHome.com
19
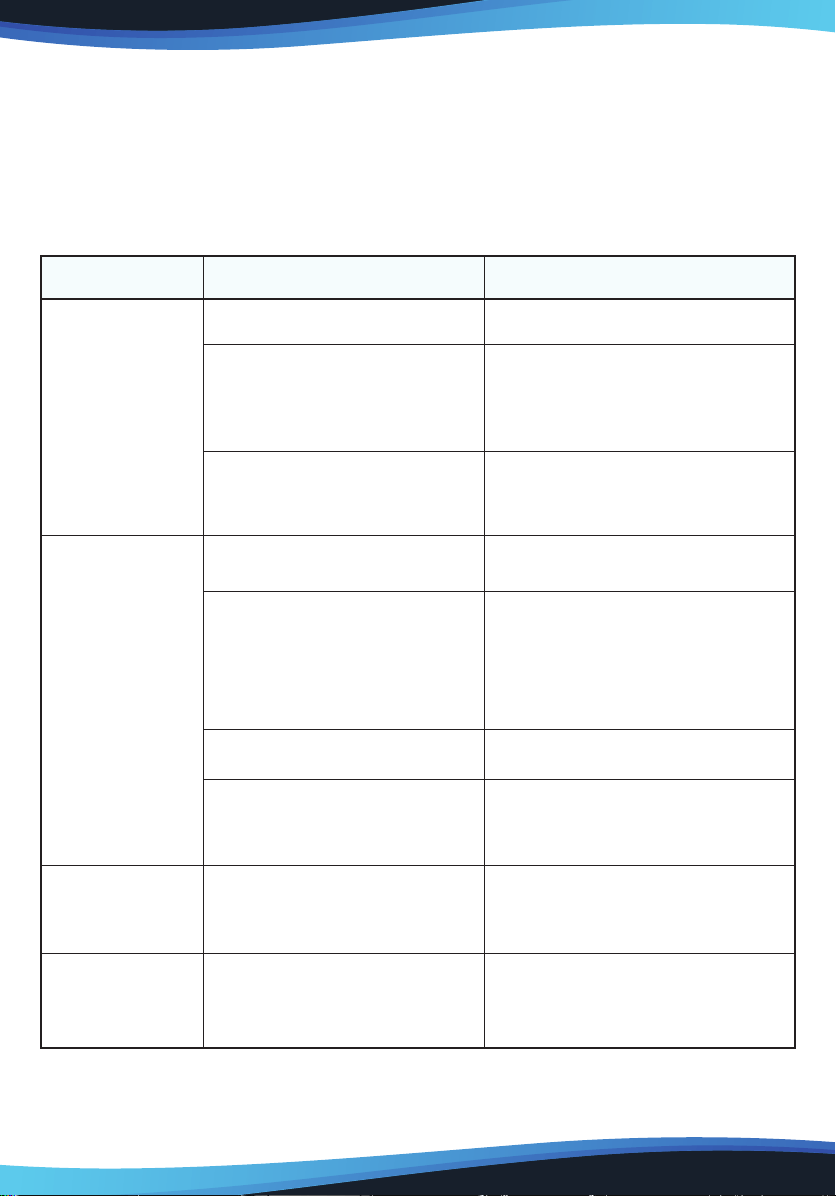
TROUBLESHOOTING
The following table lists the common faults and maintenance methods of this
series of portable A/C. When the machine is in abnormal operation, the following
table can be used for simple diagnosis and maintenance. If it still can’t be solved,
please contact professional maintenance personnel.
9
10
TROUBLE CAUSE
The A/C doesn’t
work
No display
SOLUTION
Reset circuit breaker on AC cord
The display panel displays
“FL”
Restart the A/C after power o
and draining, then it will
become normal
Time OFF function is started
The A/C can be restarted 3
minutes after being turning o
Direct sunlight Draw the curtain
Doors and windows keep
open; there are lots of
people or heat source in
room
Close doors and windows,
remove heat source
Filter screen is very dirty Clean or replace it
Air inlet or air outlet is
blocked
Remove the stem
The A/C is placed unevenly
Place it at even and rmground,
avoid shaking
The A/C starts
frequently
Loud noise
on the A/C
Its delay protection started
Wait for 3min, turn on after
temperature decreases
The compressor
doesn’t work

www.SereneLifeHome.com
20
FEATURES:
• Metal Control Box to Prevent from Fire and Exploding
• Rotary Compressor
• Universal Castors for Moving Freely
• Wi function
• Lightweight & Portable A/C Unit
• Compact Freestanding Room Air Conditioner
• (3) Operation Modes: AC Cooling / Dehumidier / Fan
• Hassle-Free, Quick Setup Cooling
• Simple Electric Plug-in Operation
• Convenient Wide-Area Climate Control Room AC Coverage
• Push Button Control Panel with LED Display
• Time, Temperature & Fan Speed Adjustment Settings
• Includes Universal Window Mount AC Exhaust Kit
• Removable & Washable Air Filter Screen
• Modern Style, Sleek Body Housing
• Energy Ecient: Low Power Consumption
• Low Noise Level Motor
• Rolling Wheels for Easy Portability
• Used for Home, Oce, School & Business Rooms
WHAT'S IN THE BOX:
• AC Unit
• Exhaust Hose
• Window Installation Plate
• Remote Control

www.SereneLifeHome.com
21
TECHNICAL SPECS:
• Power Supply: 115V/60Hz
• Rated Power: 800W
• Refrigerant Type: R410a
• Cooling capacity (ASHRAE): 8,000 Btu/h
• Cooling capacity (DOE): 5,000 Btu/h
• Coverage Area: Cools Rooms up to 300 Square Feet
• Air Flow: 360 Cubic Meters / Hour
• Operating Modes: Cool / Fan / Dry (Dehumidier)
• Moisture Removal / Dehumidier: 1.1 Liters / Hour
• Operating Noise Level: 55 dBA
• Fan Speed Settings: Two Level, Low/High
• Temperature Unit Selectable: °C / °F (Celsius / Fahrenheit)
• Adjustable Timer Settings: Up to 24 Hours
• Construction Material: High Impact Polystyrene (HIPS)
• Battery Operated Remote Control, Requires (2) x ‘AAA’ Batteries, Included
• Power Cable Length: 4.3’ ft.
• Product Dimension (L x W x H): 27.6'' x 12.8'' x 11.6'' -inches
9
10
This product can expose you to a chemical or group of chemicals, which
may include ”Acrylonitrile” which is known in the state of California to
cause cancer, birth defects, or other reproductive harm. For more info, go
to https://www.p65warnings.ca.gov/.