Loading ...
Loading ...
Loading ...

EN
www.newair.com 8
ASSEMBLY & INSTALLATION
BEFORE USING YOUR APPLIANCE
When you receive your unit, carefully remove the exterior and interior packaging. It is
recommended that you retain the packaging for future use.
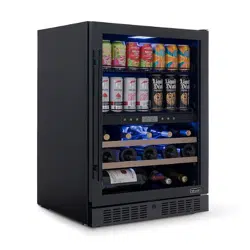
Check to make sure the following parts are included:
• 1 instruction manual
• 2 beverage shelves
• 2 sliding wine shelves
• 1 additional half sized beverage shelf
• 1 door handle and 2 screws
BUILT-IN AND FREESTANDING INSTALLATION
Before connecting the appliance to a power source, let it stand upright for
approximately 24 hours. This will reduce the possibility of a malfunction in
the cooling system from handling during transportation.
Before operating your wine/beverage fridge for the first time, follow these steps:
• This unit is designed for both built-in and freestanding installation.
• The front grille must be unobstructed for airflow under the appliance.
• Clean the interior surface of the unit with lukewarm water and a soft cloth.
• Place the fridge on a level surface that will be strong enough to support the unit
when it is fully loaded.
• To level your fridge, adjust the front feet located at the bottom of the unit.
• Install the fridge away from direct sunlight and heat sources such as stoves, heaters,
or radiators.
• Direct sunlight may affect the unit’s acrylic coating, and nearby heat sources can
increase electrical consumption.
• Extreme cold or hot ambient temperatures may also prevent proper performance.
• Avoid operating this fridge in excessively moist or humid environments.
HANDLE ASSEMBLY
This fridge includes a stainless steel handle that was not installed by the factory. To
install the handle please follow these instructions:
1. Pull away the door gasket in the area where the handle is to be installed. The
gasket is easily displaced by hand, no tools are necessary.
2. Align the handle with the screws pre-installed on the backside of the door. Tighten
the screws using a Phillips head screwdriver until the handle sets both flush and
secured tightly against the door frame. (DO NOT over-tighten as this will cause
damage to the handle assembly).
3. Replace the door gasket to its original position.
Loading ...
Loading ...
Loading ...