Loading ...
Loading ...
Loading ...
REPAIR AND ADJUSTMENT
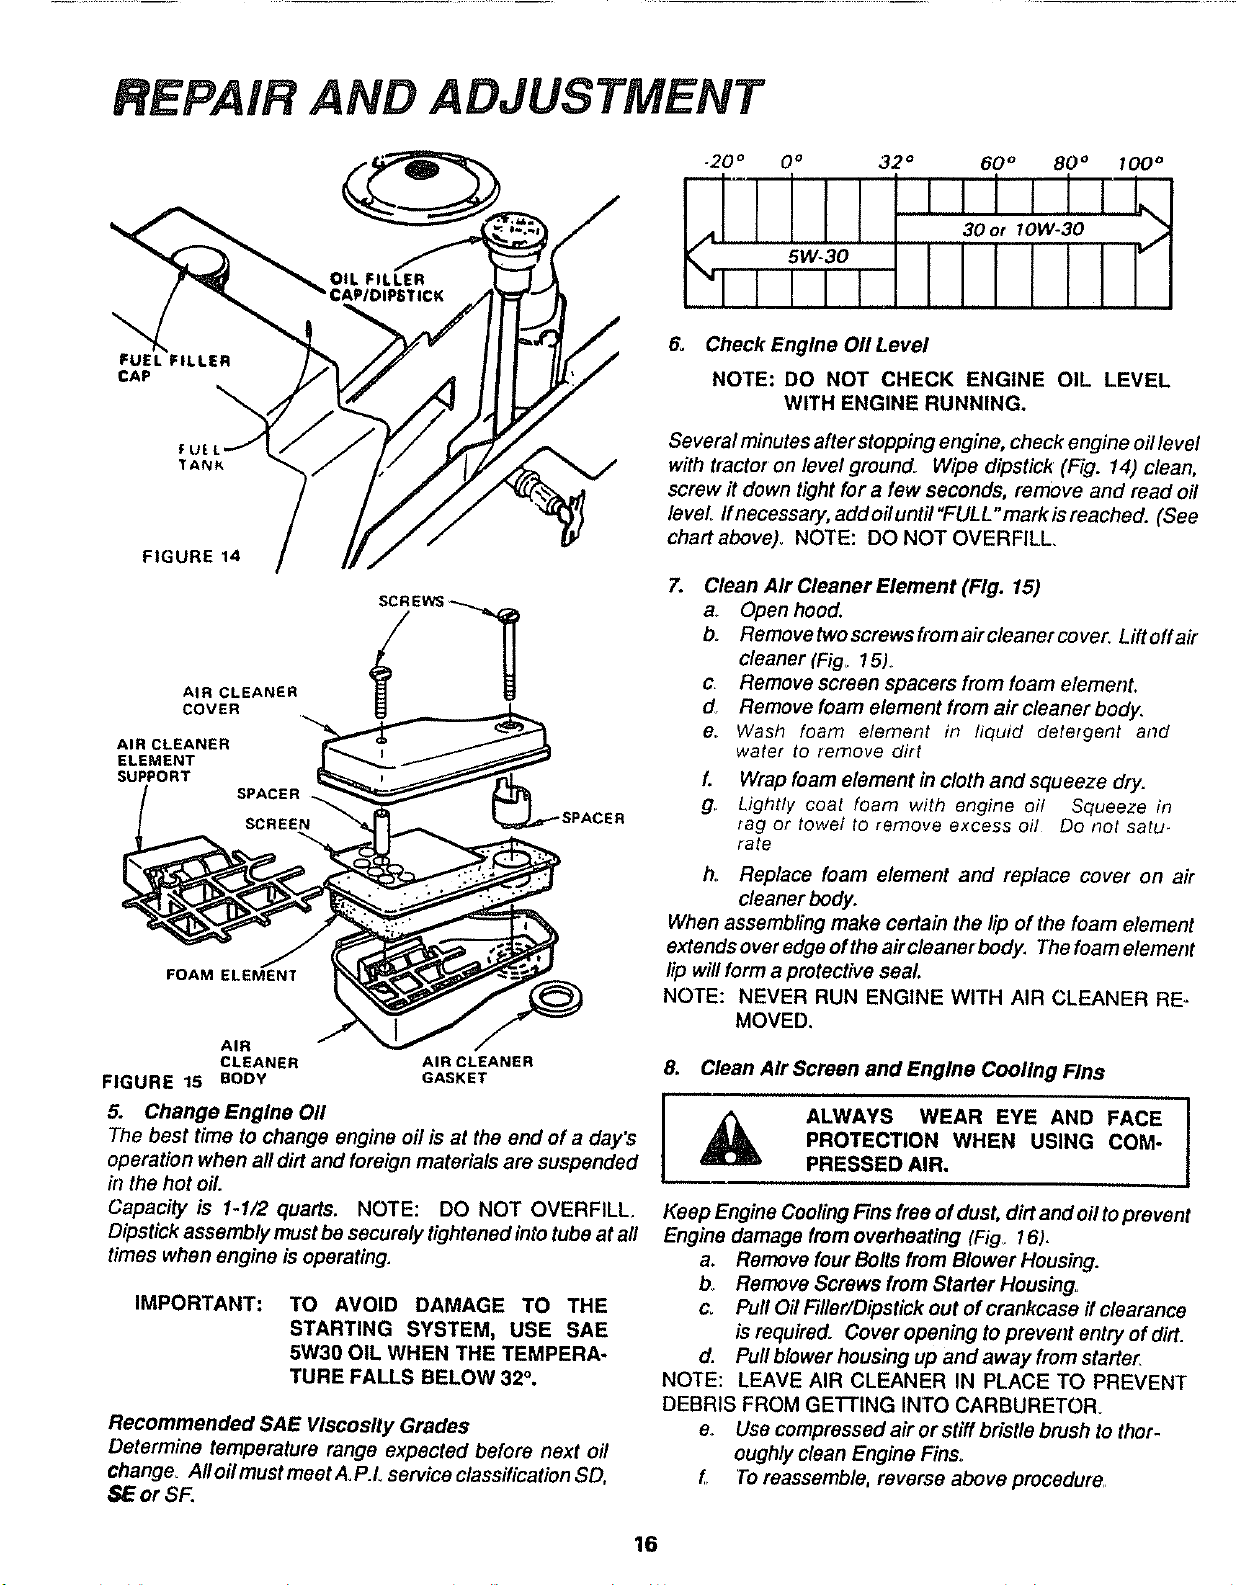
FUEL FILLER
CAP
FIGURE 14
AIR CLEANER
COVER
AIR CLEANER
ELEMENT
SUPPORT
FOAM ELEMENT
AIR
CLEANER AIR CLEANER
FIGURE 15 BODY GASKET
5. Change Engine 011
The best time to change engine oil is at the end of a day's
operation when all dirt and foreign materials are suspended
in the hot oil.
Capacity is I-1/2 quarts. NOTE: DO NOT OVERFILL.
Dipstick assembly most be securely tightened into tube at all
times when engine is operating.
IMPORTANT:
TO AVOID DAMAGE TO THE
STARTING SYSTEM, USE SAE
5W30 OIL WHEN THE TEMPERA-
TURE FALLS BELOW 32°.
Recommended SAE Viscosity Grades
Determine temperature range expected before next oil
change_ All oil must meet A,P.L service classification SD,
$E or SF,
32 ° 60 ° 80 ° tO0 °
6. Check Engine 011Level
NOTE: DO NOT CHECK ENGINE OIL LEVEL
WITH ENGINE RUNNING.
Several minutes after stopping engine, check engine oil level
with tractor on level ground. Wipe dipstick (Fig. 14) clean,
screw il down tight for a few seconds, remove and read oil
level Ifnecessary, addoiluntil"FULL"markisreached. (See
chart above). NOTE: DO NOT OVERFILL.
7.
Clean Air Cleaner Element (Fig. 15)
am Open hood.
b. Removetwoscrewsfromaircleanercover. Liftoffair
cleaner (Fig. 15)
c. Remove screen spacers from foam element.
do Remove foam element from air cleaner body.
e. Wash foam element in liquid detergent and
water to remove dirt
L Wrap foam element in cloth and squeeze dry.
g. Lightly coat foam with engine oil Squeeze in
rag or towel to remove excess oil Do t?ot satu-
rate
ho Replace foam element and replace cover on air
cleaner body.
When assembling make certain the lip of the foam element
extendsoveredgeoftheaircleanerbody. Thefoamelement
lip will form a protective seal
NOTE: NEVER RUN ENGINE WITH AIR CLEANER RE-
MOVED,
8. Clean Air Screen and Engine Cooling Fins
ALWAYS WEAR EYE AND FACE
PROTECTION WHEN USING COM-
PRESSED AIR.
Keep Engine Cooling Fins free of dust, dirt and oil toprevent
Engine damage from overheating iFig_ 16),
a. Remove four Bolts from Blower Housing.
b, Remove Screws from Starter Housing.
c, Pull Oil Filler/Dipstick out of crankcase ff clearance
is requirado Cover opening toprevent entry of dirt.
d. Pull blower housing up and away from starter,
NOTE: LEAVE AIR CLEANER IN PLACE TO PREVENT
DEBRIS FROM GETTING INTO CARBURETOR_
e.. Use compressed air or stiff bristle brush to thor-
oughly clean Engine Fins.
f. To reassemble, reverse above procedure
16
Loading ...
Loading ...
Loading ...