Loading ...
Loading ...
Loading ...
5
2. The pump requires approximately 2 in. (50.8 mm) of
water to prime. Once primed the pump will drain down
to approximately 1/2 in. (12.7mm) of the surface.
3. The pump will continuously operate until disconnected
from power. Do not let the pump run dry. The pump
relies on water for lubrication and cooling. Operating the
pump without water may cause the motor to overheat
or cause damage to internal components. It may also
shorten the life of the pump.
4. The pump motor is thermally protected. It is not
recommended for pumping liquids over 120°F (48.9°C).
The thermal overload protector will automatically shut
down the pump in an overheat/overload situation.
The motor will reset itself once it cools. This device is
designed as a safety device and should not be relied
upon to operate the pump. The thermal overload will fail
after repeated use.
ENGLISH
Installation
WARNING: Always disconnect the power source
before attempting to install, service or perform maintenance on
the pump. Failure to do so may result in fatal electrical shock.
Always disconnect the power source before servicing pump.
NOTICE: Your pump is designed and built to give you
reliable performance and long life. It will pump water for years
when properly installed in the right environment.
NOTICE: A qualified electrician must perform all wiring.
Assembly: CMXWUSD61236, CMXWUSD61336 and
CMXWUSD61536
1. Garden Hose: Thread the 3/4 in. (19.05mm) garden
hose adapter into the pump discharge. Attach a garden
hose (sold separately) to the garden hose adapter.
Extend the hose, making sure there are no kinks or tight
bends. NOTE: To keep friction loss as low as possible,
do not use a hose that is smaller than 1/2 in. (12.7mm)
inside diameter.
2. Other Hose* or Pipe*: Attach hose and fittings as
required (sold separately) directly into the discharge.
Extend the hose making sure there are no kinks or tight
bends. NOTE: To keep friction loss as low as possible,
do not use a hose that is smaller than 1/2 in. (12.7mm)
inside diameter.
Assembly: CMXWUSD61239, CMXWUSD61339 and
CMXWUSD61539
1. Lay-Flat Hose: Thread the male camlock adapter
(included) into the pump discharge. Connect the female
camlock fitting (with hose, included) to the male adapter
and secure. Extend the hose, making sure there are no
kinks or tight bends in the hose.
2. Garden Hose: Thread the 3/4 in. (19.05mm) garden
hose adapter into the pump discharge. Attach a garden
hose (sold separately) to the garden hose adapter.
Extend the hose, making sure there are no kinks or tight
bends. NOTE: To keep friction loss as low as possible,
do not use a hose that is smaller than 1/2 in. (12.7mm)
inside diameter.
3. Other Hose* or Pipe*: Attach hose and fittings as
required (sold separately) directly into the discharge.
Extend the hose making sure there are no kinks or tight
bends. NOTE: To keep friction loss as low as possible,
do not use a hose that is smaller than 1/2 in. (12.7mm)
inside diameter.
Installation
1. Install the pump on a hard level surface in the water. If
necessary, place bricks or patio blocks under the pump
to raise it off the bottom. Do not place the pump
directly in mud, sand or silt.
Operation
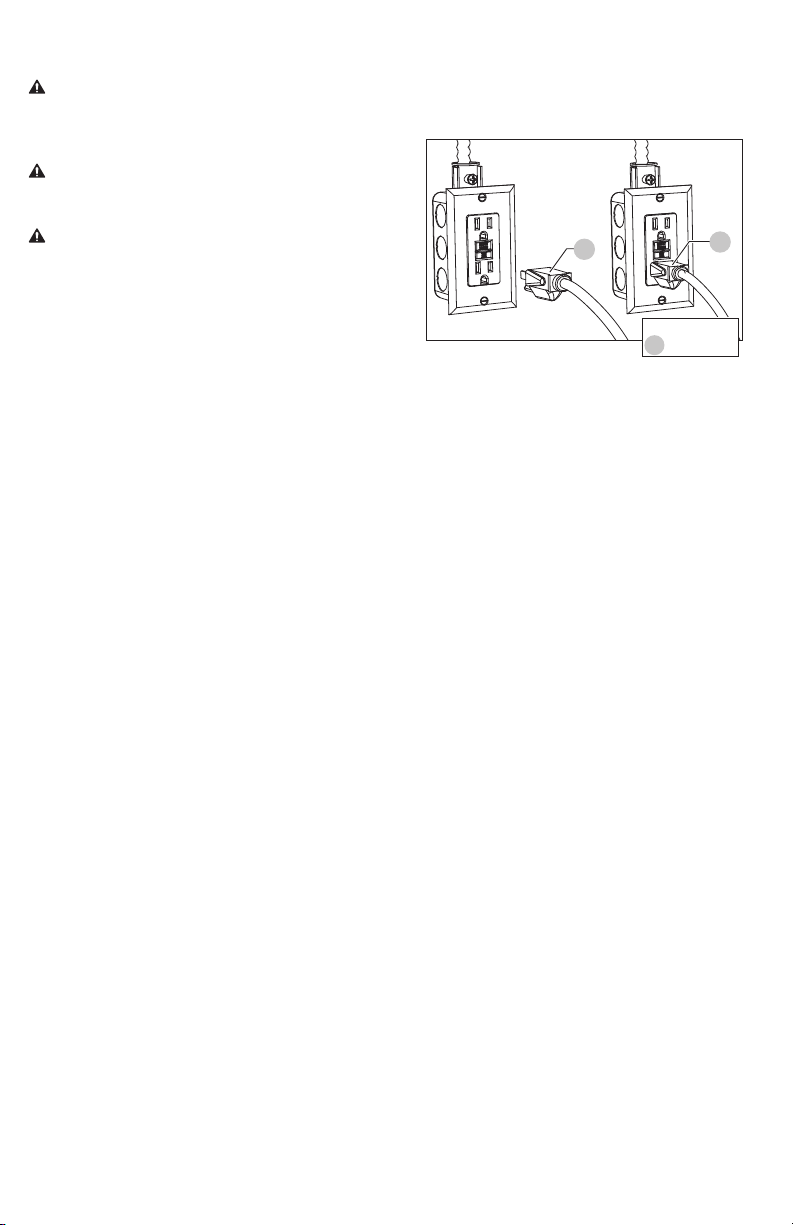
1. Connect the power cord to a 115 volt AC grounded GFCI
receptacle.
1
1
Step 1 Step 2
*Properly grounded GFCI
protected receptacle
Components
1 Power Plug
Loading ...
Loading ...
Loading ...