Loading ...
Loading ...
Loading ...
10
DAMAGE MAY BE CAUSED TO THE DOOR SEAL, WHICH WOULD NOT
BE RECTIFIED UNDER THE GUARANTEE FREE OF CHARGE.
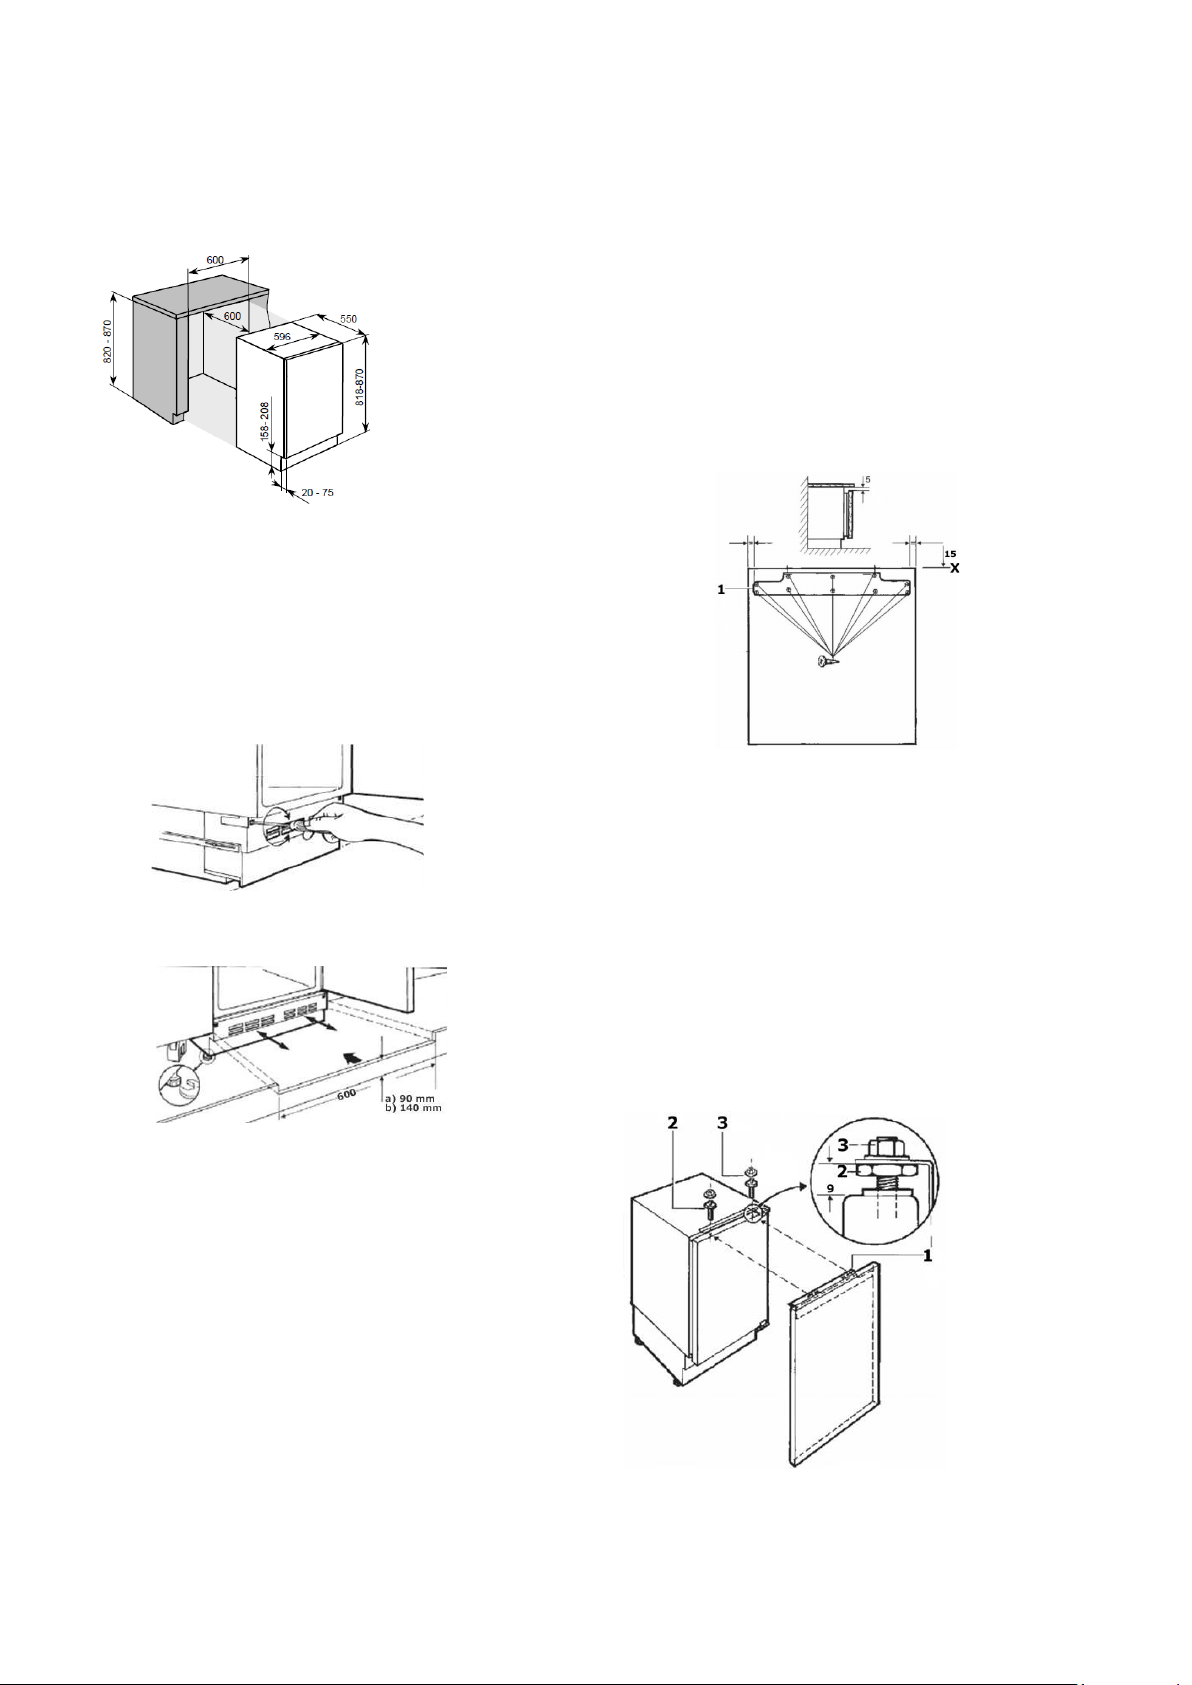
Aperture dimensions
The diagram below shows the aperture size that you will need to be
able to install your appliance.
o
The appliance must be stood on a level floor. You can use the
levelling feet to take into account any minor unevenness in the
floor.
Adjusting the plinth/kickboard
When the appliance has been placed underneath the worktop, you
may decide to attach a plinth or kickboard to match your existing
kitchen units.
o
Remove the grid on the base of the appliance by unscrewing the
screws on each side of the grid and then pull the grid towards you.
o
Use a spanner to adjust the height of the adjustable feet.
o
If your aperture has a height of 820 mm, then the adjustable feet
should be fully tightened.
o
If your aperture has a height of 870 mm, then the adjustable feet
should be set at a height of 50 mm.
o
The appliance should be flush with the underside of the worktop
and be level.
IMPORTANT: If the appliance is not level, then the door and door
seal may be affected.
o
A cut out must be made in the plinth/kickboard for ventilation. The
cut out should measure 600mm in width, and between 140mm and
90mm in height, depending on the height that you have set your
appliance.
o
Insert the plinth/kickboard and then refit the grid in its original
position to hold it in place.
IMPORTANT: Please note that as shown in the above drawing, an
appropriately sized ventilation cut out MUST be made in the
furniture plinth/kickboard.
Fitting the furniture door to the appliance
If you need the appliance door to open from the other side, then please
reverse the door before commencing the installation process. (See “Reversing
the door section”).
Tools required:
o
Tape measure
o
Sharp pencil
o
Small flat bladed screwdriver
o
Spanner
IMPORTANT: We recommend that two people install this appliance.
1.
Undo the screws from the two adjusting bolts that are located on the top of
the appliance door and then remove the mounting bracket (1).
2.
Measure the width of the furniture door, at the halfway point mark a line
vertically down the inner surface of the furniture door. You should draw the
line from the top of the furniture door to approximately halfway down.
o
Place the mounting bracket (1) on the reverse of the furniture door.
o
The middle of the mounting bracket should be positioned on the line that you
have just drawn. Please note the position of the mounting bracket in the
above drawing, to ensure that you have the mounting bracket the correct
way up.
o
The top of the mounting bracket should be positioned approximately 15 mm
from the top of the furniture door. This will allow you a 5 mm gap from the
top of the furniture door, to the underneath of your worktop.
o
Fix the mounting bracket to the furniture door using the screws provided and
a Phillips-head screwdriver. These screws should be fully tightened.
3.
Hang the furniture door onto the appliance door, making sure that the
brackets on the mounting bracket locate over the adjusting bolts.
Loading ...
Loading ...
Loading ...