Loading ...
Loading ...
Loading ...

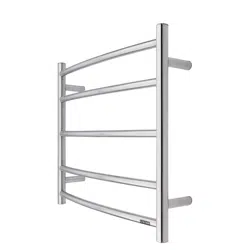
Installing your Towel Rail
Always choose a safe location for the Towel Rail, keeping in mind the safety
precautions outlined. Ensure all packaging has been removed from the unit before
use.
WARNING: INSTALL MUST BE COMPLETED BY A REGISTERED ELECTRICIAN
WALL PREPARATION
Goldair Heated Towel Rails may be fixed to any type of wall, timber stud, steel stud or masonry (solid or cavity). Stud
walls (timber or steel) require studs at the correct position for all rails. If the precise position can’t be determined
early in the job, consider sheets of 18mm construction ply, covering a larger area.
WARNING: This rail has a small footprint against the wall. The wire holes and mounting holes must be drilled neatly
and accurately.
For drilling through hard materials such as porcelain tiles, marble, granite etc. an appropriate drill bit must be used.
No responsibility will be taken by Goldair for instances where installers drill incorrectly
NOTE: Attempting to fix into plasterboard or cement sheeting alone is not recommended. Plasterboard in particular
will not hold long term.
PRE WIRING
NOTE: Only drill holes when you are 100% sure of your measurements.
Provision should be made for a Timer to control the mains supply. It is recommended that a Timer is used for energy
saving purposes. Goldair recommend a Goldair Heated Towel Rail Timer (GBT100 – not supplied).
MOUNTING
First, select which method of cord entry your installation situation requires – exposed or concealed. (please see images
below as an indication to the differences)
The accessory pack contains a set of 4 legs for your heated towel rail – one of which is a universal leg (used for both
concealed and exposed installations)
For concealed cord entry you require the addition of a concealed cable leg cover (#6) to conceal the cord cut out.
OR
For exposed cord entry you require the addition of an exposed cable grommet (#7) to the cord cut out.
WARNING: DO NOT connect both left and right hand wires, use only one side for your connection.
Loading ...
Loading ...
Loading ...