Loading ...
Loading ...
Loading ...
9
MAINTENANCE & CARE
General cleaning will help prolong the life and improve performance of your treadmill. Keep the unit
clean and maintained by dusting the components on a regular basis. Cleaning the two exposed sides
of the Running Belt (No. C23) will prevent dust from accumulating underneath. Keep your running
shoes clean so that dirt from the shoes does not wear the Running Board (No. D20) and Running
Belt (No. C23). Clean the surface of the Running Belt (No. C23) with a clean damp cloth. Keep liquids
away from electrical parts and Running Belt (No. C23).
To better maintain the treadmill and prolong its life, it is suggested that the treadmill be powered off for
10 minutes every 2 hours and fully powered off whenever not in use.
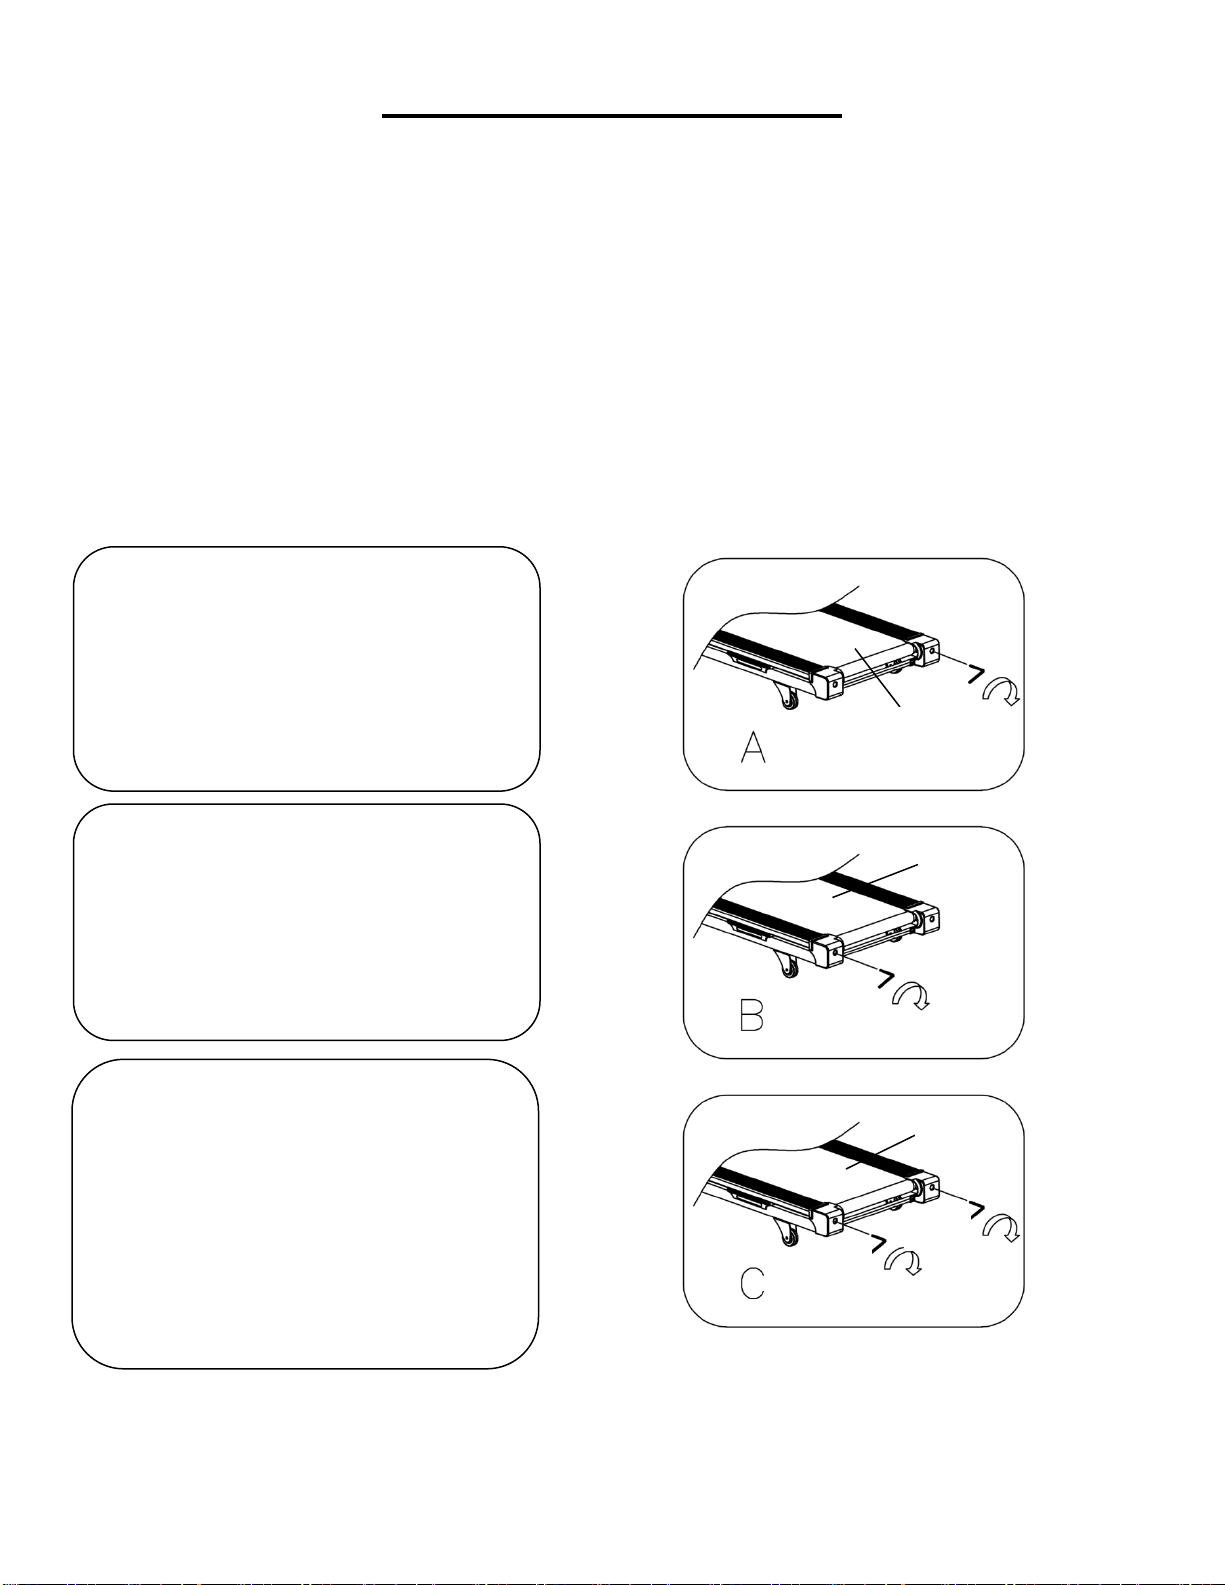
CENTERING THE RUNNING BELT:
Place the treadmill on level ground and set it at 3-5 MPH to check if the Running Belt (No. C23) drifts
from the center.
If the Running Belt (No. C23) moves to
the right, turn the right adjusting bolt ¼
turn clockwise
, then turn the left
adjusting bolt ¼ turn counter-clockwise.
If the Running Belt (No. C23) does not
move, repeat this step until it centers.
Refer to Figure A.
If the Running Belt (No. C23) moves to
the left, turn the left adjusting bolts ¼ turn
clockwise, then turn the right adjusting
bolt ¼ turn counter-clockwise
. If the
Running Belt (No. C23) does not move,
repeat this step until it centers. Refer to
Figure B.
Over time, the Running Belt (No. C23)
will loosen. To tighten the Running Belt
(No. C23), turn the left & right adjusting
bolts one full turn clockwise, check the
tension of the Running Belt (No. C23).
Continue this process until Running
Belt (No. C23) is at the correct tension.
Make sure to adjust both sides equally
to ensure correct belt alignment. Refer
to Figure C.
B04
C23
C23
B04
C23
B04
B04
Loading ...
Loading ...
Loading ...