Loading ...
Loading ...
Loading ...
8
Make sure that
other persons and pets are at
.
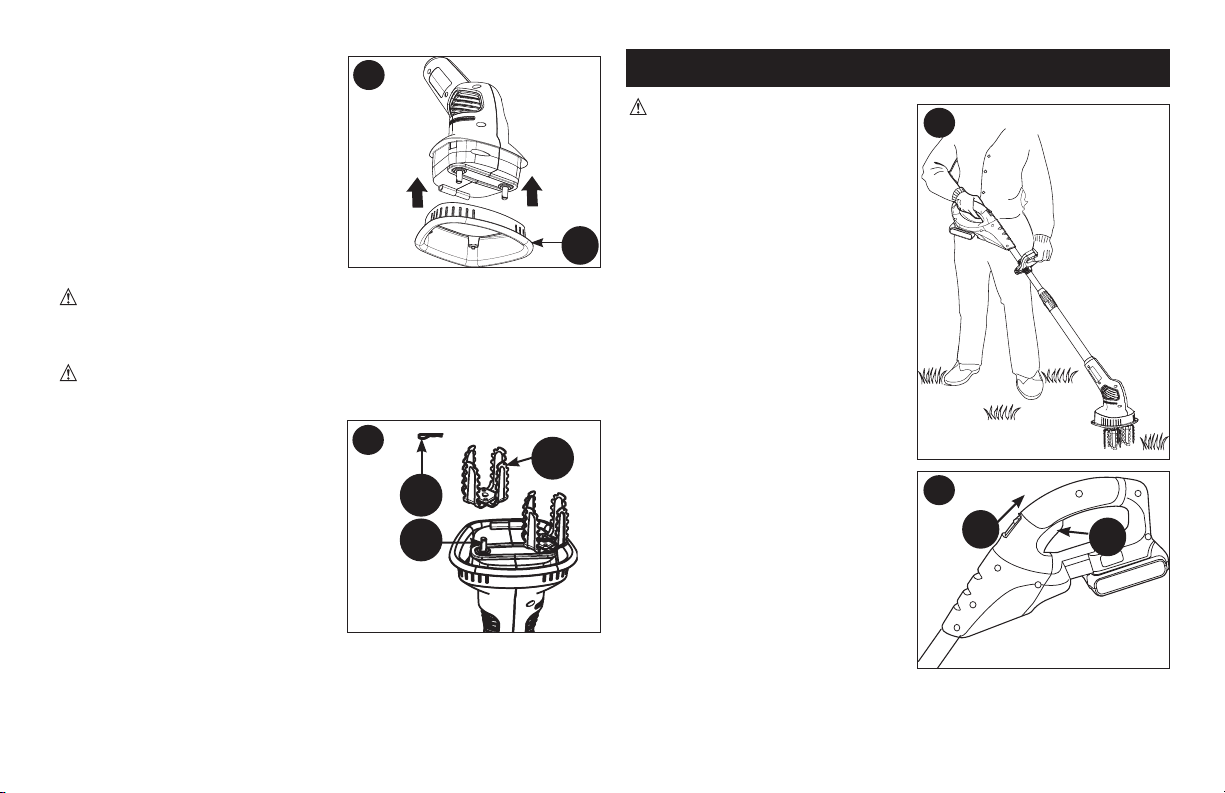
Hold tool as shown in .
Lift unit out of soil.
Slide lock off button (15) .
Pull switch trigger (16).
For the first cultivating each season,
it is best to move slowly because
cultivating will be completed more
rapidly. Do not attempt to cultivate
when the soil is wet - for electrical
safety and to prevent clogging of
the tines. If you must cultivate under
conditions that cause the tines to
become clogged, release trigger,
wait for tines to come to complete
stop! REMOVE BATTERY!
Remove clogged material with a
stick or screwdriver. To continue to
operate the tool in a clogged condition
will seriously overload the motor.
built in clutching mechanism used to
prevent permanent damage to the
unit due to an obstruction in the tines
or overloaded working conditions.
If the clutch is engaged, the unit will
make a loud clicking sound. This
noise will persist until the obstruction
or overload condition is removed.
Remove battery prior to attempting to remove obstructions from tines.
The clutch mechanism is not adjustable by the user.
Position the open center of
the shroud (11) over the lower
housing from the bottom (near
output shaft).
Align snap tabs to housing. Apply
even pressure to shroud until
snap sound is heard.
Ensure all snap features are
engaged correctly.
Place tine (12) on shaft (13),
making sure flat in hole of tine is
aligned with flat on shaft. Be sure
to push tine completely onto shaft.
Insert straight end of pin (14) into
shaft hole. Push in pin completely
until the looped end bottoms out
against the shaft.
Repeat for other tine. For tine
removal reverse the process.
E
11
13
12
14
16
15
Loading ...
Loading ...
Loading ...