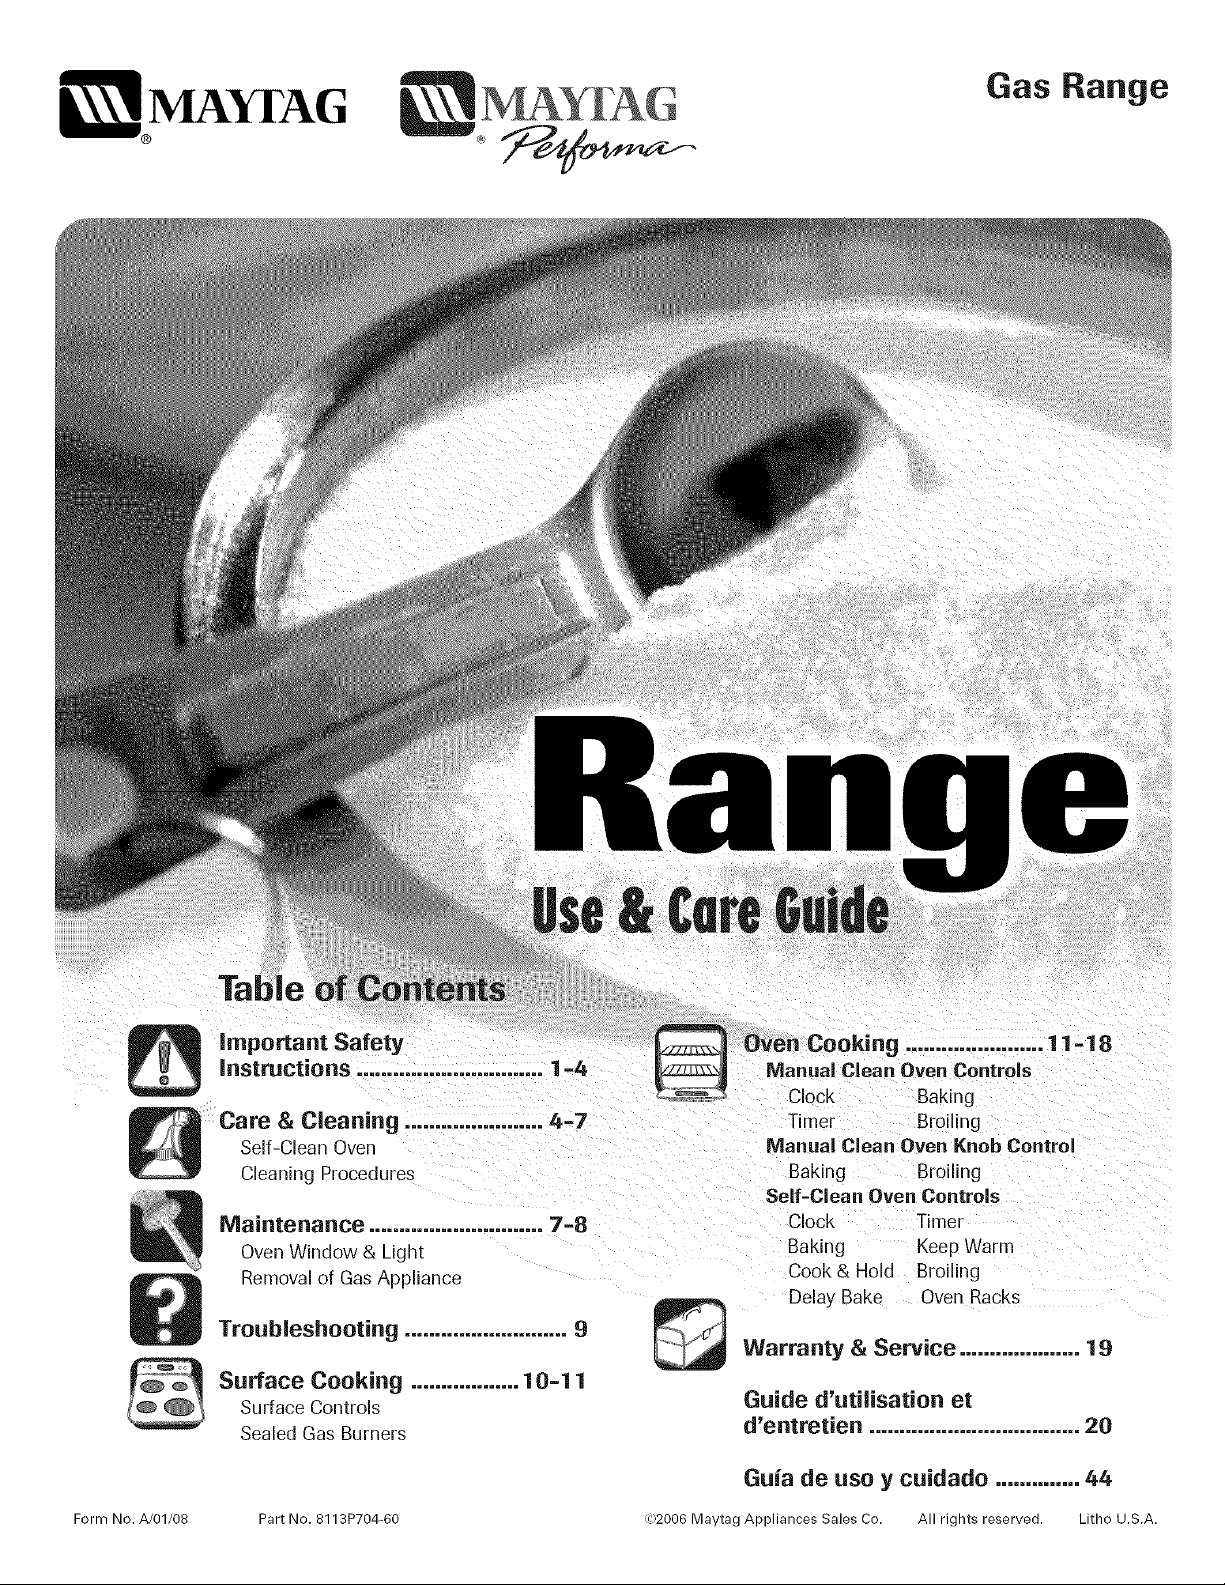
MAY[AG
Gas Range
Form No. A/01/08
important Safety
instructions ............................... 1=4
Care & Cleaning ....................... 4=7
Self-Clean Oven
Cleaning Procedures
Maintenance ............................. 7=8
Oven Window & Light
Removal of Gas Appliance
Troubleshooting ........................... 9
Surface Cooking .................. 10=11
Surface Controls
Sealed Gas Burners
Part No. 8113P704-60
Oven Cooking ....................... 11 =18
Manual Clean Oven Controls
Clock Baking
-imer Broiling
Manual Clean Oven Knob Control
Baking Broiling
Self-Clean Oven Controls
Clock Timer
Baking Keep Warm
Cook& Hold Broiling
Delay Bake Oven Racks
Warranty & Service .................... 19
Guide d'utilisation et
d'entretien ................................... 20
Guia de uso y cuidado .............. 44
;,2006 Mavtag Appliances Sales Co, All rights reserved. Litho U.S.A,
technician. Do not attempt to adjust, repair, service, or
replace any part of your appliance unless it is specifically
recommended in this guide. All other servicing should be
referred to a qualified servicer. Have the installer show you
the location of the gas shut off valve and how to shut it off
in an emergency.
Always disconnect power to appliance before servicing.
ImponentSefety
Instructions
Warning and Important Safety Instructions appearing in this
guide are not meant to cover all possible conditions and
situations that may occur. Common sense, caution, and care
must be exercised when installing, maintaining, or operating
the appliance.
Always contact the manufacturer about problems or
conditions you do not understand.
Recognize Safety Symbols, Words, Labels
Read and follow all instructions before using this
appliance to prevent the potential risk of fire, electric
shock, personal injury or damage to the appliance as a
result of improper usage of the appliance. Use appliance
only for its intended purpose as described in this guide.
To ensure proper and safe operation: Appliance must be
properly installed and grounded by a qualified
To check if device is properly installed, look underneath
range with a flashlight to make sure one of the rear leveling
legs is properly engaged in the bracket slot. The anti-tip
device secures the rear leveling leg to the floor when
properly engaged. You should check the device each time
the range has been moved.
Child Safety
To Prevent Fire or
Smoke Damage
Be sure all packing materials are removed from the
appliance before operating it.
Keep area around appliance clear and free from
combustible materials, gasoline, and other flammable
vapors and materials.
if appliance is installed near a window, proper
precautions should be taken to prevent curtains from
blowing over burners.
NEVER leave any items on the cooktop. The hot air from
the vent might ignite flammable items and may increase
pressure in closed containers which could cause them to
burst.
Many aerosol-type spray cans are EXPLOSIVE when
exposed to heat and may be highly flammable. Avoid their
use or storage near an appliance.
Many plastics are vulnerable to heat. Keep plastics away
from parts of the appliance that may become warm or hot.
Do not leave plastic items on the cooktop as they may melt
or soften if left too close to the vent or a lighted surface
burner.
To eliminate the hazard of reaching over hot surface
burners, cabinet storage should not be provided directly
above a unit. if storage is provided, it should be limited to
items which are used infrequently and which can be safely
stored in an area subjected to heat from an appliance.
Temperatures may be unsafe for some items, such as
volatile liquids, cleaners or aerosol sprays.
NEVER leave children alone or unsupervised near the
appliance when it is in use or is still hot.
NEVER allow children to sit or stand on any part of the
appliance as they could be injured or burned.
Children must be taught that the appliance and utensils in
it can be hot. Let hot utensils cool in a safe place, out of
reach of small children. Children should be taught that an
appliance is not a toy. Children should not be allowed to
play with controls or other parts of the unit.
About Your Appliance
in Case of Fire
Turn off appliance and ventilating hood to avoid spreading
the flame. Extinguish flame then turn on hood to remove
smoke and odor.
* Cooktop: Smother fire or flame in a pan with a lid or
cookie sheet.
NEVER pick up or move a flaming pan.
* Oven: Smother fire or flame by closing the oven door.
Do not use water on grease fires. Use baking soda, a dry
chemical or foam-type extinguisher to smother fire or flame.
2
Do not use the cooktop or oven as a storage area for food
or cooking utensils.
The oven vent is located at the base of the control panel.
Avoid touching oven vent area while oven is on and for
several minutes after oven is turned off. Some parts of the
vent and surrounding area become hot enough to cause
burns. After oven is turned off, do not touch oven vent or
surrounding areas until they have had sufficient time to cool.
Other potentially hot surfaces include cooktop, areas facing
the cooktop, oven vent, surfaces near the vent opening,
oven door, areas around the oven door and oven window.
Do not touch a hot oven light bulb with a damp cloth as the
bulb could break. Should the bulb break, disconnect power
to the appliance before removing bulb to avoid electrical
shock.
Cooking Safety
Always place a pan on a surface burner before turning it
on. Be sure you know which knob controls which
surface burner. Make sure the correct burner is turned
on and that the burner has ignited. When cooking is
completed, turn burner off before removing pan to
prevent exposure to burner flame.
Always adjust surface burner flame so that it does not
extend beyond the bottom edge of the pan. An exces-
sive flame is hazardous, wastes energy and may damage
the appliance, pan or cabinets above the appliance.
NEVER leave a surface cooking operation unattended
especially when using a high heat setting or when deep
fat frying. Boilovers can cause smoking and greasy
spillovers may ignite. Clean up greasy spills as soon as
possible. Do not use high heat for extended cooking
operations.
NEVER heat an unopened container on the surface
burner or in the oven. Pressure build-up may cause
container to burst, resulting in serious personal injury or
damage to the appliance.
Use dry, sturdy potholders. Damp potholders may cause
burns from steam. Dish towels or other substitutes
should never be used as potholders because they can
trail across hot surface burners and ignite or get caught
on appliance parts.
Always allow quantities of hot fat used for deep fat
frying cool before attempting to move or handle.
Do not let cooking grease or other flammable materials
accumulate in or near the appliance, hood or vent fan.
Clean hood frequently to prevent grease from accumu-
lating on hood or filter. When flaming foods under the
hood turn the fan on.
NEVER wear garments made of flammable material or
loose fitting or long-sleeved apparel while cooking.
Clothing may ignite or catch utensil handles.
Always place oven racks in the desired positions while
oven is cool. Slide oven rack out to add or remove food,
using dry, sturdy potholders. Always avoid reaching into
the oven to add or remove food. If a rack must be
moved while hot, use a dry, sturdy potholder. Always
turn the oven off at the end of cooking.
Use racks only in the oven in which they were shipped/
purchased.
Use care when opening the oven door. Let hot air or
steam escape before moving or replacing food.
PREPARED FOOD WARNING: Follow food
manufacturer's instructions. If a plastic frozen food
container and/or its cover distorts, warps, or is otherwise
damaged during cooking, immediately discard the food
and its container. The food could be contaminated.
NEVER use aluminum foil to cover oven racks or oven
bottom. This could result in risk of personal electric shock,
fire, or damage to the appliance. Use foil only as directed
in this guide.
Utensil Safety
Use pans with flat bottoms and handles that are easily
grasped and stay cool. Avoid using unstable, warped,
easily tipped or loose-handled pans. Also avoid using
pans (especially small pans) with heavy handles, as they
could be unstable and easily tip. Pans that are heavy to
move when filled with food may also be hazardous.
Be sure utensil is large enough to properly contain food
and avoid boilovers. Pan size is particularly important in
deep fat frying. Be sure pan will accommodate the volume
of food that is to be added as well as the bubble action of
fat.
To minimize burns, ignition of flammable materials and
spillage due to unintentional contact with the utensil, do
not extend handles over adjacent surface burners. Always
turn pan handles toward the side or back of the appliance,
not out into the room where they are easily hit or reached
by small children.
Never let a pan boil dry as this could damage the utensil
and the appliance.
Follow the manufacturer's directions when using oven
cooking bags.
Only certain types of glass, glass/ceramic, ceramic or
glazed utensils are suitable for cooktop or oven usage
without breaking due to the sudden change in
temperature. Follow manufacturer's instructions when
using glass.
This appliance has been tested for safe performance
using conventional cookware. Do not use any devices or
accessories that are not specifically recommended in this
guide. Do not use eyelid covers for the surface units,
stovetop grills, or add-on oven convection systems. The
use of devices or accessories that are not expressly
recommended in this manual can create serious safety
hazards, result in performance problems, and reduce the
life of the components of the appliance.
3
Cleaning Safety
Turn off all controls and wait for appliance parts to cool
before touching or cleaning them. Do not touch the
burner grates or surrounding areas until they have had
sufficient time to cool.
Clean appliance with caution. Use care to avoid steam
burns if a wet sponge or cloth is used to wipe spills on a
hot surface. Some cleaners can produce noxious fumes if
applied to a hot surface.

Self-Clean Oven (:select models:)
Clean only parts listed in this guide. Do not clean door
gasket. The door gasket is essential for a good seal.
Care should be taken not to rub, damage, or move the
gasket. Do not use oven cleaners of any kind in or
around any part of the self-clean oven.
It is normal for the cooktop of the range to become hot
during a self-clean cycle. Therefore, touching the
cooktop during a clean cycle should be avoided.
important Safety Notice and
Warning
The California Safe Drinking Water and Toxic
Enforcement Act of 1986 (Proposition 65:} requires the
Governor of California to publish a list of substances
known to the State of California to cause cancer or
reproductive harm, and requires businesses to warn
customers of potential exposures to such substances.
Users of this appliance are hereby warned that the
burning of gas can result in low-level exposure to some
of the listed substances, including benzene,
formaldehyde and soot, due primarily to the incomplete
combustion of natural gas or liquid petroleum (LP) fuels.
Properly adjusted burners will minimize incomplete
combustion. Exposure to these substances can also be
minimized by properly venting the burners to the
outdoors.
Users of this appliance are hereby warned that when
the oven is engaged in the self-clean cycle, there may
be some low-level exposure to some of the listed
substances, including carbon monoxide. Exposure to
these substances can be minimized by properly venting
the oven to the outdoors by opening the windows and/
or door in the room where the appliance is located
during the self-clean cycle.
IMPORTANT NOTICE REGARDING PET BIRDS:
Never keep pet birds in the kitchen or in rooms where
the fumes from the kitchen could reach. Birds have a
very sensitive respiratory system. Fumes released during
an oven self-cleaning cycle may be harmful or fatal to
birds. Fumes released due to overheated cooking oil, fat,
margarine and overheated non-stick cookware may be
equally harmful.
Save These instructions for Future Reference
Cleaning
Self-Clean Oven (select models)
Important: For manual clean oven, see page 7.
The self-clean cycle uses above-normal cooking temperatures
to automatically clean the oven interior. Do not force the oven
door or lock lever open. This may result in exposure to high
temperatures and be a burn hazard.
The oven should be cleaned regularly by wiping up spillovers
to prevent excessive smoke and flare-ups. Do not allow a
heavy build-up of soil to accumulate in the oven.
During the cleaning process, the kitchen should be well
ventilated to get rid of normal odors associated with cleaning.
Before Self=Cleaning
1. Turn off the oven light before cleaning. The light may burn
out during the clean cycle.
2. Remove broiler pan, all pans, and oven racks from the
oven. The oven racks will discolor and may not slide easily
after a self-clean cycle if they are not removed.
3. Clean oven frame, door frame, area outside of gasket, and
around the opening in the door gasket with a nonabrasive
cleaner such as Bon Ami* or
detergent and water. The self-
cleaning process does not clean
these areas. They should be
cleaned to prevent soil from baking
on during the clean cycle. _The
gasket is the seal around the oven
door and window.)
4. To prevent damage, do not clean or rub the gasket around
the oven door. The gasket is designed to seal in heat
during the clean cycle.
I \
i •
* Brand names for cleaning products are registered trademarks of the respective manufacturers.
4
5. Wipe up excess grease or spillovers from the oven
bottom. This prevents excessive smoking, flare-ups or
flaming during the clean cycle.
6. Wipe up sugary and acidic spilovers such as sweet
potatoes, tomato, or milk-based sauces. Porcelain enamel
is acid-resistant, not acid-proof. The porcelain finish may
discolor if acidic spills are not wiped up before a self-
clean cycle.
Important: Oven temperature must be below 400° F to
program a clean cycle.
To set Self=Clean:
1. Close the oven door.
2. Move door lock lever right to the locked position.
3. Press the Clean pad.
• "CLEAN" flashes in the display.
If the door is not closed, beeps will sound and "DOOR" will
display. If the door is not closed within 45 seconds, the
self-cleaning operation will be canceled and the display
will return to the time of day.
4. Press the More+ or Less- pad. .....................................
• "CL-M" (Medium Soil, 3 hours] is displayed. ' ..........................
5. Press the Mare+ or Less= pad to scroll through
theself-cleaningsettings.
"CL-H" (Heavy Soil, 4 hours]
"CL-M" (Medium Soil, 3 hours]
"CL-L" (Light Soil, 2 hours]
Choosing the soil level of the oven automatically programs
the self-cleaning time.
6. After four seconds, the oven will start cleaning.
• The cleaning time will start counting down in the display.
• "LOCK" will appear in the display.
• "CLEAN" will appear in the display.
To delay a Self=Clean cycle:
1. Press the Delay pad.
• "DELAY" flashes.
° 00:00 will appear in the display.
2. Press the Mare+ or Less- pad to set
the amount of time you want to delay
the cycle. Delay time can be set from
ten minutes (00:10] to 11 hours, 59
minutes (11:59].
3. Press the Clean pad.
° "CLEAN" will flash.
4. Press the Mare+ or Less- pad.
• "CL-M" (Medium Soil, 3 hours]
is displayed.
5. Press the More+ or Less- pad to scroll through the
self-cleaning settings.
"CL-H" (Heavy Soil, 4 hours]
"CL-M" (Medium Soil, 3 hours]
"CL-L" (Light Soil, 2 hours]
Choosing the soil level of the oven automatically programs
the self-cleaning time.
5
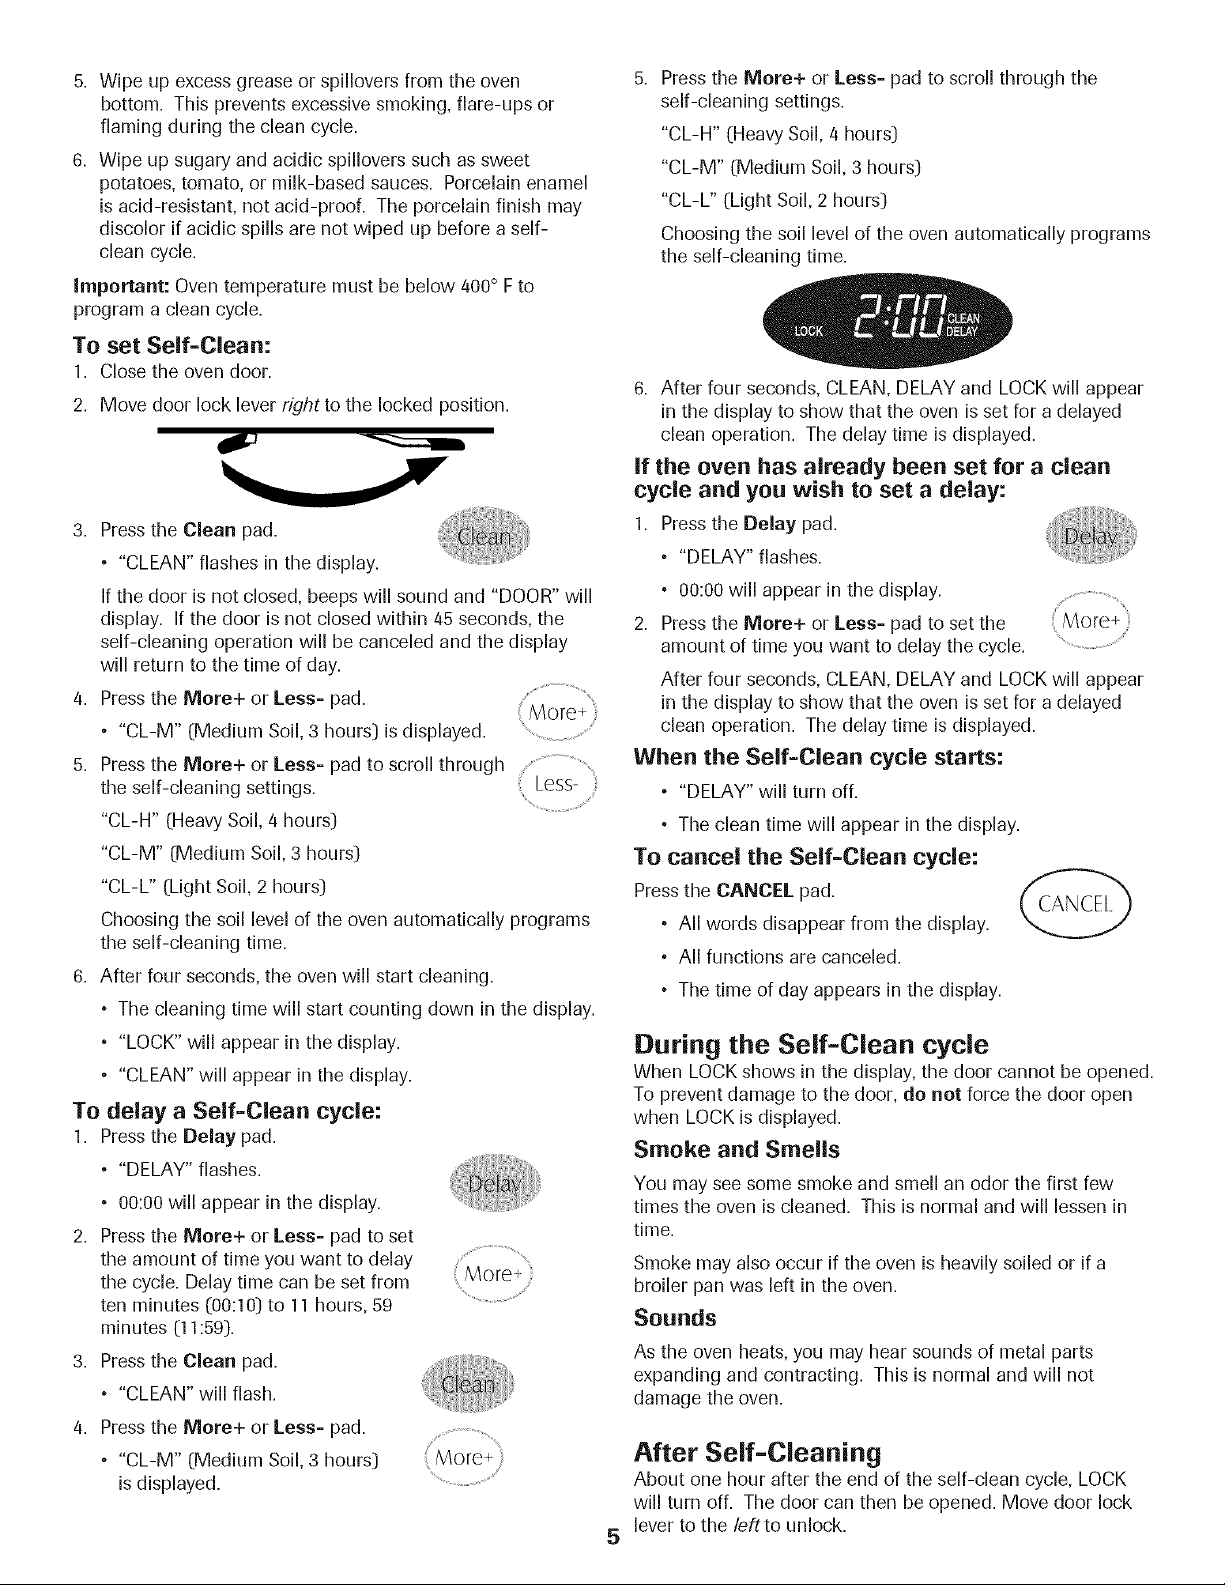
6. After four seconds, CLEAN, DELAY and LOCK will appear
in the display to show that the oven is set for a delayed
clean operation. The delay time is displayed.
If the oven has already been set for a dean
cycle and you wish to set a delay:
1. Press the Delay pad.
• "DELAY" flashes.
• 00:00 will appear in the display.
2. Press the More+ or Less- pad to set the
amount of time you want to delay the cycle. .......................................
After four seconds, CLEAN, DELAY and LOCK will appear
in the display to show that the oven is set for a delayed
clean operation. The delay time is displayed.
When the Self=Clean cycle starts:
° "DELAY" will turn off.
° The clean time will appear in the display.
To cancel the Self=Clean cycle:
Pressthe CANCEL pad. CANCEl ....
° All words disappear from the display.
• All functions are canceled.
• The time of day appears in the display.
During the Self=Clean cycle
When LOCK shows in the display, the door cannot be opened.
To prevent damage to the door, do not force the door open
when LOCK is displayed.
Smoke and Stools
You may see some smoke and smell an odor the first few
times the oven is cleaned. This is normal and will lessen in
time.
Smoke may also occur if the oven is heavily soiled or if a
broiler pan was left in the oven.
Sounds
As the oven heats, you may hear sounds of metal parts
expanding and contracting. This is normal and will not
damage the oven.
After Self=Cleaning
About one hour after the end of the self-clean cycle, LOCK
will turn off. The door can then be opened. Move door lock
lever to the/eft to unlock.
Some soil may leave a light gray, powdery ash. Remove
it with a damp cloth. If soil remains after wiping, that means
the clean cycle was not long enough. The soil will be re-
moved during the next clean cycle.
If oven racks were left in the oven and do not slide
smoothly after a clean cycle, wipe racks and rack supports
with a small amount of vegetable oil to make them easier to
m ove.
Fine lines may appear in the porcelain because it went
through heating and cooling. This is normal and will not
affect performance.
A white discoloration may appear after cleaning if acidic
or sugary foods were not wiped up before the self=clean
cycle. This discoloration is normal and will not affect
_erformance.
Notes:
• If the oven door is left open, "DOOR" will flash in the
display and a signal will beep until the door is closed
and the Clean pad is pressed again.
• If more than five seconds elapse between pressing the
Clean pad and the More+ or Less- pad, the program will
automatically return to the previous display.
• The oven door will be damaged if the oven door is
forced to open when "LOCK" is still displayed.
Cleaning Procedures
Broiler Pan and insert
Never cover insert with aluminum foil as this prevents the
fat from draining to the pan below.
• Place soapy cloth over insertand pan; let soak to loosen soil.
• Wash in warm soapy water. Use scouring pad to remove
stubborn soil.
• Broiler pan and insert can be cleaned in dishwasher.
Sealed Gas Burners
° Clean frequently. Allow burner to cool. Clean with soap and
plastic scouring pad. For stubborn soils, use a non-abrasive
cleaner and a cloth. Try to prevent the cleaner from seeping
into the gas ports as this will affect the flame. If the cleaner
does enter the ports, clean with a soft bristle brush or a
straight pin especially the port below the ignitor. Do not
enlarge or distort holes.
° Be careful not to get water into burner ports.
• Use care when cleaning the ignitor. If the ignitoris wet or
damaged the surface burner will not light.
Burner Grates
• Wash grates with warm, soapy water and a nonabrasive,
plastic scrubbing pad. For stubborn soils, clean with a
soap-filled, nonabrasive pad or a sponge and Cooktop
Cleaning Creme (Part #2OOOOOOl).**
• For burned on soils, remove grates, place on newspapers
and carefully spray with commercial oven cleaner. (Do not
spray surrounding surfaces.D Place in plastic bags for
several hours or overnight. Wearing rubber gloves, remove
from bags. Wash, rinse, dry and replace on cooktop.
Clock and Control Pad Area
° To activate "Control Lock" for cleaning, see page 14.
° Wipe with a damp cloth and dry. Do not use abrasive
cleaning agents as they may scratch the finish.
• Glass cleaners may be used if sprayed on a cloth first.
DO NOT spray directly on control pad and display area.
Control Knobs
° Remove knobs in the OFFposition by pulling forward.
• Wash, rinse and dry. Do not use abrasive cleaning agents as
they may scratch the finish.
• Turn on each burner to be sure the knobs have been
correctly replaced.
Cooktop and Control Panel - Porcelain Enamel
Porcelain enamel is glass fused on metal and may crack or chip
with misuse. It is acid resistant, not acid proof. All spillovers,
especially acidic or sugary spillovers, should be wiped up imme-
diately with a dry cloth.
• When cool, wash with soapy water, rinse and dry.
° Never wipe off awarm or hot surface with a damp cloth. This
may cause cracking or chipping.
° Never use oven cleaners, abrasive or caustic cleaning
agents on exterior finish of range.
Side Panels, Storage Drawer, Lower Broiler Door (select
models) and Door Handles = Painted Enamel
• When cool, wash with warm soapy water, rinse and dry.
Never wipe a warm or hot surface with a damp cloth as this
may damage the surface and may cause a steam burn.
• For stubborn soil, use mildly abrasive cleaning agents such
as baking soda paste or Bon Ami*. Do not use abrasive
cleaners such as steel wool pads or oven cleaners. These
products will scratch or permanently damage the surface.
Important: Use a dry towel or cloth to wipe up spills,
especially acidic or sugaty spills. Surface may discolor or
dull if soil is not immediately removed. This is especially
important for white surfaces.
Oven Window and Door = Glass
° Avoid using excessive amounts of water which may seep
under or behind glass, causing staining. Wash with soap and
water. Rinse with clear water and dry. Glass cleaner can be
used if sprayed on a cloth first.
° Do not use abrasive materials such as scouring pads, steel
wool or powdered cleaners as they will scratch glass.
* Brand names are registered trademarks of the respective
manufacturers.
** To order call 1-877-232-6771 USA or 1-800-688-8408 Canada.
Oven interior
Self=Clean:
• Follow instructions on page 4-5 to set a self-clean cycle.
Manual Clean:
° Clean frequently using mild abrasive cleaners and a
plastic pad.
° Do not use metallic scouring pads because they will
scratch the surface.
° When using commercial oven cleaners follow the
manufacturer's instructions.
• Wipe up acidic spills (tomato or milk based foods:) as soon
as possible with soap and water. If the spill is not wiped
up, it may discolor the porcelain. To make cleaning easier,
remove the oven door if desired. (See Maintenance
section below.]
Oven Racks
• Clean with soapy water.
° Remove stubborn soil with cleansing powder or soap-
filled scouring pad. Rinse and dry.
° Racks will permanently discolor and may not slide out
smoothly if left in the oven during a self-clean operation.
If this occurs, wipe the rack and embossed rack supports
with a small amount of vegetable oil to restore ease
of movement, then wipe off excess oil.
Stainless Steel (select modelsD
* DO NOT USE ANY CLEANING PRODUCT CONTAINING
CHLORINE BLEACH.
* DO NOT USEABRASIVE OR ORANGE CLEANERS.
* ALWAYS WIPE WiTH THE GRAIN WHEN CLEANING.
. Daily Cleaning/Light Soil -- Wipe with one of the
following - soapy water, white vinegar/water solution,
Formula 409 Glass and Surface Cleaner* or a similar glass
cleaner - using a sponge or soft cloth. Rinse and dry.
To polish and help prevent fingerprints, follow with
Stainless Steel Magic Spray* (Part No. 2000000d)**.
* Moderate/Heavy Soil -- Wipe with one of the following -
Bon Ami, Smart Cleanser, or Soft Scrub* - using a damp
sponge or soft cloth. Rinse and dry. Stubborn soils may be
removedwith a damp multi-purpose Scotch-Brite* pad; rub
evenly with the grain. Rinse and dry. To restore luster and
removestreaks, follow with Stainless Steel Magic Spray*.
. Discoloration -- Using a damp sponge or soft cloth, wipe
with Cameo Stainless Steel Cleaner*. Rinse immediately and
dry. To remove streaks and restore luster, follow with
Stainless Steel Magic Spray*.
Oven Door
To replace:
1. Grasp door at each side.
2. Align slots in the door with the hinge arms on the range.
3. Slide the door down onto the hinge arms until the door is
completely seated on the hinges. Push down on the top
corners of the door to completely seat door on hinges.
Door should not appear crooked.
important: The oven door on a new range may feel "spongy"
when it is closed. This is normal and will decrease with use.
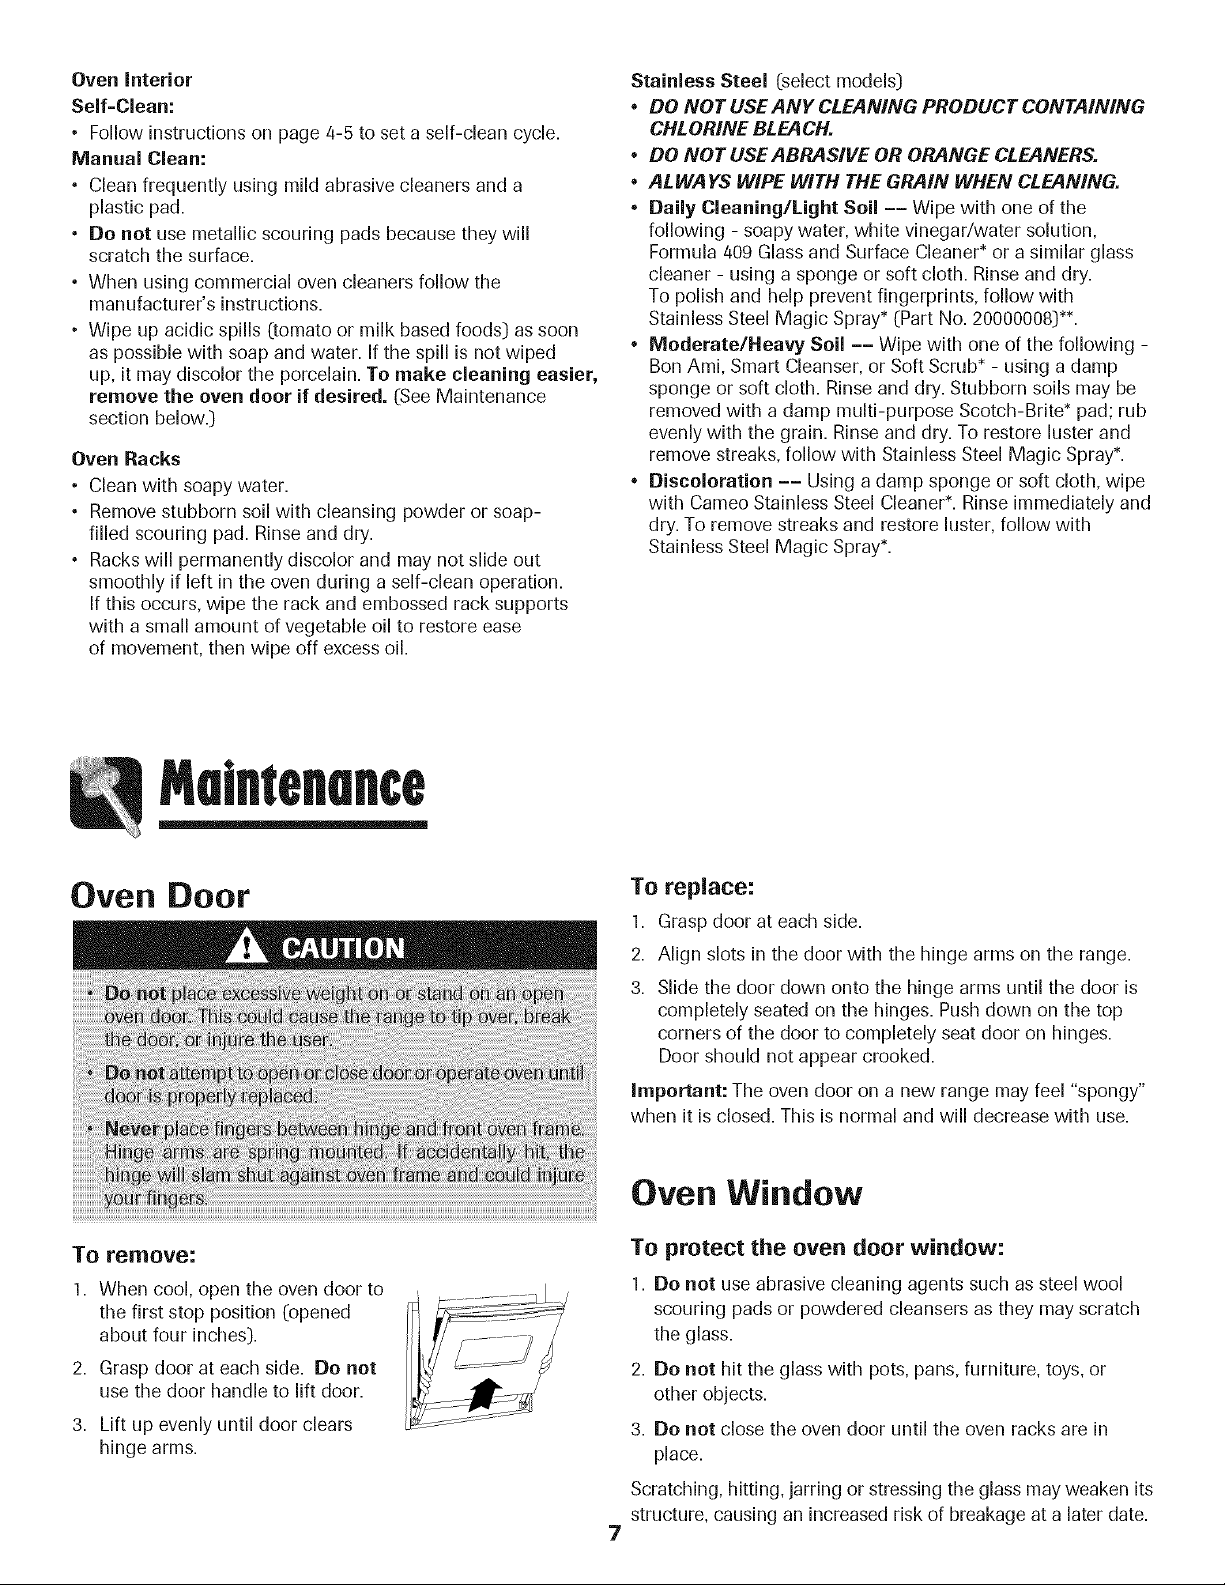
To remove:
1. When cool, open the oven door to
the first stop position (opened
about four inches:).
2. Grasp door at each side. Do not
use the door handle to lift door.
3. Lift up evenly until door clears
hinge arms.
Oven Window
To protect the oven door window:
1. Do not use abrasive cleaning agents such as steel wool
scouring pads or powdered cleansers as they may scratch
the glass.
2. Do not hit the glass with pots, pans, furniture, toys, or
other objects.
3. Do not close the oven door until the oven racks are in
place.
Scratching, hitting, jarring or stressing the glass may weaken its
structure, causing an increased risk of breakage at a later date.
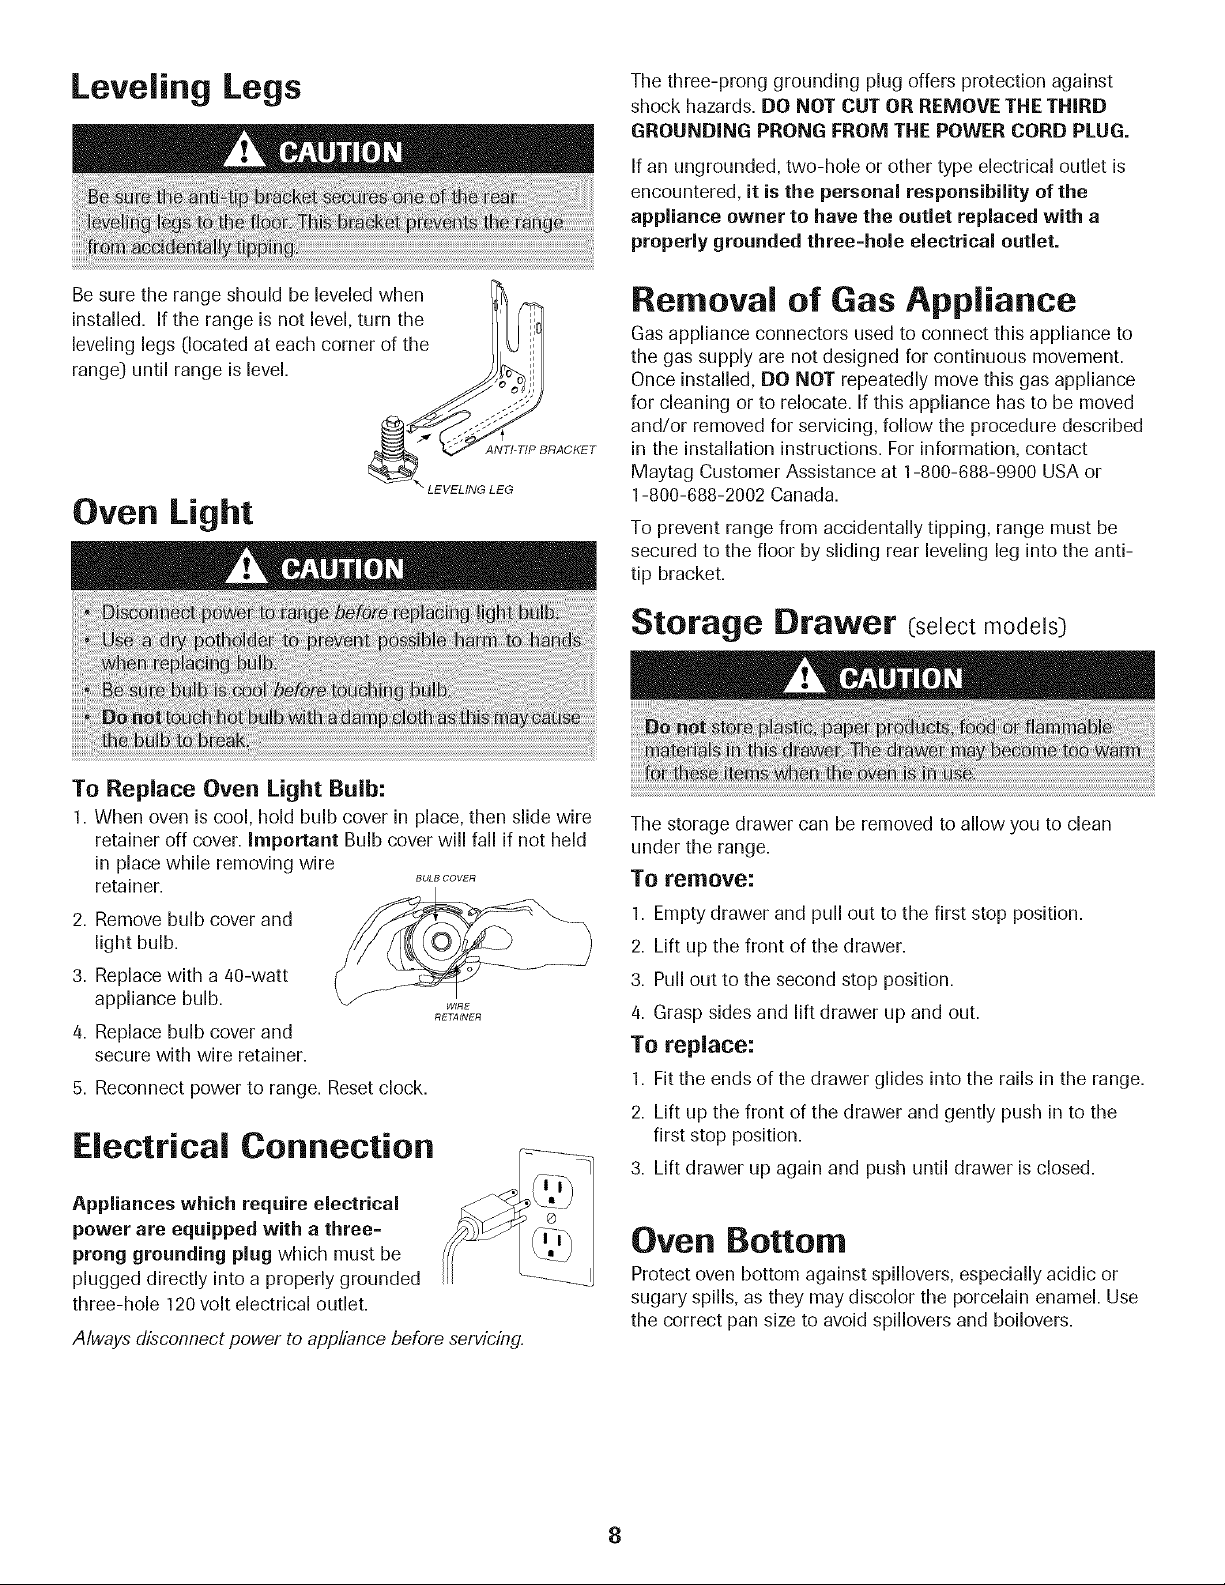
Leveling Legs
Be sure the range should be leveled when
installed. If the range is not level, turn the
leveling legs (located at each corner of the
range) until range is level.
_ AN_-_BRACKEr
\ LEVELING LEG
Oven Light
The three-prong grounding plug offers protection against
shock hazards. DO NOT CUT OR REMOVE THE THIRD
GROUNDING PRONG FROM THE POWER CORD PLUG.
If an ungrounded, two-hole or other type electrical outlet is
encountered, it is the personal responsibility of the
appliance owner to have the outlet replaced with a
properly grounded three=hole electrical outlet.
Removal of Gas Appliance
Gas appliance connectors used to connect this appliance to
the gas supply are not designed for continuous movement.
Once installed, DO NOT repeatedly move this gas appliance
for cleaning or to relocate. If this appliance has to be moved
and/or removed for servicing, follow the procedure described
in the installation instructions. For information, contact
Maytag Customer Assistance at 1-800-688-9900 USA or
1-800-688-2002 Canada.
To prevent range from accidentally tipping, range must be
secured to the floor by sliding rear leveling leg into the anti-
tip bracket.
Storage [}rawer (select models)
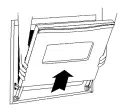
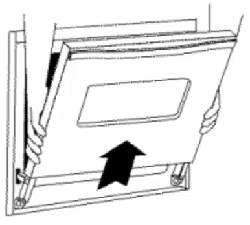
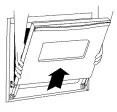
To Replace Oven Light Bulb:
1. When oven is cool, hold bulb cover in place, then slide wire
retainer off cover, important Bulb cover will fall if not held
in place while removing wire
retainer. BuL_COVER
2. Remove bulb cover and
light bulb.
3. Replace with a 40-watt
appliance bulb.
4. Replace bulb cover and
secure with wire retainer.
RE_INER
5. Reconnect power to range. Reset clock.
Electrical Connection
Appliances which require electrical
power are equipped with a three=
prong grounding plug which must be
plugged directly into a properly grounded
three-hole 120volt electrical outlet.
Always disconnect power to appliance before servicing,
The storage drawer can be removed to allow you to clean
under the range.
To remove:
1. Empty drawer and pull out to the first stop position.
2. Lift up the front of the drawer.
3. Pull out to the second stop position.
4. Grasp sides and lift drawer up and out.
To replace:
1. Fit tile ends of tile drawer glides into the rails in tile range.
2. Lift up the front of the drawer and gently push in to the
first stop position.
3. Lift drawer up again and push until drawer is closed.
Oven Bottom
Protect oven bottom against spillovers, especially acidic or
sugary spills, as they may discolor the porcelain enamel. Use
the correct pan size to avoid spillovers and boilovers.
froubleshootln9
For most concerns, try these first.
• Check if oven controls have been properly set.
• Check to be sure plug is securely inserted into receptacle.
° Check or reset circuit breaker. Check or replace fuse.
• Check power supply.
Surface burner fails to light.
° Check to be sure unit is properly connected to power
supply.
• Check for a blown circuit fuse or a tripped main circuit
breaker.
• Check to be sure ignitor is dry and clicking. Burner will not
light if ignitor is damaged, soiled or wet. If ignitor doesn't
click, turn control knob OFF.
The flame is uneven.
• Burner ports may be clogged.
Surface burner flame lifts off ports.
° Check to be sure a pan issitting on the grate above.
Baking results are not as expected or differ from
previous oven.
• Check the oven temperature selected. Make sure oven is
preheated when recipe or directions recommend preheat.
° Make sure the oven vent has not been blocked. See page
18 for location.
• Check to make sure range is level.
° Temperatures often vary between a new oven and an old
one. As ovens age, the oven temperature often "drifts" and
may become hotter or cooler. See pages 17-18 for
instructions on adjusting the oven temperature (select
models).
Important: It is not recommended to adjust the
temperature if only one or two recipes are in question.
• Use correct pan. Dark pans produce dark browning. Shiny
pans produce light browning.
° Check rack positions and pan placement. Stagger pans
when using two racks. Allow 1-2 inches between pans and
oven wall.
• Check the use of foil in the oven. Never use foil to cover an
entire oven rack. Place a small piece of foil on the rack
below the pan to catch spillovers.
Food is not broiling properly or smokes excessively.
° Check oven rack positions. Food may be too close to flame.
• Aluminum foil was incorrectly used. Never line the broiler
insert with foil.
• Trim excess fat from meat before broiling.
° A soiled broiler pan was used.
• Preheat oven for 2-3 minutes before placing food in the
ove rl.
• Broil with the oven door closed.
Oven will not self=clean. (select models)
° Check to make sure tile cycle is not set for a delayed start.
See page 5.
• Check if door is closed.
• Check if control is in Sabbath Mode. See page 17.
° Oven may be over 400° F. Oven temperature must be below
400° F to program a clean cycle.
Oven did not clean properly. (select models)
• Longer cleaning time may be needed.
° Excessive spillovers, especially sugary and/or acidic foods,
were not removed prior to the self-clean cycle.
Oven door will not unlock after self=clean cycle
(select models).
• Oven interior is still hot. Allow about one hour for tile oven
to cool after the completion of a self-clean cycle. The door
can be opened when "LOCK" is not displayed.
° The control and door may be locked. See pages 5 and 14
to unlock.
Moisture collects on oven window or steam comes from
oven vent=
• This is normal when cooking foods high in moisture.
° Excessive moisture was used when cleaning the window.
There is a strong odor or light smoke when oven is
turned on.
• This is normal for a new range and will disappear after a
few uses. Initiating a clean cycle will "burn off" the odors
more quickly.
• Turning on a ventilation fan will help remove the smoke
and/or odor.
° Excessive food soils on the oven bottom. Use a self-clean
cycle.
Fault Codes (select models).
• BAKE or LOCK may flash rapidly in tile display to alert you
if there is an error or a problem. If BAKE or LOCK appear in
the display, press the CANCEL pad. If BAKE or LOCK
continue to flash, disconnect power to the appliance. Wait
a few minutes, and then reconnect power. If the flashing
still continues, disconnect power to the appliance and call
an authorized servicer.
° If the oven is heavily soiled, excessive fiareups may result in
a fault code during cleaning. Press the CANCEL pad and
allow the oven to cool completely, wipe out excess soil, then
reset the clean cycle. If the fault code reappears, contact an
authorized servicer.
Noises may be heard.
• The oven makes several low level noises. You may I/ear tile
oven relays as they go on and off. This is normal.
° As the oven heats and cools, you may hear sounds of metal
parts expanding and contracting. This is normal and will not
damage your appliance.
There are no beeps and no display.
• Oven may be in Sabbath Mode. See page 17.
"SAb" flashing and then displayed continuously.
• Oven is in Sabbath Mode. To cancel, press and hold tile
Clock pad for five seconds.
9
¢ookln
Surface Controls
Pilotless Ignition
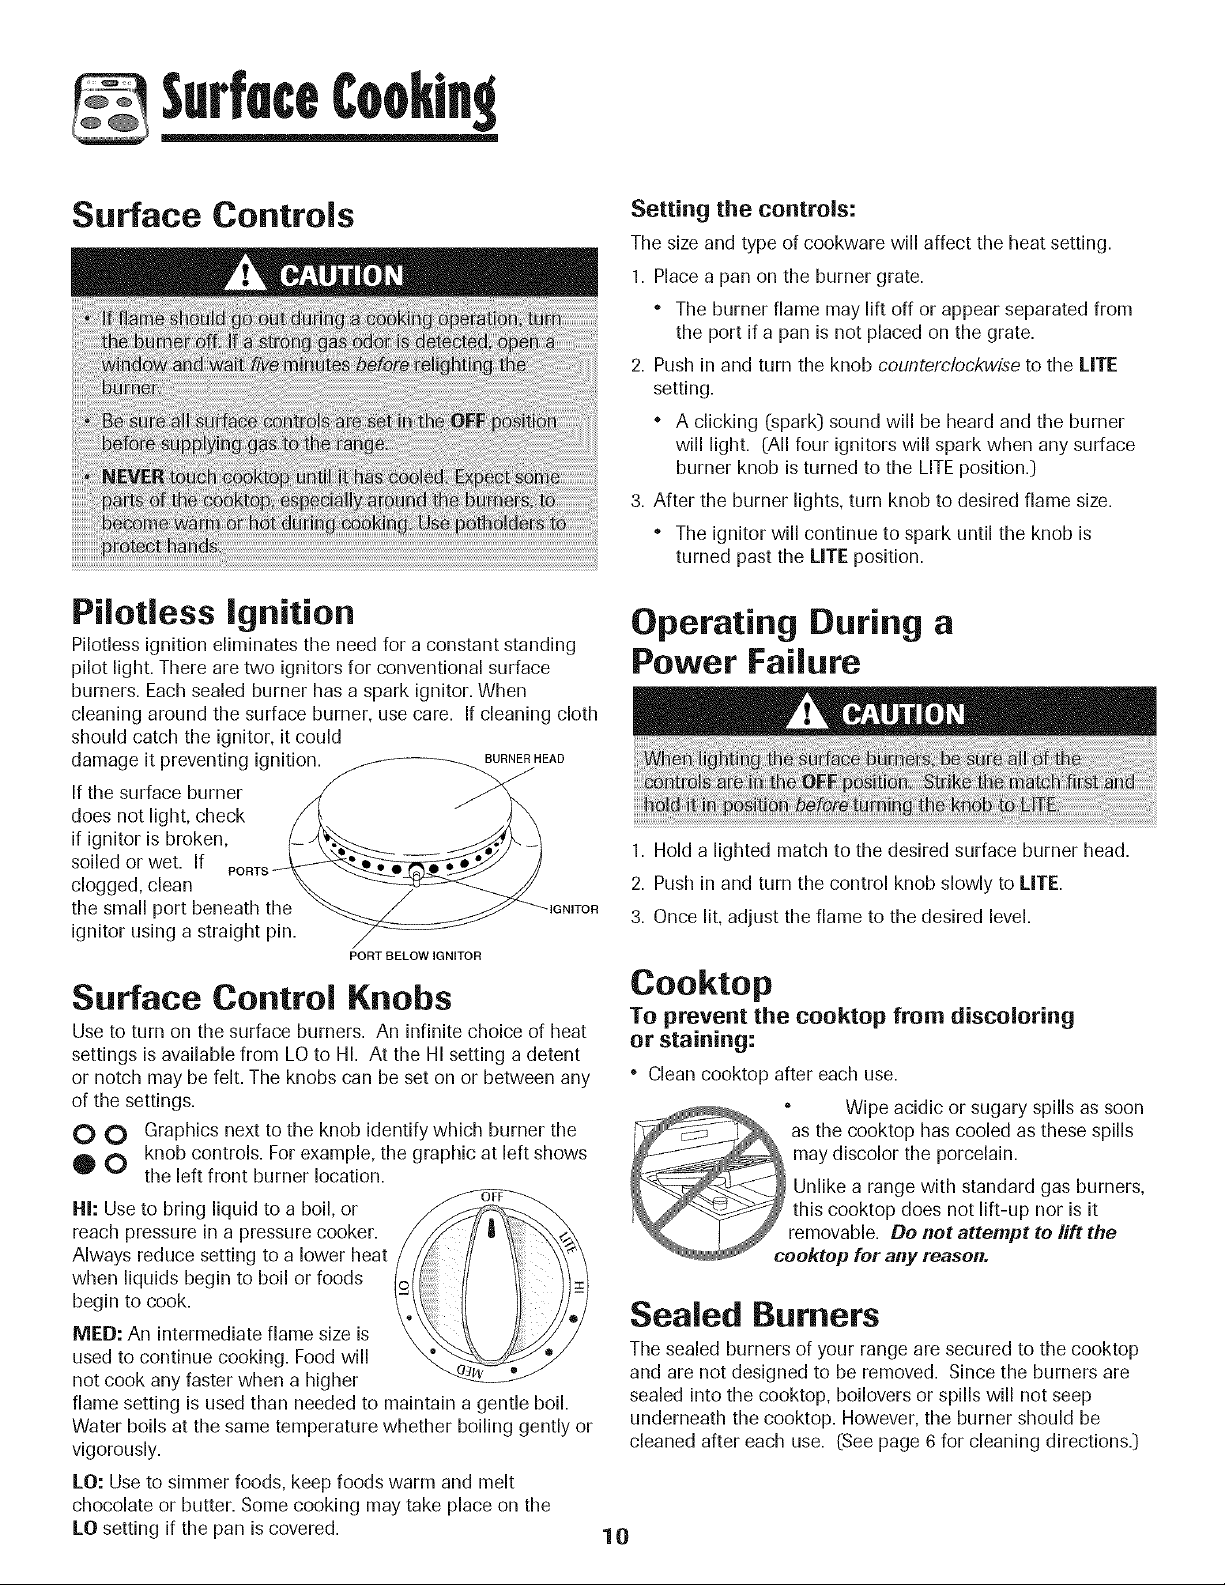
Pilotless ignition eliminates the need for a constant standing
pilot light. There are two ignitors for conventional surface
burners. Each sealed burner has a spark ignitor. When
cleaning around the surface burner, use care. If cleaning cloth
should catch the ignitor, it could
damage it preventing ignitio[_ __HEAD
If the surface burner /// J_,,,
does not light, check / _, " J X
if ignitoris broker,, (- _ J_,_ _" -1
soiled or wet. If PORTS_<_---_--___J /]
clogged, clean _.
the small port beneath tl!e __IGNITOR
ignitor using a straight pin.
/
PORT BELOW IGNITOR
Surface Control Knobs
Use to turn or, the surface burners. An infinitechoice of heat
settings is available from LO to HI. At the HI setting a detent
or notch may be felt. The knobs can be set on or between any
of the settings.
O O Graphics next to the knob identify which burner tire
O O knob corrtrols. For example, the graphic at left shows
the left front burner location.
HI: Use to bring liquid to a boil, or
reach pressure in a pressure cooker.
Always reduce setting to a lower heat
when liquids begin to boil or foods
begin to cook.
IVIED:An intermediate flame size is
used to corrtinue cooking. Food will
not cook any faster when a higher
flame setting is used than needed to maintain a gentle boil.
Water boils at the same temperature whether boiling gently or
vigorously.
LO: Use to simmer foods, keep foods warm and melt
chocolate or butter. Some cooking may take place on the
LO setting if the pan is covered.
Setting the controls:
Tire size and type of cookware will affect the heat setting.
1. Place a pan on the burner grate.
* The burner flame may lift off or appear separated from
the port if a pan is not placed on the grate.
2. Push in and turn the knob counterclockwise to the LITE
setting.
" A clicking (spark:) sound will be heard and the burner
will light. (All four ignitors will spark when any surface
burner knob is turned to the LITE position.:)
3. After the burner lights, turn knob to desired flame size.
The ignitor will continue to spark until the knob is
turned past the UTE position.
Operating During a
Power Failure
1. Hold a lighted match to the desired surface burner head.
2. Push in and turn the control knob slowly to LITE.
3. Once lit, adjust the flame to the desired level.
Cooktop
To prevent the cooktop from discoloring
or staining:
* Clean cooktop after each use.
* Wipe acidic or sugary spills as soon
as the cooktop has cooled as these spills
_may discolor the porcelain.
_._ Unlike a range with standard gas burners,
this cooktop does not lift-up nor is it
_removable. Do not attempt to lift the
cooktop for any reason.
Sealed Burners
Tire sealed burners of your range are secured to the cooktop
and are not designed to be removed. Since the burners are
sealed into the cooktop, boilovers or spills will not seep
underneath the cooktop. However, the burner should be
cleaned after each use. (See page 6 for cleaning directions.:)
10
High Performance Burner
[12,000 BTU*)
There is one high speed burner on your range, located in the
right front position. This burner offers higher speed cooking
that can be used to quickly bring water to a boil and for large-
quantity cooking.
Simmer Burner
This burner is located in the left rear position. Tile simmer
burner offers a lower BTU_ flame for delicate sauces or for
melting chocolate.
BTU ratings will vary when using LP gas.
Burner Grates
The grates must be properly positioned before cooking.
Improper installationof the grates may result in chipping of
the cooktop.
Do not operate the burners without a pan on the
grate.
The grate's porcelain finish may chip without
a pan to absorb the heat from the burner
flame.
Although the burner grates are durable, they will
gradually lose their shine and/or discolor due to
the high temperatures of the gas flame.
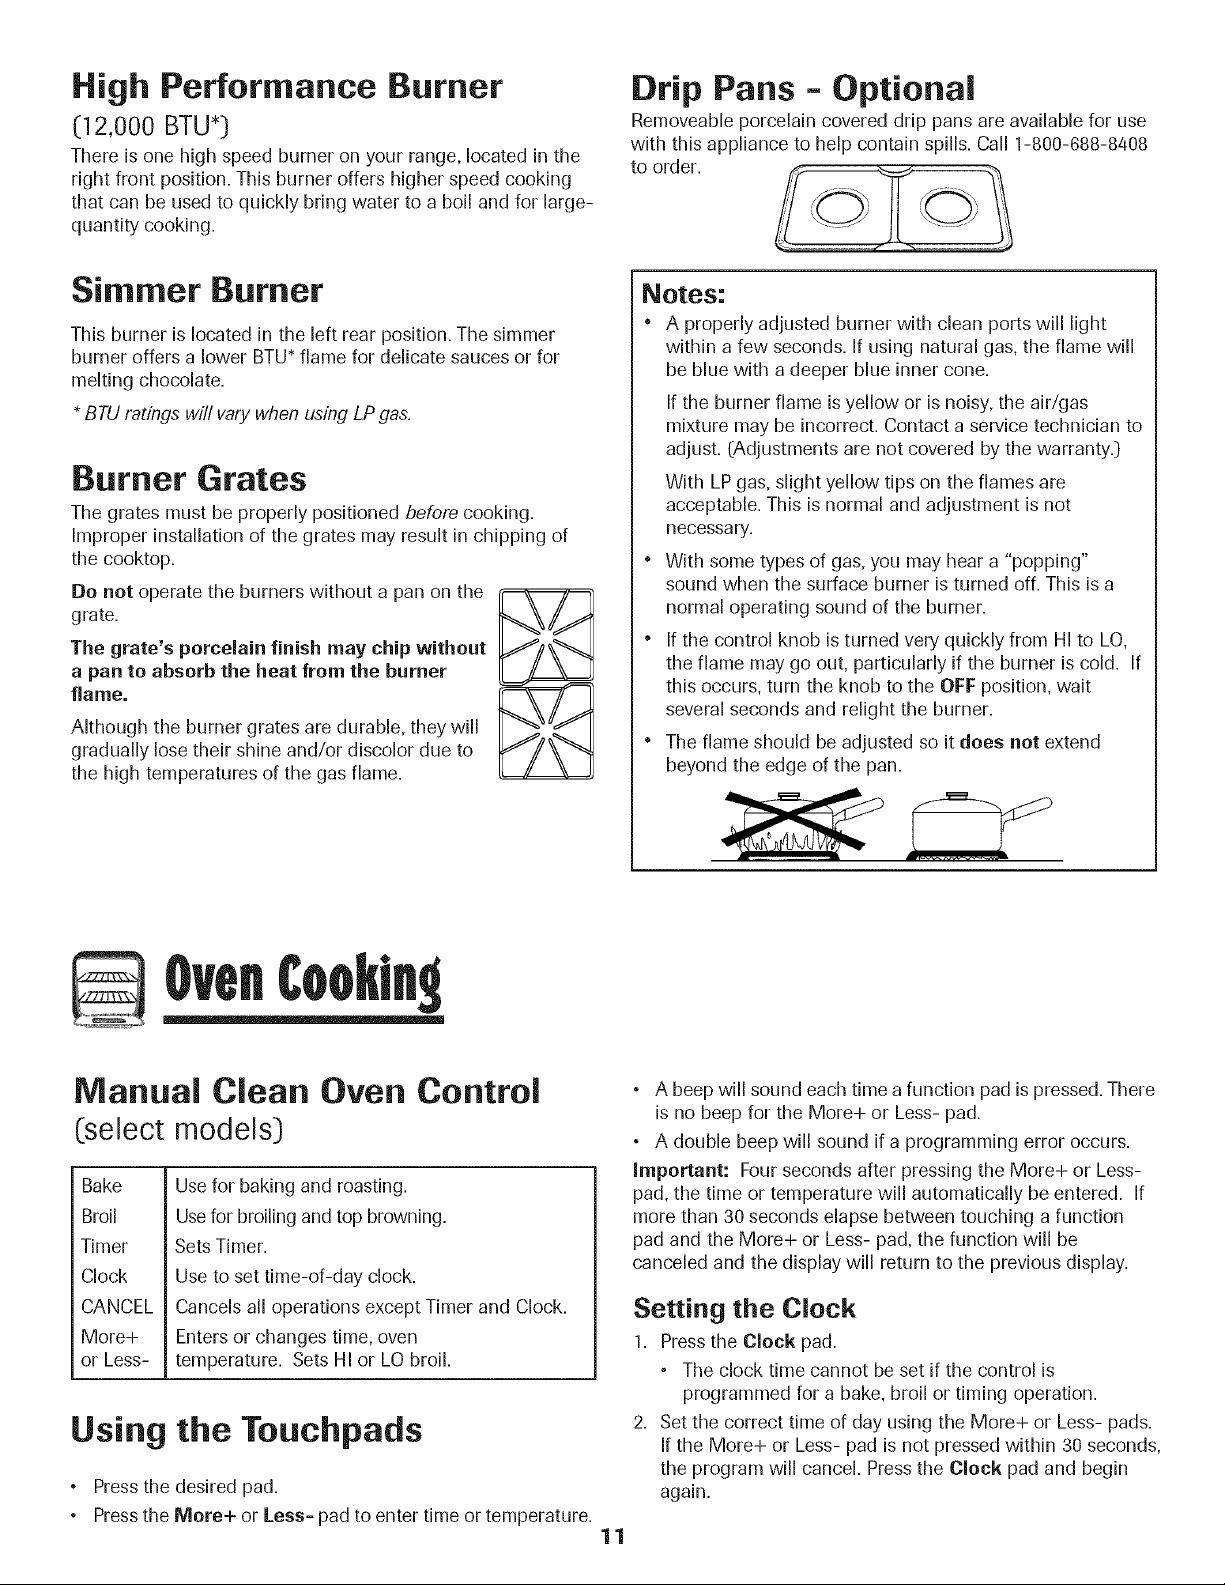
Drip Pans - Optional
Removeable porcelain covered drip pans are available for use
with this appliance to help contain spills. Call 1-800-688-8408
to order.
Notes:
• A properly adjusted burner with clean ports will light
within a few seconds. If using natural gas, the flame will
be blue with a deeper blue inner cone.
If the burner flame is yellow or is noisy, the air/gas
mixture may be incorrect. Contact a service technician to
adjust. (Adjustments are not covered by the warranty.)
With LP gas, slight yellow tips on the flames are
acceptable. This is normal and adjustment is not
necessary.
• With some types of gas, you may hear a "popping"
sound when the surface burner is turned off. This is a
normal operating sound of the burner.
" If the control knob is turned very quickly from HI to LO,
the flame may go out, particularly if the burner is cold. If
this occurs, turn the knob to the OFF position, wait
several seconds and relight the burner.
• The flame should be adjusted so it does not extend
beyond the edge of the pan.
Manual Clean Oven Control
(select models)
Bake
Broil
Timer
Clock
CANCEL
More+
or Less-
Usefor baking and roasting.
Usefor broiling and top browning.
Sets Timer.
Use to set time-of-day clock.
Cancels all operations except Timer and Clock.
Enters or changes time, oven
temperature. Sets HI or LO broil.
Using the Touchpads
• Pressthe desired pad.
• Pressthe More+ or Less- pad to enter time or temperature.
11
° A beep will sound each time a function pad is pressed. There
is no beep for the More+ or Less- pad.
° A double beep will sound if a programming error occurs.
Important: Four seconds after pressing the More+ or Less-
pad, the time or temperature will automatically be entered. If
more than 30 seconds elapse between touching a function
pad and the More+ or Less- pad, the function will be
canceled and the display will return to the previous display.
Setting the Clock
1. Press the Clock pad.
• The clock time cannot be set if the control is
programmed for a bake, broil or timing operation.
2. Set the correct time of day using the More+ or Less- pads.
If the More+ or Less- pad is not pressed within 30 seconds,
the program will cancel. Press the Clock pad and begin
again.
Setting the Timer
The timer can be set from one minute [:01] up to 99 hours
and 59 minutes (99:59]. Time will be displayed in minutes and
not in seconds. THE TIMER DOES NOT CONTROL THE
OVEN.
1. Press the Timer pad.
• 0:00 will light and the colon (:) will flash in the display.
2. Press the More+ or Less- pad until the desired time is
displayed.
• The timer will begin as soon as the time is set.
• The flashing colon indicatesthat a timing operation is in
progress. (The colon will not flash if the time of day or
oven temperature is displayed.)
• Two short beeps signal the end of the operation. "0:00"
will appear in the display.
If desired, press the Clock pad and the time of day will
briefly reappear in the display during a timing operation.
If desired, press the Bake or Broil pads and the current
temperature setting will briefly reappear in the display
during a timing operation.
To cancel the timer operation:
Press and hold the Timer pad for several seconds.
Baking, Roasting and Broiling
Setting the Controls For Baking or Roasting:
1. Press Bake pad.
• 000 wiJJJightand the Bake indicatorJight wiJJflash in
the display.
• If you press the Bake pad and do not set an oven
temperature within 30 seconds, the program will
automatically cancel and the time of day will reappear
in the display.
2. Press the More+ or Less= pad until the desired oven
temperature is displayed.
• The oven temperature can be set from 170° to 550° F.
• 350° will appear in the display when either More+ or
Less- pad is pressed once.
Press and tap the More+ or Less- pad to change the
oven temperature by 5° increments or press and hold
the More+ or Less- pad to change the oven
temperature by 10° increments.
100° or the actual oven temperature, whichever is higher,
will appear in the display when the oven turns on.
° The temperature in the display will increase in 5°
increments until preset temperature is reached. A single
beep will sound when the oven is preheated.
° Allow 10 to 15 minutes for the oven to preheat.
° To recall preset temperature during preheat, press the
Bake pad. The temperature will be displayed for three
seconds.
To change oven temperature during cooking, press
the Bake pad, then press the More+ or Less= pad until
the desired temperature is displayed.
To change oven temperature during preheat, press
the Bake pad twice, then press the More+ or Less=
pad until the desired temperature is displayed.
3. Place food in the oven. Check food for doneness at the
minimum cooking time.
4. At the end of cooking, press the CANCEL pad to turn the
oven off and remove the food from the oven.
° The oven features an automatic shut-off. If the oven is
left on for 12 hours it will automatically turn off and 000
will appear in the display. Press the CANCEL pad and the
time of day will reappear in the display.
Setting the Controls For Broiling:
(lower compartment - select models)
For best results, use pan designed for broiling.
1. Place broiler pan on recommended broiling compartment
position shown in the chart below.
2. Press the Broil pad.
° "SEt" will light and the Broil
indicatorlight will flash in
the display.
3. Pressthe More+ pad to select HI (high) broil or the
Less= pad to set LO (low) broil.
Broiling Chart = Lower Compartment
Beef Steaks, 1" thick Medium Middle
Well Done Middle
Hamburger Patties, 3/4" thick Well Done Middle
Pork Ham, precooked 1/2" slice Warm Middle
Chops, 1" thick Well Done Middle
Poultry Chicken Pieces Well Done Bottom
Seafood Fish Filets
Fish Steaks, 1" thick
Flaky
Flaky
Middle
Middle
14 - 20 min.
16 - 24 min.
16 - 24 min.
8 - 12 min.
18 - 25 min.
[Lo Broil 450° F]
30-45 min.
8 - 12 min.
10 - 15 min.
Upper is the top position; middle is the lower position; bottom is the bottom of the broiler compartment (remove the rack).
** This chart is a suggested guide. The times may vary with the food being cooked.
12
• Select HI broil for normal broiling.
• Select LO broil for low temperature broiling to avoid
excessive browning of longer cooking foods like poultry.
• If you do not select HI or LO Broil within 30 seconds, the
program will automatically cancel and the time of day
will reappear in the display.
4. Follow the suggested times in the broil chart below. Meat
should be turned once about halfway through cooking
time.
5. After broiling, press CANCEL to turn the oven off and
remove the broiler pan from the oven. The current time of
day will reappear in the display.
Manual Clean Oven Knob
Control (select models)
Oven Temp Knob
The Oven Temp Knob is used to
select and maintain the oven /
temperature. Always turn this knob
directly to the desired temperature.
Do not turn to a higher temperature
and then back.
Setting the Control for Baking
and Roasting:
1. Push in and turn Oven Temp knob to desired temperature.
Allow 10-15 minutes for preheating.
2. Place food in the center of oven. Check food for doneness
at minimum time in recipe. Cook longer if necessary.
3. Remove food from oven and turn Oven Temp knob to OFF.
Setting the Control for Broiling:
1. For best results, use a broiling pan. Place the broiler pan
on recommended rack position (see chart on page 12].
2. Turn Oven Temp knob to Broil, or for lower temperature
broiling, to 450° F.
• Lower temperature broiling avoids excessive browning
of longer cooking foods such as poultry.
3. Follow the suggested times in the broil chart on page 12.
Meat should be turned once about halfway through
cooking time.
4. Check the doneness by cutting a slit in the meat near the
center to check the color.
5. After broiling, turn the Oven Temp knob to OFF. Remove
the broiler pan from the oven.
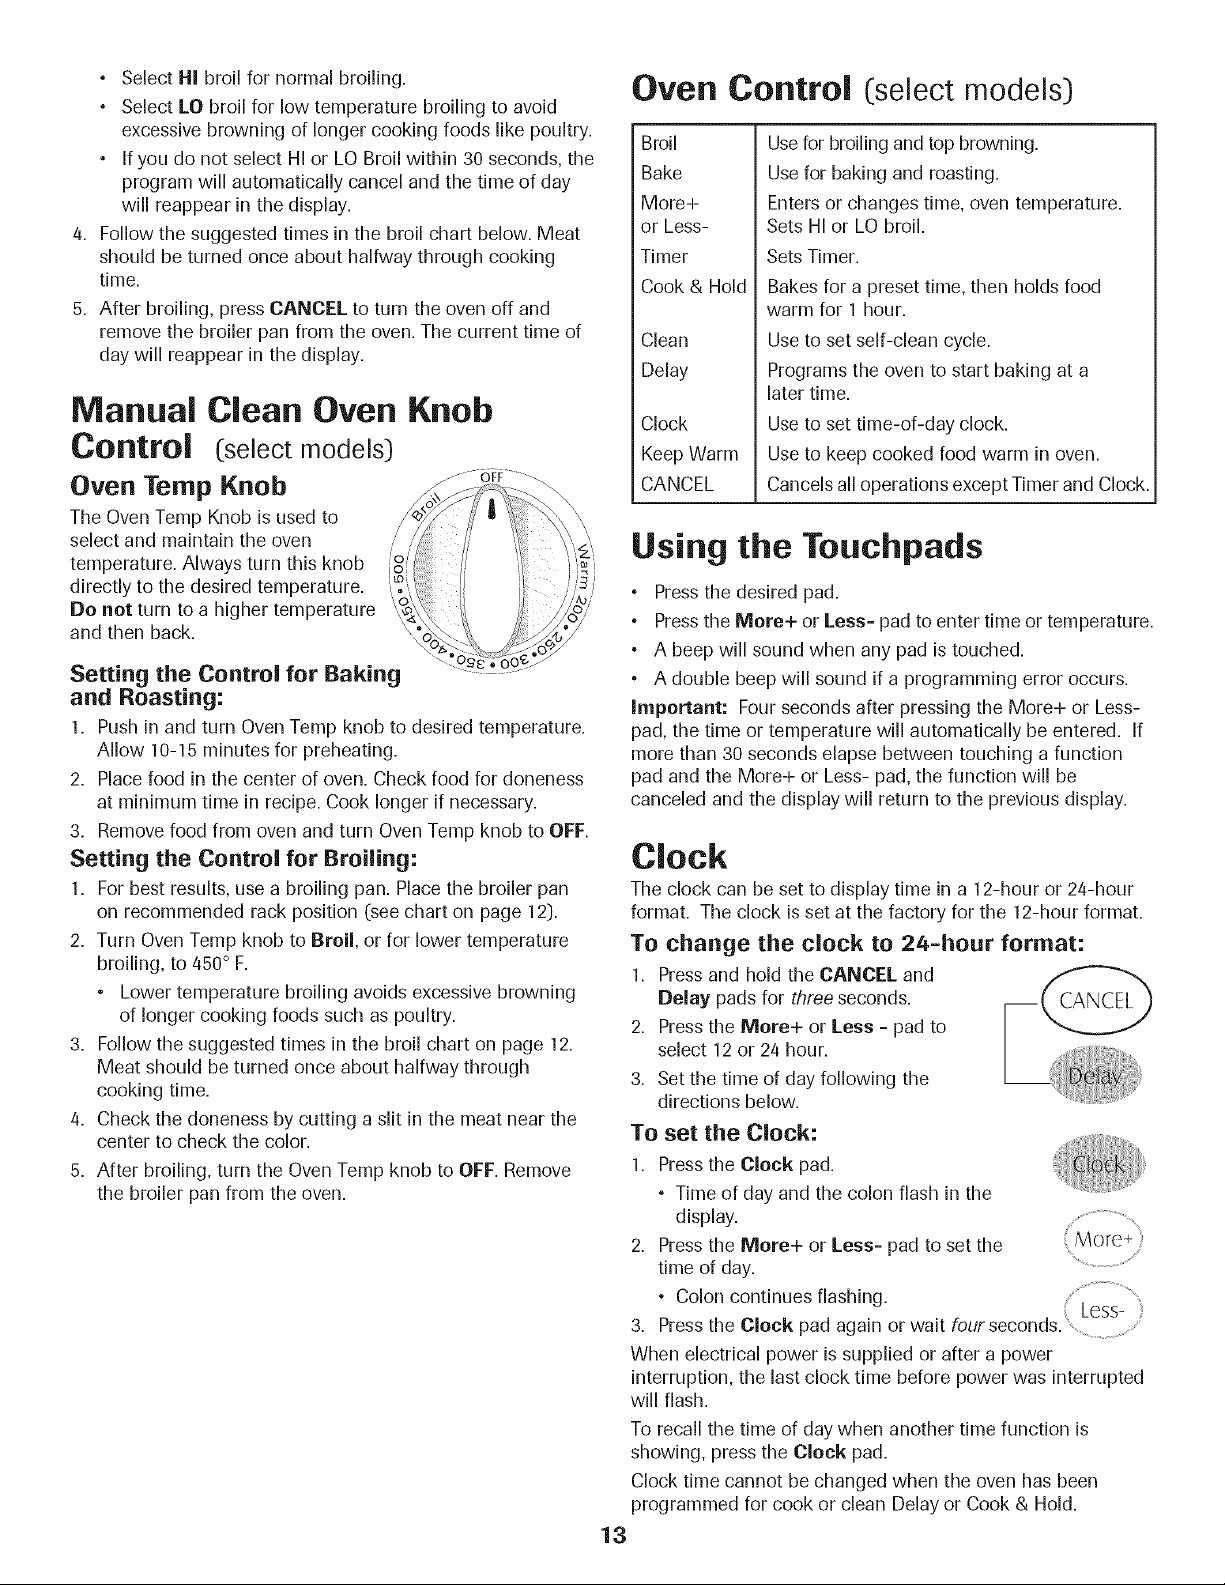
Oven Control (select models)
Broil
Bake
More+
or Less-
Timer
Cook & Hold
Clean
Delay
Clock
Keep Warm
CANCEL
Use for broiling and top browning.
Use for baking and roasting.
Enters or changes time, oven temperature.
Sets HI or LO broil.
Sets Timer.
Bakes for a preset time, then holds food
warm for 1 hour.
Use to set self-clean cycle.
Programs the oven to start baking at a
later time.
Use to set time-of-day clock.
Use to keep cooked food warm in oven.
Cancels all operations except Timer and Clock.
Using the Touchpads
Pressthe desired pad.
Pressthe More+ or Less= pad to enter time or temperature.
° A beep will sound when any pad is touched.
° A double beep will sound if a programming error occurs.
important: Four seconds after pressing the More+ or Less-
pad, the time or temperature will automatically be entered. If
more than 30 seconds elapse between touching a function
pad and the More+ or Less- pad, the function will be
canceled and the display will return to the previous display.
Clock
Tile clock car/be set to display thne in a 12-hour or 24-hour
format. The clock is set at the factory for the 12-hour format.
To change the clock to 24=hour format:
1. Pressand hold tile CANCEL and
Delay pads for three seconds.
2. Pressthe More+ or Less = pad to
select 12 or 24 hour.
3. Set the time of day following the
directions below.
To set the Clock:
1. Presstile Clock pad.
° Time of day and the colon flash in the
display .................................... ,
2. Pressthe More+ or Less= pad to set the
time of day.
• Colon continues flashing. Less-
Pressthe Clock pad again or wait four seconds. ........................
3,
When electrical power is supplied or after a power
interruption, the last clock time before power was interrupted
will flash.
To recall the time of day when another time function is
showing, press the Clock pad.
Clock time cannot be changed when the oven has been
programmed for cook or clean Delay or Cook & Hold.
13
To cancel the Clock display:
If you do not want the time of day to display:
Press and hold the CANCEL and Clock
pads for three seconds. The time of day
will disappear from the display
When the clock display is canceled, press
the Clock pad to briefly display the time
of day.
To restore the Clock display:
Press and hold the CANCEL and Clock pads for three
seconds. The time of day will reappear in the display.
Timer
The timer can be set from one minute (00:01] up to 99 hours
and 59 minutes (99:59).
The timer can be used independentlyof any other oven
activity. It can also be set while another oven function is
operating.
The Timer does not control the oven. It only controls a
beeper.
To set the Timer:
Timer
1. Press the Timer pad.....
• 0:00 lights in the display.
• The colon flashes in the display.
2. Press the More+ or Less- pad until the
correct time appears in the display.
° The colon will continue to flash.
3. Press Timer pad again or wait four seconds.
° The colon continues flashing and the time begins
counting down.
° The last minute of the timer countdown will be displayed
as seconds.
4. At the end of the set time, one long beep will sound.
To cancel the Timer:
1. Press and hold the Timer pad for three seconds.
OR
2. Press the Timer pad and set the time to 00:00.
Locking the Controls
Tile touchpad controls can be locked for safety, cleaning, or
to prevent unwanted use. They will not function when locked.
If the oven is currently in use, the controls cannot be locked.
The current time of day will remain in the display when the
controls are locked.
To lock:
Press and hold the CANCEL and Cook &
Hold pads for three seconds.
LOCK flashes in the display.
To unlock:
Press and hold the CANCEL and Cook & Hold pads for three
seconds.
LOCK disappears from the display.
Fault Codes
BAKE or LOCK may flash rapidly in the display to alert you if
there is an error or a problem. If BAKE or LOCK flash in the
display, press CANCEL pad. If BAKE or LOCK continue to
flash, disconnect power to the appliance. Wait a few minutes,
and then reconnect power. If the flashing still continues,
disconnect power to the appliance and call an authorized
servicer.
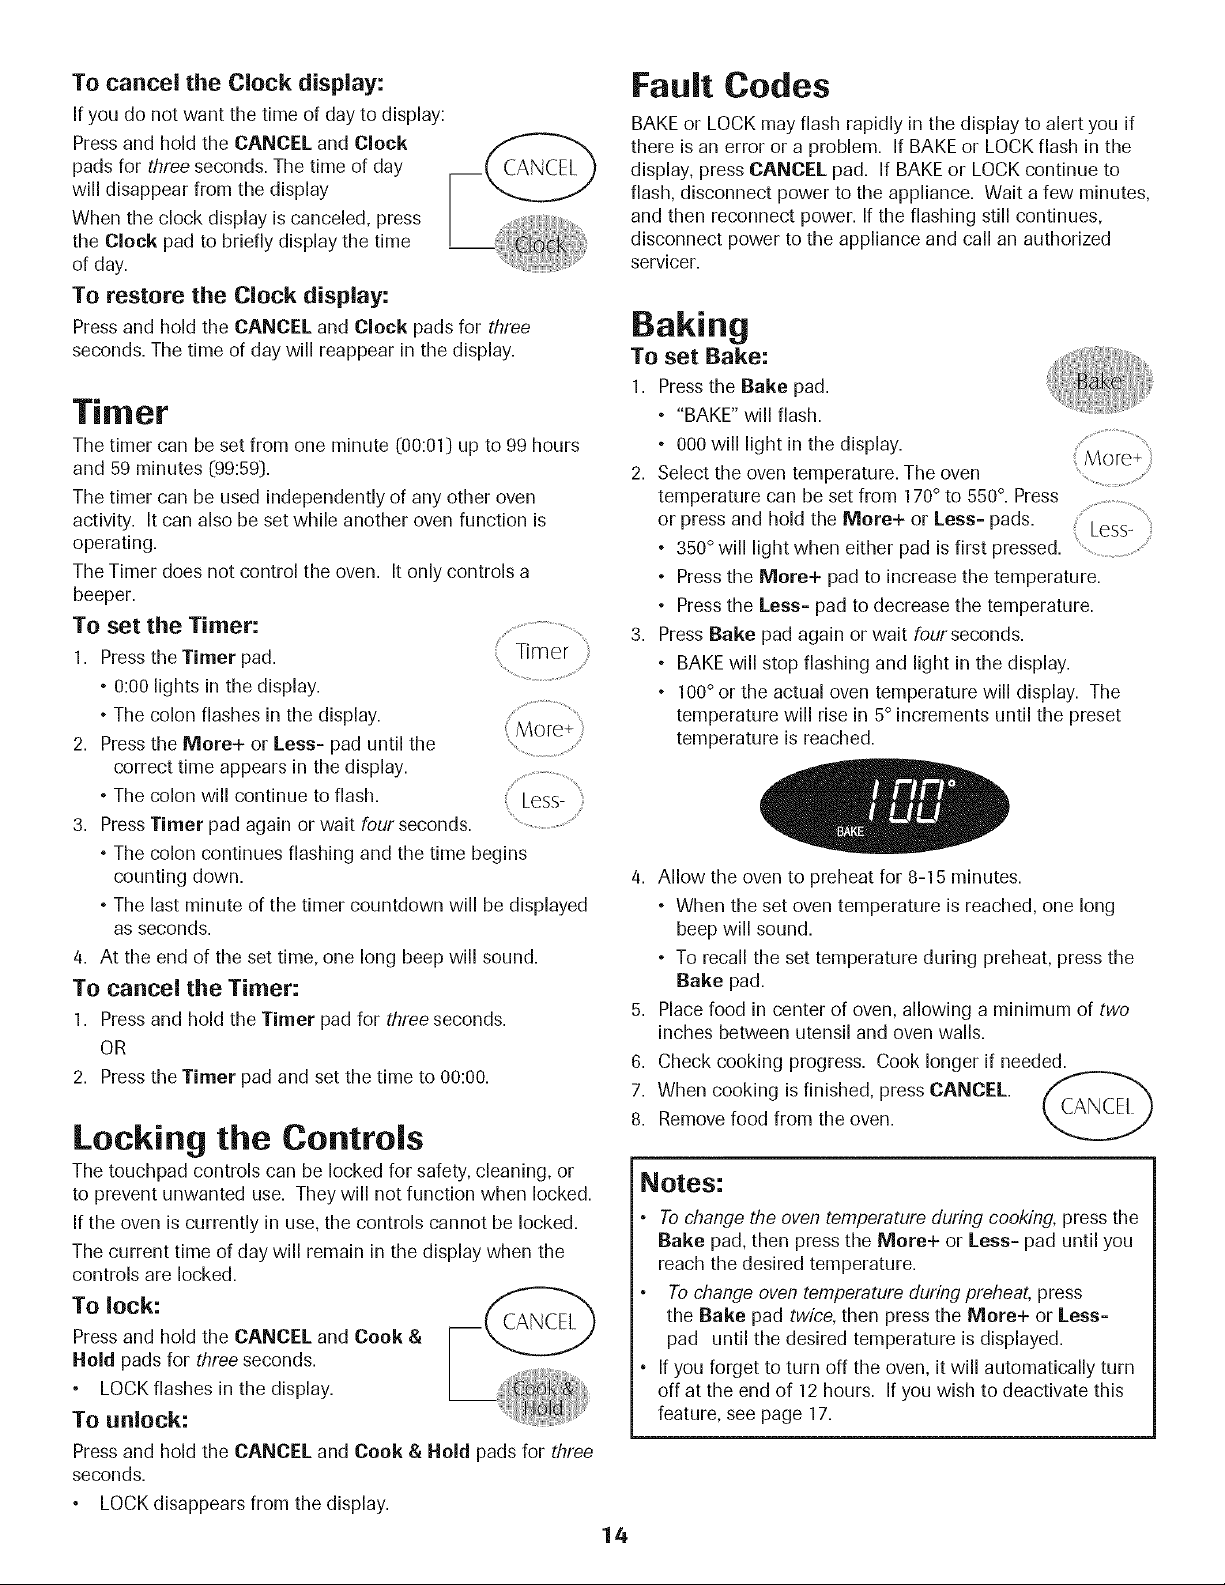
Baking
To set Bake:
1. Press the Bake pad.
• "BAKE" will flash.
• 000 will light in the display.
2. Select the oven temperature. The oven
3,
temperature can be set from 170° to 550°. Press
or press and hold the More+ or Less- pads. Less-
, 350° will light when either pad is first pressed. ...................................
• Press the More+ pad to increase the temperature.
• Press the Less- pad to decrease the temperature.
Press Bake pad again or wait four seconds.
• BAKE will stop flashing and light in the display.
• 100° or the actual oven temperature will display. The
temperature will rise in 5° increments until the preset
temperature is reached.
4. Allow the oven to preheat for 8-15 minutes.
• When the set oven temperature is reached, one long
beep will sound.
• To recall the set temperature during preheat, press the
Bake pad.
5. Place food in center of oven, allowing a minimum of two
inches between utensil and oven walls.
6. Check cooking progress. Cook longer if needed.
7. When cooking is finished, press CANCEL. _"_
8. Remove food from the oven.
Notes:
To change the oven temperature during cooking, press the
Bake pad, then press the More+ or Less- pad until you
reach the desired temperature.
To change oven temperature during preheat, press
the Bake pad twice, then press the More+ or Less-
pad until the desired temperature is displayed.
If you forget to turn off the oven, it will automatically turn
off at the end of 12 hours. If you wish to deactivate this
feature, see page 17.
14
Baking Differences Between Your Old
and New Ovens
It is normal to notice some baking time differences between a
new oven and an old one. See "Adjusting the Oven Temperature"
on page 17.
Cook & Hold
Cook & Hold allows you to bake for a preset amount of time
followed by a one-hour Keep Warm cycle.
To set Cook & Hold:
1. Press the Cook & Hold pad.
• "BAKE" and "HOLD" flash. More+
• 000 lights in the display. .............................
2. Select the oven temperature. The oven .......................................
temperature can be set from 170° to 550°. Press Less-
or press and hold the Mare+ or Less- pad.
• Press the Mare+ pad to increase the temperature.
• Press the Less= pad to decrease the temperature.
3. Press Cook & Hold again OR wait four seconds.
• "HOLD" flashes.
• 00:00 flashes in the display.
4. Enter the amount of time you want to bake by pressing the
Mare+ or Less- pad. Bake time can be set from ten
minutes (00:10) to 11 hours, 59 minutes (11:59).
° "BAKE" and "HOLD" light in the display.
° The baking time will light in the display.
• The baking time will start counting down.
When the cooking time has elapsed:
° Four beeps will sound.
° "BAKE" will turn off.
° "HOLD" and "WARM" will light.
° 170° will display.
After one hour in HOLD WARM:
° "End" will display.
° The time of day reappears in the display. _----_
To cancel Cook & Hold at any time: (, CANCEL )
Press the CANCEL pad. Remove food from oven.
Delay Bake
When using Delay, the oven begins to cook later in the day.
Set the amount of time that you want to delay before the oven
turns on and how long you want to cook. The oven begins to
heat at the selected time and cooks for the specified length of
time, then keeps food warm for up to one hour.
Delay time can be set from 10 minutes (00:10) to 11 hours, 59
minutes (11:59:).
To set a Delayed Baking cycle:
1. Pressthe Delay pad.
• "DELAY" flashes.
• 00:00 flashes in the display ................................ ,
2. Pressthe More+ or Less- pad to set the
delay time. ................................
While "DELAY" is still flashing: Less-
3. Pressthe Cook & Hold pad. -..................
• 000 lights in the display. _":°**_:uu,_
• "BAKE" and "HOLD" flash. 8:O1[ i::
4. Press Mare+ pad to set the baking temperature. :{ ....
• 00:00 and "HOLD" flash.
• "BAKE" stays lit.
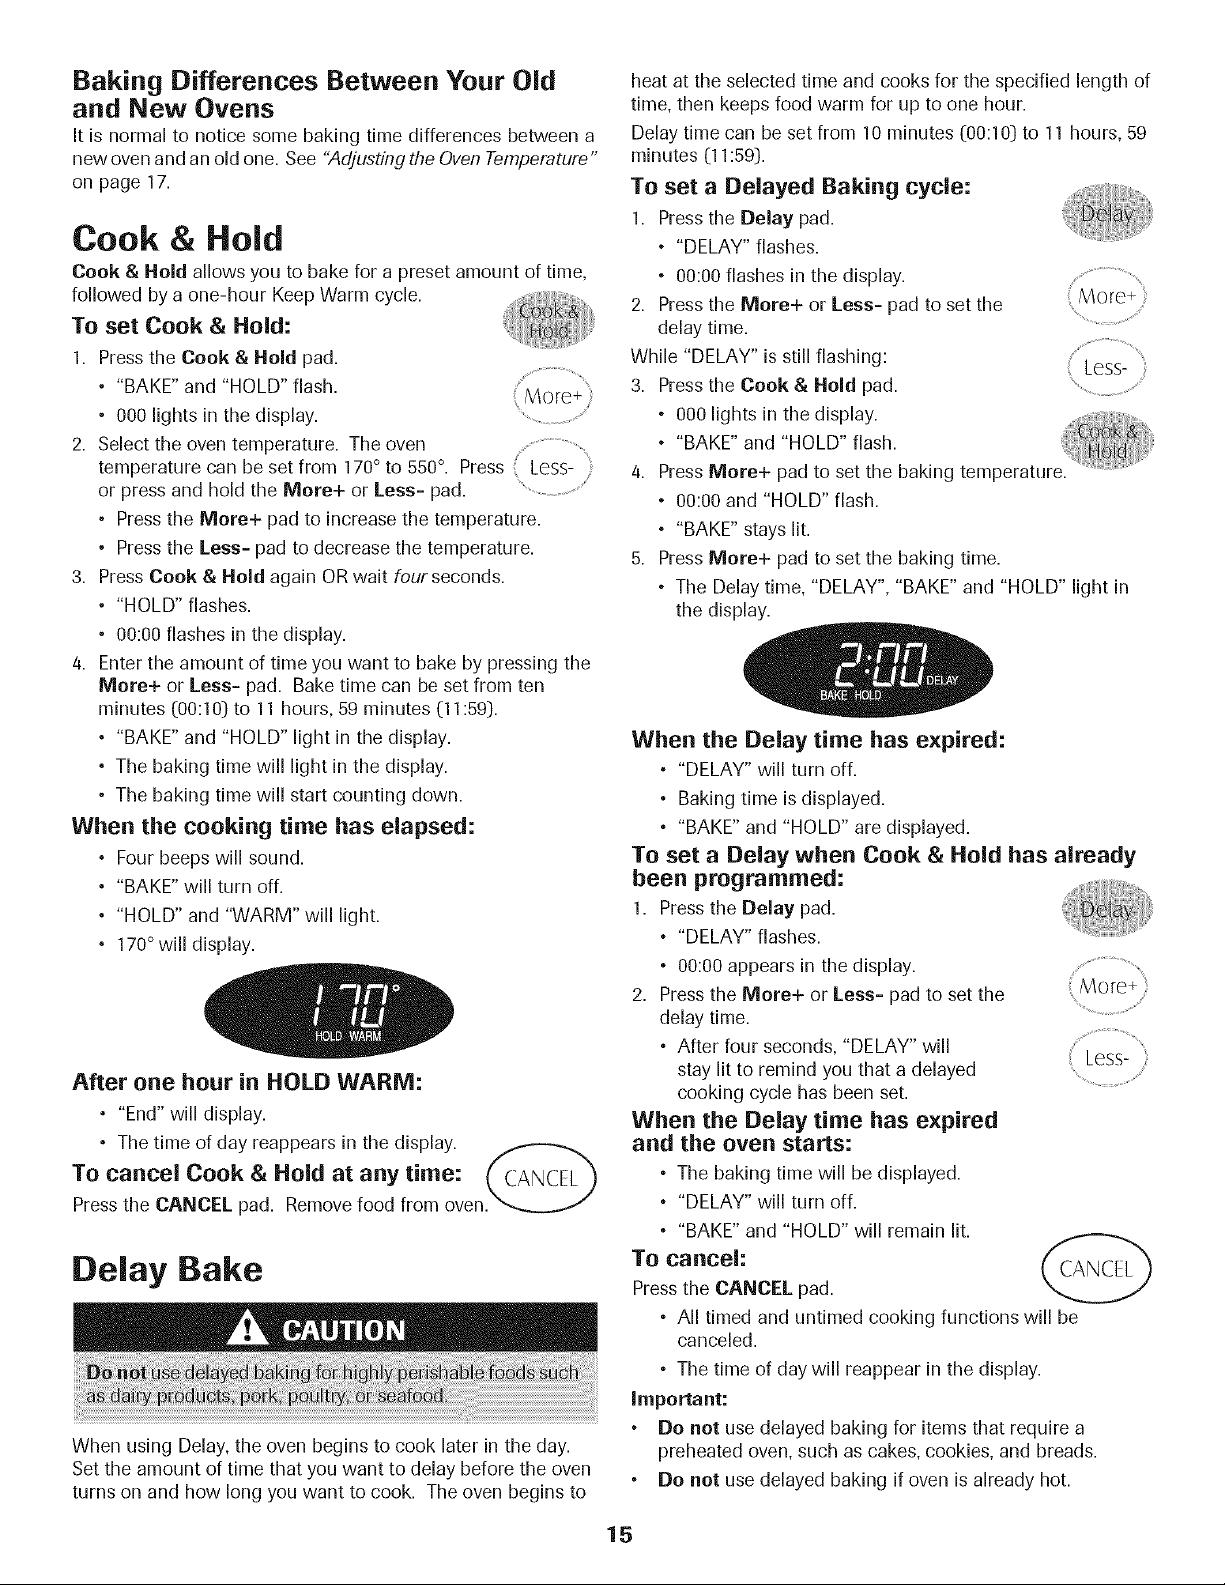
5. Press Mare+ pad to set the baking time.
• The Delay time, "DELAY", "BAKE" and "HOLD" light in
the display.
When the Delay time has expired:
° "DELAY" will turn off.
• Baking time is displayed.
• "BAKE" and "HOLD" are displayed.
To set a Delay when Cook & Hold has already
been programmed:
1. Pressthe Delay pad.
• "DELAY" flashes.
• 00:00 appears in the display ............................................
2. Pressthe Mare+ or Less- pad to set the
delay time.
• After four seconds, "DELAY" will
Less- :;
stay lit to remind you that a delayed
cooking cycle has been set.
When the Delay time has expired
and the oven starts:
• The baking time will be displayed.
• "DELAY" will turn off.
• "BAKE" and "HOLD" will remain lit.
To cancel:
Press the CANCEL pad.
• All timed and untimed cooking functions will be
canceled.
• The time of day will reappear in the display.
Important:
Do not use delayed baking for items that require a
preheated overt, such as cakes, cookies, and breads.
Do not use delayed baking if overt is already hot.
15
Keep Warm
For safely keeping foods warm or for warming breads and
plates.
To set Keep Warm:
1. Press the Keep Warm pad.
• "WARM" flashes.
• 000 appears in the display.
2. Select the Keep Warm temperature. The ................................................
Keep Warm temperature can be set from 145°
to 190°. Pressor press and hold the More+ ..........................................
or Less= pad.
• 170° will light when either pad is first
pressed.
• Press the More+ pad to increasethe temperature.
• Press the Less= pad to decrease the temperature.
WARM and the temperature will be displayed while Keep
Warm is active.
Less-
.........................
Broiling (select models)
To set Broil:
1. Pressthe Broil pad.
• "BROIL" flashes.
• SET is displayed.
2. Pressthe More+ pad to set HI broil or press the Less=
pad to set LO broil.
° HI or LO will be displayed.
° Select HI broil (550° E)for normal broiling. Select
LO broil (450° F'Jfor low-temperature broiling of longer
cooking foods such as poultry.
3. After four seconds, the oven will start.
° "BROIL" will remain lit.
To cancel Keep Warm:
1. Press the CANCEL pad.
2. Remove food from the oven.
NOteS:
° For optimal food quality, oven cooked foods should be kept
warm for no longer than 1 to 2 hours.
° To keep foods from drying, cover loosely with foil or a lid.
° To warm dinner rolls:
- cover rolls loosely with foil and place in oven.
- press Keep Warm and More+ pads to set 170° F.
- warm for 12-15 minutes.
° To warm plates:
- place 2 stacks of up to four plates each in the oven.
- press Keep Warm and More+ pads to set 170° F.
- warm for five minutes, turn off the oven and leave plates
in the oven for 15 minutes more.
- use only oven-safe plates, check with the manufacturer.
- do not set warm dishes on a cold surface as rapid
temperature changes could cause crazing or breakage.
4,
5,
6.
7.
For optimum browning, preheat for 2-3 minutes before
adding food.
Place food in the oven. Close oven door.
Turn meat once about halfway through cooking.
When food is cooked, press the CANCEL pad.
Remove food and broiler pan from the
ove [I.
• The time of day will reappear in the
display.
Notes:
• For best results when broiling, use a pan designed for
broiling.
• HI is used for most broiling. Use LO broil when broiling
longer cooking foods. The lower temperature allows
food to cook to the well done stage without excessive
browning.
• Broil times may be longer when the lower broiling
temperature is selected.
• Food should be turned halfway through broiling time.
16
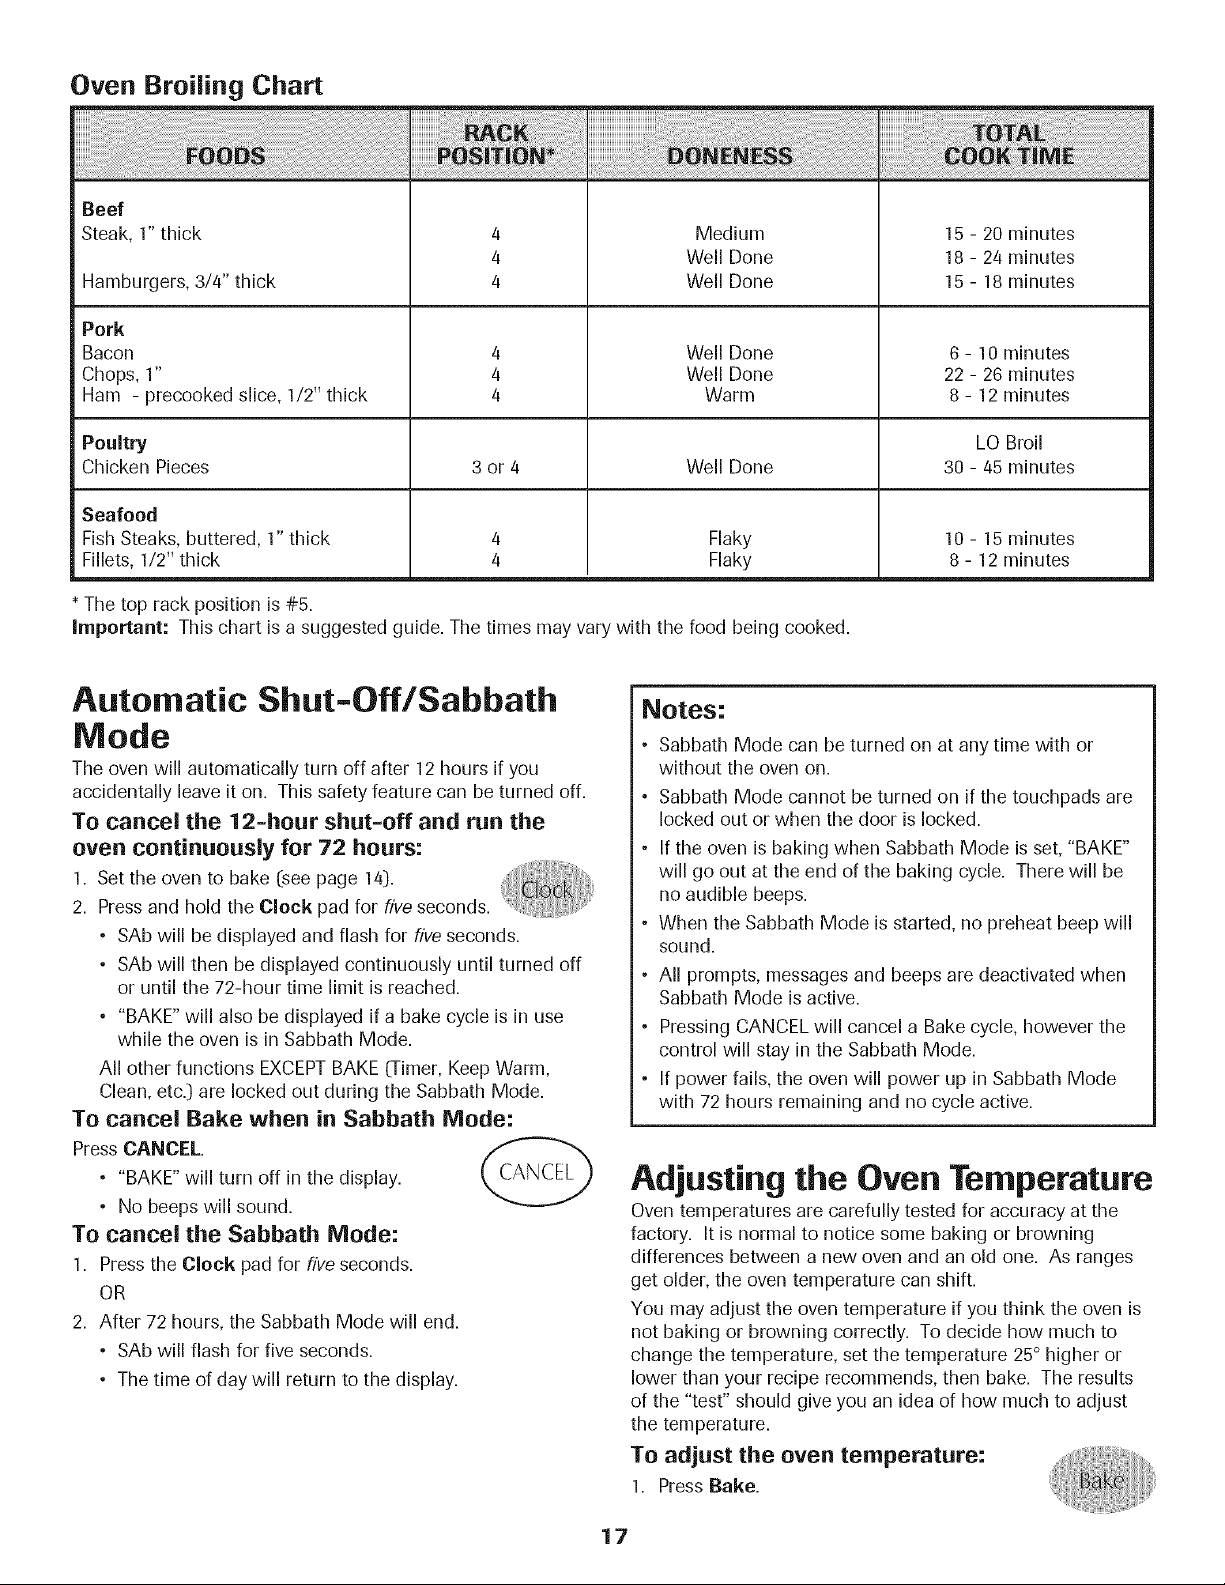
Oven Broiling Chart
Beef
Steak, 1" thick
Hamburgers, 3/4" thick
Pork
Bacon
Chops, 1"
Ham - precooked slice, 1/2" thick
4
4
4
Medium
Well Done
Well Done
Well Done
15 - 20 minutes
18 - 24 minutes
15 - 18 minutes
6 - 10 minutes
Well Done
Warm
22 - 26 minutes
8 - 12 minutes
Poultry LO Broil
Chicken Pieces 3 or 4 Well Done 30 - 45 minutes
Seafood
Fish Steaks, buttered, 1" thick
Fillets, 1/2" thick
Flaky
Flaky
* The top rack position is #5.
10 - 15 minutes
8 - 12 minutes
Important: This chart is a suggested guide. The times may vary with the food being cooked.
Automatic Shut-Off/Sabbath
Mode
The oven will automatically turn off after 12 hours if you
accidentally leave it on. This safety feature can be turned off.
To canoe[ the 12=hour shut-off and run the
oven continuously for 72 hours:
1. Set the oven to bake (see page 14].
2. Press and hold the Clock pad for five seconds.
• SAb will be displayed and flash for five seconds.
• SAb will then be displayed continuously until turned off
or until the 72-hour time limit is reached.
• "BAKE" will also be displayed if a bake cycle is in use
while the oven is in Sabbath Mode.
All other functions EXCEPTBAKE 0-imer, Keep Warm,
Clean, etc.) are locked out during the Sabbath Mode.
To cancel Bake when in Sabbath Mode:
Press CANCEL.
• "BAKE" will turn off in the display.
• No beeps will sound.
To cancel the Sabbath Mode:
1. Press the Clock pad for five seconds.
OR
2. After 72 hours, the Sabbath Mode will end.
• SAb will flash for five seconds.
• The time of day will return to the display.
Notes:
• Sabbath Mode can be turned on at any time with or
without the oven on.
• Sabbath Mode cannot be turned on if the touchpads are
locked out or when the door is locked.
• If the oven is baking when Sabbath Mode is set, "BAKE"
will go out at the end of the baking cycle. There will be
no audible beeps.
• When the Sabbath Mode is started, no preheat beep will
sound.
• All prompts, messages and beeps are deactivated when
Sabbath Mode is active.
• Pressing CANCEL will cancel a Bake cycle, however the
control will stay in the Sabbath Mode.
• If power fails, the oven will power up in Sabbath Mode
with 72 hours remaining and no cycle active.
Adjusting the Oven Temperature
Oven temperatures are carefully tested for accuracy at the
factory. It is normal to notice some baking or browning
differences between a new oven and an old one. As ranges
get older, the oven temperature can shift.
You may adjust the oven temperature if you think the oven is
not baking or browning correctly. To decide how much to
change the temperature, set the temperature 25° higher or
lower than your recipe recommends, then bake. The results
of the "test" should give you an idea of how much to adjust
the temperature.
To adjust the oven temperature:
1. Press Bake.
17
2. Enter 550° by pressing the More+ pad.
3. Press and hold the Bake pad for several More+
seconds or until O° appears in the display. ....................................
If the oven temperature was previously adjusted, the
change will be displayed. For example, if the oven tem-
perature was reduced by 15° the display will show "-15 °".
4. Press the Mare+ or Less= pad to adjust the temperature.
Each time a pad is pressed, the temperature changes by
5°. The oven temperature can be increasedor decreased
by 5° to 35°.
5. The time of day will automatically reappear in the display.
You do not need to readjust the oven temperature if there
is a power failure or interruption. Broiling and cleaning
temperatures cannot be adjusted.
Pilotless Ignition
Your range is equipped with pilotless ignition. With this type of
ignitionsystem, the gas automatically shuts off and the even
will nat operate during a power failure.
A lighted match will not light the oven burner. No attempt
should be made to operate the oven during a power
failure"
Oven Vent
When the oven is in use, the area near the vent may become
hot enough to cause burns. Never block the vent opening.
The oven vent is located below the backguard vent shield
on your range.
_ _ I OVEN VENT DO nat place
OCAT!ON plastics near the
vent opening as
heat from the vent
could distort or
melt the plastic.
Oven Light
Press tile Oven Light switch to turn the oven light on
and off.
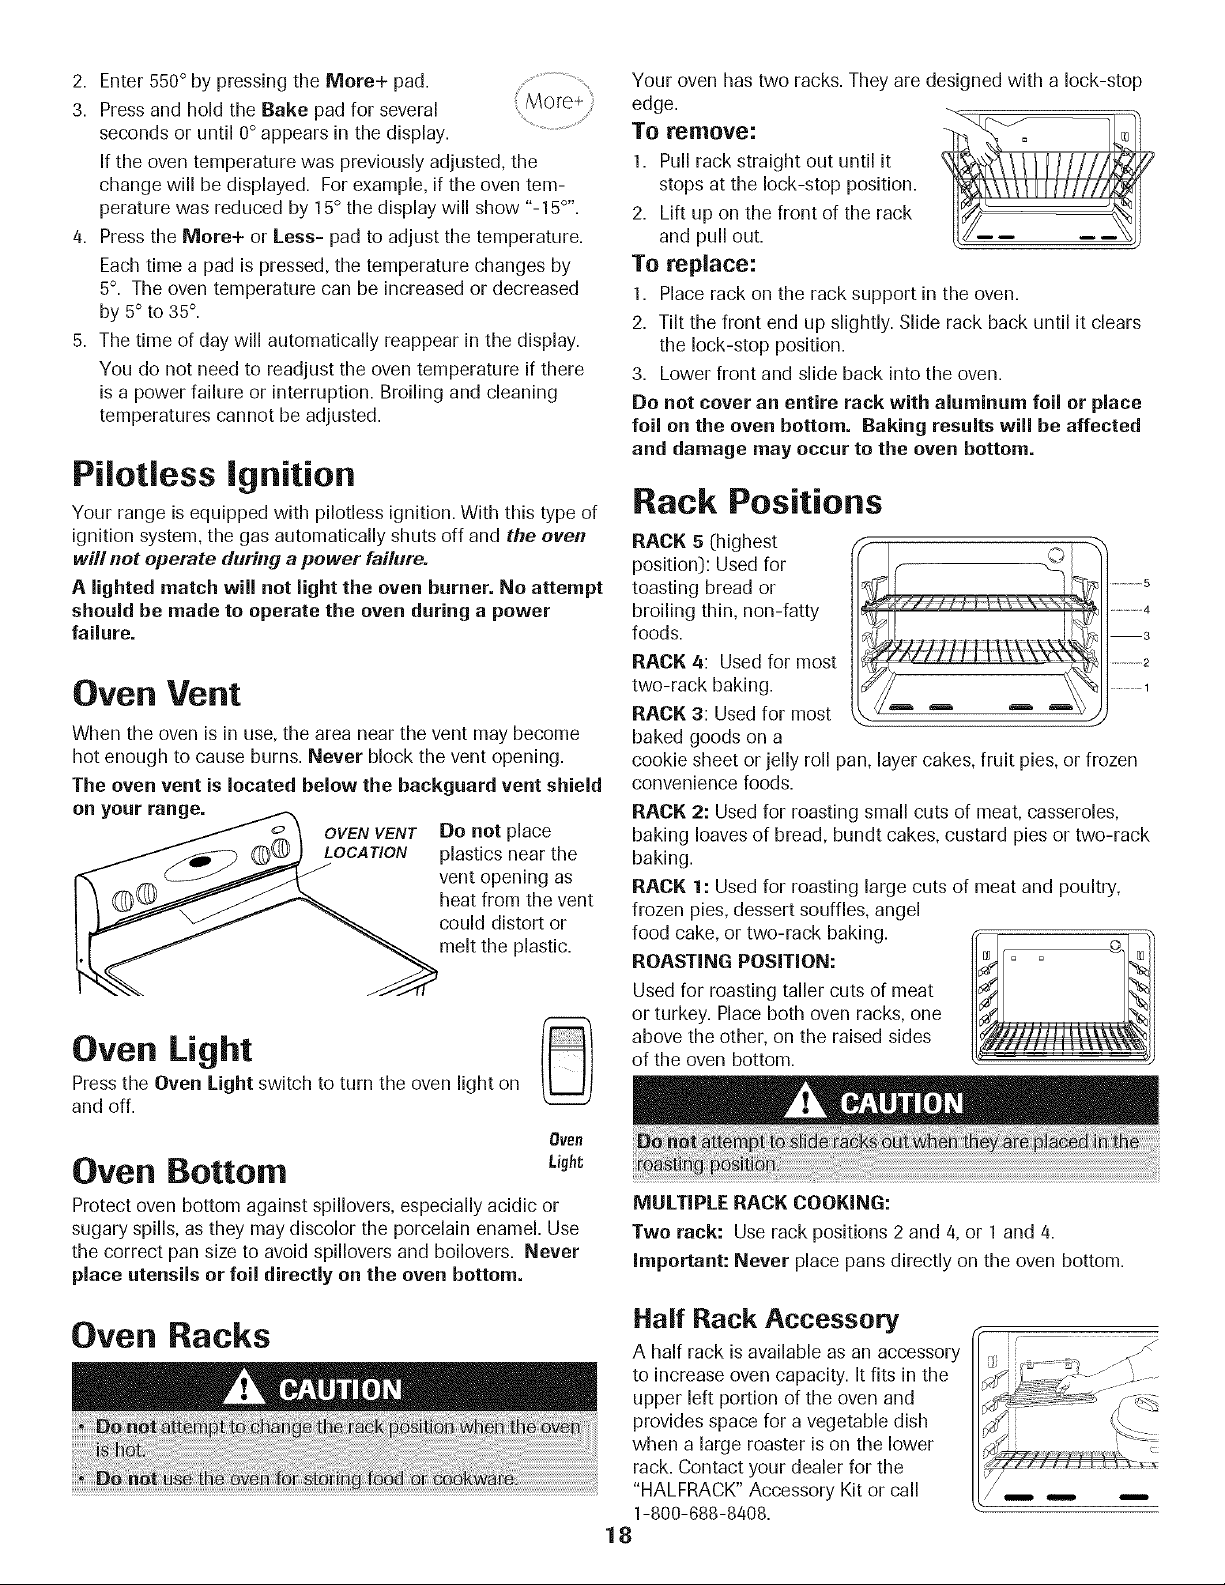
Your oven has two racks. They are designed with a lock-stop
edge.
To remove:
1. Pull rack straight out until it
stops at the lock-stop position.
2. Lift up on the front of the rack
and pull out.
To replace:
1. Place rack on the rack support in the oven.
2. Tilt the front end up slightly. Slide rack back until it clears
the lock-stop position.
3. Lower front and slide back into the oven.
De not cover an entire rack with aluminum foil or place
foil an the oven bottom. Raking results will be affected
and damage may occur to the oven bottom.
Rack Positions
RACK 5 [highest
position]: Used for
toasting bread or
broiling thin, non-fatty
foods.
RACK 4: Used for most
two-rack baking.
RACK 3: Used for most
baked goods on a
..............4
3
..................2
...............1
cookie sheet or jelly roll pan, layer cakes, fruit pies, or frozen
convenience foods.
RACK 2: Used for roasting small cuts of meat, casseroles,
baking loaves of bread, bundt cakes, custard pies or two-rack
baking.
RACK 1: Used for roasting large cuts of meat and poultry,
frozen pies, dessert souffles, angel
food cake, or two-rack baking.
ROASTING POSITION:
Used for roasting taller cuts of meat
or turkey. Place both oven racks, one
above the other, on the raised sides
of the oven bottom.
01/8n
Oven Bottom
Protect oven bottom against spillovers, especially acidic or
sugary spills, as they may discolor the porcelain enamel. Use
the correct pan size to avoid spillovers and boilovers. Never
place utensils or foil directly on the oven bottom.
MULTIPLE RACK COOKING:
Two rack: Use rack positions 2 and 4, or 1 and 4.
Important: Never place pans directly on the oven bottom.
Oven Racks
Half Rack Accessory
A half rack is available as an accessory
to increase oven capacity. It fits in the
upper left portion of the oven and
provides space for a vegetable dish
when a large roaster is on the lower
rack. Contact your dealer for the
"HALFRACK" Accessory Kit or call
1-800-688-8408.
18
i r
MAYTAG ®MAJOR APPLIANCE WARRANTY
LIMITED WARRANTY
For one year from the date of purchase, when this major appliance is operated and maintained according to instructions attached to or
furnished with the product, Maytag brand of Whirlpool Corporation or Whirlpool Canada LP (hereafter "Maytag") will pay for factory
specified parts and repair labor to correct defects in materials or workmanship. Service must be provided by a Maytag designated
service company. This limited warranty is valid only in the United States or Canada and applies only when the major appliance is used
in the country in which it was purchased. Outside the 50 United States and Canada, this limited warranty does not apply. Proof of
original purchase date is required to obtain service under this limited warranty.
ITEMS EXCLUDED FROM WARRANTY
This limited warranty does not cover:
1. Service calls to correct the installation of your major appliance, to instruct you on how to use your major appliance, to replace or
repair house fuses, or to correct house wiring or plumbing.
2. Service calls to repair or replace appliance light bulbs, air filters or water filters. Consumable parts are excluded from warranty
coverage.
3. Repairs when your major appliance is used for other than normal, single-family household use or when it is used in a manner that is
contrary to published user or operator instructions and/or installation instructions.
4. Damage resulting from accident, alteration, misuse, abuse, fire, flood, acts of God, improper installation, installation not in
accordance with electrical or plumbing codes, or use of consumables or cleaning products not approved by Maytag.
5. Cosmetic damage, including scratches, dents, chips or other damage to the finish of your major appliance, unless such damage
results from defects in materials or workmanship and is reported to Maytag within 30 days from the date of purchase.
6. Any food loss due to refrigerator or freezer product failures.
7. Costs associated with the removal from your home of your major appliance for repairs. This major appliance is designed to be
repaired in the home and only in-home service is covered by this warranty.
8. Repairs to parts or systems resulting from unauthorized modifications made to the appliance.
9. Expenses for travel and transportation for product service if your major appliance is located in a remote area where service by an
authorized Maytag servicer is not available.
10. The removal and reinstallation of your major appliance if it is installed in an inaccessible location or is not installed in accordance
with published installation instructions.
11. Major appliances with original model/serial numbers that have been removed, altered or cannot be easily determined. This warranty
is void if the factory applied serial number has been altered or removed from your major appliance.
The cost of repair or replacement under these excluded circumstances shall be borne by the customer.
DISCLAIMER OF IMPLIED WARRANTIES; LIMITATION OF REMEDIES
CUSTOMER'S SOLE AND EXCLUSIVE REMEDY UNDER THIS LIMITED WARRANTY SHALL BE PRODUCT REPAIR AS PROVIDED
HEREIN. IMPLIED WARRANTIES, INCLUDING WARRANTIES OF MERCHANTABILITY OR FITNESS FOR A PARTICULAR PURPOSE,
ARE LIMITED TO ONE YEAR OR THE SHORTEST PERIOD ALLOWED BY LAW. MAYTAG SHALL NOT BE LIABLE FOR INCIDENTAL
OR CONSEQUENTIAL DAMAGES. SOME STATES AND PROVINCES DO NOT ALLOW THE EXCLUSION OR LIMITATION OF
INCIDENTAL OR CONSEQUENTIAL DAMAGES, OR LIMITATIONS ON THE DURATION OF IMPLIED WARRANTIES OF
MERCHANTABILITY OR FITNESS, SO THESE EXCLUSIONS OR LIMITATIONS MAY NOT APPLY TO YOU. THIS WARRANTY GIVES
YOU SPECIFIC LEGAL RIGHTS, AND YOU MAY ALSO HAVE OTHER RIGHTS WHICH VARY FROM STATE TO STATE OR PROVINCE
TO PROVINCE.
If outside the 50 United States and Canada, contact your authorized Maytag dealer to determine if another warranty applies.
If you need service, first see the "Troubleshooting" section of the Use & Care Guide. After checking "Troubleshooting," you may find
additional help by checking the "Assistance or Service" section or by calling Maytag. In the U.S.A., call 1-800-688-9900. In Canada, call
1-800-807-6777.
9/07
Cuisini re gaz
/sin
instructions
importantes .......................................21 =24
Nettoyage ..........................................25=28
Four autonettoyant
M6thodes de nettoyage
Caisson duns le four .......................33=41
Commandos du four _ nettoyage manuel
Horloge Cuisson courante
Minuterie Gril
R_gulateur du four _ nettoyage manuel
Cuisson courante Gril
Entre|ion ............................................. 28=29 Commandos du four _ autonettoyage
Hublot et lampe du four
D6placement d'un appareil a gaz
Recherche des pannes .................... 30-31
Caisson sur la surface .................... 31=32
Commandes de la surface de cuisson
BrQleursscell6s
Horloge Minuterie
Cuisson courante Maintien au chaud
Cuisson et maintien Gril
Cuisson courante diff6r6 Grilles du four
Garantie et service apres=vente .............43
Guia de uso y cuidado ..............................44
Pour une utiiisation adequate et en s_curit_, il faut que
rappareil soit convenablement installe par un technicien
qualifi& et relic _ la terre. Ne pas regler, reparer ni remplacer
un composant, _ moins que cela ne soit specifiquement
recommande dans ce guide. Toute autre reparation dolt etre
effectuee par un technicien qualifi& Demander 8 rinstallateur
de montrer ou se trouve le robinet d'arret de gaz et comment le
fermer en cas d'urgence.
Toujours debrancher rappareil avant d'y faire de rentretien.
Instructionsde
s6curJteimponentes
Les instructions de securite importantes et les paragraphes
_avertissemenb>de ce guide ne sont pas destines _ couvrir
toutes les conditions et situations qui pourraient se presenter.
II faut faire preuve de bon sens, de prudence et de soin Iors de
rinstallation, de rentretien ou du fonctionnement de rappareil.
Toujours prendre contact avec le fabricant darts le cas de
problemes ou de conditions qui ne seraient pas comprises.
Reconnaitre los etiquettes, paragraphes et
symboles sur la s6curite
Life routes les instructions avant d'utiliser cot appareil;
observer toutes les instructions pour eliminer les fisques
d'incendie, choc electfique, dommages materiels et corporels
que pourrait susciter une utilisation incorrecte de rappareil.
Utiliser rappareil uniquement pour les fonctions prevues,
decfites dans ce guide.
Pour 6viter un incendie ou des
dommages par la fum6e
S'assurer que tous les materiaux de conditionnement sont
retires de rappareil avantde le mettre en marche.
Garder les materiaux combustibles, ressence et autres
matieres et vapeurs inflammables bien eloignes de rappareil.
Si rappareil est installe pres d'une fenetre, des precautions
appropriees doivent etre prises pour eviter que le vent entraine
les rideaux au-dessus des brQleurs.
NE JANIAI$ hisser des articles sur la table de cuisson. L'air
chaud de revent peut les enflammer et mettre egalement sous
pression des contenants fermes qui pourraient alors exploser.
21
De nombreux flacons d'aerosol peuvent EXPLOSERIorsqu'on
les expose _ la chaleur, et ils peuvent contenir un produit tres
inflammable. Eviter d'utiliser ou remiser un flacon d'aerosol
proximite de I'appareil.
De nombreux articles en plastique peuvent etre deteriores par
la chaleur. Conserver les articles en plastique _ distance des
composants de I'appareil susceptibles de devenir tiedes ou
chauds. Ne pas hisser des articles en plastique sur la table de
cuisson; un article en plastique trop proche de I'event du four
ou d'un brOleur allume pourrait s'amollir ou fondre.
Pour eliminer le besoin d'atteindre quelque chose par-dessus
les brOleurs de surface, il est preferable qu'il n'y air aucune
armoire de cuisine directement au-dessus de I'appareil. S'il y a
une armoire, on ne devrait y remiser que des articles peu
frequemment utilises et capables de resister _ la chaleur
emise par I'appareil. La temperature pourrait etre excessive
pour certains articles, comme liquides volatils, produits de
nettoyage ou flacons d'aerosol.
En cas d'incendie
Interrompre le fonctionnement de I'apparei[ et de la hotte de
ventilation pour minimiser le risque d'extension des flammes.
Eteindre les flammes, puis mettre la hotte en marche pour
evacuer la fumee et Fair vicie.
• Table de cuisson : Utiliser un couvercle ou une plaque
biscuits pour etouffer les flammes d'un feu qui se declare
dans un ustensiie de cuisine.
NE JAMAB saisir ou deplacer un ustensile de cuisine
enflamme.
• Four : Fermer la porte du four pour etouffer les flammes.
Ne pas projeter de I'eau sur un feu de graisse. Utiliser du
bicarbonate de sodium ou un extincteur _ mousse ou produit
chimique sec pour eteindre les flammes.
Instructions g6n6rales
Utiliser une lampe torche pour determiner si [a bride
antibasculement est convenablement installee sous la
cuisiniere. L'un des pieds arriere de reglage de I'aplomb doit
etre convenablement engage dans la fente de la bride.
Lorsque la cuisiniere est convenablement calee, la bride
antibasculement immobilise le pied arriere contre le sol.
Verifier la parfaite immobilisation de la cuisiniere par la bride
apres chaque depiacement de la cuisiniere.
S6curit6 pour les enfants
NE JAIVlAIS laisser des enfants seuls ou sans supervision
Iorsque I'appareil est en service ou encore chaud.
NE JAMAIS [aisser un enfant s'asseoir ouse tenir sur une
partie quelconque de I'appareil. II pourrait se blesser ou se
brOler.
I1est important d'enseigner aux enfants que [a cuisiniere et [es
ustensiles places dessus ou dedans peuvent ¢tre chauds.
Laisser refroidir les ustensiles en un lieu sot, hors d'atteinte
des enfants. II est important d'enseigner aux enfants qu'un
apparel[ menager n'est pas un jouet, et qu'iis ne doivent
toucher aucune commande ou autre composant de I'appareil.
Familiarisation avec I'appareil
22
Ne pas remiser des aliments ou ustensiles de cuisine sur la
table de cuisson ou dans le four.
L'event du four est situe _ la base du tableau de commande.
Eviter de toucher le voisinage de I'event du four Iorsque le four
est utilise et pendant piusieurs minutes apres I'arret du four.
Certains composants de ['event et la zone voisine peuvent
devenir suffisamment chauds pour provoquer des brQlures.
Apres I'arret du four, ne pas toucher I'event du four ou la zone
voisine avant que ces composants aient pu se refroidir
suffisamment.
Autres surfaces potentJellement chaudes: table de cuisson,
zones faisant face _ la table de cuisson, event du four, zones
voisines de I'event, porte du four et zones voisines de la porte
et du hublot.
Ne pas toucher rampoule chaude du four avec un linge
humide; le choc thermique pourrait la briser. Encas de bris de
I'ampoule, debrancher I'appareil de la source d'electricite avant
d'enlever I'ampoule, pour eviter un choc electrique.
Cuisson et s curit
Placer toujours un ustensile sur un brQleur de surface avantde
I'allumer. Veiller b bien connaitre la correspondance entre les
boutons de commande et les brQleurs. Veiller _ allumer le
brQleur correct et verifier que le brQleur s'allume
effectivement. A la fin de la periode de cuisson, eteindre le
brQleur avant de retirer I'ustensile, pour eviter une exposition
aux flammes du brQleur.
Veiller _ toujours ajuster correctement la taille des flammes
pour qu'elles ne d@assent pas sur la peripherie de I'ustensile.
Des flammes de trop grande taille sur un brQleur sont
dangereuses, elles entrai'nent un gaspillage d'energie et elles
peuvent faire subir des dommages _ I'ustensile, _ I'appareil ou
I'armoire situee au-dessus.
NE JAMAIS laisser un brQleur de surface allume sans
surveillance, particulierement avec une puissance de
chauffage elevee ou lots d'une operation de friture. Un
debordement pourrait provoquer la formation de fumee et des
produits gras pourraient s'enflammer. Eliminer des que
possible les produits gras renverses. Ne pas utiliser une
puissance de chauffage elevee _endant une periode
prolongee.
NE JAMAIS faire chauffer un recipient non ouvert dans le
four ou sur un brQleur de surface; I'accumulation de pression
dans le recipient pourrait provoquer son eclatement et de
graves dommages materiels ou corporels.
Utiliser des maniques robustes et seches. Des maniques
humides peuvent provoquer la formation de vapeur brQlante.
Nejamais utiliser un torchon b vaisselle ou autre article textile
b la place de maniques; un tel article pourrait trai'ner sur un
brQleur et s'enflammer, ou accrocher un ustensile ou un
composant de rappareil.
Laisser toujours refroidir un recipient d'huile de friture chaude
avant de tenter de le d@lacer et le manipuler.
Ne pas hisser la graisse de cuisson ou autre materiau
inflammable s'accumuler dans ou pres de I'appareil, de la
hotte ou du ventilateur de I'event. Nettoyer frequemment la
hotte pour empecher toute accumulation sur la hotte eile-
meme ou sur le filtre. Lots du flambage d'aliments sous la
hotte, mettre le ventilateur en marche.
NE JAMAIS porter, Iors de I'utilisation de I'appareil, des
vetements fairs d'un materiau inflammable, ou amples, ou
Iongues manches. De teis vetements peuvent s'enflammer ou
accrocher la poignee d'un ustensile.
Placer toujours les grilles _ la position appropriee dans le four
Iorsque le four est froid. Faire coulisser la grille vers I'exterieur
avant d'ajouter ou enlever un plat; utiliser pour ceia une
manique robuste et seche. Eviter d'introduire la main darts le
four pour y placer ou retirer un plat. S'il est necessaire de
d@lacer une grille Iorsqu'elle est chaude, utiliser une manique
seche. Veiller _ toujours arreter le four _ la fin d'une periode
de cuisson.
N'utiliser les grilles que darts le four darts lequel elles ont ete
achetees/expediees.
Ouvrir toujours la porte du four tres prudemment. Laisser Fair
chaud ou la vapeur s'echapper avant de retirer/introduire un
plat.
AVERTISSEMENT : Mets prepares : Respecter les
instructionsdu fabricant. Si le contenant ou le couvercle en
plastique d'un mets surgele se ddorme ou est endommage
durant la cuisson, jeter immediatementle recipient et son
contenu. Les aliments pourraient etre contamines.
NE JAMAIS garnir [a sole ou une grille du four avec de la
feuille d'aluminium. Ceci pourrait susciter un risque de choc
electrique ou d'incendie, ou une autre deterioration de
I'appareil. Utiliser de la feuille d'aluminium uniquement selon
les instructions de ce guide.
23
Ustensiles et s curit
Utiliser des ustensiles _ fond plat comportant une poignee
qu'on peut facilement saisir et qui reste froide. Eviter d'utiliser
un ustensile instable ou deform& qui pourrait facilement
basculer, ou dont la poignee est mal fixee. Eviter egalement
d'utiliser des ustensiles de petite taille comportant une
poignee Iourde; ces ustensiles sont generalement instables et
peuvent facilement basculer. Un ustensile Iourd Iorsqu'il est
rempli peut egalement etre dangereux Iors des manipulations.
Veiller b utiliser un ustensile de taille suffisante pour que le
contenu ne risque pas de deborder. Ceci est particulierement
important pour un ustensile rempli d'huile de friture. Verifier
que la taille de ['ustensile est suffisante pour qu'[I puisse
recevoir les produits alimentaires _ cuire, et absorber
I'augmentation de volume suscitee par I'ebullition de la
graisse.
Pour minimiser les risques de brQlure, d'infiammation de
matieres et de renversement par contact non intentionnel avec
un ustensile, ne pas orienter la poignee d'un ustensile vers un
brQleur adjacent; orienter toujours la poignee d'un ustensile
vers le cote ou I'arriere de I'appareil; ne pas laisser non plus la
poignee d'un ustensile deborder _ I'avant de Fappareil, ou un
jeune enfant pourrait facilement la saisir.
Veiller _ ne jamais hisser le contenu liquide d'un ustensile
s'evaporer completement; Fustensile et I'appareil pourraient
subir des dommages.
Appliquer los instructions du fabricant Iors de I'emploi d'un
sachet pour cuisson au four.
Seuls certains materiaux en verre, vitroceramique, ceramique,
ou certains ustensiles vitrifies/emailles peuvent etre utilises sur
la table de cuisson ou dans le four sans risque de bris sous
Ferretdu choc thermique. Observer los instructions du
fabricant Iors de I'utilisation d'un ustensile en verre.
La securite de fonctionnement de cet appareil a ete testee
I'aide d'ustensiles de cuisine conventionnels. Ne pas utiliser
un ustensile ou accessoire qui n'est pas specifiquement
recommande darts ce guide. Ne pas utiliser de couvre-
brQleur, gril place sur la table de cuisson ou systeme de
convection additionnel. L'utilisation d'un dispositif ou
accessoire qui n'est pas expressement recommande dans ce
guide peut degrader la securite de I'appareil ousa perfor-
mance, ou reduire la Iongevite des composants.
Nettoyage et securit6
Arreter toutes les commandes et attendre le refroidissement
de tous les composants avant de los toucher ou d'entre-
prendre le nettoyage. Ne pas toucher la grille d'un brQleur ou
la zone voisine avant que ces composants aient pu suffisam-
merit refroidir.
Exercer une grande prudence Iors du nettoyage de I'appareil.
Travailler prudemment pour eviter des brQlures par la vapeur
en cas d'utilisation d'un chiffon ou d'une eponge humide Iors
de I'elimination d'un produit renverse sur une surface chaude.
Certains produits de nettoyage peuvent generer des vapeurs
nocives Iorsqu'on los applique sur une surface chaude.
Four autonettoyant
(certains modeles)
Nettoyer uniquement les pieces mentionnees darts ce guide.
Ne pus nettoyer le joint de porte; le joint joue un r01e essentiel
quant _ I'etancheite. Ne pas frotter, endommager ou deplacer
le joint. Ne pas utiliser de produit de nettoyage du four darts
le four autonettoyant ou sur los zones voisines.
II est normal que la surface de cuisson devienne chaude
durant une operation d'autonettoyage; par consequent, eviter
de toucher la surface de cuisson durant Fautonettoyage.
Avertissement et avis
important pour la s curit6
La Ioi californienne _ Safe Drinking Water and Toxic Enforce-
ment Act >>de 1986 (proposition 65)stipule la publication par
le gouverneur de la Californie d'une liste de substances que
I'etat de Californie considere comme cancerigenes ou
dangereuses pour le systeme reproducteur, et impose aux
entreprises commerciales I'obligation de signaler _ leurs
clients los risques d'exposition _ de telles substances.
Les utilisateurs de cet appareil peuvent etre exposes _ une
faible concentration de certaines substances figurant darts la
liste mentionnee ci-dessus, dont benzene, formaldehyde et
suie, du fait de la combustion incomplete du gaz naturel ou du
gaz de petrole liqudie. Pour minimiser la combustion
incomplete, veiller _ ce que les brQleurs soient parfaitement
regles. Pour minimiser I'exposition 8 ces substances, veiller
bien evacuer los gaz de combustion _ I'exterieur.
Nous informons les utilisateurs de cet appareil que Iors d'une
operation d'autonettoyage, ils peuvent etre exposes _ une
faible concentration de certaines substances figurant darts la
liste mentionnee ci-dessus, dont le monoxyde de carbone.
Pour minimiser I'exposition, veiller _ ce que la piece ouse
trouve le four soit convenaNement aeree durant une operation
d'autonettoyage par I'ouverture d'une fenetre ou d'une porte.
AViS iMPORTANT - OISEAUX FAMILIERS :Les oiseaux ont
un systeme respiratoire tres sensible. Ne pas garder un oiseau
familier darts la cuisine ou darts une piece ou il pourrait etre
expose aux fumees. Les fumees emises durant une operation
d'autonettoyage peuvent etre dangereuses ou mortelles pour
un oiseau, de meme que los fumees emises Iors du chauffage
excessif de graisse, huile, margarine, et du chauffage excessif
darts un ustensile _ revetement antiadhesif.
Conserver cos instructions pour consultation uJt rieure
24

Four autonettoyant
(certains modeles)
Important : Pour la nettoyage manual voir le page 27.
5,
6,
Eliminerlos r_sidusde graisseou de produits renvers6ssur la
sole avantle nettoyage.Ceciemp6chela formation deflammes
ou de fum6edurant le nettoyage.
Essuyerlesr6sidus sucr6set acides,commeles patatesdeuces,
la tomato ou lossauces_ basede lait. Laporcelainevitrifi_e
poss_deune certainer6sistanceaux compos(_sacides,maisqui
n'est pas limit6e.Ellepout se d_colorersi los re!siriusacidesou
sucr6sne sent pas enlev6savantde commencerI'autonettoyage.
Prograramation de I'autonettoyage :
important :Latempc!raturedu four dolt 6tre situ6een dessousde
205° C [400° F) pour programmerun cycle d'autonettoyage.
1. Fermerla porte du four.
2. Placerla manettede verrouillage_ la positionde verrouillage.
L'autonettoyageutilise des temperaturessupc!rieures_ celles de la
cuissonnormalepour nettoyerautomatiquementI'int6rieur du four.
Ne forcez pas la porte du four nile levierde verrouillagepour los
ouvrir.Cecipout provoquerune exposition_ des tempc!ratures
c!levc!es,et donc pr6senterun risquede br01ure.
Lefour dolt 6tre nettoy_rc!guli_rement.Losc!claboussuresdoivent
6tre essuyc!espour _viterune production excessivede fum6e ou
I'apparitionde flammes.Ne laissezpas de rc!siduss'accumulerdans
le four.
Durant le processusd'autonettoyage,il convient de bien a6rer la
cuisinepour c!liminerlos odeursnormalement6misesdurant le
nettoyage.
Avant I'autonettoyage
1. Eteindrela lampe du four avantle nettoyage.Ellerisqueraitsinon,
degriller.
2. Enleverla I_chefrite,tous los platset lesgrilles du four. Los grilles
risquentdese ti!!colorer et de ne plus glisseraussibienapr_sun
cycled'autonettoyagesi on neles enl_vepas.
3. Nettoyerle cadre du four, le cadrede la
porte,lazone _ I'ext6rieurdu joint et
autourde I'ouverturedarts le joint de la
porte,a I'aided'un produit de nettoyage
nonabrasifcomme BenAmi* ou d'eau
additionn6ede d(gtergent.Leprocessus
d'autonettoyagene nettoie pascos
zones.Ellesdoivent6tre nettoy6espour
emp6cherla saletc!de s'incruster pendantle cycle de nettoyage.
[Lejoint assureI'c!tanch_it6autour de la porte et du hublot du
four.)
4. Pouremp6chertout dommage,ne pas nettoyerni frotter lejoint
qui setrouve autour de la porte du four. Cejoint est con_u pour
_viterles pertesde chaleur pendant lecycle d'autonettoyage.
\
3. Appuyer sur latouche Clean (Nettoyage).
• Le motCLEANclignotea I'afficheur.
Sila porte n'est pasferm6e,des bips retentissentet le mot DOOR
(PORTE)parait a I'afficheur.Si la porte n'est pas ferm_edanslos
45secondes,I'opc!rationd'autonettoyageest annulc!eet
I'afficheur revient_ I'heuredu jour.
4. Appuyer sur latouche More + (Plus+) ou Less= More+
(Moins-)........................
• CL-M [Nettoyage- saletc!moyenne)est affich&
tess-
5. Appuyer sur latouche More + ou Less- pour voir
ti!!filer los diff6rentsr_glagesde I'autonettoyage.
CL-H [Nettoyage- salet8importante,4 heures]
CL-M (Nettoyage- salet_!moyenne,3 heures)
CL-L (Nettoyage- salet_I_g_re,2 heures]
Lechoix du niveaude salet_du four programme
automatiquementladuroc du cycle d'autonettoyage.
6 Apr_s quatre secondes,le four commencele nettoyage.
• Ladur_!ede nettoyagecommencele d_comptea I'afficheur.
• Le motLOCKparait _ I'afficheur.
• Le motCLEANparait a I'afficheur.
D_raarrage diff_r_ d'un cycle d'autenetteyage :
1. Appuyer sur latouche Delay [D_marragedifferS).
• Le motDELAY[Attente) clignote.
• 00:00parait _ I'afficheur.
*Lesnomsde marquedes produits de nettoyagesentdes marquesd_!pos6esdes diff,!rentsfabricants.
25
2. Appuyer sur la toucheMore + (Plus+) ou Less-
(Moins-] pour programmerla durCed'attente , More+
avantque ne commencele cycle.La durCe ................................
d'attentepeut 6tre rc!gk!e,de dix minutes(00:10)
) onzeheures,cinquante-neufminutes [11:59).
3. Appuyer sur la toucheClean (Nettoyage).
4 ..........................
• Lemot CLEANva clignoter.
4. Appuyer sur la toucheMore + ou Less-. ...............................
• CL-M [Nettoyage- salet8 moyenne]est affich&
5. Appuyer sur la toucheMore + ou Less- pour voir driller les
diffCrentsrc!glagesde I'autonettoyage.
CL-H(Nettoyage- salet6importante,4 heures)
CL-M [Nettoyage- salet6 moyenne,3 heures]
CL-L (Nettoyage- salet8 16g_re,2 heures)
Lechoixdu niveaude salet6du four programme
automatiquementladurc!edu cycled'autonettoyage.
6. Apr_s quatre secondes,les rootsCLEAN,DELAY(Attente]et
LOCK(Verrouillage)paraissent_ I'afficheur pour indiquerque le
four est programm6pour uneop@ationde nettoyagediffCrc!.Le
temps d'attente parait_ I'afficheur.
Sile four esttr_s saleou si la I_chefritea c!tc!laissc!eduns le four, il
pout y avoir productionde fumc!e.
Bruits
Pendantque le four chauffe,il pout se produiredes bruitsde m_tal
en dilatationou en contraction.Ceciest normal et n'indique pus que
le four s'abime.
Apres le cycle d'autonettoyage
Environune heureapr_s la fin du cycle, le mot LOCKs'_teint. Ace
moment,laporte peut 6tre ouverte.Pousserla manettede la porte
verslagauche pourdCverrouiller.
La salet6 pout avoir laiss6 un rCsidugris poudreux.L'enlever
avecun linge humide.S'il restede la salet(!,cola indique que le cycle
de nettoyagen'a pus 6t6 assezlong. Cettesalet6restantesera
enle%eau prochain cycled'autonettoyage.
Si losgrilles ont 6t6 laissCes_ rintCrieur du four pendant le
cycle d'autonettoyage et qu'elles glissent real sur leurs sup-
ports, losenduire,ainsi que los supports,d'une fine couched'huile
vCg(!tale.
De fines lignespeuvent apparaitre duns la porcelaineparce
qu'elle a subi chaleur et refroidissement.Ceciest normal et
n'affecterapus la performance.
Line dCcoloration blanche peut apparaitre apr_s le nettoyage
si des aliments acJdesou sucrCsn'ont pas 6t6 enlev_s avant
quene commencerautonettoyage. Lati!!coloration estnormale
et n'affecterapus la performancedu four.
Si le four a dej_ ere programme pour un cycle de
nettoyage et que I'on desire etablir un delai :
1. Appuyer sur la toucheDelay [DemurragedifCrCe].
, Lemot DELAYclignote.
, 00:00parait _ I'afficheur.
2. Appuyer sur la toucheMore + ou Less=pour ........................................
programmerladurCedc!sirc!ede I'attenteavantque More+
nedc!butele cycle. '...................................
Apr_s quatre secondes,los rootsCLEAN,DELAYet LOCK
paraissenta I'afficheurpour indiquer que le four est programm6
pourune opCrationde nettoyagediffc!rc!.Letemps d'attente
parait a I'afficheur.
Lorsque le cycle d'autouettoyage debate :
° Lemot DELAYs'Cteint.
, Ladurc!ede nettoyageparait a I'afficheur.
Annulation de cycle d'autonettoyage :
Appuyersur la touche CANCEL(Annule0.
• Tous los roots disparaissentde I'afficheur.
• Touteslos fonctions sont annulc!es.
, L'heuredu jour parait_ I'afficheur.
Pendant le cycle d'autonettoyage
Lorsquele mot LOCKparafta I'afficheur,la porte ne peut _tre
ouverte.Pour6viterd'endommagerla porte,ne pas forcer la porte
pour I'ouvrir IorsqueLOCKestaffichc!.
Fumee et odeurs
La premierefois oL'Jlefour est nettoy_!,il peut y avoir production
d'odeur et defum_e.Ceci eat normalet disparaitra_ I'usage.
Reilrlarql.|es :
• Si la porte du four n'est pus ferm_e,le mot DOOR(Porte)
clignote_ I'afficheur et lefour _!metdes bips jusqu'a ce que la
porte soitferm_!eet que I'onappuiea nouveausur Clean.
• S'il s'_!couleplus de cinq secondesentre le momentot_I'on
appuiesur Cleanet celui oQI'on appuiesur la touche
More + ou Less-, I'afficheur retourneautomatiquement
I'affichagepr_!c_!dent.
, La portedu four se trouvera endommag_esi I'on forceson
ouverturealors que le mot LOCKestencore affich&
M thodes de nettoyage
2B
L_chefriteet sa grille
Ne jamais couvrir la grille de papier d'aluminium;cela
emp_che la graisse de ceuler dunsla I_chefrite.
° Recouvrirla I_chefriteet sa grille d'un linge savonneux;laisseragir
pour d_!tacherlos r_sidus.
° Laveravecde I'eausavonneusetilde. Utiliserun tampon _ r_curer
pour _!liminerlessouillurestenaces.
• OnpeutplacerlesdeuxcomposantsdelaI_chefritedunsun
lave-vaisselle.
Br_leurs_gazscell_s
• Nettoyerfr_quemment.LaisserlebrMeurrefroidir.Nettoyeravec
dusavonetuntampon_r6curerdeplastique.Pourdessouillures
tenaces,utiliserunproduitdenettoyagenonabrasifavecun
chiffon.Eviterdelaisserleproduitdenettoyages'introduiredans
lesorificesdesortiedugaz;cecipourraitaffecterlacombustion
dugaz.Sileproduitdenettoyagepdn_tredanslesorifices,
nettoyeravecunpinceausoupleouunebrochedroite,
particuli_rementI'orificesitudau-dessousdeI'allumeur.Veiller
nepas ddormer ou agrandirles trous.
• Veiller_ ne paslaisser de I'eaus'introduire dans lesorifices du
brt31eur.
• Proc6derprudemmentIors du nettoyagede I'allumeur.Le brOleur
ne s'allumerapassi I'allumeurest mouill6 ouendommag&
Grillesdes br_leurs
• Laverles grilles avecde I'eausavonneusetilde et un tampon
rc!curerdeplastiquenon abrasif.Pourles souillurestenaces,
nettoyeravec une@onge ou un tampon non abrasifsavonneuxet
la CooktopCleaningCreme (produit n° 20000001)**.
• Pourles r_sidusalimentairescarbonis_s,enleverlos grilles pour
les placersur du papier-journal,et pulv6riser prudemmentun
produit commercialde nettoyagede four (he pus projeterle
produit sur lasurface environnante).Placerlos grilles dartsun
sachetde plastique pendant plusieurs heuresou pendantune
nuit. Porterdes gants de caoutchoucet retirer los grilles du
sachet.Lavedrincer/faires6cheret r6installerlosgrilles sur la
table de cuisson.
Zone de la console de commando et horloge
• Pourutiliser lafonction Verrouillagedes commandospour le
nettoyage,voir page36.
• Laver,rincer et faire sdcher.Ne pus utiliserun agent de nettoyage
abrasifsusceptiblede rayerla finition.
• On pout utiliserun produit de nettoyagedu verre,pulvdris6
d'abord sur un chiffon.NE PASprojeter le produit directement
sur los touchesde commande ou sur I'afficheur.
Boutons de cornrnande
• Placerchaquebouton _ la positiond'ARRET,et retirer chaque
bouton en le tirant.
• Laver,rincer et faire s6cher.Ne pus utiliser un agent de nettoyage
abrasifsusceptiblede rayerla finition.
• Fairefonctionner bri_vementchaquebrMeur pour v_rifier que le
bouton a 6td correctementrc!install&
Table de cuissonet tableau de commando=_rnail vitrifi_
L'c!mailvitrifi_ est du verre lid au mc!talpar fusion. II pout se fissurer
ou s'_cailleren casde mauvaiseutilisation. II est r6sistantaux
acides,mais pustotalement inattaquablepar los acides.Tous los
produitsrenvers6s,en particulieracidesou sucr6s,doivent6tre
essuy6simmddiatementavecun lingo sec.
• Une lois refroidi,laveravec de I'eausavonneuse,rincer et s6cher.
• Ne jamais essuyerunesurface tilde ou chaudeavec un linge
humide.Cecipourrait lafissurer ou I'c!cailler.
• Ne jamais utiliserde nettoyantspour four,d'agents de nettoyage
caustiquesou abrasifssur le fini extc!rieurde la cuisini_re.
Panneaux lat_raux,tiroir de remisage, porte du gril inferior et
poign_esde porte =_mail point
• Une fois lespi_ces refroidies,les lavera I'eausavonneusetilde,
rincer et sdcher.Ne jamais essuyerune surfacetilde ou chaude
avecun linge humide,ceci pouvantendommagerla surfaceet
entrafnerune brQlurepar lavapeur.
• Pourlestaches rebelles,utiliser des agents de nettoyage
I_g_rementabrasifscommela p_te au bicarbonatede soudeou
BonAmi*. Ne pas utiliser de nettoyantsabrasifs,caustiquesou
dnergiquescomme les nettoyantspour four ou lestampons en
lained'acier. Cesproduits raieraientou endommageraientde
fagonpermanentela surface.
Important: Utiliser un linge ou un torcflen sec pour essuyer
les produits renvers_s, surtout s'ils sent acides ou sucres. La
surface pourrait se d_co/orer ou se ternir si la sa/et_ n'_tait
pus imm_diatement en/ev_e. Ceciest particuli_rement
important dunslecas de surfaces blanches.
Hublot et porte dufour en verre
• Eviterd'utiliser trop d'eau,qui risqueraitde s'infiltrer sousou
derriereleverre et detacher. Laver_ I'eauet au savon.Rincer
avecde I'eaupropre et sdcher.Un produit de nettoyagedu verre
peut 8tre utilis_ en levaporisantd'abord sur un lingo.
• Ne pusutiliser de produitsabrasifscommetamponsa rdcurer,
lained'acier ou produit de nettoyageen poudrequi risqueraient
de rayerle verre.
Int_rieur du four
Fourautonettoyant:
• Exdcuterles instructionspr_sent_esaux pages25-26 pour
I'autonettoyagedu four.
Nettoyage manual:
• Nettoyerfrdquemmentavecun tampon de plastiqueet un produit
de nettoyagemoyennementabrasif.
• Ne pus utiliser un tampon_ r_curer m_tallique,qui formerait des
rayuressur lasurface.
• Lors de I'emploid'un produit commercialde nettoyagede four,
appliquerlos instructionsdu fabricant.
• Eliminerd_sque possiblelos produitsacidesrenvers_s(produits
basede lait ou de tomato) avec eau et savon;cos produits peuvent
faire changer lacouleur de I'dmail Iorsd'un contactprolong_!.
Pour faciliter le nettoyage,on peut enlever la porte du four.
(Voir lasection Entretien,page28.)
Grillesdu four
• Nettoyeravecde I'eausavonneuse.
• Eliminerles souillurestenacesavecunepoudre de nettoyageou
un tampona rdcurer savonneux.Rinceret faire sdcher.
• Siles grilles sont laissdesdunsle four pendant le cycle
d'autonettoyage,ellesse d_colorentet peuventne plus tr_s bien
glisser.Si cecise produit,appliquerpar essuyageun peu d'huile
vdg_talesur la grille et sessupports en relief pour faciliter le
mouvement,et enleverI'excSsd'huile.
Acier inoxydable(certainsmodules)
• NE PAS UTILISERDE PRODUITSDENETTOYAGE
CONTENANTBU JA VELL/SANT
• NE PAS UT/LISERDE NETTOYANTS_ ORANGE_ OU
ABRASIFS.
• TOUJOURSESSUYERDANS LE SENSDE LA TEXTUREDE
L'ACIERLORSDU NETTOYAGE.
* Lesnoms de marquesont des marquesd@os_esdes diffdrentsfabricants.
** Pourcommanderdirectement,composerle 1-877-232-6771 E.-U.ou 1-800-688-8408 Canada.
27

• Netteyagejournalier/salet_ 16g_re= EssuyeravecI'un des
produitssuivants:eausavonneuse,vinaigreblanc/eau, produit de
nettoyagepourverre et surface Formula409* ou un produit
semblablepourverre - avecun lingo soupleet une 6ponge.Rincer
et s6cher.Pour polir et enleverlosmarquesdedoigts,faire suivre
par unevaporisationde MagicSpray*pouracier inoxydable
(produit n° 20000008_**.
• Salet6 rnod6r6e/6paisse=EssuyeravecI'un des produits
suivants:BenAmi*, SmartCleanse€ou SoftScrub* - _ I'aided'un
lingosouple ou d'une c!pongehumide.Rincer et s6cher.Los
tachesrebellespeuvent 6tre enlevc!esavecuntampon multi-
usages Scotch-Brite*humidifi6. Frotteruniform6mentdans le
sensdu m6tal.Rincer et s6cher.Pour redonnerdu lustre et retirer
los rayures,faire suivrepar unevaporisationde Magic Spray*pour
acier inoxydable.
• D6coloration=A I'aided'une c!pongehumidifk!eou d'un lingo
souple,essuyer_ I'aide du nettoyantCameo_ pour acier
inoxydable.Rincerimmc!diatementet s6cher.Pourenleverlos
marqueset redonnerdu lustre,faire suivrepar unevaporisationde
Magic Spray*pour acier inoxydable.
Porte du four
D6pose de la porte :
1. Apr_s le refroidissementdu four,ouvrir la
porte - positionde cuissonau gril (porte
entrouverted'environ 10 cm [4 pouces]).
2. Saisir la portede chaque c6t6.Ne pas
utiliserla poign_ede porte pour la
soulever.
3. Souleveruniformc!mentpour d_gagerla porte des charni_res.
R_installation :
1. Saisir la portede chaque c6t6.
2. Aligner les fentes avecles bras de charni_resur la cuisiniSre.
3. Fairedescendrela porte pourla positionnercorrectementsur los
charni_res.Poussersur los anglessupc!rieursde la porte pour
renfoncercompl_tementsur los charni_res.IIfaut que la porte
soit parfaitementd'aplomb.
important : On peut percevoirune certaine_lasticit6_ lots de
lafermeture de la porte du four d'une cuisini_reneuve;ceci est
normal;cot effet disparaitprogressivement.
Hublot du four
Pour prot6ger le hublot de la porte du four :
11 Ne pas utiliser de produits nettoyantsabrasifscommedes
tampons a rc!cureren laine d'acier ou des produitsde nettoyage
en poudrequi risqueraientde rayerle verre.
2. Ne pas heurter le hublot en verre avec un ustensile,un article de
mobilier,un jouet,etc.
3. Ne pas former la porte du four avant que losgrilles ne soient en
place dartsle four.
Toutede!gradatiOndu hublot de verre- rayure,choc,tension, etc. -
pout affaiblir sa structureet augmenterle risque de bris _ unedate
ultc!rieure.
Lampe du four
Pour rempiacer i'ampoule du four :
1.Apr_s le refroidissementdu four,
CABOCHON
maintenirlecabochontout en
enlevantla piece m6talliquequi
la maintienten place.
important : Lecabochon
tomberasi on ne le maintient
pas en place.
2. Enleverlecabochonet
rampoule.
3. Installerune ampoulede 40 watts pour appareil m6nager.
4. R6installerlecabochonet lefil mc!talliquede retenue.
5. R_tablirI'alimentationde lacuisini_re.R6glerde nouveau
rhorloge.
RESSORT DE RETENUE
Cfi/m6ta/lique)
28
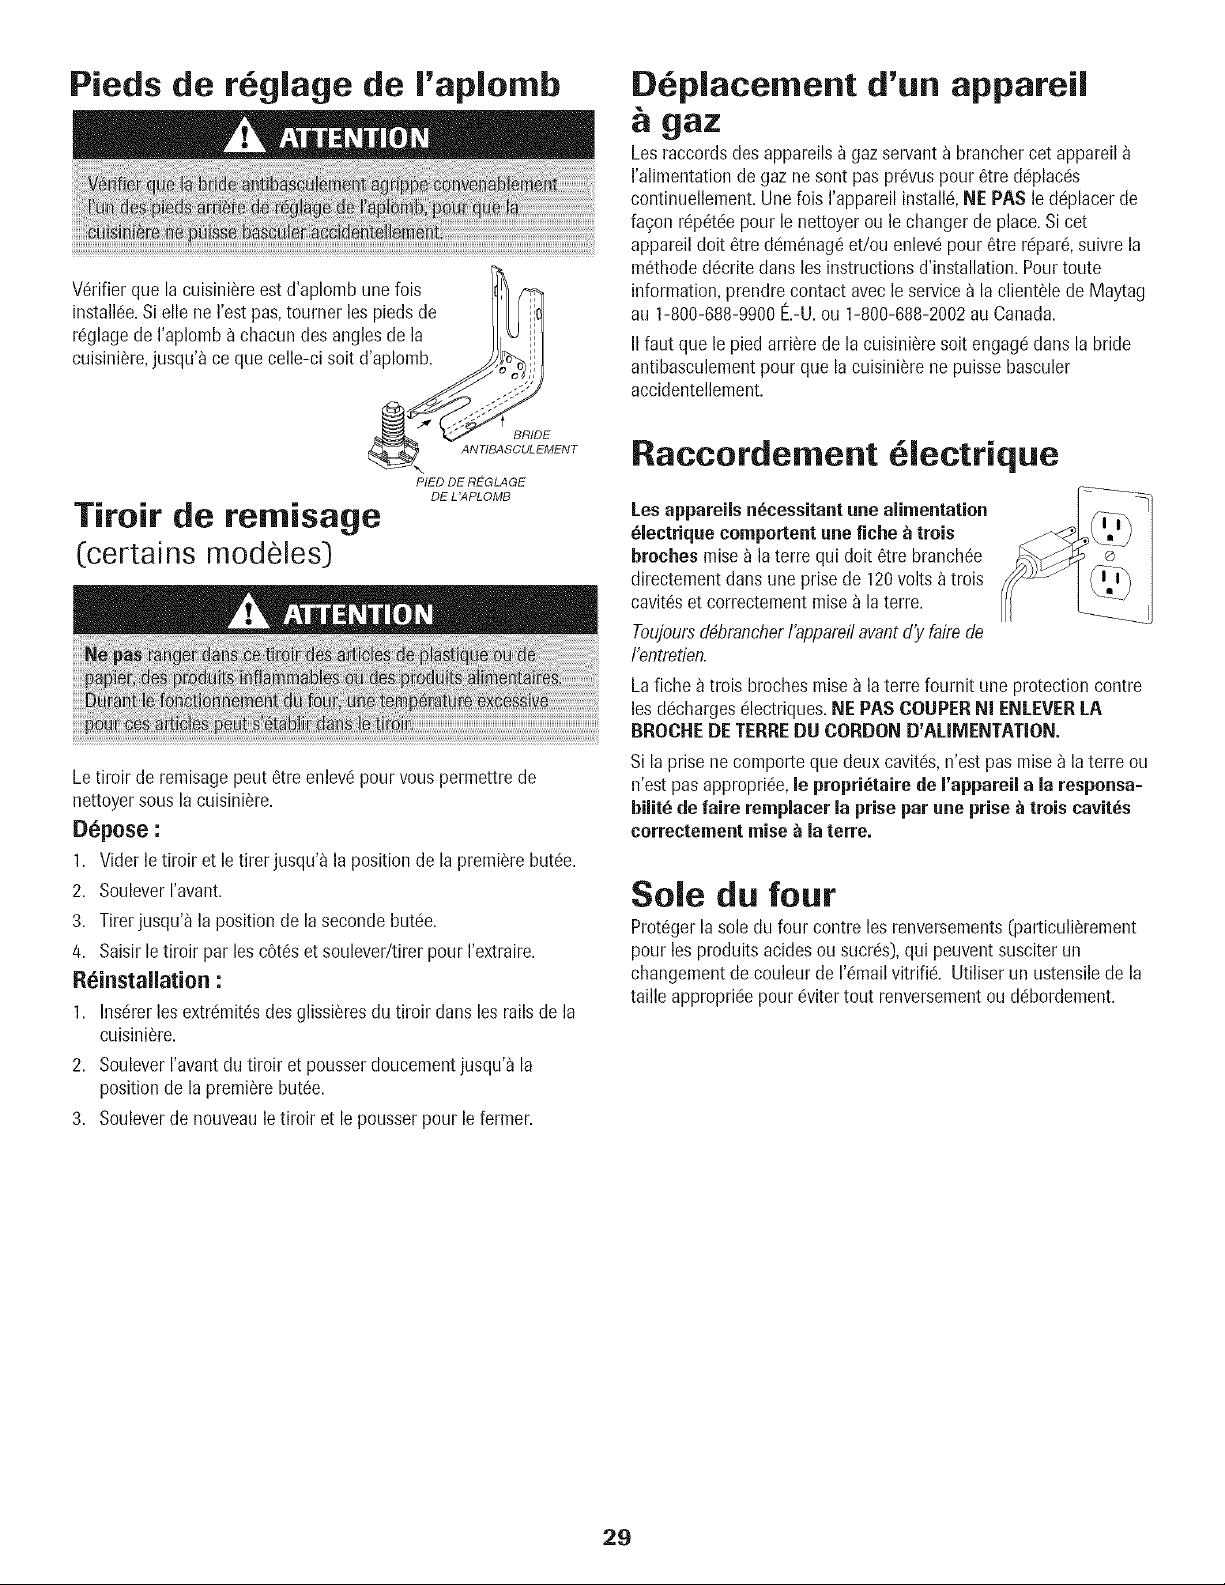
Pieds de r glage de I'aplomb
V6rifierque la cuisini_reest d'aplombune lois
installde.Sielle ne I'estpus, tourner les pieds de
r6glagede I'aplomb _ chacundes anglesde la J I
cuisini_re,jusqu'_ceque celle-ci soit d'aplomb. _;,//
&_TIBASI_EMENT
PIED DE R_-:GLAGE
DE L 'APLOMB
Tiroir de remisage
(certains modeles)
Letimir de remisagepeut 6tre enlevd pourvouspermettrede
nettoyersous la cuisiniSre.
D_pose :
1. Vider letiroir et le tirer jusqu'_ la positionde la premierebut6e.
2. SouleverI'avant.
3. Tirerjusqu'_ laposition de la seconde but6e.
4. Saisir letiroir par les c6t6s et soulever/tirerpour I'extraire.
R_installation :
1. Ins6rerles extrc!mit6sdes glissi_resdu tiroir duns los rails de la
cuisini_re.
2. SouleverI'avantdu tiroir et pousserdoucementjusqu'a la
positionde la premierebut6e.
3. Souleverde nouveauletiroir et le pousserpour le former.
[} placement d'un appareil
gaz
Les raccordsdesappareils_ gazservanta branchercetappareil
I'alimentationde gazne sont pas pr_vuspour 6tre d@lacds
continuellement.Une lois I'appareilinstalld,NE PAS le ddplacerde
fa_on r@6tde pourle nettoyerou lechanger de place.Sicet
appareildolt 6tre ddm6nag6et/ou enlevdpour 6tre r@ar6,suivre la
m6thoded6critedans les instructionsd'installation.Pourtoute
information,prendrecontact avecleservicea la clientele de Maytag
au 1-800-688-9900E.-U.ou 1-800-688-2002au Canada.
IIfaut que le piedarriSrede la cuisini_resoitengagddans la bride
antibasculementpour que lacuisinidrene puissebasculer
accidentellement.
Raccordement lectrique
Losappareils n_cessitantune alimentation
_lectrique comportent unefiche _ trois
broches raisea la terre qui dolt 6tre branch6e
directementduns une prise de 120volts a trois
cavit6set correctementraisea la torte.
Toujoursd4brancherI'appareilavantd'yfaire de
I'entretien.
Lafiche a trois brochesraisea la terre fournit une protectioncontre
les ddchargesdlectriques.NE PAS COUP[R NI ENL[VERLA
BROCHEDE T[RRE DU CORDOND'AUMENTATION.
Si laprise ne comporteque deux cavitds,n'est pas mise_ la terre ou
n'est pus appropri6e,le propri_tairede I'appareil a la responsa=
hiiit_ de fake remplacer la prise par une prise _ trois cavit_s
correctement raise_ la terre.
Sole du four
Prot6gerla sole du four contre los renversements_articuli_rement
pour los produitsacidesou sucres),qui peuventsusciterun
changementde couleur de 1'6mailvitrifid. Utiliser un ustensilede la
taille appropridepourdvitertout renversementouddbordement.
29
Becherchedes
Pour la plupart des problbmesobserv6s, essayerd'abord los
solutionspossibles,_ droite.
• VCrifierque los cornrnandesdu four sont correcternentrCglCes.
• VCrifiersi la fiche est bieninsCr_eclanslaprise.
• Inspecter/rCarrnerle disjoncteur.Inspecter/rernplacerlosfusibles.
• Contr61erlasourced'alirnentation61ectrique.
Un br_leur de surface ne s'allume pas.
• VCrifierque I'appareilest correcternentraccord6_ la source
d'61ectricit&
• Dc!terrninersi I'alirnentation61ectriqueest interrompue(fusible
grillc!/disjoncteurouvert].
• VCrifierque I'allurneurest sec et qu'il 6rnetdes 6tincelles.Le
brQleurnepout s'allurnersi I'allurneurestendornrnagC,souill_ou
rnouill_.Si I'allurneurne gCn_repas d'Ctincelles,rarnenerle
bouton de commando_ la positionOFF(ArrCt).
Flammesnon uniformes.
• Orificesdu brQleurobstruCs.
SCparation entre losflammes et le brQleur.
• Veiller_ placercorrectementI'ustensilesur la grille du brQleur.
R6suJtatsde cuissonau four diff6rents des attentes ou de
ceux produitspar le four ant6rieur.
• VCrifierque la ternpCraturesClectionnCeestcorrecte. Veiller
pr_chaufferle four si ceci est dernand6dartsla recette.
• DCterrninersi 1'Cventdu four est obstruC.Voir son emplacement
page40.
• S'assurerque lacuisini_re est d'aplomb.
• Los rCglagesde ternpCraturevarientsouvententre un four neuf et
le four qu'il rernplace.On observesouventune d@ivedu rCglage
de ternpCratured'un four _ mesurequ'il vieillit; il pout devenirplus
chaud ou rnoinschaud.Voir page40 los instructionsd'ajusternent
de latempCraturedu four (certainsmodules],important :11n'est
pas utile de modifier le rc!glagede temp@aturesi la variation
n'affecte qu'uneou deux recettes.
• Utiliser los bonsustensiles.Los ustensilesfoncCsdonnent un
brunissementdecouleur foncCe,los ustensilesbrillants,un
brunissementplus clair.
• VCrifierla positiondesgrilles et des ustensiles. Lorsde la
r@artition sur deux grilles,ne passuperposerlos plats. Veiller
laisserun espacede2,5 a 5 crn (1a 2 pc) entre los plats et los
patoisdu four.
• Contr61erI'utilisationde feuille d'aluminium darts le four. Ne
jamais recouvrircompl_ternentune grille du four avecde la
feuille d'alurniniurn.Placerun petit morceaude feuille d'alurniniurn
sur la grille sousle plat pour rc!cupCrerlos rnati_resrenversCes.
R6sultatsincorrects lotsde la cuissonau gril, ou 6mission
excessivede fum6e.
° DCterrninerla position des grilles. Lesalimentspeuvent6tre trop
pros desflarnrnes.
• Utilisationincorrectede feuille d'aluminium.Ne jamais garnir la
grille de I_chefriteavecde la feuille d'aluminium.
• EnleverI'excSsde graissesur la piece deviandeavant la cuisson
au gril.
• Utilisationd'une I_chefritesouillCe.
• Pr_chaufferle four pendantdeux a 2 a 3 minutesavantde placer
le plat clansle four.
• Portedu four ferrnCedurant la cuissonau gril.
ImpossJbilit6 d'autonettoyagedu four (certains mod_les).
• DCterrninerque I'appareiln'a pas 6t6 prograrnrn6pour un
autonettoyagediffCr_.Voir pages25-26.
• VCrifierque la porte est ferrn_e.
• V@ifiersi la cornrnandeest en modesabbat.Voir page39.
• Lefour est pout 6tre _ unetemp@aturesupCrieurea 205° C
(400° F).La ternp@aturedufour dolt 6tre inf_rieure_ 205° C
(400° F) pour pouvoirprogrammerun cycle d'autonettoyage.
Le four ne se nettoie pas correctement(terrains mod_les).
• Un temps de nettoyageplus longpeut 6tre nCcessaire.
° On n'a pas 61imin6avant I'op@ationd'autonettoyagelos
accumulationsexcessivesde rCsidus,particuli_rernentlos rCsidus
d'alimentsacidesou sucrCs.
La porte du four ne se d_verrouille pas apr_s rautonettoyage
(certaJns mod_les).
• L'intCrieurdu four est encorechaud.Attendre environ uneheure
aprCsI'ach_vernentde la p@ioded'autonettoyage.II est possible
d'ouvrir la porte apr_sla disparitiondu messageLOCK
(Verrouillage]sur I'afficheur.
• Loscomrnandeset la porte sont peut-Ctreverrouill@s.Voir pages
25et 36 pourle deverrouillage.
Accumulationd'humidit6 sur le hublot ou vapeur sortant
de r6vent.
° Ceciest normaldurant la cuissond'alirnentscontenant beaucoup
d'eau.
• Utilisationexcessived'humidit6 lots du nettoyagedu hublot.
Emissiond'une forte odeur ou de fum6e lots de la mise en
marche du four.
• Ceciest normalpour une cuisini_re neuveet disparait apr_s
quelquesutilisations.Un cycled'autonettoyage{{ brQlera_ plus
rapidernentlosodeurs.
• La miseen marched'un ventilateuraide a rotifer fum_eet odeurs.
• PresencedesaletCssur lasole.Proc_dera un autonettoyage.
Codes d'anomalie (terrains mod_les).
• LosrnotsBAKE(Cuissoncourante)ou LOCKpeuventclignoter
rapidernent_ I'afficheur pour prdvenird'une erreur ou d'un
probl_me.Sile mot BAKEou LOCKparait a I'afficheur,appuyer
sur la touche CANCEL(Annuler]. Sile mot BAKEou LOCK
continuea clignoter,dCbrancherI'appareil.Attendre quelques
minutes,puis rebrancherI'appareil.Sile mot continue _ clignoter,
ddbrancherI'appareilet prendrecontact avec un r@arateur
autoris(_.
• Si lefour esttr_s sale,losflamm_chespeuvent produire un code
d'anornalieau coursdu cycled'autonettoyage.Appuyersur la
toucheCANCEL et laisserlefour refroidircornpl_tement,
essuyerla salet6enex@spuis reprogramrnerI'autonettoyage.Si
le code d'anomalierdapparait,prendrecontactavecun r@arateur
autorisC.
Des bruits se font entendre.
• Lefour fait plusieursbruits faibles.IIest possibled'entendre los
relais dufour qui se mettenten marcheet s'arrCtent.Ceci est
normal.
• Alors que lefour se rCchauffeet se refroidit, il est possible
d'entendredes bruitscorrespondanta la dilatation et a la
Suite
3O
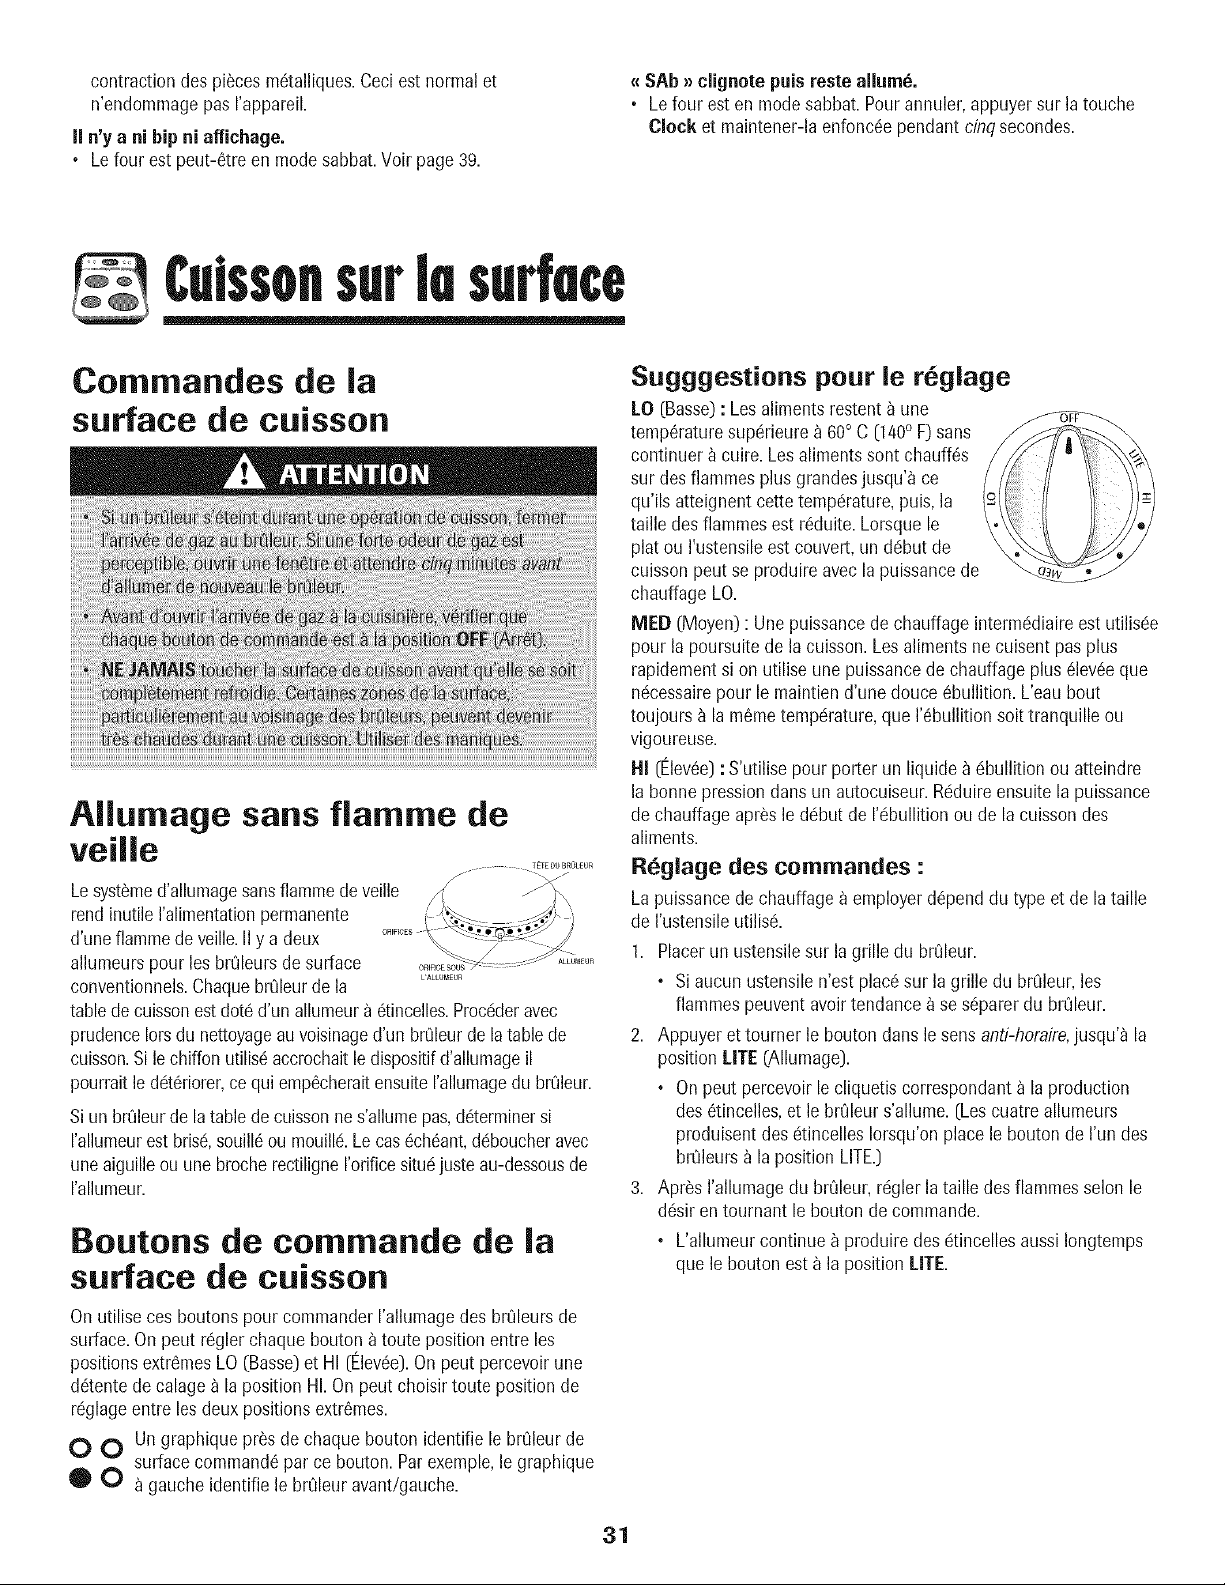
contractiondes pi_cesm6talliques.Ceciestnormal et
n'endommagepus I'appareil.
II n'y a ni hip ni affichage.
• Le four est peut-6treen modesabbat.Voir page39.
{{SAb _ ciignote puisreste allure&
• Lefour est en modesabbat.Pourannulet,appuyer sur la touche
Clock et maintener-laenfonc6ependant cinqsecondes.
tulssonsurlasurfece
Commandes de la
surface de caisson
Aliumage sans flamme de
veille
Lesyst_med'allumagesansflammedeveille
rendinutile ralimentationpermanente
d'uneflammedeveille.IIy a deux
allumeurspour leabrQleursdesurface
conventionnels.ChaquebrQleurde la L........
tablede cuissonest dot6 d'un allumeura 6tincelles.Procdderavec
prudenceIorsdu nettoyageau voisinaged'un brQleurde latablede
cuisson.Silechiffon utilis6accrochaitle dispositifd'allumageil
pourraitle ddt6riorer,ce qui emp6cheraitensuiteI'allumagedu brQleur.
Siun brOleurde latable de cuissonnes'allumepas,d6terminersi
I'allumeurestbrisd,souill6ou mouilld.Lecas 6ch6ant,ddboucheravec
uneaiguilleouune bmcherectiligneI'orificesitudjuste au-dessousde
I'allumeur.
Boutons de cornmande de la
surface de caisson
Onutilise cesboutonspour commanderI'allumagedes brQleursde
surface.Onpout r_glerchaque bouton _toute position entre los
positionsextr6mesLO (Basso)et HI (Elev6e).Onpout percevoirune
d6tentede calagea la position HI. On pout choisir toute position de
rdglageentre les deuxpositionsextr6mes.
O O Un graphiquepros de chaquebouton identifie le brQleurde
surfacecommand6par ce bouton.Parexemple,le graphique
O O a gaucheidentifie le brQleuravant/gauche.
Sugggestions pour ie reglage
LO (Basse): Lesalimentsrestent_ une
temp6raturesupdrieurea 60° C 0400 F)sans
continuer_ cuire.Les alimentssont chauff6s
sur des flammesplus grandesjusqu'_ ce
qu'ils atteignent cettetempdrature,puis,la
taille des flammesest r6duite.Lorsquele
plat ou I'ustensileest couvert,un ddbut de
cuissonpeut se produireavec la puissancede
chauffageLO.
NIED (Moyen): Une puissancede chauffage intermc!diaireest utilisde
pour la poursuitede lacuisson.Lesalimentsne cuisent pasplus
rapidementsi on utilise unepuissancede chauffageplus 61ev6eque
ndcessairepour le maintiend'une douce 6bullition.L'eau bout
toujours_ la m6metempdrature,que I'_bullition soittranquille ou
vigoureuse.
141(Elev_e): S'utilisepour porter un liquide _ dbullition ou atteindre
la bonnepressiondunsun autocuiseur.Rdduireensuite la puissance
de chauffageapr_sle ddbut de I'dbullitionou de la cuissondes
aliments.
R_glage des commandes :
La puissancede chauffagea employerd@end du type et de lataille
de I'ustensileutilis(_.
1. Placerun ustensilesur la grille du brQleur.
• Si aucun ustensilen'est plac6sur la grille du brQleur,les
flammespeuventavoir tendance_ se s@arer du brOleur.
2. Appuyer et tourner le boutondans le sensanti-horaire,jusqu'a la
position UfE (Allumage).
° On peut percevoir le cliquetiscorrespondanta la production
des 6tincelles,et le brQleurs'allume.(Lescuatre allumeurs
produisentdes dtincellesIorsqu'onplace le bouton de I'un des
brt31eursa la positionLITE.)
3. Apr_s I'allumagedu brOleur,rdglerla taille des flammesselon le
d6sir en tournant le bouton decommande.
• L'allumeurcontinue _ produiredes _tincellesaussiIongtemps
que le bouton est _ la positionUTE.
31
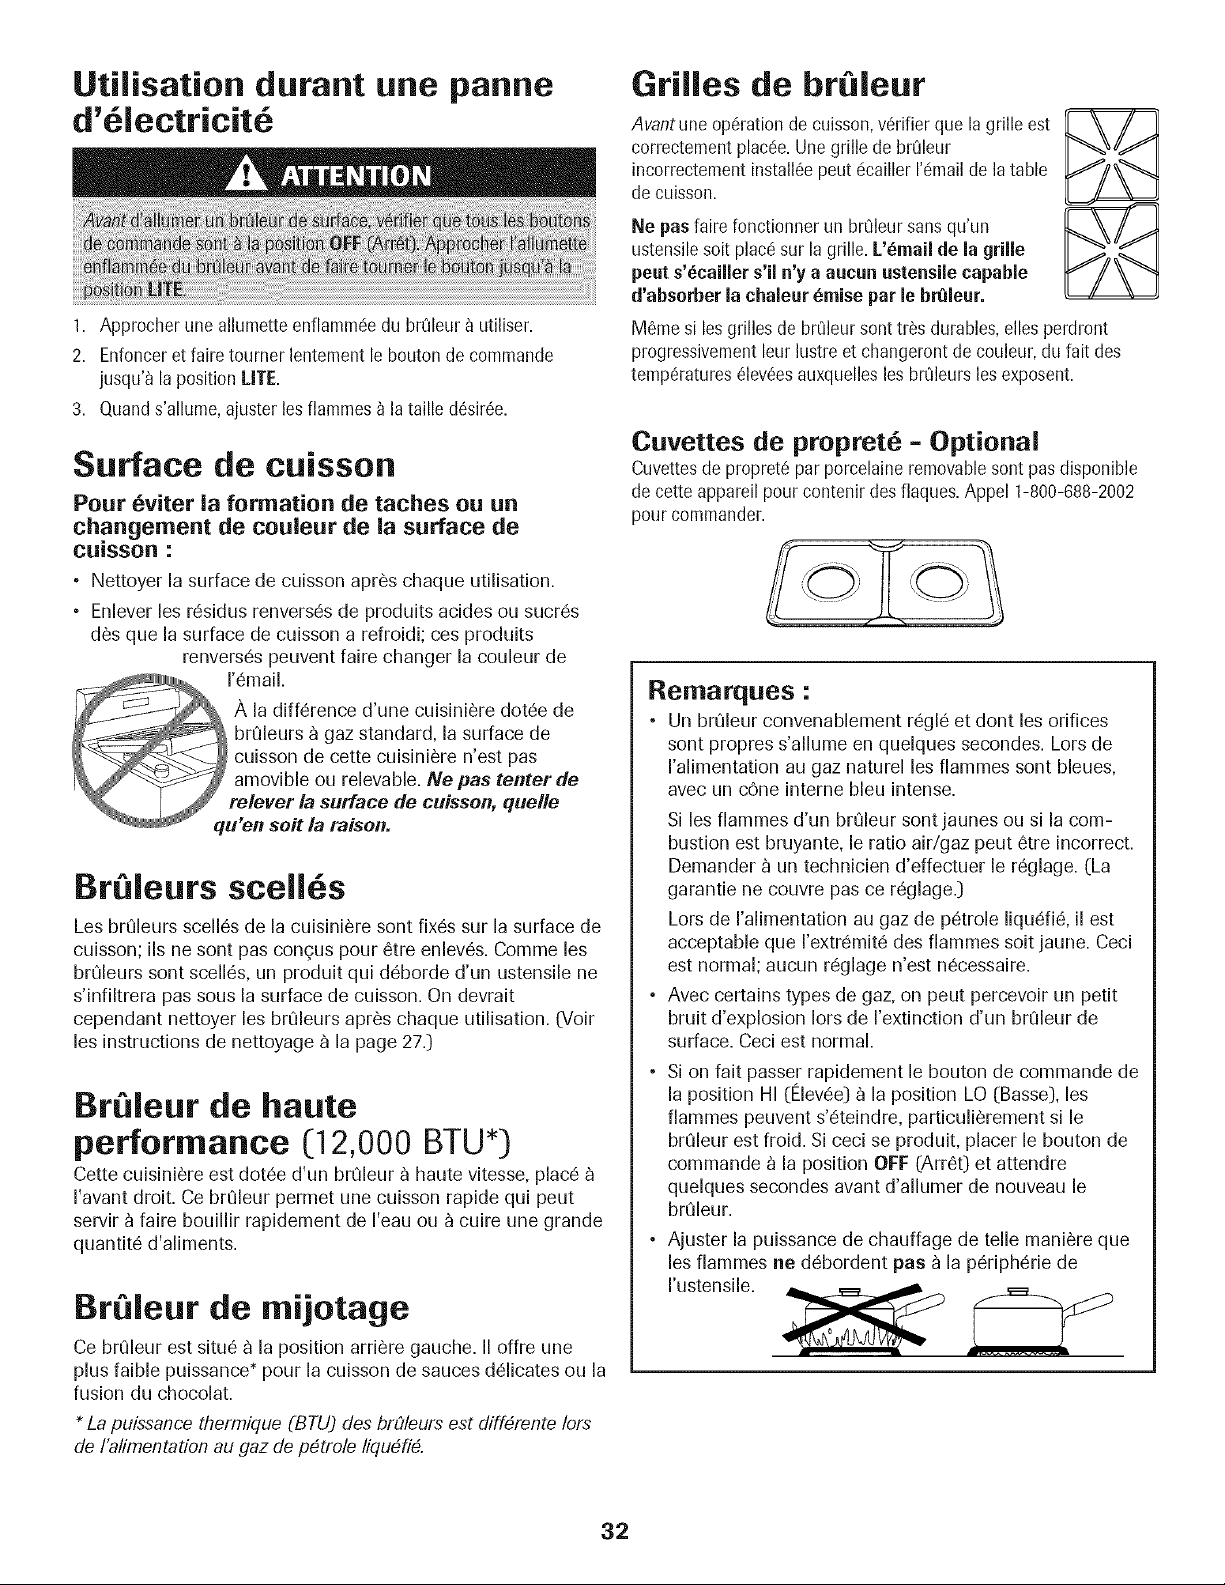
Utilisation durant une panne
d'61ectricit
1. Approcher une allumetteenflamm6edu brOleur_ utiliser.
2. Enfonceret faire tourner lentement le boutonde commando
jusqu'a la positionLITE.
3. Quands'allume,ajuster losflammes_ la taille d6sir6e.
Surface de cuisson
Pour _viter ia formation de taches ou un
changement de couleur de la surface de
cuJsson :
• Nettoyer la surface de ouisson apr6s chaque utilisation.
• Enlever los r6sidus renvers6s de produits acides ou sucr6s
d_s que la surface de cuisson a refroidi; ces produits
renvers6s peuvent faire changer la couleur de
l'6mail.
A la diff6rence d'une cuisini_re dot6e de
brCfleursb gaz standard, la surface de
cuisson de cette cuisini_re n'est pas
amovible ou relevable. Ne pas tenter de
relever la surface de cuisson, quelle
"on soit la raison.
Br leurs scell6s
Les brCJleursscell6s de la cuisini_re sont fix6s sur la surface de
cuisson; ils ne sont pas congus pour 6tre enlev6s. Comme les
brCJleurssont scell6s, un produit qui d6borde d'un ustensile ne
s'infiltrera pas sous la surface de cuisson. On devrait
cependant nettoyer les brQleurs apr_s chaque utilisation. _oir
los instructions de nettoyage _ la page 27.1
Br leur de haute
performance (12,000 BTU
Cette cuisini_re est dot6e d'un brCJleur_ haute vitesse, plac6
I'avant droit. Ce brCfleurpermet une cuisson rapide qui peut
servir _ faire bouillir rapidement de I'eau ou _ cuire une grande
quantit6 d'aliments.
Br leur de mijotage
Ce brQleur est situ6 _ la position arri_re gauche. II offre une
plus faible puissance* pour la cuisson de sauces d61icates ou la
fusion du chocolat.
La puissance thermique (BTU) des brOleurs est diff4rente /ors
de I'alimentation au gaz de p4trole liqu4fi4.
Grilles de br leur
Avantune op6ration de cuisson,v6rifier que lagrille est
correctementplacc!e.Une grille de brQleur
incorrectementinstall6epout c!caillerI'c!mailde latable
de cuisson.
Ne pasfaire fonctionnerun br61eursansqu'un
ustensilesoit plac6sur la grille. L'_mail de la grille
peut s'_cailler s'il n'y a aucun ustensilecapable
d'abserber la chaleur _mise par le br_leur.
M6me si lesgrilles de brQleursont tr_s durables,elles perdront
progressivementleurlustre et changerontdecouleur,du fait des
temp6ratures_lev6esauxquelleslos brQleurslos exposent.
Cuvettes de propret6 = Optional
Cuvettesde propret6 par porcelaineremovablesont pasdisponible
de cette appareilpour contenirdes fiaques.Appel 1-800-688-2002
pour commander.
P=eilrla tques :
• Un br_leur convenablement regle et dont les orifices
sont propres s'allume en quelques secondes. Lors de
ralimentation au gaz naturel les fiammes sont bleues,
avec un cone interne bleu intense.
Si les fiammes d'un br_leur sont jaunes ou si la com-
bustion est bruyante, le ratio air/gaz peut 6tre incorrect.
Demander _ un technicien d'effectuer le r6glage. (La
garantie ne couvre pas ce reglage.]
Lors de I'alimentation au gaz de petrole liqudi6, il est
acceptable que rextremJte des fiammes soit jaune. Ceci
est normal; aucun r6glage n'est n6cessaire.
° Avec certains types de gaz, on peut percevoir un petit
bruit d'explosion Iors de rextinction d'un br_leur de
surface. Ceci est normal.
• Si on fait passer rapidement le bouton de commande de
la position HI [Elevee) _ la position LO [Basse], les
fiammes peuvent s'eteindre, particulierement si le
br_leur est froid. Si ceci se produit, placer le bouton de
commande _ la position OFF [Arre0 et attendre
quelques secondes avant d'allumer de nouveau le
br_leur.
° Ajuster la puissance de chauffage de telle maniere que
les fiammes ne debordent pas _ la p6riph6rie de
rustensile. _ ,_
32
Culssondenslefour
Commandes du four nettoyage manuel (certains modeles)
Bake(Cuisson
courante)
Broil(Cuisson
au gril)
Timer (Minuterie)
Clock (Horloge)
CANCEL(Annule0
More+ ou Less-
(Plus+ ou Moins-)
S'utilise pour la cuissoncouranteet le
rOtissage.
S'utilise pour la cuissonaugril et le rissolage
sur partiesup6rieure.
Programmela minuterie.
S'utilise pour programmerI'heuredu jour.
Annuletoutes losopc!rationssauf minuterie
et horloge.
S'utilise pourentrer ou changer la durc!e,la
temp6raturedu four. Etablit le gril
tempc!raturec!lev6eou basso.
•Les deux pointsqui clignotent indiquent qu'un d6compteest
en cours. (Lesdeux points ne clignotent passi I'heureou la
tempc!raturedu four sent affich6es.)
• Deuxbipscourts signalent la fin de I'opc!ration.0:00paraTt
I'afficheur.
• Si I'onveut, appuyersur la toucheClock et I'heuredu jour
rc!apparaitbri_vementa I'afficheur pendantune op6ration
minut6e.
• Si I'onveut, appuyersur les touchesBake ou Broil et le
r6glagedetemp6ratureactuelle rdapparaitbri_vement
I'affichagependantune op6rationminutc!e.
Annulation de ia minuterie :
Utilisation des touches
Appuyersur la toucheTimer et la maintenirainsi pendant plusieurs
secondes.
• Appuyersur la touche d6sir_e.
• Appuyersur More+ ou Less- pour entrer la durc!eou la
tempc!rature.
• Un hip retentit IorsqueI'on appuiesur unetouche de fonction. II
n'ya pusde hip pour la touche More+ ou la toucheLess-.
• Un doublebip retentiten cas d'erreur de programmation.
Important : Quatresecondesapr_savoir appuyc!sur lostouches
More+ ou Less-,la dur_e ou la temp6ratureseront
automatiquemententr6es.Siplus de 30 secondess'6coulententre
la pressionsur une touchede fonction et sur les touchesMore+ ou
Less-,la fonction seraannulc!eet I'afficheurreviendraa I'affichage
pr6c6dent.
R_glage de I'horioge
1. Appuyer sur la toucheClock.
• L'horloge nepeut pus 6tre re!gl6esile four est dc!japrogrammc!
pourune operationde cuissoncourante,de gril ou une
op6rationminut6e.
2. Mettre _ I'heurea I'aidedes touches More+ ou Less-.SiI'on
n'appuiepus sur cestouches en moins de 30 secondes,le
programmeestannulc!.Appuyersur latouche Clock et
reoommencer.
Programmation de la minuterie
La minuteriepout 6tre programm6ede uneminute (:01)jusqu'a 99
heureset 59 minutes (99:59).La dur6eseraaffichc!een minuteset
non en secondes.LA MINUTERIENE COMMANDE PAS LE FOUR.
1. Appuyer sur la toucheTimer (Minuterie).
. 0:00s'allume et lesdeux points [:) clignotent a rafficheur.
2. Appuyer sur More+ ou Less=jusqu'_ ce que la dur6e d6sirc!e
soit affichc!e.
• Laminuterie commencea d6compterd_s que ladurc!ea 6t6
programm6e.
Caisson courante, r6tissage et
caisson au gril
Program(nation des coma]andes pour une caisson
courante ou un rStissage :
1. Appuyersur latoucheBake.
° 000s'allumeet le t_!moinlumineuxde cuissoncouranteclignote
rafficheur.
• Si I'onappuiesur [atoucheBake,sansprogrammerunetemp-
6futuredu four duns les30 secondessuivantes,leprogramme
estautomatiquementannul_!et rheure du jour r_!apparait
I'afficheur.
2. Appuyersur la toucheMore+ ou Less- jusqu'_ceque la
temp_!ratured6sir_!edufour soitaffich_!e.
° Latemp_!raturepout_tre programm_ede75_ 285° C (170
550° F).
• 350° paraita rafficheurIorsqueI'onappuieunefoissur latouche
More+ ou Less-.
° Appuyer_ plusieursreprisessur latouche More+ ouLess- pour
changerla temperaturedufour parintervallesde3° C (5° F)ou
appuyersur latouche More+ ou Less- en maintenantla
pression,pour changerla temp_!raturedu four parintervallesde
6° C (10° F).
° 100° ou latemperaturer_!elledu four,solonlaquelleest la plus
_lev_!e,paraita rafficheurIorsquele four se met en marche.
• La temp_!raturea I'afficheuraugmenteparintervallesde 3° C
(5° F), jusqu'a ceque la temperaturepr_programm_esoitatteinte.
Unseul bip retentit Iorsquele four esten coursdepr_chauffage.
° Laisserle four pr_chaufferpendant 10_ 15minutes.
• Pourrappelerla temperaturepr@rogramm_ependantle
pr_!chauffage,appuyersur la toucheBake. La temp_!raturesera
affich_ependanttroissecondes.
33
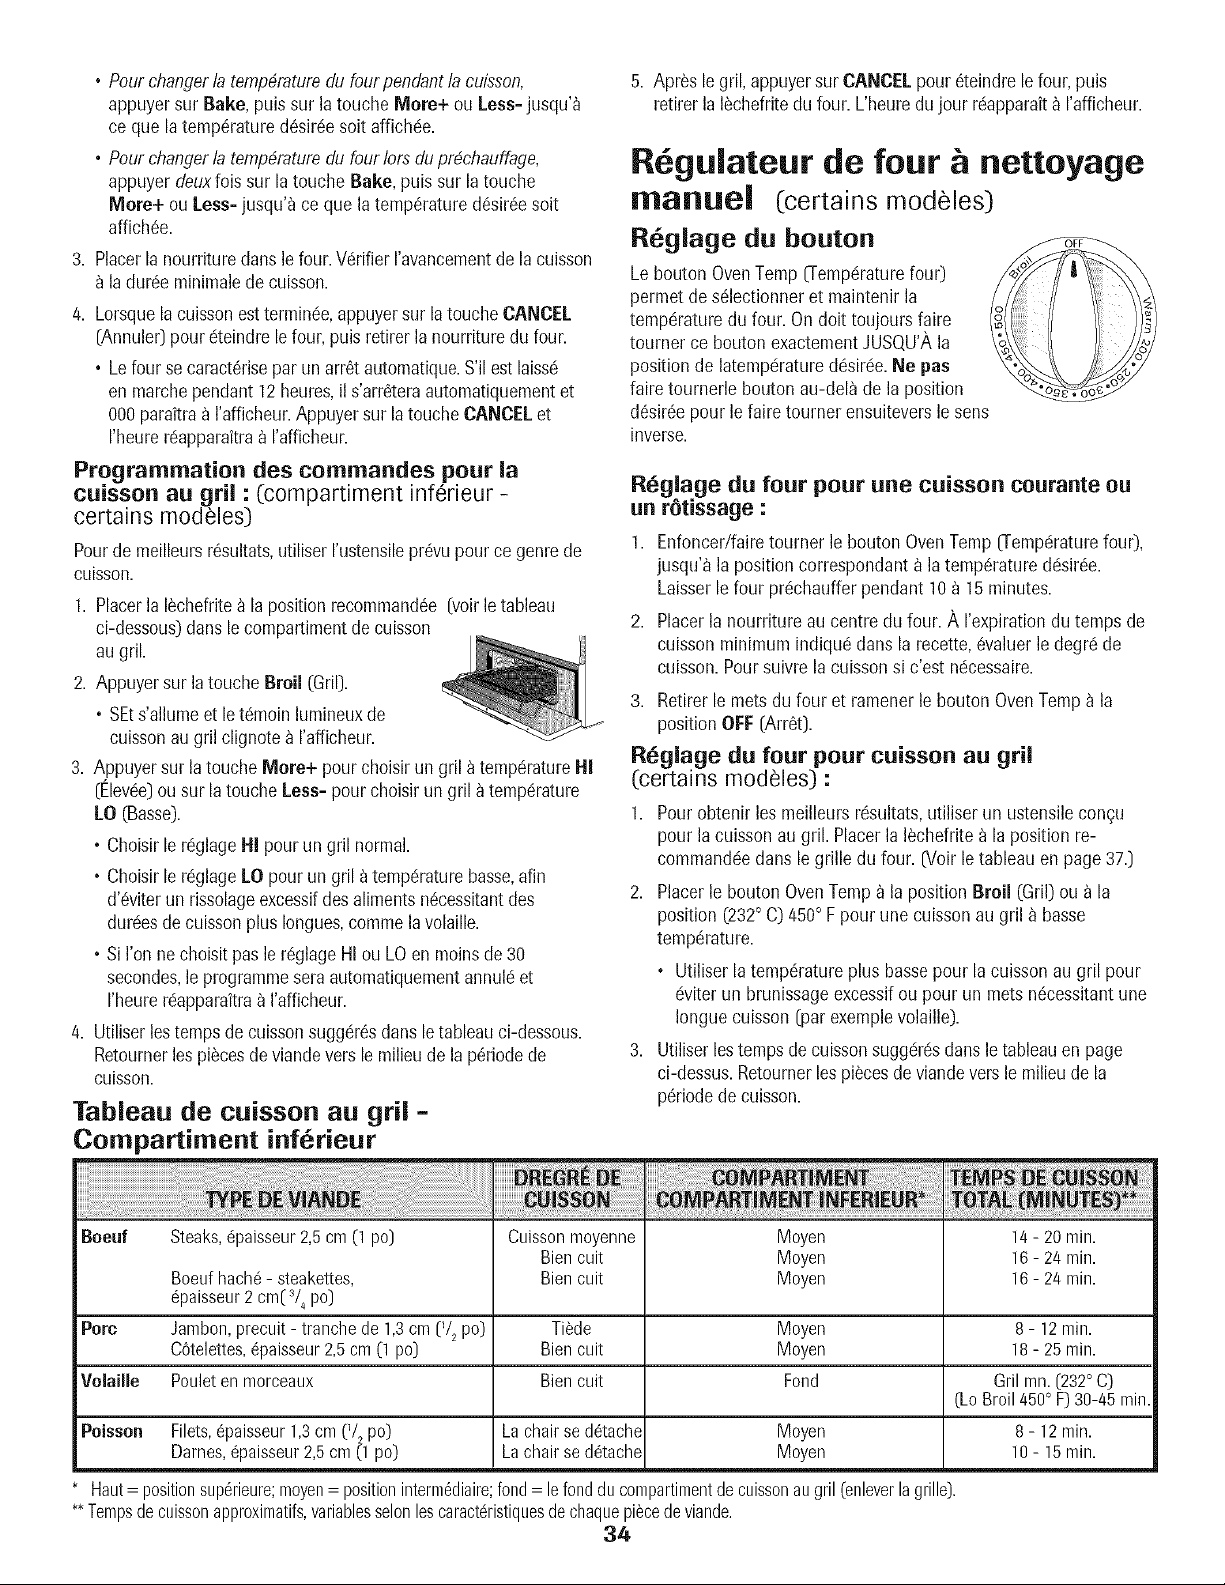
, Pourchangerla temp_,raturedu four pendantla cuisson,
appuyersur Bake, puis sur la touche More+ ou Less-jusqu'_
ce que la temp6ratured_sir6esoit affichc!e.
, Pourchangerla ternp_,raturedu four Iorsdu pr#chauffage,
appuyerdeuxfois sur la touche Bake, puis sur la touche
More+ ou Less-jusqu'a ce que la temp6ratured_sir6esoit
affich_e.
3. Placerlanourrituredartsle four.Vc!rifierI'avancementde la cuisson
la dur6eminimalede cuisson.
4. Lorsquelacuissonestterminc!e,appuyersur la touche CANCEL
[Annule0 pourc!teindrele four, puisretirer lanourrituredu four.
, Lefour se caract6riseparun arr6t automatique.S'il est laissc!
en marchependant12heures,il s'arr6teraautomatiquementet
000paraitraa rafficheur.Appuyersur latoucheCANCELet
I'heurerc!apparaitra_ I'afficheur.
Programmatiou des commandos pour la
cuisson au gril : (compartiment inf_rieur -
certains modeles)
Pourde meilleursr6sultats,utiliserI'ustensilepr6vupource genrede
CUiSSOn.
1. Placerla I_chefrite) la positionrecommand6e[voir le tableau
ci-dessous)dansle compartimentde cuisson
augril.
2. Appuyersur la touche Broil (GriD.
• SEts'allumeet letc!moinlumineuxde
cuissonau grilclignote_ I'afficheur.
3. Appuyersur la touche More+ pour choisir un gril a temp6ratureHI
[Elev6e)ou sur latouche Less- pour choisirun gril a temperature
LO (Basso).
, Choisir le rc!glageHI pour un gril normal.
, Choisir le rc!glageLO pour un gril a tempc!raturebasso,afin
d'6viterun rissolageexcessifdesalimentsn6cessitantdes
durc!esde cuissonplus Iongues,commelavolaille.
° Si I'onnechoisit pasle r6glageHI ou LO en moinsde 30
secondes,leprogrammeseraautomatiquementannulc!et
I'heurerc!apparaitraa I'afficheur.
4. Utiliserlestempsde cuissonsuggc!r6sdans le tableauci-dessous.
Retournerlospi_cesdeviandevers le milieude lap6riodede
CUiSSOn.
Tableau de cuisson au gril -
Compartiment inf_rieur
5. Apr_s le gril, appuyersur CANCELpour Qteindrelefour,puis
retirer la I_chefritedu four.L'heuredujour rc!apparait_ I'afficheur.
R gulateur de four & nettoyage
marluel (certains modeles)
R_glage du bouton
Lebouton OvenTernp0-empc!raturefour)
permetdes_lectionneret maintenirla
tempc!raturedu four. On dolt toujours faire
tourner ce bouton exactementJUSQU'Ala
positionde latempc!ratured6sirc!e.Ne pas
faire tournerle bouton au-dela de la position
dQsir6epour le faire tourner ensuiteversle sons
inverse.
Reglage du four pour uue cuissou courante ou
un r_tissage :
1. Enfoncer/fairetourner le bouton OvenTernp0-emp_!raturefour),
jusqu'_ la positioncorrespondant_ la temp6ratured_!sir6e.
Laisserle four pr6chaufferpendant 10a 15 minutes.
2. Placerla nourriture au centre du four. A I'expirationdu temps de
cuisson minimumindiqu_!dans la recette,_valuerle degr_!de
cuisson.Poursuivrela cuissonsi c'est n_!cessaire.
3. Retirerle metsdu four et ramenerle bouton OvenTemp a la
positionOFF[ArrSt).
R_giage du four pour cuissou au gril
(certains mod_les) :
1. Pourobtenir los meilleursr_sultats,utiliser un ustensilecon9u
pour la cuissonau gril. Placerla 16chefritea la position re-
command_!edans le grille du four. _Voirle tableauen page370
2. Placerle bouton OvenTemp_ la position Broil (Grid ou a la
position (232° C)450° Fpour une cuissonau gril _ basso
temp_!rature.
° Utiliser latemperatureplus bassopour la cuissonau gril pour
_!viterun brunissageexcessifou pour un mets n_cessitantune
Iongue cuisson[par exemplevolaille).
3. Utiliserlestempsde cuissonsugg_!r_!sdartsletableauen page
ci-dessus.Retournerlespi_cesdeviandeversle milieu de la
p_riodede cuisson.
Beeuf Steaks, @aisseur 2,5 cm (1 pc) Cuisson moyenne Moyen 14 - 20 rain.
Bien cuit Moyen 16 - 24 rain.
Boeuf hach_ - steakettes, Bien cuit Moyen 16 - 24 rain.
@aisseur 2 cm( _/_pc)
Pore Jambon, precuit - tranche de 1,3cm (_/_pc) TiSde Moyen 8 - 12 rain.
CStelettes,@aisseur 2,5 cm (1 pc) Bien cuit Moyen 18 - 25 rain.
Velaille Poulet en morceaux Bien cuit Fond Gril ran. (232° C)
(Lo Broil 450° F) 30-45 rain.
Peissen La chair se d_tache 8 - 12 rain.
La chair se detache t0 - 15 rain.
Filets,@aisseur1,3cm (_/_po)
Dames,@aisseur2,5em (t po)
Moyen
Moyen
Haut= positionsup6rieure;moyen= positioninterm6diaire;fond= le fonddu compartimentdecuissonaugril (enleverlagrille}.
**Tempsde cuissonapproximatifs,variablesselonlescaractdristiquesdechaquepi6cede viande.
34
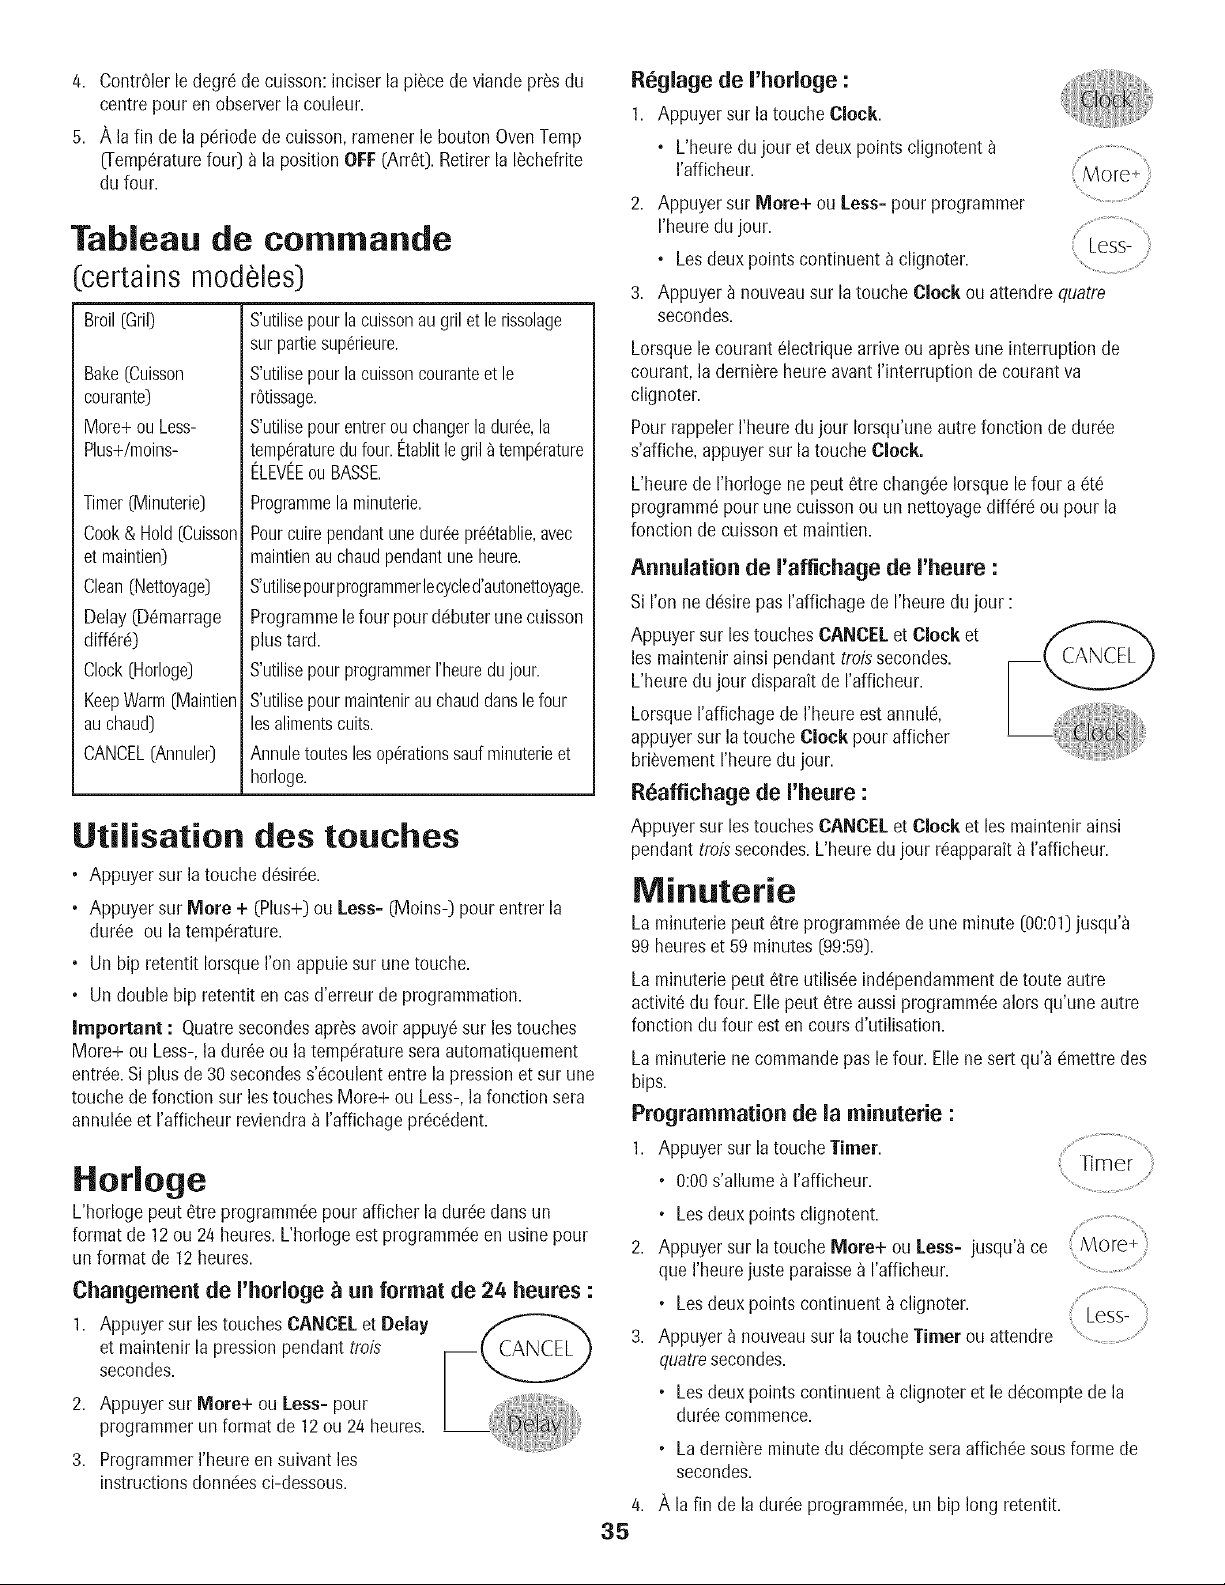
4. Contr01erledegr6decuisson:inciserlapiScedeviandeprosdu
centrepourenobserverlacouleur.
5. Alafindelap6riodedecuisson,ramenerleboutonOvenTemp
O-emp6raturefour) a la position OFF(Arr6t). Retirerla I_chefrite
dufour.
Tableau de commando
certains modeles)
Broil(Grid
Bake(Cuisson
courante)
More+ou Less-
Plus+/moins-
Timer(Minuterie)
Cook& Hold(Cuisson
et maintien)
Clean(Nettoyage)
Delay(D6marrage
diff_rc!}
Clock(Horloge]
KeepWarm(Maintien
auchaud)
CANCEL(Annule0
S'utilisepourlacuissonaugrilet lerissolage
surpartiesup6rieure.
S'utilisepourlacuissoncouranteet le
rOtissage.
S'utilisepourentrerouchangerladuree,la
temp6raturedu four.Etahlitle gril _ temperature
ELEVEEou BASSE
Programmelaminuterie.
Pourcuirependantunedur6epr66tablie,avec
maintienauchaudpendantune heure.
S'utilisepourprogrammerlecycled'autonettoyage.
Programmelefour pourd6buter unecuisson
_lustar(].
S'utilisepourprogrammerI'heuredu jour.
S'utilisepourmaintenirau chauddansle four
lesalimentscults.
Annuletouteslosop6rationssaulminuterieet
horloge.
Utilisation des touches
• Appuyer sur la touche d6sir6e.
• Appuyer sur More + (Plus+}ou Less=(Moins-} pour entrer la
dur6e ou latemp6rature.
• Un hip retentit IorsqueI'on appuiesur une touche.
• Un doublehip retentit encos d'erreur de programmation.
Important : Quatresecondesapr_savoir appuy6sur los touches
More+ ou Less-,la dur6e ou la temp6ratureseraautomatiquement
entr6e.Si plusde 30 secondess'6coulententre lapressionet sur une
touche de fonction sur los touches More+ ou Less-,la fonction sera
annul6eet rafficheur reviendraa I'affichagepr6c6dent.
Horloge
L'horlogepout 6tre programm6epour afficher la dur6e donsun
format de 12ou 24 heures.L'horlogeest programm6een usinepour
un format de 12heures.
Changement de I'horloge t! un format de 24 heures :
1. Appuyer sur los touchesCANCELet Delay
et maintenirla pressionpendanttrois
secondes.
2. Appuyer sur More+ ou Less=pour
programmerun format de 12ou 24 heures.
3. ProgrammerI'heureen suivant los
instructionsdonn6esci-dessous.
Reglage de I'horloge :
1. Appuyer sur la toucheClock.
• L'heuredu jour et deux pointsclignotent
I'afficheur.
2. Appuyersur More+ ou Less=pour programmer
I'heuredu jour.
• Losdeux points continuent a clignoter. Less-
...............................
3. Appuyer _ nouveausur latouche Clock ou attendrequatre
secondes.
Lorsquele courant 6lectriquearriveou apr_s une interruption de
courant,la derniSreheure avantI'interruption decourant va
clignoter.
PourrappelerI'heuredujour Iorsqu'uneautre fonction de dur6e
s'affiche,appuyersur latouche Clock.
L'heure de I'horlogene pout 6tre chang6eIorsquele four a 6t6
programm6pour une cuissonou un nettoyagediff6r6 ou pour la
fonction de cuissonet maintien.
Annulation de I'aftichage de I'heure :
Si ron ne d6sirepas I'affichagede I'heuredu jour :
Appuyersur lestouches CANCELet Clock et
los maintenirainsi pendant troissecondes.
L'heure dujour disparait de rafficheur.
LorsqueI'affichagede I'heureest annul&
appuyersur la touche Clock pour afficher
briSvementI'heuredu jour.
R_affichage de I'heure :
Appuyersur lostouches CANCELet Clock et los maintenirainsi
pendant troissecondes.L'heure du jour r6apparait_ I'afficheur.
Minuterie
La minuteriepout 6tre programm6ede une minute [00:01)jusqu'a
99 heureset 59 minutes [99:59).
La minuteriepout 6tre utilis6e ind6pendammentde toute autre
activit6du four. Ellepeut _tre aussiprogramm6ealors qu'une autre
fonction du four est en coursd'utilisation.
La minuteriene commandepas le four. Ellene sert qu'a 6mettredes
bips.
Programmation de la minuterie :
1. Appuyer sur latoucheTimer.
• 0:00s'allume a rafficheur.
Iimer
• Lesdeux points clignotent.
2. Appuyer sur latouche More+ ou Less= jusqu'a ce
que I'heurejuste paraissea I'afficheur.
• Losdeux points continuent_ clignoter. Less-
3. Appuyer _ nouveausur latouche Timer ou attendre ".................................
quatresecondes.
• Lesdeux points continuent_ clignoter et le d6comptede la
dur6ecommence.
• Laderni_re minute du d6comptesera affich6esous forme de
secondes.
4. A la fin de la dur6eprogramm6e,un hip long retentit.
35
Annalation de la minaterie :
1. Appuyer sur la toucheTimer (Minuterie] et la [naintenirainsi
pendanttrois"secondes.
OU
2. Appuyer sur la toucheTimer et r6gler I'heure_ 00:00.
Verrouillage des commandos
Lostouches peuvent6tre verrouill6espour des raisonsde securitY,
nettoyageou pouremp6chertoute utilisation non souhait6e.Ellesne
pourront 6tre utilis_essi olios sont verrouillees.
Si lefour esten coursd'utilisation, les co[n[nandesnepeuvent6tre
verrouillees.
L'heureactuelledu jour restera_ I'afficheurIorsqueloscommandos
serontverrouill6es.
Verroaillage :
Appuyersur lostouches CANCEL (Annuler]et
Cook & Hold (Cuissonet maintien)et lea
maintenirainsi pendant troissecondes.
• Le [not LOCK(Verrouillage)clignotea I'afficheur.
D_verroaillage :
Appuyersur lestouches CANCELet Cook & Hold et los [naintenir
ainsi pendant troissecondes.
• Le [not LOCKdisparaitde I'afficheur.
Codes d'anomalie
Les[nots BAKE(Cuissoncouratne)ou LOCKpeuventclignoter
rapidement_ I'afficheur pour pr@eniren cas d'erreur ou de
probl_[ne.Sitel eat lecas, appuyersur latouche CANCEL.Siles
rootsBAKEou LOCKcontinuent _ clignoter,d6brancherI'appareil.
Attendrequelquesminutes,puis rebrancherI'appareil.Si I'undes
mots continue_ clignoter,d6brancherI'appareilet prendrecontact
avecun r@arateur autoris_.
Caisson courante
Programmation de ane caisson coarante :
1. Appuyer sur la toucheBake.
. Lemot BAKEclignote.
. 000clignote a I'afficheur.
2. S61ectionnerla temperaturedu four.Latemp6rature
peut 6tre programm6ede75 _ 290° C (170_ 550° F]. .................................................
Appuyer unelois sur latouche More + (Plus+)ou
Less- (Moins-), ou appuyersur la touche More+ Less-
ou Less- et la [naintenir ainsi. ......................................
. 175° (350°) s'allu[neIorsqueI'onappuie la
pre[nierelois sur rune destouches.
• Appuyer sur la touche More+ pour augmenterlatemp@ature.
• Appuyer sur la touche Less- pour di[ninuer la temperature.
3. Appuyer a nouveausur latouche Bake ouattendre quatre
secondes.
• Lemot BAKEs'arr6te de clignoteret s'allu[ne_ I'afficheur.
• 38° (1000)ou la te[np6raturerdelledu four sera affichee.La
temp6ratureaug[nenterapar intervallede 3° C (5° F)jusqu'_
ce que latemp@atureprdprogra[nmdesoit atteinte.
4. Laisserlefour pr6chaufferpendant 8 a 15minutes.
• Lorsquela temperatureprogram[n6epour lefour est atteinte,
un bip long retentit.
• Pourrappelerla te[np@atureprogra[n[n@pendant le
prechauffage,appuyersur la toucheBake.
5. Placerla nourriture au centredu four, en laissantun [nini[nu[nde
5 c[n (2pouces)entre I'ustensileet leaparoisdu four.
6. Verifier I'avance[nentde la cuisson_ la dur6e[nini[nalede
cuisson.Cuireplus Iongte[npsau besoin.
7. Lorsquela cuissor_estter[nin_e,appuyersur _-'-'_
latouche CANCEL.
8. Retirerla nourriture du four.
Differences de caisson entre I'ancien
four et le nouveau
II est normalde re[narquerquelques diff6rencesdans ladureede
cuissonentre un four neuf et un four ancien.VoirAjustementde la
temp6raturedu four _ la page 40.
Remarqaes :
Pourchangerlatemp4raturedu fourpendantla cuisson,
appuyersur Bake, puissur la touche More+ ou Less- jusqu'a
ce que latemp6ratured6sir6esoit affich6e.
Pourchangerla temp4raturedu four Iors du pr4chauffage,
appuyerdeuxfois sur la touche Bake, puis sur la touche
More+ ou Less=jusqu'a ce que latemp6ratured_sir6esoit
affich6e.
Si I'on oublied'arr6ter le four,il s'arr6teraautomatiquement
apres 12heures.Si I'on desiredesactivercette fonction,voir
page39.
Caisson et maintien
Lafonction cuissonet [naintien per[net de cuire pendantune duree
pr6determin6e,suivie par un cyclede maintienau chaud d'une
heure.
Program[nation de la fonction caisson et maintien :
1. Appuyer sur la toucheCook & Hold (Cuisson et
[naintien).
• Lea[nots BAKEet HOLD(MAINTIEN]
clignotent.
• 000s'allu[ne _ I'afficheur.
2,
More+
S61ectionnerla temp6raturedu four. Latemp6rature
pout 6tre program(neede 75 a 290° C (170 _ 550° F). Less-
Appuyer unelois sur latouche More+ ou Less- ou
appuyersur la touche More+ ou Less- et la [naintenir ainsi.
• Appuyer sur la toucheMore+ pour augmenterla te[nperature.
• Appuyer sur la toucheLess- pour diminuer latemp6rature.
Suite
36

3. Appuyer a nouveausur latouche Cook & Hold (Cuissonet
maintien)OUattendre quatresecondes.
• Lemot HOLD(Maintien] clignote.
, 00:00clignote a I'afficheur.
4. Entrerla duroc pendant laquelleI'on dCsireque la cuissonait
lieuen appuyantsur los touchesMore+ (Plus+)ou Less-
(Moins-]. LadurCede cuisson pout 6tre programmCede dix
minutes(00:10)_ 11 heures,59 minutes(11:59].
• Losroots BAKE[Cuissoncourante] et HOLDs'allument
I'afficheur.
• Ladurc!ede cuissons'allume _ I'afficheur.
• Ladurc!ede cuissoncommence le compte a rebours.
Lorsque la duroc de cuisson s'est _coul_e :
• Quatrebips retentissent.
• Lemot BAKEs'_teint.
, Losroots HOLDet WARM (CHAUD)s'allument.
• 75° (170°) parait a I'afficheur.
Apr_s une heure de MAINTIEN AU CHAUD :
• Le motEnd [Fin)s'affiche.
• L'heuredu jour rCapparaita I'afficheur.
Annulation de la fonction cuisson et maintien _ tout
moment :
Appuyersur la touche CANCEL(Annule0. Retirer la ( CANCEL ')
nourriture du four.
Cuisson courante diff r e
Avecla fonction diffdrCe,lefour se met_ cuire plustard dans la
journCe.Programmerla durded'attente dCsirdeavantque le four ne
se motto en marcheet la durCede cuissondCsir_e.Lefour com-
mencea chauffer a I'heuresdlectionndeet cult pour ladurde
spCcifiCe.
La durCed'attentepout 6tre programmdede 10minutes (00:10)
11heures,59minutes [11:59).
Programmation d'un cycle de cuisson
courante diff_rCe :
1. Appuyer sur latouche Delay [DCmarragediffCrC).
• Le motDELAY(Attente] clignote.
, 00:00clignote a I'afficheur.
2. Appuyer sur latouche More + ou Less= pour
programmerla durc!ed'attente.
,_ .............................%
Less- '
Alors que le mot DELAYclignotetoujours :
3. Appuyer sur la toucheCook & Hold.
, 000s'allume _ I'afficheur.
° Losmots BAKEet HOLDclignotent.
4. Appuyer sur More+ pour programmerla tempCraturede
CUiSSOn.
• 00:00et le mot HOLD clignotent.
° Le mot BAKEreste allumc!.
5. Appuyersur More+ pour programmerla durCede cuisson.
• LadurCed'attente, les rootsDELAY,BAKEet HOLDs'allument
I'afficheur.
Lorsque la durCe d'attente s'est 6coulee :
• Lemot DELAYs'Cteint.
° La durCede cuissonestaffichc!e.
, Losmots BAKEet HOLDsent affichc!s.
Pour programmer un temps fl'attente Iorsque la
fonction cuisson et maintien a dCj_ ete programmee :
1. Appuyer sur la touche Delay.
, Lemot DELAYclignote.
, 00:00parait a I'afficheur.
2. Appuyer sur la touche More+ ou Less= pour
programmerla dur_ed'attente.
, Apr_s quatre secondes,le mot DELAYreste
allum_ pour rappelerqu'un cycle de cuisson
difk!r_!ea _!t_programm_!.
Less-
Lorsque la duroc fl'attente s'est ecoulee
et que le four se met en marche :
, Ladur_ede cuissonseraaffich_!e.
• Lemot DELAYs'_teint.
• Losroots BAKEet HOLD restentallum_s.
Annulation :
latouche CANCEL (CANCEL)
Appuyer
sur
, Touteslos fonctions de cuissonminut_e et
non minut_eserontannuk!es.
, L'heuredu jour r_apparait_ I'afficheur.
Important :
Ne pas utiliser la cuissondiff_r_e pour des articles qui
n_cessitentque lefour soit prdchauffd,commelos g_teaux,los
petits biscuitset los pains.
Ne pas utiliser le cycle de cuissonet maintien diffdrdssile four
est d6j_chaud.
37
Maintien au chaud
Pourmaintenirauchaud dans le four desalimentscults et chauds
ou pour rdchaufferpains et assiettes.
Program[nation da maintien au chaud :
1. Appuyersur la touche KeepWarm (Maintien au chaud].
Le motWARM (Chaud]clignote.
. 000parait a I'afficheur.
2. S61ectionnerla temp6raturede maintienau chaud. ...........................
Celle-cipout 6tre rc!gl6ede63 a90° C (145
190° F]. Appuyerunelois sur latouche More +
(Plus+)ou Less- (Moins-] ou appuyersur la touche .............................................
More+ ou Less- et lamaintenirainsi, less-
q ...................................
• 75° (170°] s'allume IorsqueI'on appuiela premiere
lois sur I'une destouches.
, Appuyersur la touche More+ pour augmenterla tempdrature.
• Appuyersur la touche Less- pour diminuer latemp6rature.
Lemot WARMet la tempdratureseront affichds pendantque la
fonction maintienau chaud estactive.
Annulation du maintien au chaud :
Cuisson au gril (certains modeles)
Program[nation de la caisson au gril :
1. Appuyersur la touche Broil [Gril].
° Le mot BROILclignote.
• Lemot SET[Valider]estaffich&
2. Appuyersur la touche More + pour programmerun gril
temp6raturedlev6eou sur latouche Less=pour programmerun
gril atempdraturebasse.
•Les roots HI (ELEVEE)ou LO(BASSE]seront affich6s.
• S61ectionnerHI broil [Gril _temp6rature61ev6e][290° C
[550° F]] pour un gril normal.SdlectionnerLO broil (Gril
tempdraturebasse] (230° C [450° F]) pour un gril
tempdratureinf_rieured'alimentsa cuissonplus Iongue
comme lavolaille.
3. Apr_s quatresecondes,lefour se meten marche.
• Lemot BROILresteallured.
1.Appuyer sur latouche CANCEL (Annule0.
2. Retirerla nourrituredu four.
Remarques :
° Pourobtenir des qualitc!salimentaireset nutritives optimales,
los alimentscults au four ne doivent pas6tre gard_sau chaud
plus de 1a 2 heures.
• Pouremp6cherlos alimentsde dessc!cher,los recouvrirde
papieraluminium,sans serrer,ou d'un couvercle.
• Pour r_chauf|er des petits pains :
- recouvrir los petits painsde papieraluminium sansserrer et
les placer aufour.
- appuyersur lestouchesKeep Warm et More+ pour
programmer75° C (170° F].
- rdchaufferpendant 12_ 15minutes.
• Pour r_ehaufferdes assiettes :
- placer deuxpiles de quatre assiettesmaximumdartsle four.
- appuyersur lestouches Keep Warm et More+ pour
programmer75° C (170° F].
- rdchaufferpendant 5 minutes,arr6ter lefour et laisserlos
assiettesau four pendantencore 15minutes.
- n'utiliser que des assiettespouvantaller au four, avdrifier
avecle fabricant.
- ne pas poserdes assiettestildes sur une surfacefroide, les
changementsrapidesdetemp6raturepouvant casser
I'assietteou la fendiller.
4,
5,
6.
7.
Pourun rissolagemaximum,pr_chaufferle four pendant 2 ou 3
minutes avantd'ajouter lanourriture.
Placerla nourriture dans le four. Formerla porte du four.
Retournerla viandeune lois _ la moitid de la dur6e de cuisson.
Lorsque I'alimenteat cult, appuyersur la touche
CANCEl.. Retirer la nourritureet la I_chefritedu
four.
• L'heuredu jour rdapparait_ I'afficheur.
Remarques :
• Pourde meilleursr6sultatsIorsdu gril, se servird'un ustensile
pr_vupour ce type de cuisson.
° Legril au rdglageHI(Elev_)eat utilisdpour la majoritddes
op6rationsde cuissonau gril. Utiliser le gril au rc!glageLO
(Bas]pour la cuissonde metsdevant cuire plus Iongtemps,
afin de leur permettred'6tre biencults sans rissolageexcessif.
° Losdur6esde cuissonau gril peuvent6tre plus Ionguesavec
unetemp6raturede gril infdrieure.
° Retournerla nourriture Iorsquela moitic!de la dur_epr6vue
pour la cuissonau gril s'est_coul6e.
38

Tableau de cuisson au gril du four
Beau|
Bifteck, 2,5 cm (1 po) d'@aisseur
Hamburgers, 2 cm [3/4 po) d'@aisseur
Porc
Bacon
COtelettes,2,5 cm (1 po]
Jambon- prd-cuit tranche de 1,3cm (1/2 po]
4
4
4
4
4
4
Cuisson moyenne
Bien cuit
Bien cuit
Bien cuit
Bien cuit
Tilde
Voiaille
Pouleten morceaux
3ou4
Bien cuit
Fruitsde met
Damesde poisson,beurr6es,2,5 cm (1 po] d'@aisseur 4 Lachair se d6tache
Filetes,1,3cm (1/2 po] 4 Lachair se d6tache
Grillesup6rieurea la position n° 5.
Reraarque : Cetableau n'est qu'un guide de suggestions.Losdur6es peuventvariersolon I'alimenta cuire.
15 - 20 minutes
18 - 24 minutes
15 - 18 minutes
6 - 10 minutes
22 - 26 minutes
8 - 12 minutes
LOBroil-
Gril _temp6raturebasse
30 - 45minutes
10- 15minutes
8 - 12minutes
Arr t automatique/Mode
sabbat
Lefour s'arr6teautomatiquementapr_s12 heuress'il a 6t6
accidentellementlaiss6en marche.Cettecaract6ristiquede s_curit6
pout 6tre arr6t6e.
Pour annulet I'arr_t 12 heures et faire fonetionner le
four en continu pendant 72 heures :
1. Programmerlefour pour une cuissoncourante (voir page 36).
2. Appuyer sur la toucheClock (Horloge]et la
maintenirainsipendant cinqsecondes.
, SAbsera affichc!et clignoterapendant
cinq secondes.
° SAb sera ensuite affich6 en continujusqu'a ce qu'on I'arr6te
oujusqu'a ce que la durc!elimite de 72heuressoit atteinte.
° Lemot BAKE(Cuissoncourante) seraaussiaffich6 si un
cyclede cuissoncourante est en cours alors que le four est en
modesabbat.
Touteslesautres fonctions (Minuterie,Maintien au chaud,
Nettoyage,etc.]sont verrouill6es,SAUFBAKE,pendant le mode
sabbat.
Annulation de la cuisson courante alors que le four
est en mode sabbat :
Appuyersur CANCEL(Annule0.
, Lemot BAKEs'6teinta I'afficheur.
, Aucun bip sonorene retentit.
Annulation du mode sabbat :
1. Appuyer sur latoucheClock pendant cinqsecondes.
OU
2. Apr_s 72 heures,le modesabbat se termine.
• SAb clignote pendant cinq secondes.
• L'heuredu jour revient a I'afficheur.
Reilrlarques :
Lemode sabbatpeut 6tre mis en marchea tout moment,que
lefour soit en marcheou non.
Lemode sabbatne pout pas6tre misen marchesi los
commandossontverrouill6esou la porte verrouill6e.
Sile four esten mode cuissonIorsquele mode sabbatest
programm6,le mot BAKEs'6teint _ la fin du cyclede cuisson.II
n'y auraaucun signal sonoreaudible.
Lorsquele modesabbat a d6marr6,aucun bip de prc!chauffage
ne retentit.
Touslos messageset los hipssont dc!sactivc!sIorsquele mode
sabbatest actif.
Si I'on appuiesur la touche CANCEL,un cyclede cuisson
couranteau four seraannul6.Cependant,le programmateur
resteraen modesabbat.
Apr_s une pannede courant,le four revienten modesabbat
avec72 heuresrestanteset aucun cycle actif.
39
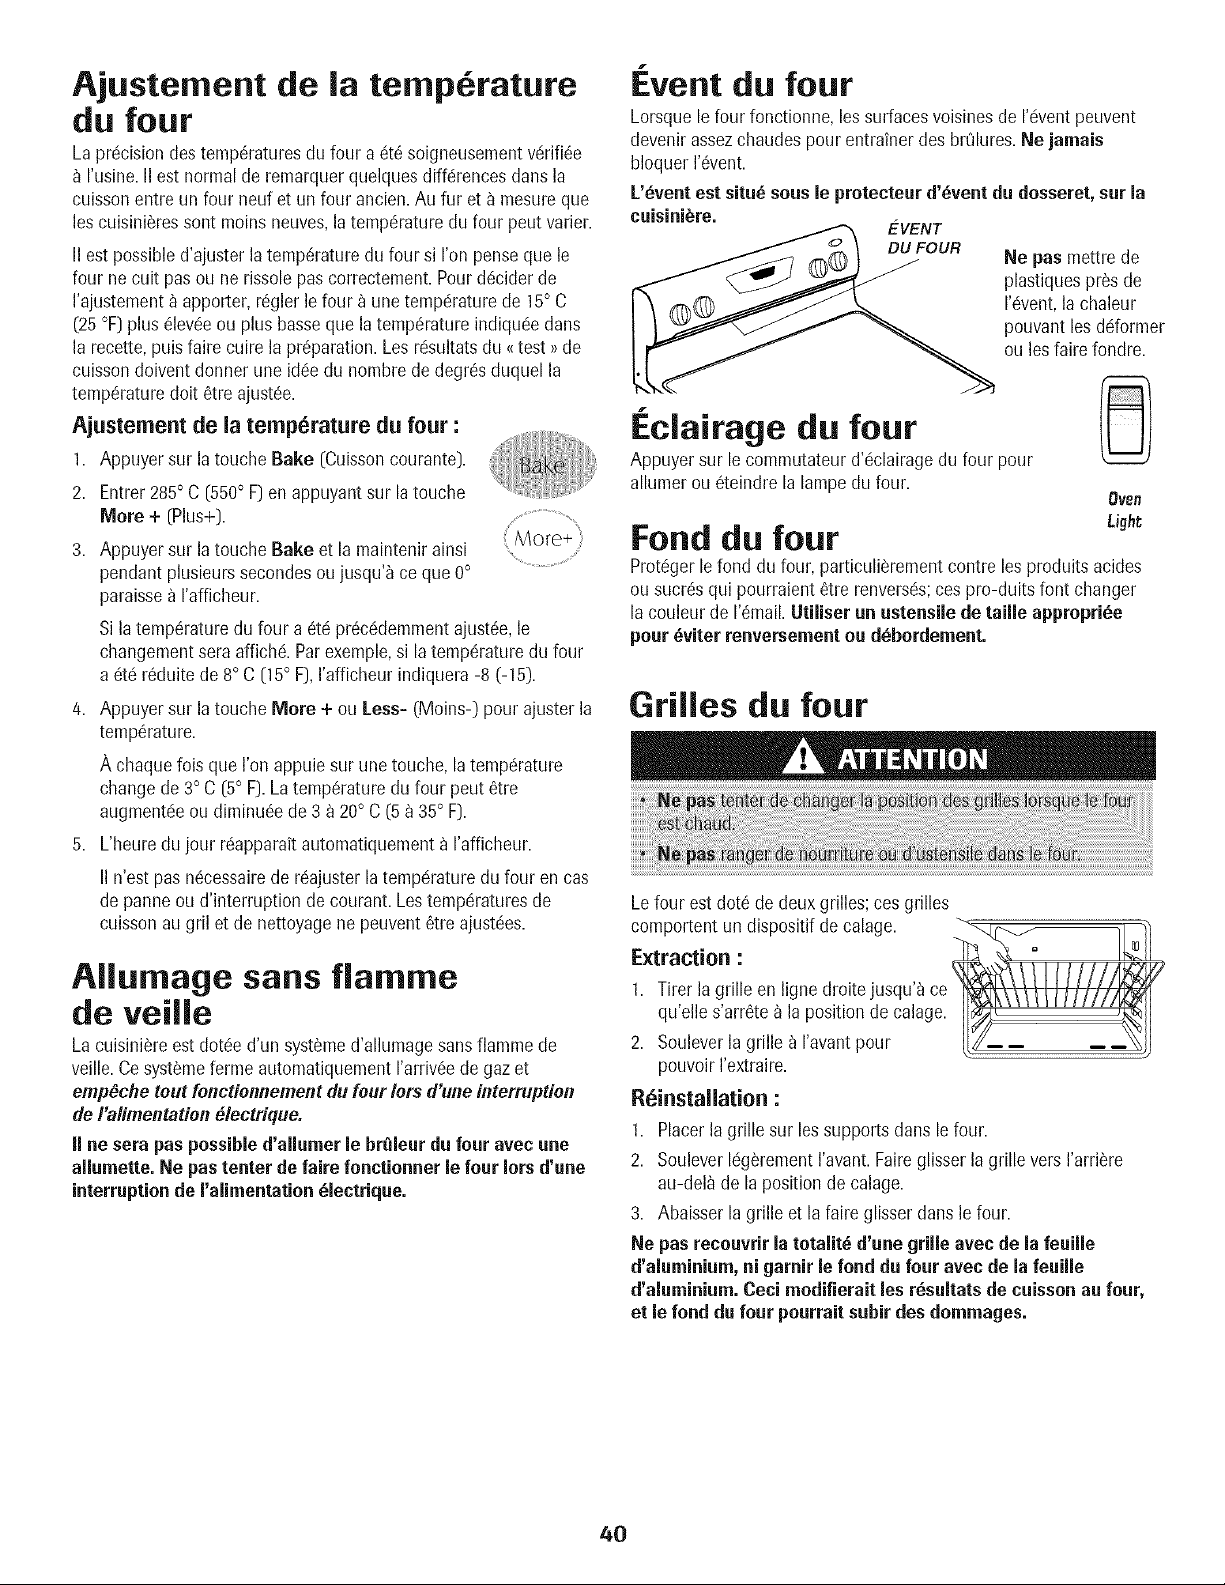
Ajustement de la temperature
du four
La pr6cisiondes temp6raturesdu four a €!t6soigneusementv6rifi6e
I'usine.II est normalde remarquerquelquesdiffc!rencesdans la
cuissonentre un four neuf et un four ancien.Au fur et _ mesureque
les cuisini_ressent moinsneuves,la temp6raturedu four pout varier.
II estpossibled'ajusterla temp6raturedu four si I'on penseque le
four necult pasou ne rissolepas correctement.Pour d6ciderde
I'ajustement_ apporter,r6glerle four a une tempc!raturede 15° C
(25°F)plus 61ev6eou plus bassoque la temp6ratureindiquc!edarts
la recette,puisfaire cuire la pr@aration.Les rc!sultatsdu _{test >>de
cuissondoivent donner uneidc!edu hombrede degr6sduquel la
temp6raturedolt 6tre ajust6e.
Ajustement de la temperature du four :
1. Appuyer sur la toucheBake (Cuissoncourante).
2. Entrer285° C [550° F) en appuyantsur latouche
More + (Plus+)...........................................
3. Appuyer sur la toucheBake et la maintenirainsi ....
pendantplusieurssecondesoujusqu'_ ceque 0°
paraissea I'afficheur.
Si latemp6raturedu four a 6tc!pr6c6demmentajust6e,le
changementseraaffichc!.Parexemple,si latemp6raturedu four
a 6tc!r6duitede 8° C [15° F), I'afficheur indiquera-8 (-15).
4. Appuyer sur la toucheMore + ou less= (Moins-) pour ajuster la
temperature.
A chaquelois que I'on appuiesur une touche, la tempc!rature
changede 3° C (5° F).La tempSraturedu four pout 6tre
augmentc!eou diminu_e de 3 a 20° C (5 a 35° F).
5. L'heuredu jour rc!apparaitautomatiquementa I'afficheur.
II n'est pas n6cessairede r6ajusterla temp6raturedufour en cas
depanneou d'interruption de courant.Lestemp6raturesde
cuissonau gril et de nettoyagene peuvent6tre ajustc!es.
Allumage sans flamme
de veille
Lacuisini_re est dot6e d'un syst_med'allumagesans flammede
veille.Ce syst6meferme automatiquementI'arriv6ede gazet
emp_che toutfonctionnement dufour lots d'une interruption
de I'alimentation #lectrique.
II ne sera pas possibled'allumer le br_leur du four avec une
allurnette. Ne pastenter de fake fonctionner le four lots d'une
interruptionde I'alimentation blectrique.
f
Event du four
Lorsquele four fonctionne,lessurfacesvoisinesde 1'6ventpeuvent
devenirassezchaudespour entrainer desbrQlures.Ne jarnais
bloquer1'6vent.
L'_vent est situ_ sous le proteeteur d'_ventdu dosseret, sur la
cuisini_re.
EVENT
Ecla|rage du four
Appuyer sur lecommutateurd'c!clairagedu four pour
allumerou 6teindre la lampedu four.
0yen
Fond du four L g,,
Prot_gerle fond du four,particuli_rementcontre les produitsacides
ousucr6squi pourraient6tre renvers6s;cos pro-duits font changer
la couleurde 1'6mail.Utiliser un ustensile de taille appropriee
pour_viter renversernentou d_bordernent.
Ne pas mettre de
plastiquespros de
I'_vent,la chaleur
pouvant losd_!former
ou losfaire fondre.
Grilles du four
Lefour est dot_ de deuxgrilles; ces grilles
comportentun dispositifde calage.
Extraction :
1. Tirerla grille en lignedroite jusqu'a ce
qu'elle s'arr_te_ la positionde calage.
2. Souleverla grille a I'avantpour
pouvoirI'extraire.
R_installation :
1. Placerla grille sur lessupportsdans le four.
2. SouleverI_!g_rementI'avant.Faireglisserlagrille vers I'arri_re
au-del_ de la positionde calage.
3. Abaisserlagrille et la faire glisserdartslefour.
Ne pas recouvrirla totaiit_ d'une griJJeavee de la feuiJJe
d'aluminium, ni garnir le fond du four avee de la feuille
d'aluminium.Ceci modifierait los r_sultats de caisson au four,
et le fond du four pourrait subir des dommages.
4O
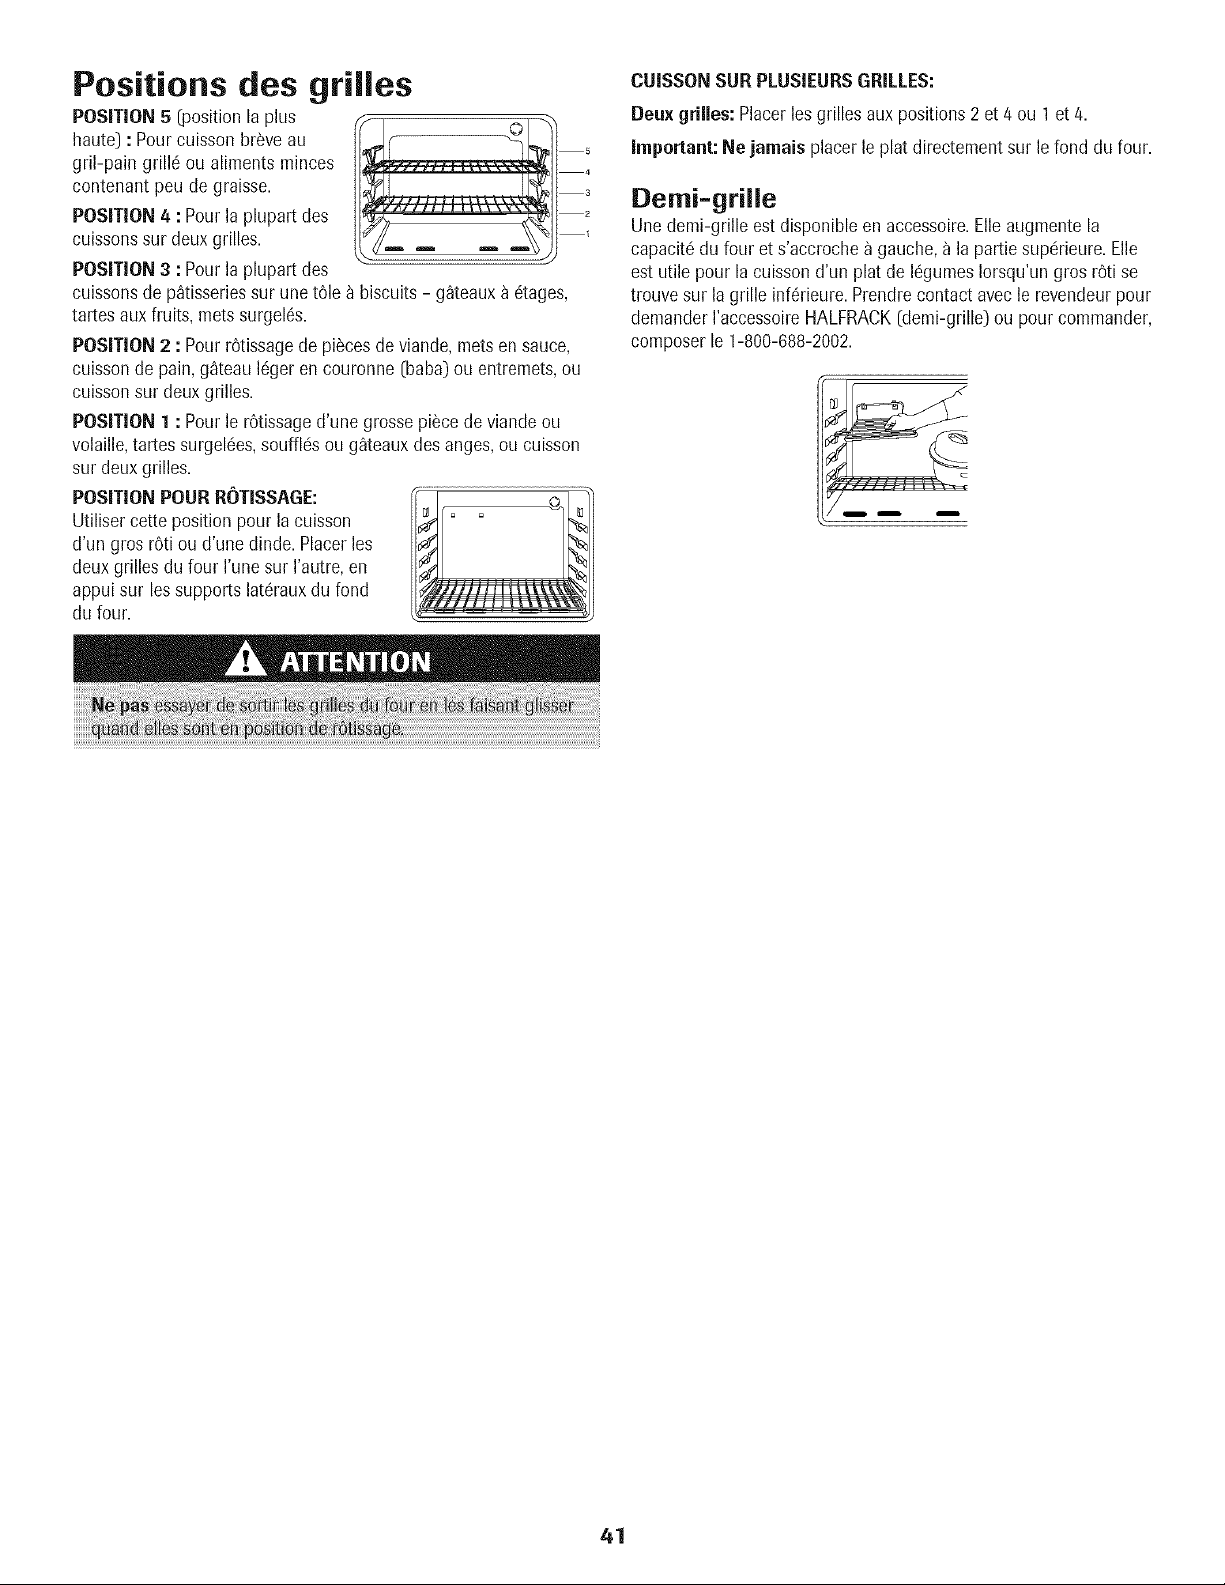
Positions des grilles
POSiTiON5 (positionla plus
haute) : Pourcuisson braveau
gril-pain grilla ou aliments minces
contenant peu de graisse.
POSITION4 : Pourla plupart des
cuissonssur deux grilles.
POSITION3 : Pourla plupart des
cuissonsde p_tisseriessur une tOle_ biscuits- g_teauxa atages,
tartesaux fruits, metssurgel6s.
POSITION2 : PourrOtissagede placesde viande,mets en sauce,
cuissonde pain,g_teau lager en couronne [baba)ou entremets,ou
cuissonsur deux grilles.
POSITION1 : Pourle rOtissaged'une grosseplacede viandeou
volaille,tartes surgel6es,souffl6s ou g_teauxdes anges,ou cuisson
sur deux grilles.
POSITIONPOURROTISSAGE:
Utiliser cette positionpour la cuisson
d'un gros rOtiou d'une dinde. Placerles
deux grilles dufour I'unesur I'autre,en
appuisur lessupports lat6rauxdu fond
du four.
CUISSONSUR PLUSIEURSGRILLES:
Deux grilles:Placerles grilles auxpositions2 et 4 ou 1 et 4.
important: Ne jamais placerle plat directementsur le fond du four.
Demi-grille
Une demi-grille estdisponible enaccessoire.Elleaugmentela
capacit6du four et s'accrochea gauche,a la partiesup6rieure.Elle
est utile pour la cuissond'un plat de I_gumesIorsqu'ungros rOtise
trouvesur la grille infarieure.Prendrecontactavecle revendeurpour
demanderI'accessoireHALFRACK[demi-grille)ou pour commander,
composerle 1-800-688-2002.
41

Rema_€ues
42
P
GARANTIE DES GROS APPAREILS MENAGERS
MAYTAG CORPORATION
GARANTIE LIMITI_E
Pendant un an & compter de la date d'achat, Iorsque ce gros appareil menager est utilise et entretenu conformement aux instructions
jointes a ou fournies avec le produit, la marque Maytag de Whirlpool Corporation ou Whirlpool Canada LP (ci-apres designees
"Maytag") paiera pour les pieces specifiees par I'usine et la main-d'oeuvre pour corriger les vices de mat@iaux ou de fabrication. Le
service doit 6tre fourni par une compagnie de service designee par Maytag. Cette garantie limitee est v.alide uniquement aux €:tats-Unis
ou au Canada et s'applique exclusivement Iorsque I'appareil est utilise dans le pays ou il a ete achet& A I'exterieur du Canada et des 50
€tats des 12tats-Unis, cette garantie limit_e ne s'applique pas. Une preuve de la date d'achat original est exigee pour obtenir un service
dans le cadre de la presente garantie limitee.
ARTICLES EXCLUS DE LA GARANTIE
La pr6sente garantie limit6e ne couvre pas :
1. Les visites de service pour rectifier I'installation du gros appareil menager, montrer a I'utilisateur comment utiliser I'appareil,
remplacer ou reparer des fusibles ou rectifier le c&blage ou la plomberie du domicile.
2. Les visites de service pour reparer ou remplacer les ampoules electriques de I'appareil, les filtres a air ou les filtres a eau. Les pieces
consomptibles ne sent pas couvertes par la garantie.
3. Les reparations Iorsque le gros appareil menager est utilise a des fins autres que I'usage unifamilial normal ou Iorsque les
instructions d'installation et/ou les instructions de I'operateur ou de I'utilisateur fournies ne sont pas respectees.
4. Les dommages imputables a : accident, modification, usage impropre ou abusif, incendie, inondation, actes de Dieu, installation
fautive ou installation non conforme aux codes d'electricite ou de plomberie, ou I'utilisation de pieces consomptibles ou de produits
nettoyants non approuves par Maytag.
5. Les defauts apparents, notamment les eraflures, les bosses, fissures ou tout autre dommage au fini du gros appareil menager,
moins que ces dommages soient dus a des vices de materiaux ou de fabrication et soient signales a Maytag dans les 30 jours
suivant la date d'achat.
6. Toute perte d'aliments due a une defaillance du refrig6rateur ou du congelateur.
7. Les coots associes au transport du gros appareil menager du domicile pour reparation. Ce gros appareil menager est con(_u pour
_tre repare a domicile et seul le service a domicile est couvert par la presente garantie.
8. Les reparations aux pieces ou systemes resultant d'une modification non autorisee faite a I'appareil.
g. Les frais de transport pour le service d'un produit si votre gros appareil est situe dans une region eloignee ou un service d'entretien
Maytag autorise n'est pas disponible.
10. La depose et la reinstallation de votre gros appareil si celui-ci est installe dans un endroit inaccessible ou n'est pas installe
conformement aux instructions d'installation fournies.
11. Les gros appareils m_nagers dont les numeros de serie et de modele originaux ont ete enleves, modifies ou qui ne peuvent pas _tre
facilement identifies. La presente garantie est nulle si le numero de serie d'usine a ete modifie ou enleve du gros appareil menager.
Le coot d'une reparation ou des pieces de rechange dans le cadre de ces circonstances exclues est a la charge du client.
CLAUSE D'EXONCRATION DE RESPONSABILIT¢ AU TITRE DES GARANTIES IMPLICITES; LIMITATION DES RECOURS
LE SEUL ET EXCLUSIF RECOURS DU CLIENT DANS LE CADRE DE LA PR¢SENTE GARANTIE LIMITI2E CONSISTE EN LA
REPARATION PRC:VUE CI-DESSUS. LES GARANTIES IMPLICITES, Y COMPRIS LES GARANTIES APPLICABLES DE QUALITE
MARCHANDE ET D'APTITUDE A UN USAGE PARTICULIER, SONT LIMITEES A UN AN OU A LA PLUS COURTE PERIODE AUTORISC:E
PAR LA LOI. MAYTAG N'ASSUME AUCUNE RESPONSABILITE POUR LES DOMMAGES FORTUITS OU INDIRECTS. CERTAINES
JURIDICTIONS NE PERMETI-ENT PAS L'EXCLUSION OU LA LIMITATION DES DOMMAGES FORTUITS OU INDIRECTS, OU LES
LIMITATIONS DE LA DURI2E DES GARANTIES IMPLICITES DE QUALIT¢: MARCHANDE OU D'APTITUDE A UN USAGE PARTICULIER,
DE SORTE QUE CES EXCLUSIONS OU LIMITATIONS PEUVENT NE PAS S'APPLIQUER DANS VOTRE CAS. CE'FI-E GARANTIE VOUS
CONFI2RE DES DROITS JURIDIQUES SP¢CIFIQUES ET VOUS POUVEZ 12GALEMENT JOUIR D'AUTRES DROITS QUI PEUVENT
VARIER D'UNE JURIDICTION/_, UNE AUTRE.
/_,I'exterieur du Canada et des 50 12tatsdes Ctats-Unis, cette garantie ne s'applique pas. Contactez votre marchand Maytag autorise
pour determiner si une autre garantie s'applique.
Si vous avez besoin de service, voir d'abord la section "Depannage" du Guide d'utilisation et d'entretien. Apres avoir verifie la section
".D_pannage", de I'aide supplementaire peut _tre trouvee en v@ifiant la section "Assistance ou service" ou en appelant Maytag. Aux
E.-U., composer le 1-800-688-9900. Au Canada, composer le 1-800-807-6777.
9/07
Estufa a gas
lnstrucciones
sobre seguridad ............................
Cuidado y limpieza .......................49=52
Horno autolimpiante
Procedimientos de limpieza
lVlafltenimieflto .............................. 52=53
Ventana y luz del horno
Retiro de la estufa a gas
Localizaci6n y soluci6a
de aver/as .......................................53=54
Cocinando en la estufa ................55=56
Controles superiores
Quemadores de gas sellados
Cocinando en el homo ................57=65
Contreles del homo de Iimpieza manual
Reloj Hornear
Temporizador Asar
Perilla de[ homo de limpieza manual
Hornear Asar
Controles del homo autoiimpiante
Relo Temporizador
Hornear Mantener caliente
CocciOn y Asar
mantener caliente Diferido
Parrillas del homo
Garantia y servicio ...............................67
Para asegurarfuncionarniento correcto y seguro: FI
electrodom_sticodebeser instaladodebidamentey puestoa tierra per
un tecnico calificado.No intente ajustar,reparar,prestarservicioo
reemplazarninguna piezade esteelectro-dom_sticoa menosque sea
especificamenterecomendadoen estaguia. Todaslas reparaciones
deben ser realizadasper un tecnico calificado.Pidaal instaladorque le
indiquela ubicaciOnde la v_lvulade cierre del gas y comecerrarlaen
case de unaemergencia.
Siempredesenchufeel electrodom_sticoantesde dectuar alguna
reparaciOn.
Lasadvertenciase instruccionesimportantessobre seguridadque
aparecenen esta gufa no est_ndestinadasa cubrir todaslas
posiblescircunstanciasy situacionesque puedanocurrir. Sedebe
ejercer sentidocomOn,precauciOny cuidado cuando instale,realice
mantenimientoo hagafuncionar el artefacto.
SiemprepOngaseen contactocon el fabricantesi surgenproblemas
o situacionesque ustedno comprenda.
Reconozca los simbolos, advertencias,
etiquetas de seguridad
Lea y sigatedas las instruceionesantes de usar este
eleetrodorn_stieo paraevitarel riesgo potencialde incendio,
cheque el_ctrico,lesion personalo da_o al electrodom_sticocome
resultadode su use inapropiado. Utilice esteelectrodom_stico
solamentepara el propOsitoque ha side destinadosegOnse
describeen esta guia.
Para evitar un incendio o da o
causado per el humo
Aseg_resede que se hayanretiradotodos los materialesde
empaquedel electrodom_sticoantesde su use.
Mantengael drea alrededordel electrodom_sticolibre y exentade
materialescombustibles,gasolina u otrosvaporesy materiales
inflamables.
Siel electrodom_sticoes instaladocercade una ventana,se debe
tener cuidado paraevitarque las cortinas pasensobre los
quemadores.
45
NUNCA dejearticulos sobre lacubiertade la estufa.Elaim caliente
del respiraderopuede encenderlos articulos inflamablesy aumentar
la presiOnen los envasescerrados basrahacerlosreventar.
Muchos envasesde tipo aerosolson EXPLOSIVOScuando son
expuestosal calory puedenset altamenteinflamables. Evitesu uso o
su almacenamientocercadel electrodom(!stico.
Muchos pl_sticossonvulnerablesal calor. Mantenga los pl_sticos
alejadosde las piezasde laestufa que puedanestartibias o calientes.
No deje articulosde pl_sticosobre la cubierta de la estufa pues se
puedenderretir o ablandarsi est_ndemasiadocerca del respiradero
o de un quemadorsuperiorencendido.
Paraeliminar el riesgo de pasarsobre los quemadoressuperiores
calientes,no se debenguardararticulos en los armariosque est_n
directamentesobre laestufa. Si talesarmariosson usadospara
almacenamiento,debe limitarsea colocar articulosde uso poco
frecuentey que puedenguardarseen forma seguraen una 9rea que
est_sujetaal calor provenientede la estufa. Las temperaturas
puedenno set apropiadasparaalgunos articulos,tal comoliquidos
vol_tiles,limpiadoreso spraysen aerosol.
En case de incendio
Apagueel electrodom(!sticoy la campanade ventilaci6npara evitar
que las llamassedispersen. Extingalas llamas hego enciendala
campanaparaexpulsarel humo y el olor.
• En la cubier[a:Apague el fuego o la llamaen una sart_n con una
tapa o una bandejade hornear.
NUNCA levanteo muevaunasartenen llamas.
• En el homo: Apague el fuego o la llamacerrando la puerta del
homo.
No useagua en los incendios de grasa. Use bicarbonato,un
productoquimico secoo un extinguidordeltipo con espumapara
apagarun incendio o la llama.
Instrucciones generales
Paraverificar si el dispositivoest_debidamenteinstalado,mire
debajode la estufacon una linterna paraasegurarsede que uno de
los tornillos niveladorestraseroseste debidamenteenganchadoen
la ranuradel soporte. El dispositivoantivuelcoasegurael tornillo
niveladortrasero al piso cuando est_debidamenteenganchado.
Estodebeverificarsecada vez que la estufasea movida.
Seguridad para los nifios
NUNOA dejea los nifiossoloso sin supervisioncuando el
electrodom_sticoest8en uso o est8caliente.
NUNOA permitaque los nifios se sienteno se paten en ninguna
parte del electrodom(!sticopues se pueden lesionaro quemar.
Seles debeensefiara los nifiosque el electrodom_sticoy los
utensiliosque est_n en (!1o sobre(!1pueden estar calientes. Deje
enfriar los utensilioscalientesen un lugar seguro,fuera del alcance
de los nifios peque_os. Seles debeensefiara los nifios que un
electrodom(!sticono es un juguete. No se debe permitir que los
nifiosjueguen con los controlesu otras piezasde la estufa.
Generalidades
alimentoso utensiliosde cocina.
No use la cubierta o el homo como una _rea para almacenar
46
Elrespiraderodel homo se encuentra en la basedel panel de control.
Evitetocar el _readel respiraderodel homo cuando el homo este
encendidoy durante variosminutos despu_!sde que el homo haya
sido apagado. Algunas piezasdel respiraderoy del _reacircundante
se calientanIo suficientecomo paracausarquemaduras. Despu_!sde
que el homo hayasido apagado,no toque el respiraderoni las_reas
circundanteshastaque elias hayantenidotiemposuficientepara
enffiarse.
Otrassuperficiespotencialmentecalientesincluyenla cubiertade la
estufa,las _reasdirigidas hacia la cubiertade la estufa,el respiradero
del horno, lassuperficiescerca de la aberturadel respiradero,la
puerta del homo y las _reasalrededorde la puerta y la ventanadel
homo.
No toque un foco calientedel hornocon un paso hOmedopues el
foco se puedequebrar. Si se quiebra el foco, desconectela corriente
el_ctricahacia la estufa antesde sacarel foco para evitar choque
el_ctrico.
Seguridad para cocinar
Siemprecoloque un utensilioen un quemadorsuperior antesde
encenderlo. AsegOresede usar la perillacorrectaque controla cada
quemadorsuperior. Aseg_resedeencender el quemadorcorrectoy
comprobarde queen decto el quemador hayasido encendido.
Cuandohayaterminado de cocinar,apagueel quemador antesde
retirar el utensilioparaevitarexposiciOna la llama del quemador.
Siempreajuste la llamadel quemadorsuperior de modo que no se
extiendam_sall_ del horde inferior del utensilio. Una llamaexcesiva
es peligrosa,desperdiciaenergfay puededa_ar la estufa,el utensilio
o los armariosqueest_nsobre la estufa.
NUNCA dejesin supervisionla cubiertade la estufa cuandoest8
cocinando,especialmentecuando usa un ajustede calor alto o
cuando est8usando unafreidora. Losrebosespueden producir humo
y los derramesdegrasa puedeninflamarse. Limpielos derrames
grasosostan pronto comosea posible. No use calor alto durante
periodosde cocciOnprolongados.
NUNCA calienteun envasecerradoen el quemadorsuperior o en el
homo. La acumulaciOnde presiOnpuede hacerexplotarel envase
causandouna lesion personalgraveo da_o a la estufa.
Usetomaollassecosy gruesos. Los tomaollash_medospueden
causarquemadurasa causadel vapor. Lastoallas u otros sustitutos
no debenser usadoscomotomaollasporque ellospueden quedar
colgandoa travesde los quemadoressuperioresy encenderseo
enredarseen las piezasde la estufa.
Siempredeje enfriar la grasacaliente que se ha usadoen la freidora
antesde intentar movero manipularla.
No permita que se acumulegrasa u otros materialesinflamablesen la
estufao cerca de ella,en la campana o en el ventilador aspirador.
Limpie la campanaextractoracon frecuenciaparaevitarque lagrasa
u otros materialesinflamablesse acumulenen la campana o en el
filtro. Enciendaelventiladorcuando cocinealimentos flameados
debajola campana.
NUNCA use vestimentasde materialesinflamables,ropasueltao de
mangaslargascuando estecocinando. La vestimentase puede
encendero engancharen los mangosde los utensilios.
Siemprecoloquelas parrillasdel homo en la posiciOndeseada
cuando el homo este ffio. Deslicela parrilla del homo hacia afuera
paraagregaro retiraralimento, usandotomaollassecosy
resistentes.Siempreevite alcanzardentro del homo paraagregaro
retirar alimentos. Si una parrilladebeset sacadacuando est_
todaviacaliente,useun tomaollasseco. Siempreapague el homo
despuesde haberterminadode cocinar.
Uselas parrillassolamenteen el homo en que fueron enviadas/
compradas.
Tengacuidado cuandoabra la puerta del homo. Deje que escape
el aireo elvapor calienteantesde sacaro volvercolocar el alimento.
ADVERTENCIASOBRELOS ALIMENTGSPREPARADOS: Siga
las instruccionesdel fabricantede los alimentos. Si un envasede
pl_sticode alimento congeladoy/o su tapa se deforma,se combao
se danade algunaotra maneradurante la cocciOn,descarte
inmediatamenteel alimentoy su envase. Elalimentopuedeestar
contaminado.
NUNOA use papelde aluminio paracubrir una parrilladel homo o
la parte inferior del homo. Eluso incorrectopuederesultaren un
riesgode choqueel_ctrico, incendio o da_o al electrodom_stico.
Usepapelde aluminio solamentecomo se indica en estaguia.
Utensilios apropiados
Usesartenescoil rondospianosy mangosque seanf_ciles de
tomary que permanezcanfrios. Eviteusarsartenesu ollas
inestables,combadasquese puedenvolcar f_cilmenteu ollas cuyos
mangosestensueltos. Adem_seviteusar utensiliosespecialmente
peque_oso sartenescon mangospesadospuesellos pueden set
inestablesy volcarsef_cilmente. Losutensiliosque son pesadosde
movercuando est_nIlenoscon alimentopuedentambi_nser un
peligro.
AsegOresede que el utensiliosea Io suficientementegrande como
paraconteneren forma debidalos alimentosy evitarderrames. El
tama_oes particularmenteimportante cuandose utilizanfreidoras.
AsegOresede que el utensiliotiene capacidadpara el volumen de
alimentosque se va a agregaral igual que para la formaciOnde
burbujasde la grasa.
Parareducir a un minimo lasquemadurasy que los materiales
inflamablesy los derramesse enciendandebidos a contactono
intencionalcon el utensilio,los mangosne deben extendersesobre
el quemadorsuperioradyacente. Siempregire los mangosde los
utensilioshacia el lado o hacia la partetrasera de la estufa,ne hacia
la habitaciOndonde puedeser f_cilmentegolpeadoso alcanzados
por los ni_os peque_os.
Nunca dejeque un utensiliohiervahasta quedarsecopues esto
puededa_ar el utensilioy la estufa.
Sigalas instruccionesdel fabricante cuando use bolsasparacocinar
en el homo.
47
Solamenteciertos tipos de utensiliosdevidrio cer_mico,de
cer_micao glaseadosson convenientespara usoen la cubierta de
la estufao en el homo sin quebrarsedebido al cambio repentinode
temperatura. Sigalas instruccionesdel fabricantecuando use
utensiliosde vidrio.
Esteelectrodomesticoha sido probadorespectoa su rendimiento
seguro usandoutensiliosde cocina convencionales.No use ning0n
dispositivoo accesorioque no hayasido especificamente
recomendadoen estagufa. No use tapasparacubrir los
quemadoressuperiores,rejillas para la cubierta de la estufani
agreguesistemasde convecci0npara hornos. Eluso de dispositivos
o accesoriosque no son expresamenterecomendadosen esta guia,
puedecrear seriospeligrosde seguridad,resultaren problemasde
rendimientoy reducir la vida 0til de los componentesde la estufa.
Seguridad de la limpieza
Apaguetodos los controlesy espereque se enfrfen las piezasde la
estufaantesde tocarlaso limpiarlas. No toque las rejillasde los
quemadoreso las _reascircundanteshastaque elias no hayan
tenido tiempo suficientede enfriarse.
Limpie la estufacon cuidado. Tengacuidado para evitar
quemadurasdevapor si se usa unaesponjao un paso mojadopara
limpiar los derramesen unasuperficiecaliente. Algunos
limpiadorespueden producirvaporesnocivoscuandose aplicana
una superficiecaliente.
Homo autolimpiante
[modelos selectos]
Limpie solamentelas piezasque se indican en estagufa. No limpie
lajunta de la puerta. Lajunta es esencialparaun selladoherm_tico.
No restriegue,dame,ni muevalajunta de la puerta. No use
limpiadoresde homo de ningunaclaseen el homo ni alrededorde
cualquier parte del homo autolimpiante.
Esnormal que la cubierta de la estufa se calientedurante el ciclo de
autolimpieza. PorIo tanto,se debe evitar tocar la cubierta durante
un ciclo de autolimpieza.
Aviso y advertencia
importante sobre seguridad
La Propuesta65 de la Leyde 1986del Estadode CaliforniaSobre
Seguridady ContaminaciOndel Agua Potable(CaliforniaSafe
DrinkingWater andToxic EnforcementAct of 1986)exigeque el
Gobernadorde Californiapublique una listade las sustanciasque
segOnel estadode Californiacausanc_ncer o da_o al sistema
reproductivoy exige que las empresasadviertana sus clientessobre
la exposiciOnpotencial a tales sustancias.
Seadviertea los usuariosde estaestufaque la combustiondel gas
puederesultaren exposiciOnde bajonivel a algunasde las
sustanciaspublicadasen la lista, incluyendobenceno,formaldehido
y hollin,debido principalmentea la combustion incompletadel gas
natural o de los combustiblesde petrOleolicuado. Losquemadores
ajustadosen forma debida reducir4nla combustion incompleta. La
exposiciOna estassustanciaspuede tambi_n set reducidaa un
minimoventilandolos quemadoresal exterioren forma adecuada.
Seadviertea los usuariosde esteelectrodom@sticoque cuando el
homo est_funcionandoen el ciclode autolimpieza,puedehaber
exposiciOnde bajonivel a algunasde las sustanciasindicadasen la
lista,inchyendo monOxidode carbono. LaexposiciOna estas
sustanciaspuedeser reducidaa un minimoventilandoel homo al
exterioren forma adecuada,abriendo lasventanasy/o la puertaen
la habitaciOnen dondeestd ubicadoel electrodom_sticodurante el
ciclo de autolimpieza.
AVISO IMPORTANTERESPECTOA LOS PAJAROS
DOMESTICOS:
Nunca mantengalos p_jarosen la cocina o en las habitaciones
donde puedanIlegarlos humosde la cocina. Losp_jarostienen un
sistemarespiratoriomuysensitivo. Los humosproducidosdurante
el ciclo de autolimpiezadel homo puedenser perjudicialeso
mortalespara los p_jaros. Los humos que despideel aceite de
cocina recalentado,la grasa,margarinay los utensilios
antiadherentesrecalentadospuedentambi_n ser perjudiciales.
Conserve estas instrucciones para referencia futura
48
Culdedo¥Hmplez
Homo autolimpiante
(modelos selectos)
Importante: Parala limpiezamanual,ver p_gina51.
6. Limpielos derramesazucaradoso _cidostalescome papadulce
(camote),tomateso salsasa basede leche.La porcelana
esmaltadaes resistenteal _cido pero no a pruebade_cidos. El
acabadode porcelanapuede descolorarsesi los derrames_icidos
o azucaradosnoson limpiadosantesde un ciclo de autolimpieza.
Iraportante: La temperaturadel homo debeser inferior a205° C
(400° F) paraprogramarun ciclo de limpieza.
Para pregramar 'Self=Clean' (Autolimpieza):
1. Cierrela puerta del homo.
2. Muevala palancade bloqueo de la puerta a la derechaa la
posici6nbloqueada.
3. Optimala tecla 'Clean' (Limpieza).
• 'CLEAN'destella en el indicadorvisual.
Elciclo deautolimpiezausatemperaturassuperiores alas
temperaturasnormalesde cocciOnparalimpiar autom_ticamenteel
interior del homo.No fuerce lapuerta del homo ni la palancade
bloqueoparaabrirla.EstopuedecausarexposiciOnalas
temperaturasaltasy constituir un riesgo dequemadura.asnormales
paralimpiar autom_iticamentetodo el interiordel homo.
Limpieel homo con frecuenciaremoviendolos derramespara evitar
humoexcesivoy Ilamaradas.No permitaquese acumuledemasiado
sucio en el homo.
Duranteel procesode limpieza,la cocinadebeestar bienventilada
paraeliminar los oloresnormalesasociadoscon lalimpieza.
Antes de la autolimpieza
1. Apaguela luz del horno antesde la limpieza.La luzdel borne
puedefundirsedurante el ciclo de limpieza.
2. Retirelaasadera,todos los utensiliosy las parrillasdel homo. Las
parrillasdel homo se descolorar_ny nose deslizar_nf_cilmente
despu6sde un ciclo de autolimpiezasi no son retiradasdel homo.
3. Limpie el marcodel homo,el marcode
la puerta,el _reafuera de lajunta de la \ \'_---..._/ //_//
puerta y alrededorde laabertura en la
junta de la puerta,con un agente de
limpiezano abrasivetal come'Ben
Ami'* ocon detergentey agua.El
procesode autolimpiezano limpiaestas
_reas. Eliasdeben set limpiadaspara evitar que la suciedad se
horneedurante elciclo de autolimpieza. (Lajunta es elsello
alrededorde la puerta y ventanadel homo.)
/4. Paraevitarda_o no limpie ni frote lajunta situadaalrededorde la
puerta del homo.Lajunta est_dise_adaparasellar
hermc!ticamenteel calordurante el ciclo de limpieza.
5. Limpie el excesode grasao derramesde la parte inferior del
homo. Estoevitahumo excesivoo Ilamaradasdurante el ciclo de
limpieza.
Sila puerta no se cierra,se oir_una sepalsonoray la palabra
'DOOR'(Puerta)se desplegar_en el indicadorvisual. Si la puerta
no es cerradadentro de/45segundos,la operaciOnde
autolimpiezaser_canceladay el indicadorvolver_ia desplegarla
heradel dfa.
/4. Optimala tecla 'More+' (M_s+) o 'Less-' (Menos-). More+
, Sedespliega'CL-M (SuciedadModerada,
3 horas). Less-
5. Optimala tecla 'More+' o 'Less=' paradesplazarlos ...........................................
ajustesde autolimpieza.
'CL-H' (SuciedadIntensa,/4horas)
'CL-M' [SuciedadModerada,3 horas)
'CL- L' (Suciedadleve,2 horas)
AI seleccionarel nivel de suciedaddel homo se programa
autom_iticamenteel tiempo de limpieza.
6. Despuc!sde cuatrosegundos,el homo comenzar_a limpiar.
° Eltiempo de limpieza comenzar_la cuenta regresivaen el
indicador.
° 'LOCK'se desplegar_ien el indicadorvisual.
, 'CLEAN'se desplegar_ien el indicadorvisual.
Para diferir un cicle de autolimpieza:
1. Oprimala tecla 'Delay' (Diferido).
, 'DELAY'destella.
, '00:00'se desplegar_en el indicadorvisual.
2. Optimala tecla 'More+' o 'Less=' paraprogramar
la cantidadde tiempoque usteddeseadiferir el
ciclo. Eltiempodiferido puedeset programadode
10minutes (00:10)a 11 horas,59 minutes (11:59).
M ore+
*Loshombresde los productosson marcasregistradasde sus respectivosfabricantes.
49
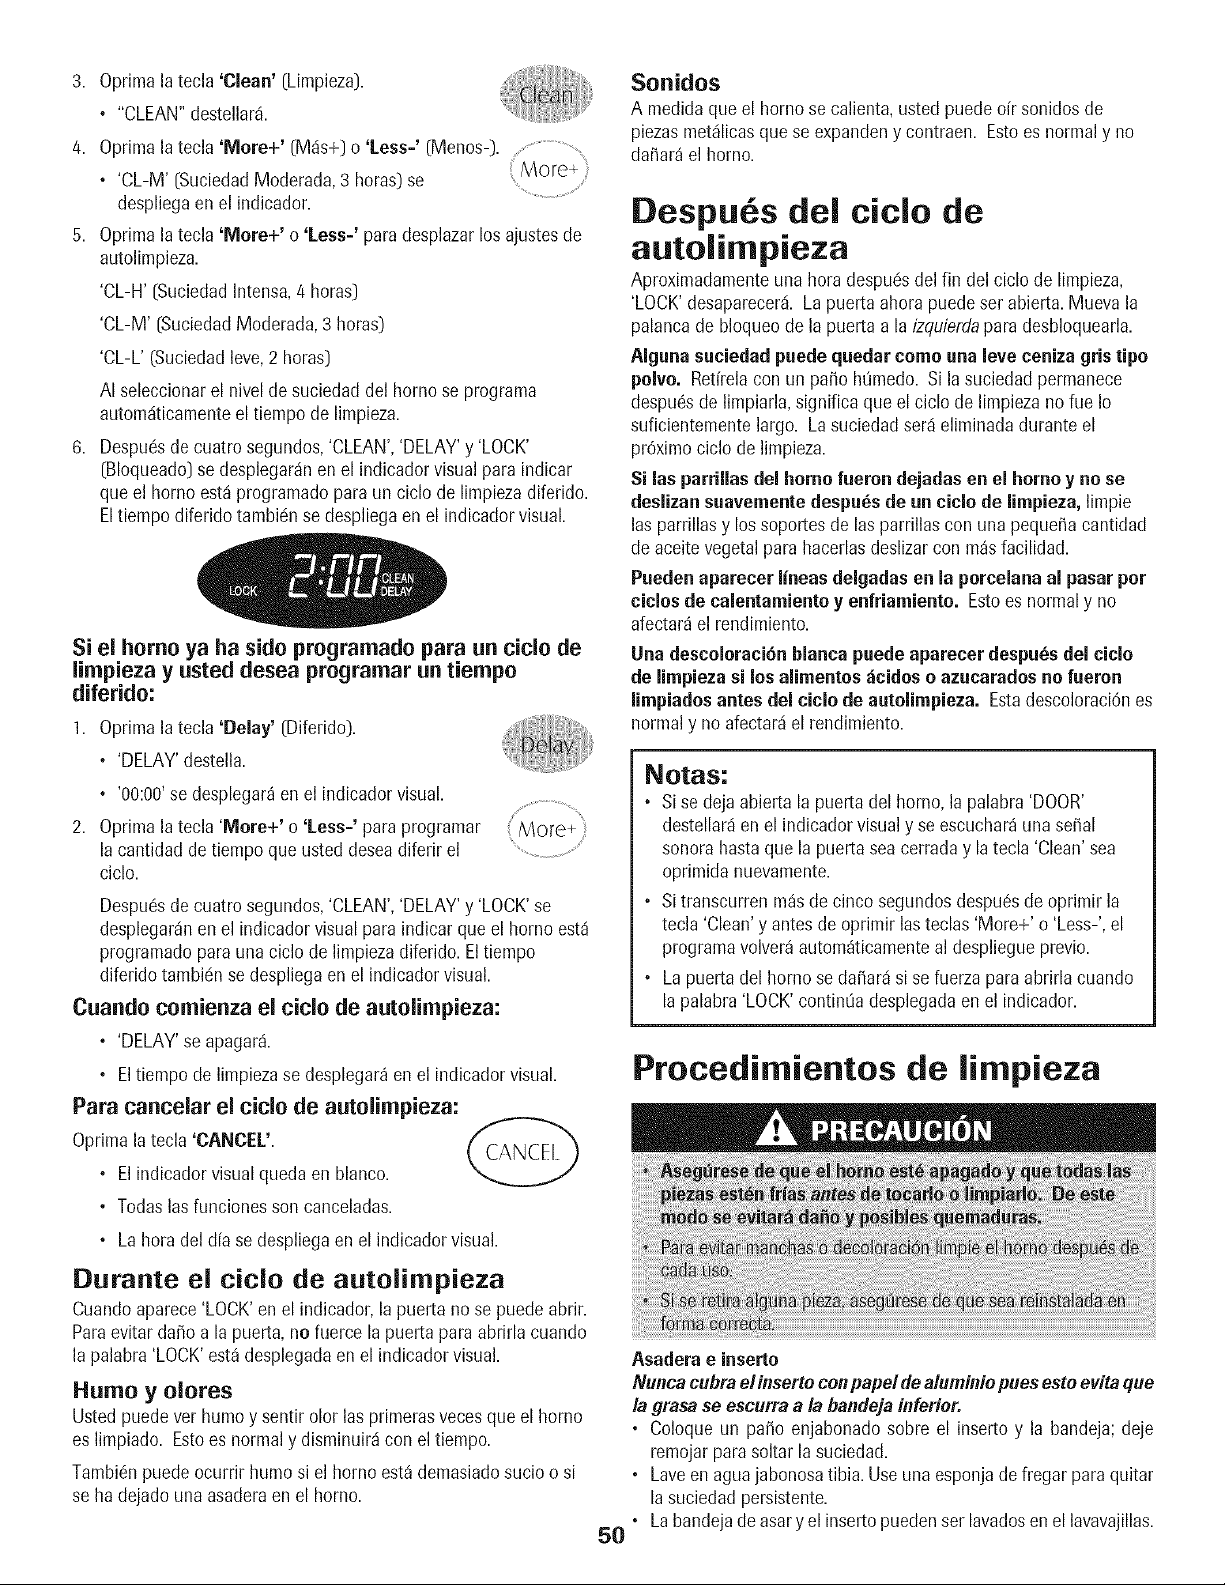
3. Oprimala tecla 'Clean' [Limpieza].
• "CLEAN"destellar&
4. Oprimala tecla 'More+' [M_is+]o 'Less-' [Menos-). ..................................
• 'CL-M' (SuciedadModerada,3 horas)se
despliegaen el indicador.
5. Oprimala tecla 'More+' o 'Less-' para desplazarlos ajustesde
autolimpieza.
'CL-H' (SuciedadIntensa,/4horas]
'CL-M' [SuciedadModerada,3 horas)
'CL-L' (Suciedadleve,2 horns]
AI seleccionarel nivel de suciedaddel homo se programa
autom_iticamenteel tiempo de limpieza.
6. Despu6sde cuatrosegundos,'CLEAN','DELAY'y 'LOCK'
[Bloqueado]se desplegar4nen el indicadorvisual paraindicar
queel homo est4programadoparaun ciclo de limpiezadiferido.
Eltiempo diferido tambic!nse despliegaenel indicadorvisual.
Si el homo ya ha side programado para an ciclo de
limpieza y usted desea programar an tiempo
diferido:
1. Oprimala tecla 'Delay' [Diferido).
• 'DELAY'destella.
, '00:00'se desplegar_en el indicadorvisual.
2. Oprimala tecla 'More+' o 'Less-' para programar
la cantidaddetiempo queusted deseadiferir el
ciclo.
Despu_sde cuatrosegundos,'CLEAN','DELAY'y 'LOCK'se
desplegar_nen el indicadorvisualparaindicar que el homo est4
programadopara unaciclo de limpiezadiferido.Eltiempo
diferidotambi6n sedespliegaen el indicadorvisual.
Cuando comienza el title de autolimpieza:
, 'DELAY'se apagar&
, Eltiempo de limpiezase desplegar_en el indicadorvisual.
Para cancelar el title de autolimpieza:
Oprimala tecla 'CANCEL'.
, Elindicadorvisual queda en blanco.
, Todaslasfuncionesson canceladas.
° Lahera deld[a se despliegaen el indicadorvisual.
Durante el title de autolimpieza
Cuandoaparece'LOCK'en el indicador,la puerta no se puede abrir.
Paraevitarda_o a la puerta,no fuerce lapuerta paraabrirla cuando
la palabra'LOCK'est_desplegadaen el indicadorvisual.
Humo y olores
Usted puedever humoy sentirolor Insprimerasvecesque el borne
es limpiado. Estoes normal y disminuir_icon el tiempo.
Tambi6npuedeocurrir humo si el homo est_demasiadosucio o si
se ha dejadounaasaderaen el homo.
Sonidos
A medidaqua el bornese calienta,usted puedeoff sonidosde
plazasmet_ilicasquese expandeny contraen. Estoes normaly no
da_ar_el homo.
Despu s del ciclo de
autolimpieza
Aproximadamenteunahera despuc!sdelfin del ciclo de limpieza,
'LOCK'desaparecer& Lapuerta ahorapuedeset abierta.Muevala
palancade bloqueode la puerta a la izquierdapara desbloquearla.
Alguna suciedad puede quedar come una love ceniza gristipo
polvo. Retfrelacon un pa_o hQmedo.Si la suciedadpermanece
despu6sde limpiarla,significa que el ciclode limpiezano fue Io
suficientementelargo. Lasuciedadser_ieliminadaduranteel
pr6ximociclo de limpieza.
Si las parrillasdel homo fueron dejadas en el homo y no se
deslizansuavemente despu_sde un cido de limpieza, limpie
las parrillasy los soportesde Insparrillas con una peque_acantidad
de aceitevegetalpara hacerlasdeslizarcon m_sfacilidad.
Pueden aparecer lineas delgadas en la porcelana al pasar per
ciclos de calentamientoy enfriamiento. Estoes normaly no
afectar_el rendimiento.
Una descoloraci6nblanca puede aparecer despu_s del ciclo
de limpieza si los alimentos dcidos o azacarados no faeron
limpiadosantes del ciclo de aatolimpieza. Estadescoloraci6nes
normaly no afectar_iel rendimiento.
Notas:
° Si se deja abierta la puerta del borne,la palabra'DOOR'
destellar4enel indicadorvisual y se escuchar_una seSal
sonora hastaque la puertasea cerraday la tecla 'Clean' sea
oprimidanuevamente.
° Si transcurrenm_sde cincosegundosdespu6sde oprimir la
tecla 'Clean'y antesde oprimir Insteclas 'More+' o 'Less-',el
programavolver_autom_ticamenteal despliegueprevio.
• La puertadel homo se daSar_isi se fuerza para abrirla cuando
la palabra'LOCK'continuadesplegadaen el indicador.
Procedimientos de limpieza
5O
Asadera e inserto
Nunca cubra el inserto con pape! de alum#fie pues esto evita que
la grasa se escurra a la bandeja inferior.
° Coloque un pa_o enjabonado sobre el inserto y la bandeja;deje
remojarpara soltar la suciedad.
° Laveenaguajabonosatibia. Useunaesponjade fregar para quitar
lasuciedadpersistente.
• Labandejadeasary el insertopuedenser Invadesen el lavavajillas.
quemaderesde gas sellades
• Limpiefrecuentemente.Espereque elquemadorse enfr[e. Limpie
con una esponjade fregar de pl_stico con jab6n. Parala suciedad
persistente,use un limpiadorno abrasivoy un paso.Tratede
evitarque el limpiadorse escurra hacia los orificios del gas pues
estoafectardla llama. Si el limpiadorpenetra en losorificios,
limpie con una escobilladecerdassuaveso un alfiler derecho,
especialmenteel orificio debajodelencendedor. No agrandeo
distorsionelos agujeros.
• Tengacuidadode que no entre aguaen los orificios de los
quemadores.
• Tengacuidadocuando limpie el encendedor. Si el encendedor
est_h_medoo da_adoel quemadorsuperior no encender_
Rejillas de losquemadores
• Lavelas rejillas con agua tibia jabonosay una esponjade fregar
de pl_sticono abrasiva. Parasuciedadpersistente,limpie con una
esponjano abrasivae impregnadacon jab6n o con unaesponjay
una CooktopCleaningCreme(plaza#20000001)**.
• Parasuciedadquemada,saque lasparrillas, coloqueperi6dicosy
rode cuidadosamentecon un limpiador de homo comercial.(No
rode las superficiesvecinas.)Coloqueen bolsasde pldstico
durantevarias horaso toda la noche. Usandoguantes de goma,
retire de las bolsas. Lave,enjuague,sequey vuelva a colocar en la
cubiertade la estufa.
Area del reloj y de las teclas de control
• Paraactivar 'Control Lock'[Bloqueode loscontroles) para la
limpieza,vet pdgina60.
• Lave,enjuaguey seque. No useagentes de limpiezaabrasivos
pues puedenrayarel acabado.
• Sepuedeusar limpiavidriossi se rodan en el paso primero. NO
rode directamente en el panel.
Perillasde control
• Retirelasperillas cuandoest6nen la posici6n'OFF'tirdndolas
haciaadelante.
• Lave,enjuaguey seque. No use agentesde limpiezaabrasivos
pues puedenrayarel acabado.
• Enciendacarla quemadorpara asegurarsede qua las perillasban
sido correctamentereinstaladas.
Cubierta y panel de control = Esmaltede porcelana
La porcelanaesmaltadaes vidrio fundido errmetaly puede
agrietarseo picarsesi no se usa correctamente.Esresistentea los
dcidos,no a prueba de _cidos.Todos losderrames,especialmente
los derramesazucaradoso addicos deben ser limpiados
inmediatamentecon un paso seco.
• Cuandose enfrie, lavecon agua jabonosa,enjuaguey seque.
• Nanca limpie unasuperficietibia o caliente con un paso hOmedo.
Estopuedecausaragrietamientoo picaduras.
• Nunca use limpiadoresde homo, agentesde limpiezaabrasivoso
c_usticosen el acabadoexterior de la estufa.
Paneles Laterales, gaveta de almacenamiento, puerta de la
parrilla inferiory manijas de Inspuertas = Esmaltepintado
• Cuandoest(_fria, lavecon agua tibia jabonosa,enjuaguey seque.
Nunca limpieuna superficietibia o caliente con un paso hOmedo
puesesto puede da_arla superficiey causar una quemaduraa
causadel vapor.
• Paramanchasrebeldes,use agentesde limpiezalevemente
abrasivostal comopastade bicarbonatoo 'Bon Ami'*. No use
limpiadoresabrasivos,c_usticoso dsperostal comoesponjasde
lanade acero o limpiadoresde hornos.Estosproductospueden
rayaro da_ar permanentementela superficie.
Importante: Use una toal/a o un pa#o seco para limpiar los
derrames,especialmente los derrames acidicos o
azucarados. La superficie se puede descelorar o perder el
brillu si el derrame no se limpiainmediatamente. Estoes
especialmente importante en las superficies blancas.
Ventanay puerta del homo =Vidrio
• Eviteusar cantidadesexcesivasde agua puespuedeescurrirse
debajoo detrdsdelvidrio causandomanchas.
• Lavecon agua y jab6n. Enjuaguecon agua limpia y seque. El
limpiador devidrio puedeusarsesi se rocfaen un paso primero.
• No use materialesabrasivostalescomoesponjasde restregar,
limpiadoresen polvoo esponjasde lana de acero
pues puedenrayarel vidrio.
Interiordel homo autoiimpiante:
• Sigalasirrstruccioneserr las pdginas49-50 paraprogramarun ciclo
de autolimpieza.
Homo iimpiezamanual:
• Limpiefrecuentementeusandolimpiadoresabrasivossuavesy una
esponjade pldstico.
• No useesponjasde fregar metdlicasporquepueden rayarla
superficie.
• Cuandoutilice limpiadoresdehomo comercialessigalas
instruccionesdel fabricante.
• Limpielos derramesdcidos (alimentosa basede tomateso de
leche)tan prontocomosea posibleconaguay jab6n.
Siel derrameno es limpiadose puededescolorarla porcelana.
Para hater m_s f_cil la limpieza,saque la puertadel homo, si
Io desea. [Verla secci6nMantenimiento.)
Parrillas del homo
• Limpiar con aguacon jab6n.
• Sacarlas manchasdificiles con polvo de limpiezao una esponja
lianacon jab6n. Enjuaguey seque.
• Las parrillasse descolorardnpermanentementey puedenno
deslizarsecon suavidadsi son dejadasen el homo durante un
ciclo deautolimpieza.Si estosucede,limpie la parrilla y los
soportesen relievecon una pequeSacantidad de aceitevegetal
pararestaurarla facilidadde movimiento,luegolimpie el exceso
de aceite.
Acero Inoxidable Onodelosselectos)
• NO USENINGUN PRODUCTODE LIMPIEZA QUE CONTENGA
BLANQUEADORA BASEDE CLORO.
• NO USELIMPIADORES "ORANGE"NI LIMPIADORES
ABRASIVOS.
• $1EMPRELIMPIE LAS SUPERFICIESDEACERO A FAVORDEL
GRANO.
• Limpieza Diaria/Suciedad Love=Limpiecon uno de los
siguientes- agua con jab6n, unasoluci6nde vinagreblanco con
agua,limpiador para superficiesy vidrio 'Formula409'_o un
limpiavidriossimilar - usandouna esponjao un paso suave.
Enjuaguey seque. Parapulir y evitar marcasde los dodos,useel
producto'StainlessSteelMagic Spray'*[PlazaNo.20000008)_*.
• Suciedad Moderada/Intensa = Limpiecon uric de lossiguientes
- 'Bon Ami'_,'SmartCleanser'_o 'Soft Scrub'*- usando una
esponjah_medao un paso suave. Enjuaguey seque. Las
manchasdificiles puedenser quitadascon una esponjamulti-uso
* Loshombresde los productosson marcasregistradasdesus respectivos
** Parahacerpedidos,Ilame al 1-877-232-6771EE.UU.o al 1-800-688-8408
51
fabricantes.
Canadd.
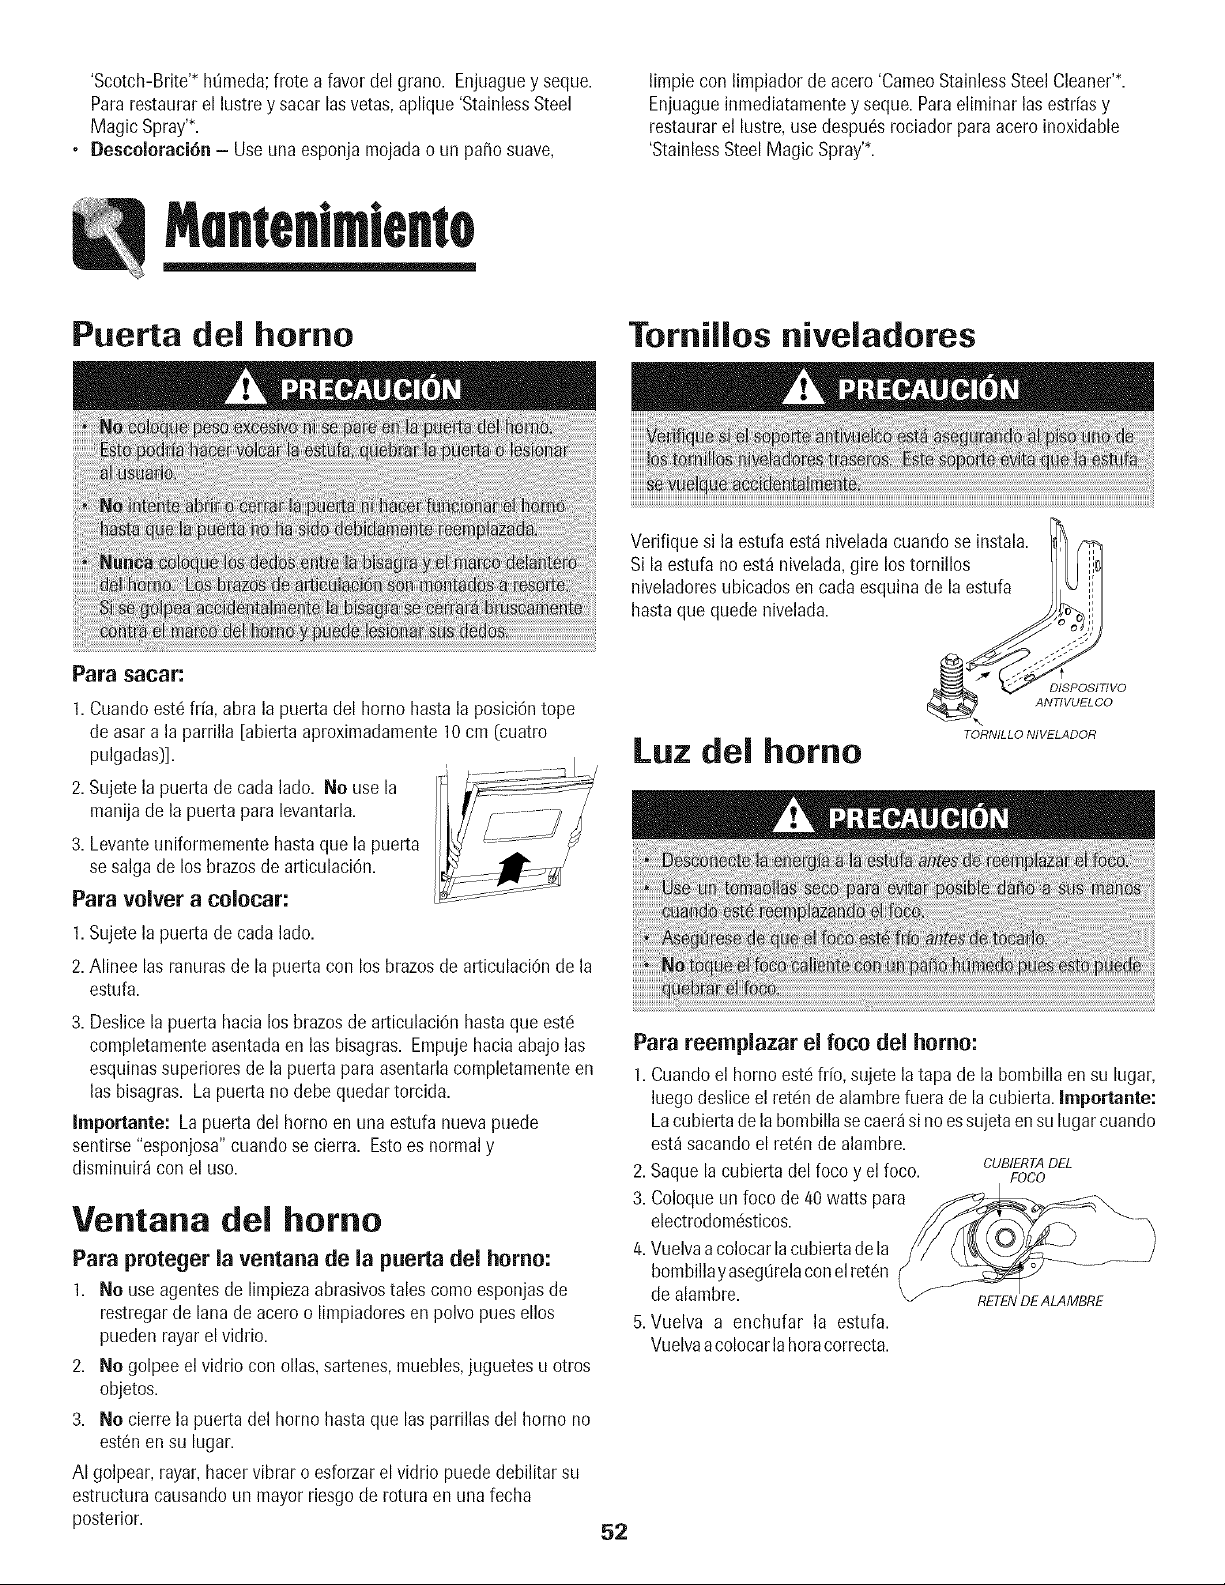
'Scotch-Brite'*h0meda;froteafavordelgrano.Enjuagueyseque.
Pararestaurarellustreysacarlasvetas,aplique'StainlessSteel
MagicSpray'*.
• Descoloraci6n- Useunaesponjamojadao un patio suave,
limpie con limpiadorde acero'CameoStainlessSteelCleaner'*.
Enjuagueinmediatamentey seque.Paraeliminarlas estr[asy
restaurarel lustre,usedespu_srociador para acero inoxidable
'StainlessSteelMagicSpray'*.
Puerta del homo Tornillos niveladores
Para sacar:
1. Cuandoest6frfa, abra lapuerta del homo hastala posici6ntope
de asar a la parrilla [abiertaaproximadamente10cm (cuatro
pulgadas)].
2.Sujete la puertade cada lado. No use la
manijade la puerta para levantarla.
3. Levanteuniformementehastaque la puerta
se salga de los brazosde articulaci6n.
Para velvet a colocar:
1.Sujete la puertade cada lado.
2.Alinee las ranurasde la puerta con los brazosde articulaci6nde la
estufa.
3. Deslicela puerta hacialos brazosde articulaci6n hastaque estd
completamenteasentadaen las bisagras. Empujehaciaabajo las
esquinassuperioresde lapuerta paraasentarlacompletamenteen
las bisagras. La puerta nodebe quedartorcida.
Importante: La puerta del homo en una estufa nuevapuede
sentirse"esponjosa"cuando secierra. Estoes normaly
disminuir_con el uso.
Ventana del homo
Para proteger la ventana de la puerta del homo:
1. No use agentesde limpiezaabrasivostales como esponjasde
restregarde lanade aceroo limpiadoresen polvo pues ellos
puedenrayarel vidrio.
2. No golpeeelvidrio con ollas,sartenes,muebles,juguetes u otros
objetos.
3. No cierre la puertadel homo hasta que lasparrillas del homo no
est6nen su lugar.
AI golpear,rayar, hacervibrar o esforzarel vidrio puededebilitar su
estructuracausandoun mayorriesgode rotura en unafecha
posterior.
Verifiquesi la estufa estdniveladacuandose instal& (_
Si laestufa no est_nivelada,gire lostornillos I,q
niveladoresubicadosen carlaesquinade la estufa
hastaque quedenivelada. , ,jj
TORNILLO NIVELADOR
Luz del homo
Para reemplazar el foco del homo:
1.Cuandoel homo estd fr[o, sujete la tapa de la bombillaensu lugar,
luegodesliceel retdnde alambrefuera de la cubierta.Importante:
Lacubiertadela bombillasecaer_si no essujeta ensu lugar cuando
est_sacandoel ret6n de alambre.
2. Saquela cubiertadel foco y el foco. CUBIERTADEL
FOCO
3. Coloqueun foco de/40watts para
electrodom_sticos.
/4.Vuelvaa colocar la cubiertade la
bombillay asegOrelaconelret6n
de alambre. RETENDE ALAMBRE
5. Vuelva a enchufar la estufa.
Vuelvaa colocarlahoracorrect&
52
Gaveta de almacenamiento
i:modelos selectos)
Parainformaci6n,p6ngaseen contactocon el Servicioa los Clientes
Maytag Ilamandoal 1-800-688-9900EE.UU.o al 1-800-688-2002
Canada.
Paraevitarque la estufase vuelqueaccidentalmente,se debe
aseguraral piso colocandoel tornillo niveladortraserodentro del
soporteantivuelco.
La gavetade almacenamientopuedeset retiradaparaque usted
puedalimpiar debajode la estufa.
Para sacar :
1. Vade la gavetay deslfcelahaciaafuera hasta la primeraposici6n
tope.
2. Levantela partedelanterade la gaveta.
3. Tirela hastalasegundaposiciOnde tope.
4. Sujete los ladesy levantela gavetapara retirarla.
Para velvet a colocar:
1. Insertelos extremesde las correderasde la gavetaen los rieles
de laestufa.
2. Levantela partedelanterade la gavetay suavementeempt_jelaa
la primeraposiciOnde tope.
3. Levantela gavetanuevamentey empQjelahasta que quede
completamentecerrada.
Retire de la estufa a gas
Los conectoresde laestufa a gas usadosparaconectareste
artefactoal suministrode gas no est_indise_adosparamovimiento
continue. Unavez instalados,NO mueva repetidamenteeste
artefactoa gas parasu limpiezao paraubicarlo enotro lugar. Si
esteartefactotiene queset movidoy/o retiradopara reparaci6n,
siga el procedimientodescrito en las instruccionesde instalaciOn.
Cone×i6n el ctrica
Loselectrodom_stieosque requierenenergia
el_ctrica est_n equipadoscon unenchufe de
ires clavijas con conexi6na tierra, el cual
debeser enchufadodirectamenteenun
tomacorrienteeldctrico detres agujeros,para
120voltiosdebidamenteconectadoa tierra.
Siempredesenchufeel electrodom4sticoantesde efectuar
reparacione&
Elenchufede tres clavijascon conexiOna tierra ofreceprotecciOn
contra peligrosde chequesel6ctricos.NO OOLITENI ELIMINE LA
TERCERACLAVUA DE CONEXIONA TIERRADELENCHUFE
DELCORDONELECTRICO.
Sisolamentese dispone de un tomacorrientesin conexi6na tierra,
de dos agujerosu otro tipo de tomacorrienteel_ctrico,el
propietariodel eleetrodom_sticoes personalmente
responsablede reemplazar el tomacorriente con un
tomacorriente el_ctrico de tres agujeros debidamente puesto
a tierra.
Panel inferior del homo
Protejael panel inferior del borne contra derrames,especialmentede
tipo acidicoo azucarado,pues pueden descolorarla porcelana
esmaltada.Useel utensiliodetamale correcto a fin de evitar
derramesy reboses.
solud6nde
Para la mayoria de los problemas,verifique primero Io
siguiente.
• Revisesi los controlesdel borne est_indebidamenteajustados.
• Verifiquesi el enchufeest_ firmemente insertadoen el
tomacorriente.
• Verifiqueo vuelvaa reponerel disyuntor. Verifiqueo reemplaceel
fusible.
• Verifiqueel suministro de energ[ael6ctrica.
El quemador superior no se enciende.
• Verifiquesi la estufaest_debidamenteconectadaa la fuente de
alimentaciOn.
• Verifiquesi est_ifundido un fusible del circuito o si se dispar6el
disyuntorprincipal.
• Verifiquepara asegurarsede que el encendedorest6 seco y que
emitachasquidos. Elquemadorno se encender4si el encendedor
est_ida_ado,sucio o mojado. Siel encendedorno produceun
chasquido,gire la perillade controla la posici6n'OFF'.
La llama es dispareja.
• Losorificios delquemadorpueden estar obstruidos.
La llama del quemador superior se levanta del orificio.
• Verifiquepara asegurarsede que el utensilio est,1asentadoen la
parrillasobre el quemador.
Losresultados del horneado no son come se esperaban o son
diferentesa losdel homo anterior.
• Verifiquela temperaturadel borneseleccionada.Aseg_resede
queel homo est_precalentadocuando la recetao instrucciones
recomiendanprecalentamientodel homo.
• AsegL_resede que el respiraderodel homo no eat6bloqueado.
Verp_igina87 parala ubicaciOn.
• Verifiquepara asegurarsede que la estufa eat4nivelada.
• Lastemperaturasa menudovarian entre un homo nuevoy uric
antiguo. A medidaque pasael tiempo,la temperaturadel homo
cambiay puede hacersem_scalienteo m_sfr[a. Ver
p4g. 64para las instruccionescomeajustarla temperaturadel
53 homo (modelosselectos).
Imporfante: No se recomiendaajustarlatemperaturasi hatenido
problemascon solo una o dos recetas.
• Useel utensiliocorrecto.Losutensiliososcurosproducendorado
oscuro.Los utensiliosbrillantes producendoradoclare.
• Verifiquelas posicionesde las parrillasy la colocaci6nde los
utensilios.Alterne los utensilioscuandouse dos parrillas. Deje
2,5-5cm (1-2 pulgadas)entre los utensiliosy las paredesdel
homo.
• Verifiqueel use de papel de aluminio en el homo. Nunca use
papelde aluminio paracubrir unaparrilla completadel homo.
Coloqueun pedazopeque_ode papel de aluminio en la parrilla
que est4debajodel utensiliopararecibir los derrames.
Losalirnentosno se asan a la parrilla en forma debida o sale
demasiado humo.
• Verifiquelas posicionesde las parrillas del homo. El alimento
puedeestarmuycercade la llama.
• Elpapelde aluminio se us0 de maneraincorrecta. Nunca forre el
insertodel asadorcon papel de aluminio.
• Recorteel excesode grasade la cameantesde ponerlaa asara la
parrilla.
• Seus6 unaasaderasucia.
• Precalienteel homo durante2 a 3 minutes antesde colocar el
alimentoen el homo.
• Ase a la parrilla con lapuerta del homo cerrada.
El borne nose autolimpia (modelos seleetos).
• Verifiquepara asegurarsede que el ciclo no est6 ajustadopara un
comienzodiferido.Ver p%inas 49-50.
• Verifiquesi la puertaest,1cerrada.
• Verifiquesi el control est_ en Mode Sab_tico.Ver p%. 63.
• El homo puedeestara m_isde 205° C (400° F]. Latemperatura
del homo debeset inferior a 205° C [400° F] paraprogramarun
ciclo de limpieza.
El borne nose limpi6 en forma debida (modelos seleetos).
• Puedeque seanecesarioun tiempo de limpieza m_s largo.
• Los derramesexcesivos,especialmentede alimentosazucarados
y/o _cidosno fueron limpiadosantesdel ciclo de autolimpieza.
La puerta del borne no se desbloqueadespu_sdel eielo de
autolimpieza (modelos seleetos).
° El interiordel horno todav[aest_caliente. Dejeque paso
aproximadamenteuna hera paraque el homo se enfrie antesde
quese complete un ciclo de autolimpieza.La puerta puedeset
abierta cuandodesaparezcala palabra'LOCK'(Bloqueado)el
indicadorvisual.
• Elcontroly la puerta puedeestarbloqueada. Ver las p%inas 49y
60 parasedesbloqueo.
Sejunta humedad en la ventana del homo o sale vapor per el
respiraderodel homo.
° Estoes normal cuandose cocinanalimentoscon alto contenido
de humedad.
° Seus6 humedadexcesivacuando limpi6 la ventana.
Hay un olor fuerte o bumo loveeuandose enciendeel borne.
• Estoes normal en unaestufa nuevay desaparecer_idespuc!sde
unos pocosuses. AI iniciar un ciclode autolimpiezase
"quemar_n" los oloresm_isr_pidamente.
• Sise enciendeel ventilador ayudar_a eliminar el humo y/o el olor.
• Suciedadexcesivade alimentosen el panel inferior del homo.
Useun ciclo de autolimpieza.
C6digosde Errores (modelos seleetos).
° 'BAKE'(Horneado)o 'LOCK'pueden destellar r4pidamenteenel
indicador paraavisarleque hayun error oun problem& Si 'BAKE'
o 'LOCK'aparecenen el indicadorvisual,oprima la tecla
'CANCEL' [Cancela0.Si 'BAKE'o 'LOCK'continQandestellando,
desconectela energfael_ctrica al electrodom6stico.Espereunos
pocosminutosy vuelva a reconectarla energ[ael6ctrica. Si
contintian destellando,desconectelaenerg[ael6ctricadel
electrodom6sticoy Ilameal t6cnico deservicioautorizado.
• Siel homo est_demasiadosucio, puedenocurrir demasiadas
IlamaradasIocual resultaraen un c6digo de error durante la
limpieza. Oprimala tecla 'CANCEL' y deje que el homo se enfr[e
completamente,limpie el excesode suciedady luegovuelvaa
programarel ciclo de limpieza.Si el c6digo de error reaparece,
Ilamea un t6cnicoautorizado.
Se escuchan ruidos.
• Elhomo emitevariessonidosbales. Ustedpuede oir los relc!sdel
homo cuandose enciendeny se apagan.Estoes normal.
• A medida queel homo se calientay se enfrfa,usted puede oir
sonidosde piezasmet41icasque se expandeny contraen. Estoes
normaly no da_ar_isu electrodom6stico.
No se escuchan so,ales sonoras y el indicadorvisual no se
activa.
• Elborne puedeestaren Mode Sab_tico. Vet p_ig.63.
'SAb' destella y luego se despliegacontinuamente.
• Elhorno est4en modesab_itico.Paraanular el modesab_tico,
oprimay mantengaoprimida la tecla 'Clock' [Reloj)durante cinco
segundos.
54
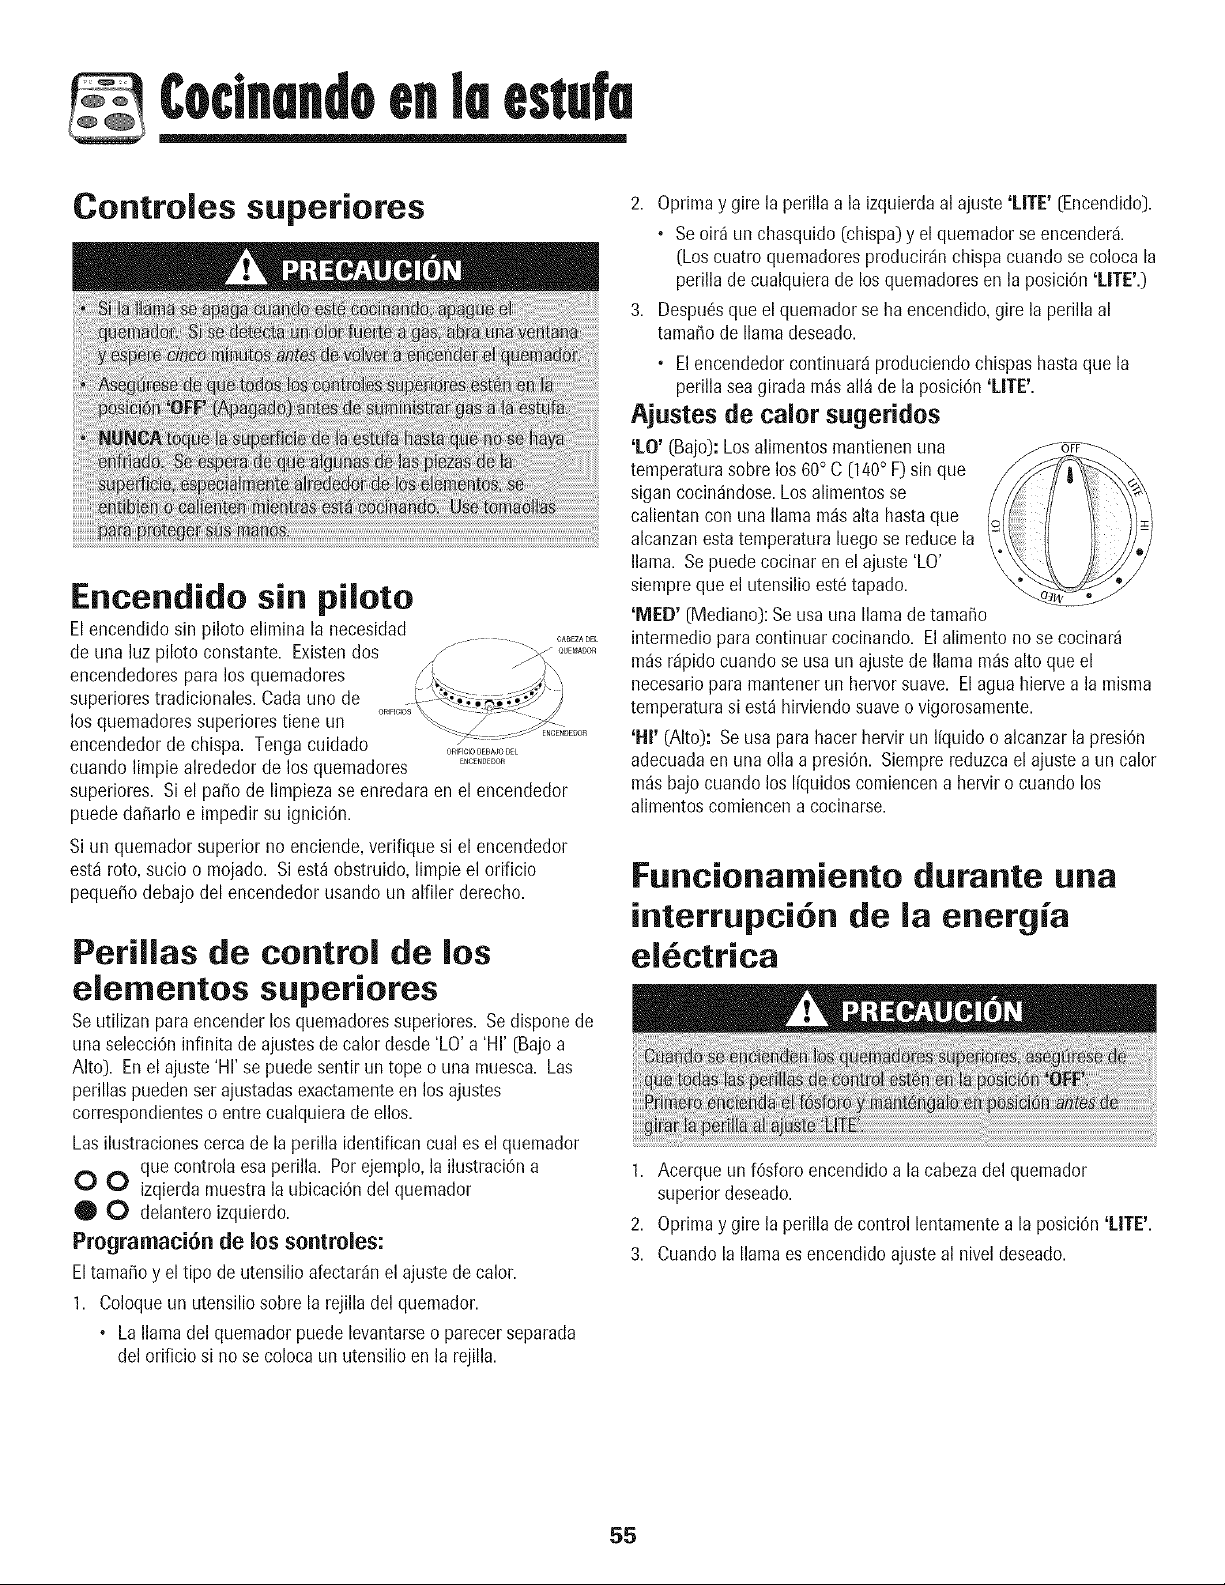
Cocinandoenlu estufa
Controles superiores
Encendido sin piloto
Elencendido sin piloto elimina la necesidad
de una luz piloto constante. Existendos
encendedorespara los quemadores
superiorestradicionales.Carlauno de
los quemadoressuperiorestiene un
encendedorde chispa. Tengacuidado .................
ENCENBEDOn
cuando limpie alrededor de los quemadores
superiores. Siel paso de limpiezase enredaraen el encendedor
puededa_arlo e impedir su ignici6n.
Siun quemadorsuperior no enciende,verifique si el encendedor
est,1roto, sucio o mojado. Si est_ obstruido,limpie el orificio
peque_odebajodel encendedorusando un alfiler derecho.
Perillas de control de los
elementos superiores
Seutilizanparaencender losquemadoressuperiores. Sedisponede
unaselecciOninfinitade ajustesde calor desde'LO' a 'HI' (Bajoa
Alto). Enel ajuste'HI' se puedesentir un tope o una muesca. Las
perillaspueden set ajustadasexactamenteen los ajustes
correspondienteso entre cualquieradeellos.
Las ilustracionescercade laperilla identifican cual es el quemador
quecontrola esaperilla. Por ejemplo,la ihstraciOna
O O izqierdamuestrala ubicaciOndel quemador
O O delanteroizquierdo.
Programaci6n de los sontroles:
Eltama_oy el tipo de utensilioafectar_nel ajuste de calor.
1. Coloqueun utensiliosobre la rejilla del quemador.
, Lallama del quemadorpuede levantarseo parecerseparada
delorificio si nose colocaun utensilioen la rejilla.
2. Oprimay gire la perilla a la izquierdaal ajuste'lrrE' (Encendido].
, Seoir_ un chasquido(chispa)y el quemadorse encender&
(Loscuatro quemadoresproducir4nchispa cuando se coloca la
perillade cualquierade los quemadoresen la posiciOn'LITE'.)
3. Despu6squeel quemadorse ha encendido,gire la perilla al
tama_ode llamadeseado.
° El encendedorcontinuar_iproduciendochispashastaque la
perillaseagirada m_s all_ de la posici6n 'LITE'.
Ajustes de calor sugeridos
'[,O' (Bajo):Losalimentos mantienenuna
temperaturasobre los 60° C (140° F) sin que
sigan cocin4ndose.Losalimentosse
calientancon una llama m_salta hastaque
alcanzanestatemperatura luegose reducela
llama. Sepuedecocinaren el ajuste'LO'
siempreque el utensilioest6tapado.
'MED' (Mediano):Seusa unallama detama_o
intermedioparacontinuarcocinando. Elalimento nose cocinar_
m_sr4pidocuando se usa un ajustede llama m_salto queel
necesarioparamantenerun hervorsuave. Elaguahiervea la misma
temperaturasi est_hirviendosuaveo vigorosamente.
'Hi' (Alto): Seusapara hacerhervir un Ifquidoo alcanzarla presiOn
adecuadaen una old a presiOn.Siemprereduzcael ajuste a un calor
m_sbajocuando los Ifquidoscomiencena herviro cuando los
alimentoscomiencena cocinarse.
Funcionamiento durante una
interrupci6n de la energia
el ctrica
1. Acerque un fOsforoencendidoa la cabezadel quemador
superior deseado.
2. Oprimay gire la perilla de control lentamentea la posici6n '[.ITE'.
3. Cuando la llamaes encendidoajuste al nivel deseado.
55
Cubierta
Para evitar que la cubierta se descolore o se
manche:
. Limpielacubierta de laestufa despu6sde cadause.
• Limpie losderrames_cidos o azucaradostan pronto come la
cubiertase hayaenfriado pues estosderrames
puedendescolorarla porcelana.
A diferenciade unaestufa con quemadoresde
gas est_ndar,estacubiertano se levantani
tampocoes removible. No intente levantar la
cubierta per ning_nmotive.
Quemadores sellados
Losquemadoresselladosdesu estufaest_inaseguradosa la
cubiertay no hart side disehadosparasersacados. Debido a que
los quemadoresest_inselladosen la cubierta,los derrameso
rebosesnose escurrir_indebajode la cubiertade laestufa.Sin
embargo,los quemadorespuedenser limpiadosdespu6sde cada
use. (Veren la p_gina51 las instruccionessobre la limpieza.)
RejUlas de los quemadores
Las rejillasdeben estar debidamentecolocadasantes
do comenzara cocinar. La instalaciOnincorrectade
las rejillas puederesultaren picadurasde lacubierta.
No use los quemadoressin tenor un utensilioen la
parrilla. El acabado de percelana de las parrillas
puede piearse si no existe un utensilioque
absorba el ealor de la llama del quemador.
Aunquelas parrillas de losquemadoresson durables,
gradualmenteperder4nsu brilloy/o se descolorar4n,
debidoalas altas temperaturasde la llamadel gas.
Platillos protectores = Optional
Platillosprotectoresporcelanaremovableest_nobteniblepor
estoelectrodomesticoparacontenerderramamientos.Llameal
1-800-688-8408parasolicitarlos.
'/ _ ......_ _"-_ '_,
Quernador de alto rendimiento
(12.000 BTU)*
Existeun quemadorde alto rendimientoensu estufa,situadoen la
posiciOnderechadelantera. Estoquemadorofrececocci6n m_s
r_piday puedeser usado paraherviragua con rapidezo para
cocinargrandescantidadesde alimento.
Quemador para cocinar a
fuego lento
Estequemadorse encuentraen la posici6nizquierdatrasera. El
quemadorpara cocinara fuego lento ofreceuna llama de menor
intensidad(BTU*inferior) paracalentarsalsasdelicadaso derretir
chocolate.
_EIr_gimennominaldeBTUvariar_cuandoso usagas licuado.
Notas:
• Un quemadorajustadode maneracorrectacon orificios
limpiosse encenderddentro de unos pocossegundos. Si
estdusandogas natural la llamaser_azul con un cone
interior azul profundo.
Si la llamadel quemadores amarillao es ruidosa,la mezcla
deaire/gas puedeser incorrecta. P6ngaseen contacto con
untc!cnicode servicio para ajustarla. [Losajustesno estdn
cubiertosper la garantfa.)
Congas licuado son aceptablesalgunaspuntas amarillasen
la llama. Estoes normaly no es necesariohacerningLin
ajuste.
. Conalgunostipos de gas, usted puede oir un "chasquido"
cuandoel quemadorsuperiorse apaga. Estees un sonido
normaldel funcionamientodel quemador.
. Si la perillade control se gira muyrdpidamentede 'HI' a 'LO',
la llamapuede apagarse,particularmentesi el quemadorest_
frio. Siestoocurre,gire la perillaa la posici6n'OFF'
(Apagado),esperealgunossegundosy vuelva encenderel
quemador.
. Lallama debeser ajustadade mode que no se extiendam_s
all_del bordedel utensilio.
56
¢odnandoend homo
Controles del homo de
limpieza manual
(modelos selectos)
'Bake' (Hornear)
'Broil' (Asa0
'Timer' 0-emporizador)
'Clock' (Reloj)
'CANCEL'(Cancelar)
'More+' o 'Less-'
(M_s+ o Menos-)
Seusa parahorneary asar.
Seusa paraasara la parrilla y dorar los
alimentos.
Programael temporizador.
Seusa paraprogramarla hera del d[a.
Cancelatodas las funcionesa excepci0n
deltemporizadory del reloj.
Seusanpara seleccionaro cambiar el
tiempoy latemperaturadel homo.
Seleccionalos ajustesde asado'HI' (Alto)
o 'LO' (Bajo).
Uso de las teclas
• Oprima latecla deseada.
• Oprima latecla 'More+' o 'Less-' para seleccionareltiempo o la
temperatura.
. Seescuchar_una sepalsonoracada vezque oprima una tecla. No
se escuchar_una sepalsonoracuando se opriman lasteclas
'More+' o 'Less-'.
• Seescuchar_ndos so,ales sonorassi ocurre un error en la
programaciOn.
Importante: Cuatrosegundosdespu_sde oprimir la tecla'More+' o
'Less-',eltiempo o la temperaturaque se despliegase programar_i
automdticamente.Si transcurrenm_sde 30segundosdespu6sde
haberoprimido una teclade funciOny latecla 'More+' o 'Less-', la
funci6n serdcanceladay el indicadorvisual volver_al despliegue
anterior.
Programaci6n dei reioj
1. Oprimala tecla 'Clock'.
• Lahora del relojno se puedeprogramarsi el control ha sido
programaticpara hornearo asar o para usar el temporizador.
2. Programela horacorrectadel d[a usando lasteclas 'More+' o
'Less-'.Si latecla 'More+' o 'Less-' nose oprime en30 segundos,
la programaciOndel relojser_ cancelada.Optima la tecla 'Clock'
paracomenzarde nuevo.
Programaci6n dei temporizador
Eltemporizadorpuedeser programadode un minute (:01)hasta 99
horasy 59 minutos(99:59).El tiempo se desplegarden minutosy no
en segundos.EL TEMPORIZADORNO CONTROLAEL HORNO.
1. Oprimala tecla 'Timer'.
, Enel indicadorvisual desplegar_i0:00y losdos puntos(:)
destellar_inen el indicadorvisual.
2,
Oprima latecla 'More+' o 'Less=' hastaque se despliegueel
tiempo deseado.
• Eltemporizadorcomenzar_a funcionar cuandose programeel
tiempo.
• Losdos puntos destellantesindican que un conteo del
temporizadorest_ enprogreso.(Losdos puntosno destellansi
el indicadorvisual muestrala hora del d[a o la temperaturadel
homo.)
. AI final del tiempoprogramado,se escuchar_ndos seSales
sonoras.El indicadorvisual desplegar_i"0:00".
• Si as[Io desea,oprima latecla 'Clock' durante el
funcionamientodel temporizadorparadesplegarbrevemente
la horadel alia.
• Si as[Io desea,oprima latecla 'Bake' o 'Broil' durante el
funcionamientodel temporizadorparadesplegarbrevemente
el ajusteactual detemperatura.
Para cancelar el temporizador:
Oprimay mantengaoprimidala tecla'Timer' durantevariessegundos.
Horneado, asado y asado
a la parrilla
Ajuste de los controles para hornear o asar a
la parriUa:
1. Oprimala tecla 'Bake'.
• '000'se desplegar_iy la luz indicadora'Bake'destellar_ien el
indicadorvisual.
° Sioprime la tecla 'Bake'y noprogramalatemperaturaen30
segundos,el programasecancelar_autom_ticamentey la
horadel d[ase desplegar_nuevamenteen el indicadorvisual.
2. Oprimalatecla 'More+' o 'Less=' hastaque latemperatura
deseadasedespliegueenel indicadorvisual.
° Latemperaturadel homo puedeser programadade 75° a
285° C (WO° a 550° F).
• '175°, [350°) sedesplegar_cuandooprima latecla'More+'
o 'Less-'pot primeravez.
• Oprimalatecla'More+' o 'Less-' repetidamenteparacambiar la
temperaturaenincrementosde 3° C (5° F),u oprfmalay
mantc!ngalaoprimidaparacambiarlatemperaturaenincrementos
de 6° C (10° F).
° Enel indicadorvisual sedesplegar_38° (100°) o latemperatura
realdel homosi esque essuperiora 38° C (100° F)cuandose
enciendeel homo.
• La temperaturaaumentar_en incrementosde 3° C [5° F)hasta
Ilegara la temperaturaprogramada.Cuandoel homo se haya
precalentado,se escuchar_unasepalsonora.
• Esperea que el homo se precalientedurante 10-15minutes.
57
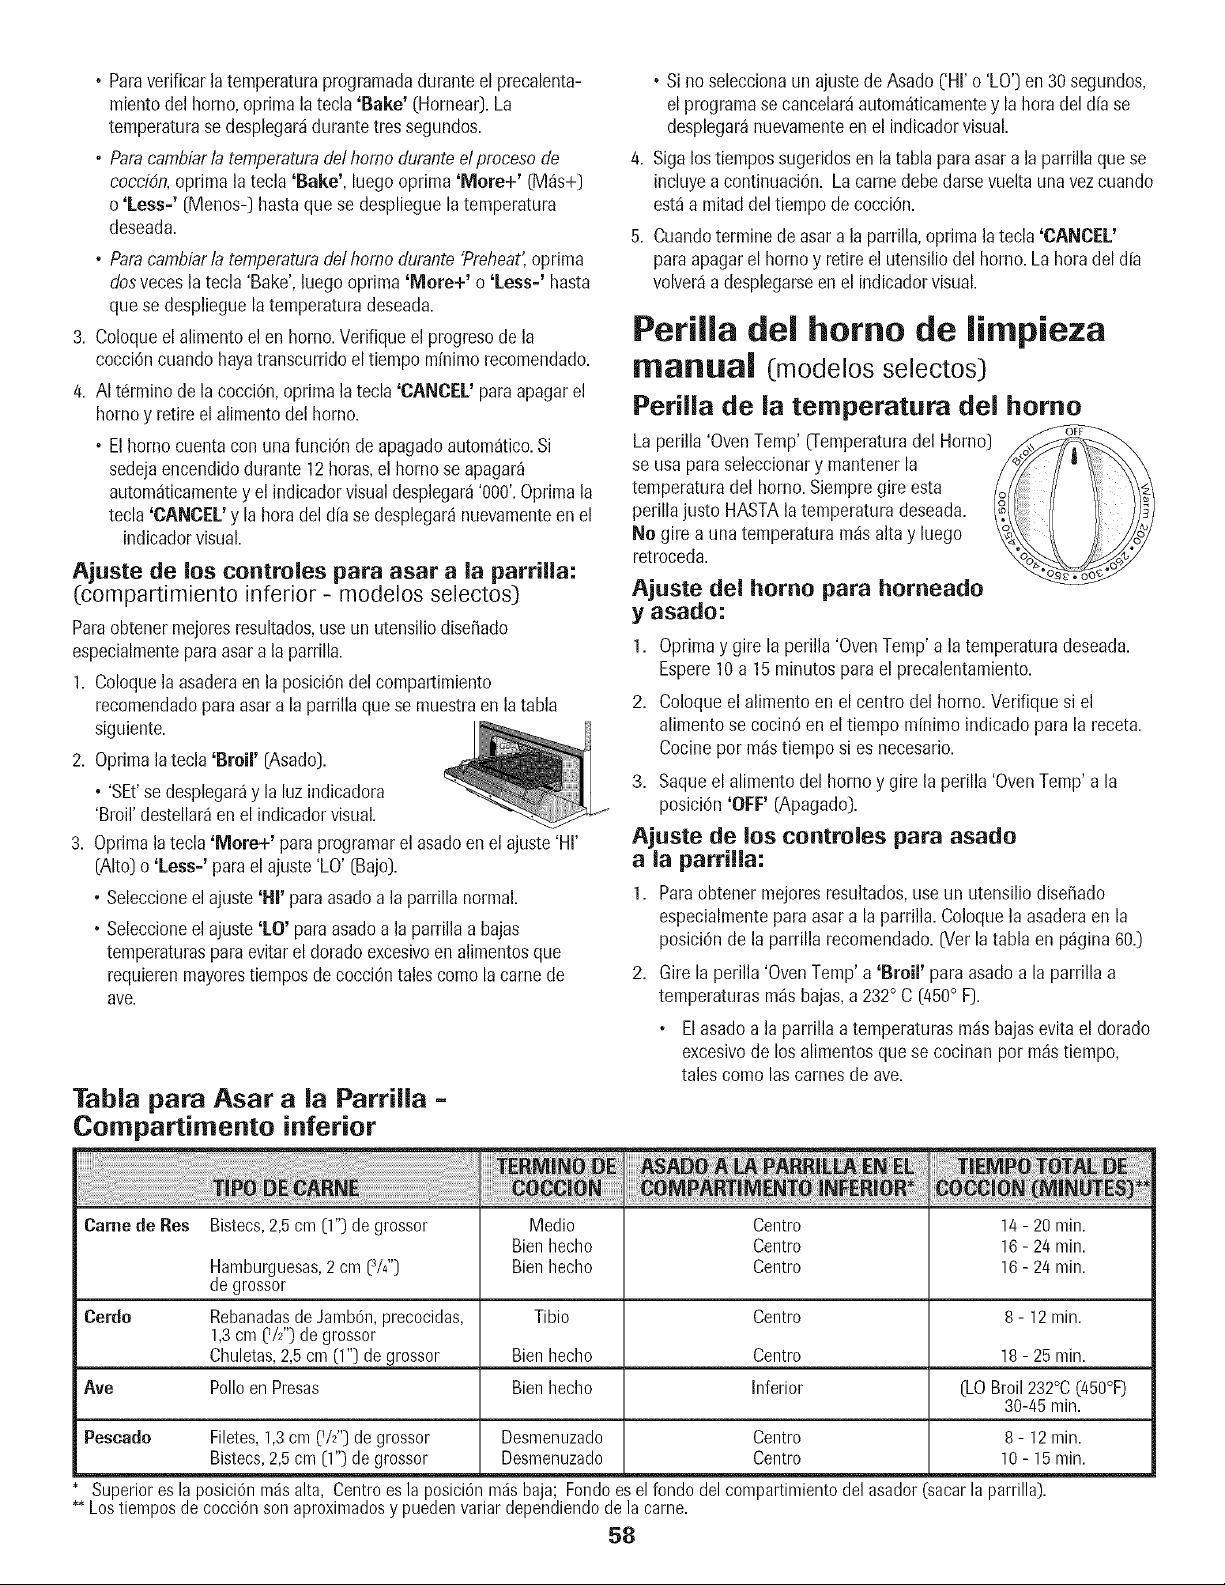
• Paraverificarlatemperaturaprogramadaduranteel precalenta-
rnientodel homo,oprirnalatecla'Bake' (Hornear).La
temperaturasedesplegarddurantetres segundos.
, Paracambiarla temperaturadel homo duranteel pmceso de
coccidn,oprima la tecla 'Bake', luego optima 'More+' (M_s+)
o 'Less=' [Menos-) hastaque se desplieguela temperatura
deseada.
• Paracambiarla temperaturadel homo durante'Preheat',oprirna
dosveces latecla 'Bake',luego optima 'More+' o 'Less=' hasta
que se desplieguela temperaturadeseada.
3. Coloqueelalimentoel en homo.Verifiqueel progresodela
cocciOncuando hayatranscurridoel tiempomfnimorecornendado.
4. AI tdrmino de la cocci0n,oprimala tecla 'CANCEL' paraapagarel
homoy retireel alirnentodel homo.
• Elhomo cuenta con una funci6n de apagadoautom_tico.Si
sedejaencendidodurante12 horns,el homo se apagar_
autom_ticarnentey el indicadorvisual desplegar_'000'.Optima la
tecla'CANCEL'y laheradel d[ase desplegardnuevamenteen el
indicadorvisual.
Ajuste de los controles para asar a la parrilla:
(compartimiento inferior - modelos selectos)
Paraobtenermejoresresultados,use un utensiliodise_ado
especialmenteparaasara la parrilla.
1. Coloquela asaderaen la posiciOndel cornpartimiento
recomendadoparaasara la parrillaque se muestraenla tabla
siguiente.
2. Oprirnala tecla 'Broil' [Asado).
• 'SEt'sedesplegar_y la luzindicadora
'Broil' destellar_en el indicadorvisual.
3. Oprimalatecla 'More+' paraprogramarel asadoen el ajuste'HI'
[Alto) o 'Less=' parael ajuste'LO' [Bajo).
, Seleccioneel ajuste'Hi' para asadoala parrillanormal.
• Seleccioneel ajuste 'LO' paraasadoa laparrillaa bajas
ternperaturaspara evitarel doradoexcesivoen alirnentosque
requierenrnayorestiernposde cocci0ntalescomelacame de
ave.
Tabla para Asar a ia Parrilla =
Compartimento inferior
4,
5,
• Si no selecciona un ajuste de Asado ('HI' o 'LO') en 30 segundos,
el programa se cancelard autom_ticamente y la hora del d[a se
desplegar_ nuevamente en el indicador visual.
Siga los tiempos sugeridos en la tabla para asar a la parrilla que se
incluye a continuaciOn. La came debe darse vuelta una vez cuando
est_ a rnitad del tiernpo de cocci6n.
Cuando termine de asar a la parrilla, oprima la tecla 'CANOE[.'
para apagar el homo y retire el utensilio del homo. La hora del d[a
volverd a desplegarse en el indicador visual.
Perilla del homo de limpieza
Inallual (modelos selectos)
Perilla de la temperatura del homo
La perilla'OvenTernp'(Ternperaturadel Homo)
se usa paraseleccionary mantener la
temperaturadel homo.Siempregire esta
perillajusto HASTAla temperaturadeseada.
No gire a unatemperaturamds alta y luego
retroceda.
Ajuste del homo para horneado
y asado:
1.
Oprimay gire la perilla 'OvenTemp' a la temperaturadeseada.
Espere10a 15 minutes para el precalentarniento.
2. Coloqueel alimento en el centre del homo. Verifiquesi el
alimentose cocin6en el tiempo m[nimoindicadopara la receta.
Cocineper mdstiempo si es necesario.
3. Saqueel alirnentodel homo y gire la perilla 'OvenTemp'a la
posici0n'OFF' (Apagado).
Ajuste de los controles para asado
a la parrilla:
1. Paraobtener rnejoresresultados,useun utensiliodise_ado
especialrnentepara asara la parrilla.Coloquela asaderaen la
posici0nde la parrillarecomendado.Ner la tabla en p%ina 60.)
2. Girela perilla 'OvenTemp'a 'Broil' para asadoa la parrillaa
temperaturasrn_sbajas,a 232° C [450° F).
Elasadoa la parrilla a temperaturas rndsbajasevitael dorado
excesivode los alimentosque se cocinanper m_stiernpo,
talescome las earnesde ave.
Came de Res Bistecs, 2,5 cm [1") de grossor Medio Centre 14 - 20 rain.
Bien hecho Centre 16 - 24 rain.
Hamburguesas, 2 em [3/4") Bien heeho Centre 16 - 24 rain.
de grossor
Cerde Rebanadas de Jarnb6n, preeoeidas, Tibio Centre 8 - 12 min.
1,3em (V2") de grossor
Chuletas, 2,5 em [1") de grossor Bien heeho Centre 18 - 25 rain.
Ave Polio en Presas Bien heeho Inferior [LO Broil 232°C (450°F)
30-45 rain.
Pescado Filetes, 1,3em [V2") de grossor Desmenuzado Centre 8 - 12 min.
Bistees,2,5 cm [1") de grossor Desmenuzado Centre 10 - 15 rain.
Superiores la posici6nrndsalta, Centrees la posici6nmdsbaja; Fondoesel fondodelcompartimientodelasador(sacarlaparrilla).
_ Lostiemposde cocci6nsonaproximadosy puedenvariardependiendodelacame.
58
3. Sigalostiempossugeridosen la tabla para asara laparrillaen
p4gina67quese incluyea continuaciCn.Lacame debedarse
vueltaunavezcuandoest4a mitaddeltiempode cocciCn.
4. Verifique eltCrminode cocciCnhaciendoun corte en la came
cercadelcentre paraverificar elcolor.
5. DespuCsde asara la parrilla,coloque la perilla 'OvenTemp'en la
posiciCn"Off". Saquela asaderadel homo.
Panel de control (modelos selectos)
'Broil'(Asara
laParrilla)
'Bake'(Hornear)
'More+/Less-'
(M_s+/Menos-)
'Timer'ffemporizador)
'Cook& Hold'(Cocci6n
y MantenerCaliente)
'Clean'(Limpieza)
'Delay'(Diferido)
'Clock'(Reloj)
'KeepWarm'
(MantenerCaliente)
'CANCEL'(Cancela0
Seusaparaasaralaparrillay dorarlos
alimentos.
Seusaparahorneary asar.
Programao cambiala hera,la temperaturadel
horno.Programaasara la parrilla'HI'o 'LO'.
Programaal temporizador.
Seusaparahornearduranteuntiempo
seleccionado,luegomantieneel alimento
calienteduranteuna hera.
Seusaparaprogramarunciclodeautolimpieza.
Programael homo para comenzara hornear
olimpiarsea una heraposterior.
Seusaparaprogramarla heradeldfa.
Seusaparamantenercalienteen el homoel
alimentococinado.
Cancelatodas las funcionesa excepciOndel
temporizadory elreloj.
Use de las teclas
• Oprima latecla deseada.
•Oprima 'More+' o 'Less-' paraprogramarel tiempo o la
temperatura.
• Seescuchar_unaserial sonoracada vezque optima una tecla.
• Seescuchar_ndos seralessonorassi ocurre un error en la
programaciCn.
Importante: CuatrosegundosdespuCsde haberoprimido la
tecla 'More+' o 'Less-' el tiempo o la temperaturaset4 autom_itica-
monteprogramada.Sitranscurrenm_sde 30segundosdespuCsde
haberoprimido unatecla defunciCny antesde oprimir lasteclas
'More+' o 'Less-', la funciCnser_ canceladay el indicadorvisual
volver_al despliegueanterior.
'Clock' (Reloj)
Elreloj puedeser ajustadoparadesplegarla heraya sea enformate
de 12horas o 24horas.Elreloj haside programadoen la f_brica
parael formate de 12horas.
Para cambiar el reloj a formate de 24 horas:
1. Oprimay mantengaoprimidaslasteclas
'CANCEL' y 'Delay' durantetres segundos. CANCEL
2. Optima 'More+' o 'Less=' paraprogramar
el formate de 12horas o 24betas.
3. Programela heradel dfasiguiendo las instruccionesindicadas
abajo.
ProgramaciCn del reloj:
1. Optima latecla 'Clock'.
, Laheradel aliay dos puntosdestellanen el
indicador......................................
2. Oprima 'More+' o 'Less='paraprogramarla
heradel d[a.
• Losdos puntos continOandestellando. Less-
3. Optima latecla 'Clock' nuevamenteo esperecuatro ....................................
segundos.
Cuandose conectaenergfael_ctricaal homo o despu_sde una
interrupciOnde la energiaelCctrica,la Oltimahera del reloj previaa
la interrupciCndestellar_ien el indicador.
Paradesplegarla hera del d[a cuando el indicadorest6 mostrando
otra funciCnde tiempo, optima la tecla 'Clock'.
La heradel reloj no puedeset cambiadacuandoel homo ha side
programadopara 'DelayCook','Clean' o 'Cook & Hold'.
Para cancelar el despliegue del reloj:
Si nodeseaque el indicadorvisual muestre la hera del d[a:
Optimay mantengaoprimida lasteclas
'CANCEL'y 'Clock' durante tressegundos.La --
heradel d[a desaparecer_del indicador.
Cuandose cancelael desplieguedel reloj,
oprima latecla 'Clock' paradesplegar
brevementela heradel dia.
Para restaurar el despliegue del reloj:
Oprimay mantengaoprimida lasteclas 'CANCEL' y 'Clock' durante
tressegundos.La horadel dfa reaparecer_en el indicador.
59
'Timer' (Temporizador)
Eltemporizadorpuedeser programadode un minuto (00:01)hasta
99 horasy 59 minutos [99:59).
Eltemporizadorpuedeser usado independientementede cualquier
otra actividaddel homo,Adem_ispuedeser programadocuando otra
funci6n del homo est6en funcionamiento.
Eltemporizadorno controlael homo.Solamentecontrolauna serial
sonora.
Para programar el temporizador: Timer
1. Oprima latecla 'Timer'.
• '0:00'se ilumina en el indicadorvisual. .......................................
, Losdos puntosdestellar_n. ...................
2. Oprima latecla 'More+' o 'Less-' hasta que el
tiempo correctoaparezcaen el indicadorvisual.
, Losdos puntos contint3andestellando.
3. Optima nuevamentelatecla 'Timer' o espere cuatrosegundos.
° Losdos puntoscontinL_andestellandoy comienzala cuenta
regresivadel tiempo.
, Elt31timominutede la cuentaregresivadeltemporizadorse
desplegar_ien segundos.
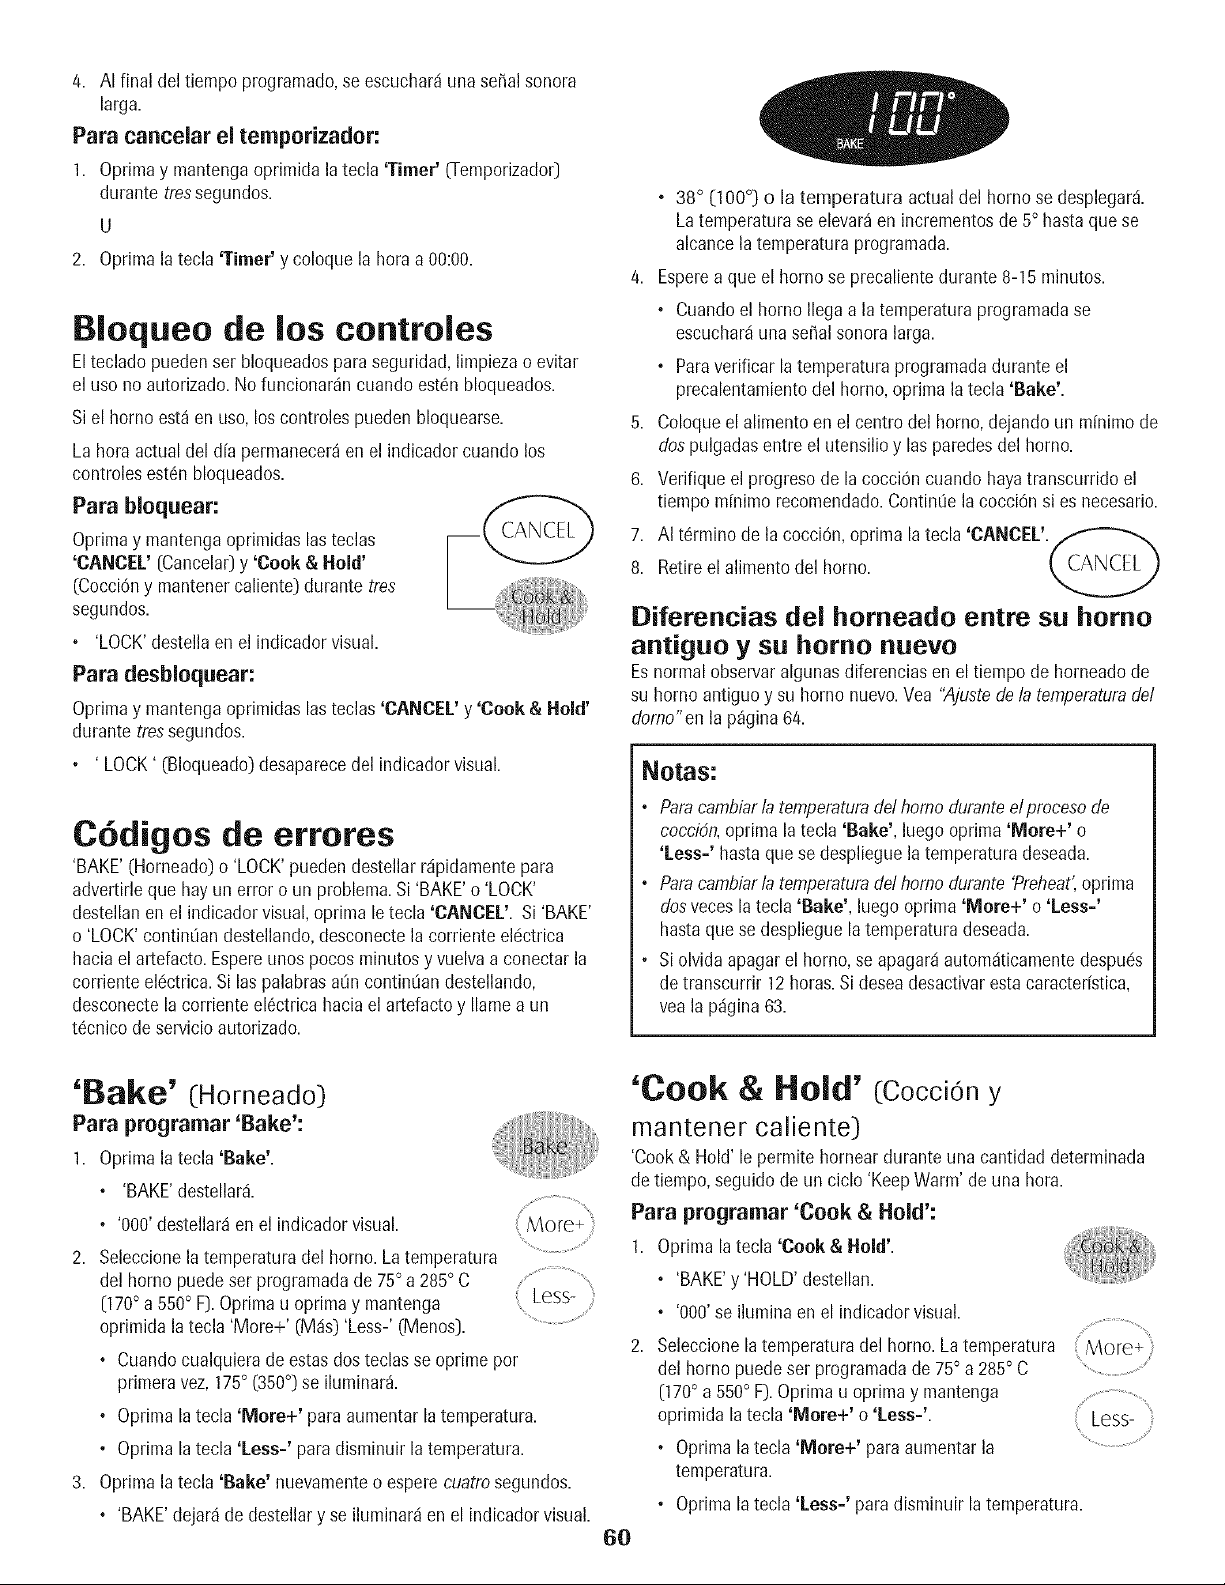
4. AIfinaldeltiempoprogramado,seescuchar_iunaserialsonora
larga.
Para cancelar el temporizador:
1. Oprimay mantengaoprimidala tecla 'Timer' (Temporizador)
durante tressegundos.
U
2. Oprimala tecla 'Timer' y coloque la horaa 00:00.
Bioqueo de los controles
Eltecladopuedenset bloqueadospara seguridad,limpiezao evitar
el uso no autorizado.No funcionar4ncuando est6nbloqueados.
Siel homo est4en uso,loscontroles pueden bloquearse.
La horaactualdel d[a permanecer_en el indicador cuando los
controlesest6n bloqueados.
Para bloquear:
Oprimay mantengaoprimidaslasteclas
'CANCEL' [Cancelar]y 'Cook & Hold'
(Cocci6ny mantenercaliente)durante tres
segundos.
• 'LOCK'destella en el indicadorvisual.
Para desbloquear:
Oprimay mantengaoprimidaslasteclas 'CANCEL' y 'Cook & Hold'
durante tressegundos.
• ' LOCK' (Bloqueado)desaparecedel indicadorvisual.
C6digos de errores
'BAKE'(Horneado)o 'LOCK'pueden destellar r@idamentepara
advertirleque hayun error o un problem& Si 'BAKE'o 'LOCK'
destellanen el indicador visual,oprima letecla 'CANCEL'. Si 'BAKE'
o 'LOCK'contin0andestellando,desconectela corrienteel6ctrica
hacia elartefacto.Espereunos pocosminutosy vuelvaa conectar la
corrienteelc!ctrica.Si las palabrasa0n continOandestellando,
desconectela corrienteel6ctricahacia elartefactoy Ilamea un
t6cnico de servicioautorizado.
• 38 ° (100°] o la temperatura actual del homo se desplegar4.
Latemperaturaseelevar_en incrementosde5° hastaque se
alcancela temperaturaprogramada.
4. Esperea que el homo se precalientedurante8-15 minutos.
, Cuandoel homo Ilegaa la temperaturaprogramadase
escuchar4una serialsonora larga.
, Paraverificar la temperaturaprogramadadurante el
precalentamientodel homo, oprima la tecla 'Bake'.
5. Coloqueel alimento en el centro del homo, dejando un minimo de
dospulgadasentre el utensilio y lasparedesdel homo.
6. Verifique el progresode la cocci6n cuando hayatranscurrido el
tiempo m[nimorecomendado.Contimiela cocci6nsi es necesario.
7. AI t6rmino de la cocci6n,optima la tecla'CANCEL'.,_'_,
8. Retireel alimentodel homo.
Diferencias del horneado entre su homo
antiguo y su homo nuevo
Esnormal observaralgunas diferenciasen el tiempode homeadode
su homo antiguoy su homo nuevo.Vea "Ajustedela temperaturadel
domo"en la p_gina64.
Notas:
• Paracambiarla temperaturedel homo duranteelpmceso de
coccidn,oprima la tecla 'Bake', luego oprima 'More+' o
'Less-' hastaquese desplieguela temperaturadeseada.
• Paracambiarla temperaturadel homo durante'Preheat',oprima
dosvecesla tecla 'Bake', luego oprima 'More+' o 'Less-'
hastaque se desplieguela temperaturadeseada.
, Siolvida apagarel homo,se apagar4autom_iticamentedespuc!s
de transcurrir 12horas.Si deseadesactivarestacaracter[stica,
vea la p_igina63.
'Bake' (Horneado)
Para programar 'Bake':
1. Oprimala tecla 'Bake'.
, 'BAKE'@stellar&
, '000'destellar4en el indicadorvisual.
2. Seleccionelatemperaturadel homo. Latemperatura
del homo puedeser programadade 75° a285° C ..................................
[170°a 550° F]. Oprimau oprimay mantenga Less-
oprimidala tecla 'More+' (M4s) 'Less-' (Menos). ............................
• Cuandocualquierade estasdos teclasse oprime pot
primeravez,175° (350°) se iluminar&
• Optimalatecla 'More+' para aumentarla temperatura.
, Optimalatecla 'Less-' paradisminuir la temperatura.
3. Oprimala tecla 'Bake' nuevamenteo esperecuatrosegundos.
• 'BAKE'dejar4 de destellary se iluminar_ien el indicadorvisual.
'Cook & Hold' (CocciOny
mantener caliente)
'Cook& Hold' le permitehorneardurante unacantidad determinada
detiempo, seguidode un ciclo 'KeepWarm' de una hora.
Para programar 'Cook & Hold':
1. Optima latecla 'Cook & Hold'.
• 'BAKE'y 'HOLD' destellan.
, '000'se ilumina en el indicadorvisual.
2. Seleccionelatemperaturadel homo. Latemperatura
del homo puedeser programadade 75° a 285° C
070° a550° F).Oprima u oprimay mantenga
oprimida la tecla'More+' o 'Less='.
° Oprimalatecla 'More+' para aumentarla
temperatura.
BO
Less- :i
, Oprimala tecla 'Less=' paradisminuir latemperatura.
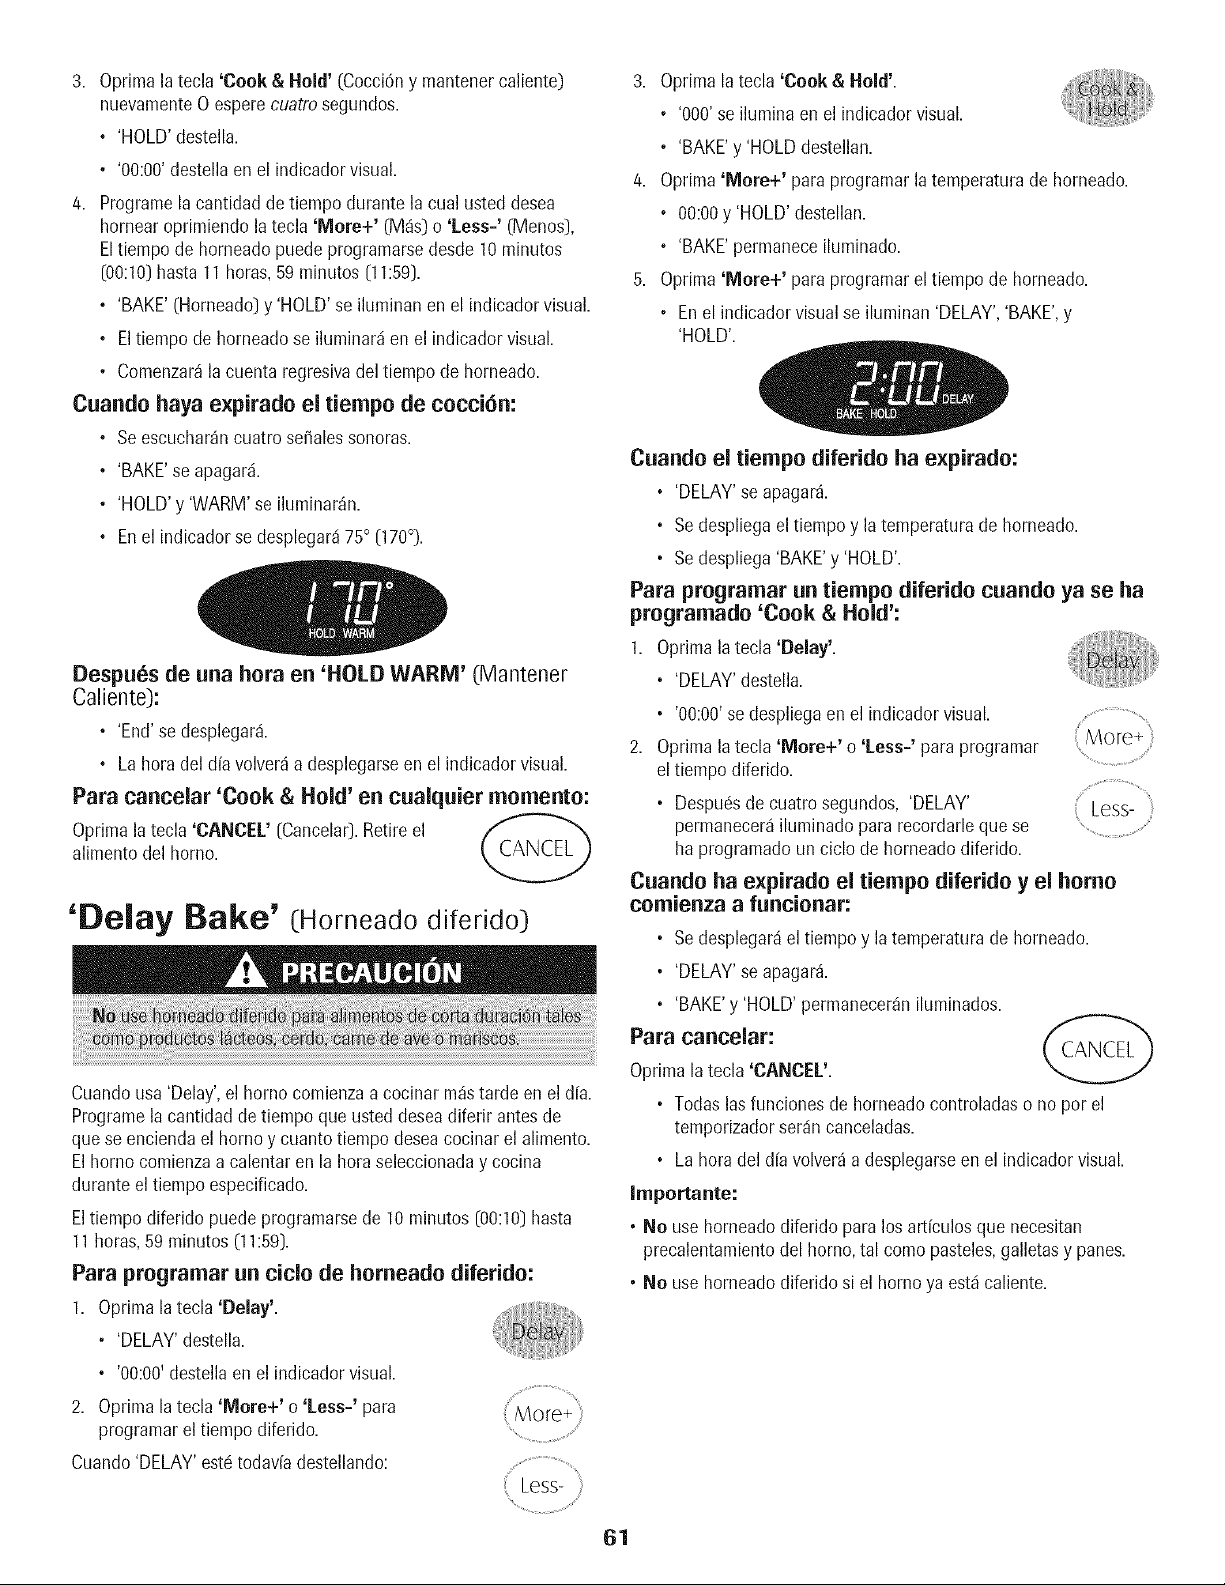
3. Oprimalatecla'Cook&Hold' (Cocci0ny mantenercaliente)
nuevamenteO esperecuatrosegundos.
• 'HOLD'destella.
° '00:00'destellaen el indicadorvisual.
4. Programelacantidad detiempo durante lacual usteddesea
hornearoprimiendo latecla 'More+' (M_s) o 'Less-' (Menos),
Eltiempo de horneadopuedeprogramarsedesde 10minutos
[00:10)hasta11 horas,59minutos [11:59).
• 'BAKE'(Horneado)y 'HOLD'se iluminan en el indicadorvisual.
• Eltiempo de horneadose iluminar_ien el indicadorvisual.
° Comenzar_la cuenta regresivadel tiempo de horneado.
Cuando haya expirado el tiempo de cocci6n:
• Se escuchar_ncuatro so,ales sonoras.
• 'BAKE'se apagar&
° 'HOLD'y 'WARM'se iluminar_n.
• Enel indicadorse desplegar_i75° 070°).
Despues de una hora en 'HOLD WARM' (Mantener
Caliente):
• 'End'se desplegar4.
• Lahora del dfa volver_a desplegarseen el indicador visual.
Para caneelar 'Cook & Hold' en cualfluier memento:
Oprimala tecla 'CANCEL' (Cancelar).Retire el /_ _,, _,_L'_
alimentodel homo.
'Delay Bake' (Horneadodiferido)
Cuandousa 'Delay',el homo comienzaa cocinar m_starde en el d[a.
Programelacantidadde tiempo queusted deseadiferir antesde
quese enciendael homo y cuantotiempodeseacocinar el alimento.
Elhomo comienzaa calentaren la horaseleccionaday cocina
duranteel tiempo especificado.
Eltiempo diferido puedeprogramarsede 10minutos (00:10)hasta
11horas,59 minutos (11:59).
Para programar un title de horneado diferido:
1. Oprima latecla 'Delay'.
° 'DELAY'destella.
• '00:00'destella en el indicadorvisual.
2. Oprima latecla 'More+' o 'Less='para
programarel tiempo diferido.
Cuando'DELAY'estc!todaviadestellando:
( Less-ii
Optimalatecla 'Cook & Hold'.
• '000'se ilumina en el indicadorvisual.
• 'BAKE'y 'HOLDdestellan.
Oprirna'More+' para programarlatemperaturade horneado.
• 00:00y 'HOLD'destellan.
• 'BAKE'permaneceiluminado.
Optima'More+' para programarel tiempo de horneado.
• Enel indicadorvisual se ilurninan 'DELAY','BAKE',y
'HOLD'.
Cuando el tiempo diferido ha expirado:
• 'DELAY'se apagar&
• Sedespliegael tiempoy la temperaturade horneado.
• Sedespliega'BAKE'y 'HOLD'.
Para programar un tiempo diferido cuando ya se ha
programatic 'Cook & Hold':
1. Oprimala tecla 'Delay'.
• 'DELAY'destella.
• '00:00'se despliegaen el indicadorvisual. ........................................
2. Optimala tecla 'More+' o 'Less=' paraprogramar
eltiempo diferido.
• Despu6sde cuatrosegundos, 'DELAY' Less-
permanecer_iluminado pararecordarlequese
ha programadoun ciclo de horneado diferido.
Cuando ha expirado el tiempo diferido y el homo
comienza a funcionar:
• Sedesplegardel tiempoy latemperaturade horneado.
• 'DELAY'se apagar&
• 'BAKE'y 'HOLD'permanecer_niluminados.
Para cancelar:
Oprimala tecla 'CANCEL'.
• Todas lasfunciones de horneadocontroladaso no por el
temporizadorser_incanceladas.
• La horadel d[avolver_ a desplegarseen el indicadorvisual.
Irnportante:
• No usehorneadodiferido paralos artfculosque necesitan
precalentamientodel homo,tal eomo pasteles,galletasy panes.
• No usehorneadodiferido si el homo ya est,1caliente.
61
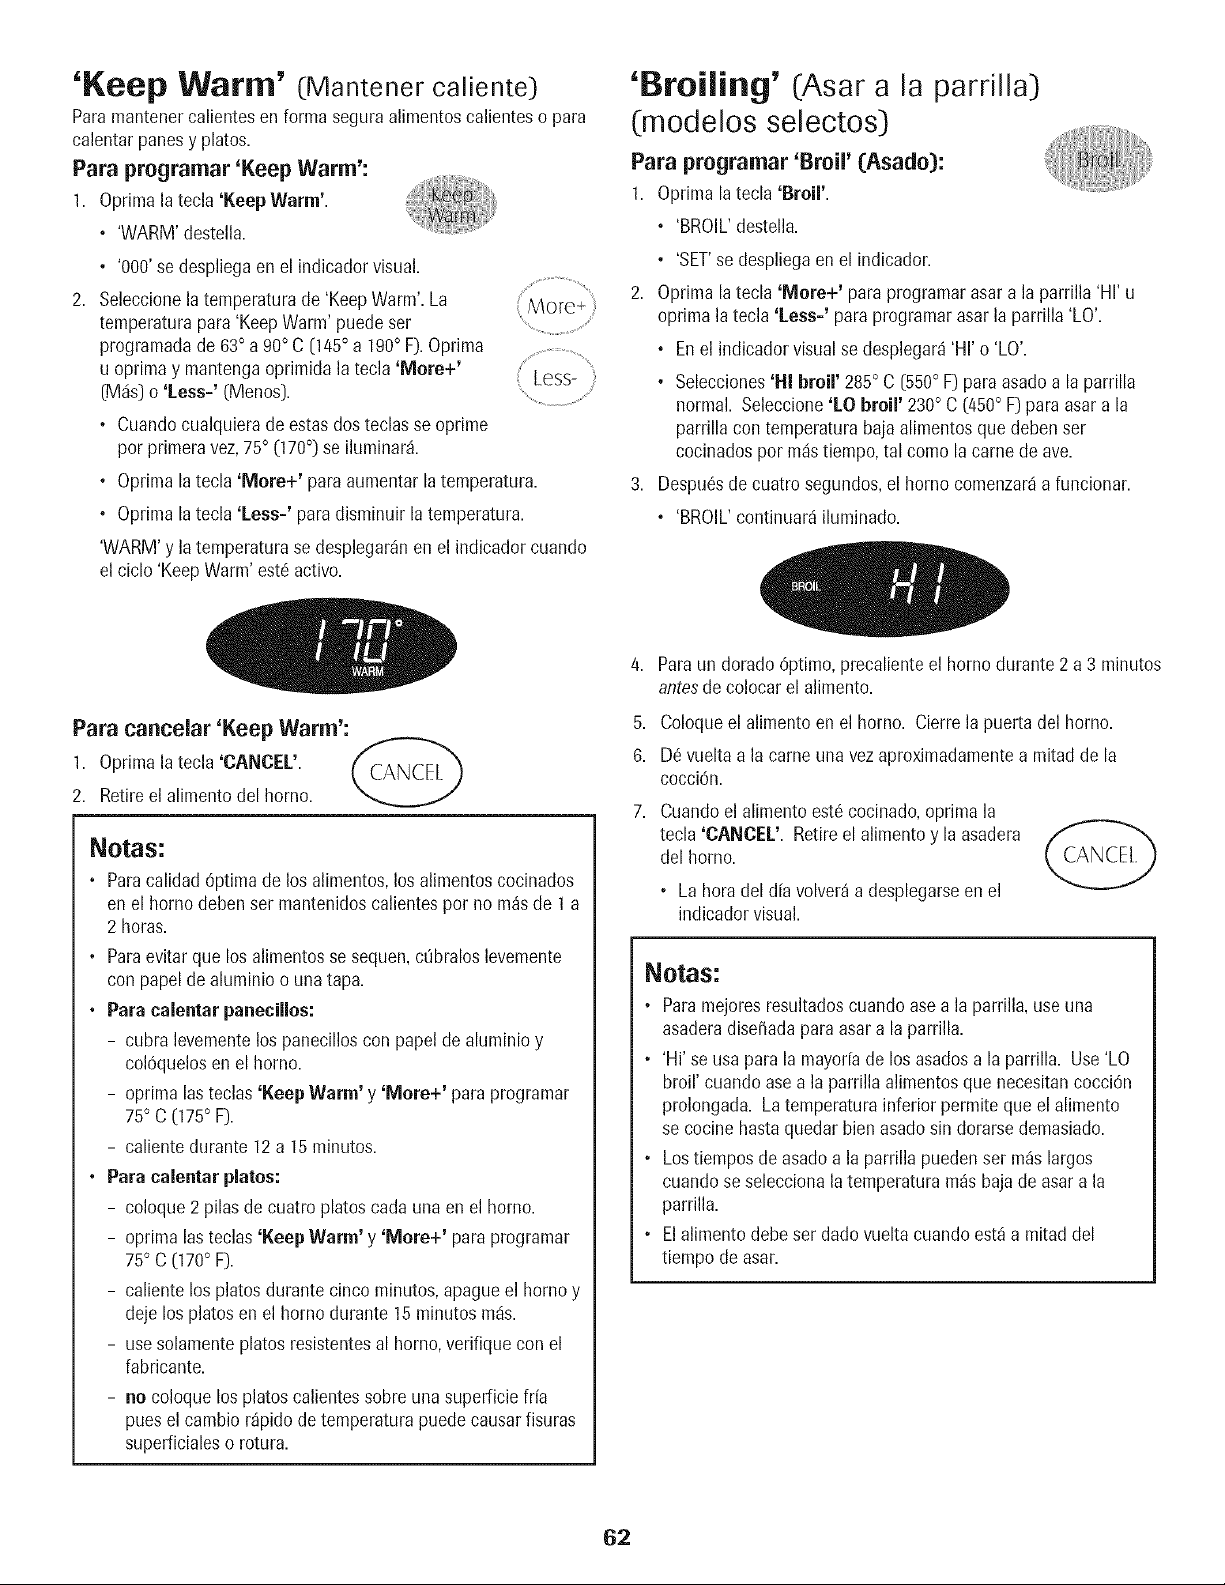
'Keep Warm' (Mantener caliente)
Paramantenercalientesen forma seguraalimentoscalienteso para
calentarpanesy platos.
Para programar 'Keep Warm':
1. Oprimala tecla 'Keep Warm'.
, 'WARM'destella.
, '000'se despliegaenel indicadorvisual.
2. Seleccionelatemperaturade 'KeepWarm'.La
temperaturapara 'KeepWarm' puedeset
programadade 63° a 90° C [145° a 190° F).Optima ..........................................
u optimay mantengaoprimida la tecla'More+' , Less- ......
[M_is]o 'Less='[Menos].
, Cuandocualquierade estasdos teclasse oprime
por primeravez,75° (170°) se iluminar&
, Optimalatecla 'More+' para aumentarla temperatura.
• Optimalatecla 'Less-' paradisminuir la temperatura.
'WARM'y latemperaturase desplegar_nen el indicador cuando
el ciclo'Keep Warm'est6activo.
'[}roiling' (Asar a la parrilla)
(modelos selectos)
Para programar 'Broil' [Asado):
1. Optima latecla 'Broil'.
° 'BROIL'destella.
° 'SET'se despliegaen el indicador.
2. Oprima latecla 'More+' para programarasar a la parrilla 'HI' u
oprima la tecla 'Less=' paraprogramarasarla parrilla 'LO'.
• Enel indicadorvisual se desplegar4'HI' o 'LO'.
° Selecciones'Hi broil' 285° C [550° F) paraasadoa la parrilla
normal. Seleccione'LO broil' 230° C (450° F)para asar a la
parrillacon temperaturabaja alimentosque deben ser
cocinadospor m_istiempo,tal como la came de ave.
3. DespuCsde cuatro segundos,el homo comenzar4a funcionar.
• 'BROIL'continuar4iluminado.
Para eancelar 'Keep Warm':
1. Oprimala tecla 'CANCEL'. CANCEl ....
2. Retireel alimentodel homo.
NOtaS:
° Paracalidad@tima de los alimentos,los alimentoscocinados
en el homo debenser mantenidoscalientespot no m_sde 1a
2 horas.
° Paraevitar que los alimentosse sequen,ct_braloslevemente
con papelde aluminioo una tap&
• Para calentar panecillos:
- cubra levementelos panecilloscon papelde aluminio y
colCquelosen el homo.
-oprima las teclas 'Keep Warm' y 'More+' para programar
75° C (175° F).
- caliente durante 12a 15 minutos.
° Para calentar platos:
- coloque 2 pilas de cuatro platos cada una en el horno.
-oprima las teclas 'Keep Warm' y 'More+' para programar
75° C (170° F).
- caliente losplatos durantecinco minutos,apague el homo y
deje los platosen el homo durante 15minutosm4s.
- usesolamenteplatos resistentesal homo,verifique con el
fabricante.
- no coloque los platos calientessobreuna superficiefria
puesel cambio r_pido de temperaturapuede causarfisuras
superficialeso rotura.
4,
5.
8.
Paraun dorado6ptimo, precalienteel homo durante 2 a 3 minutos
antesdecolocarel alimento.
Coloqueel alimentoen el homo. Cierrela puerta del homo.
D6 vueltaa la cameuna vezaproximadamentea mitadde la
cocciOn.
CtJandoel alimento est6 cocinado,oprima la
tecla 'CANCEL'. Retire el alimentoy la asadera
del homo.
• La horadel d[avolver_ a desplegarseen el
indicadorvisual.
Notas:
• paramejoresresultadoscuandoase a la parrilla,use una
asaderadise_adaparaasara la parrilla.
° 'Hi' se usa parala mayor[ade los asadosa la parrilla. Use 'LO
broil' cuandoase a la parrillaalimentosque necesitancocci6n
prolongada. Latemperaturainferior permiteque el alimento
se cocinehastaquedar bienasadosin dorarsedemasiado.
° Lostiempos deasadoa la parrilla pueden set m_s largos
cuandose seleccionala temperaturam_sbajade asara la
parrilla.
° Elalimento debe ser dado vuelta cuando est_ a mitad del
tiempo de asar.
62
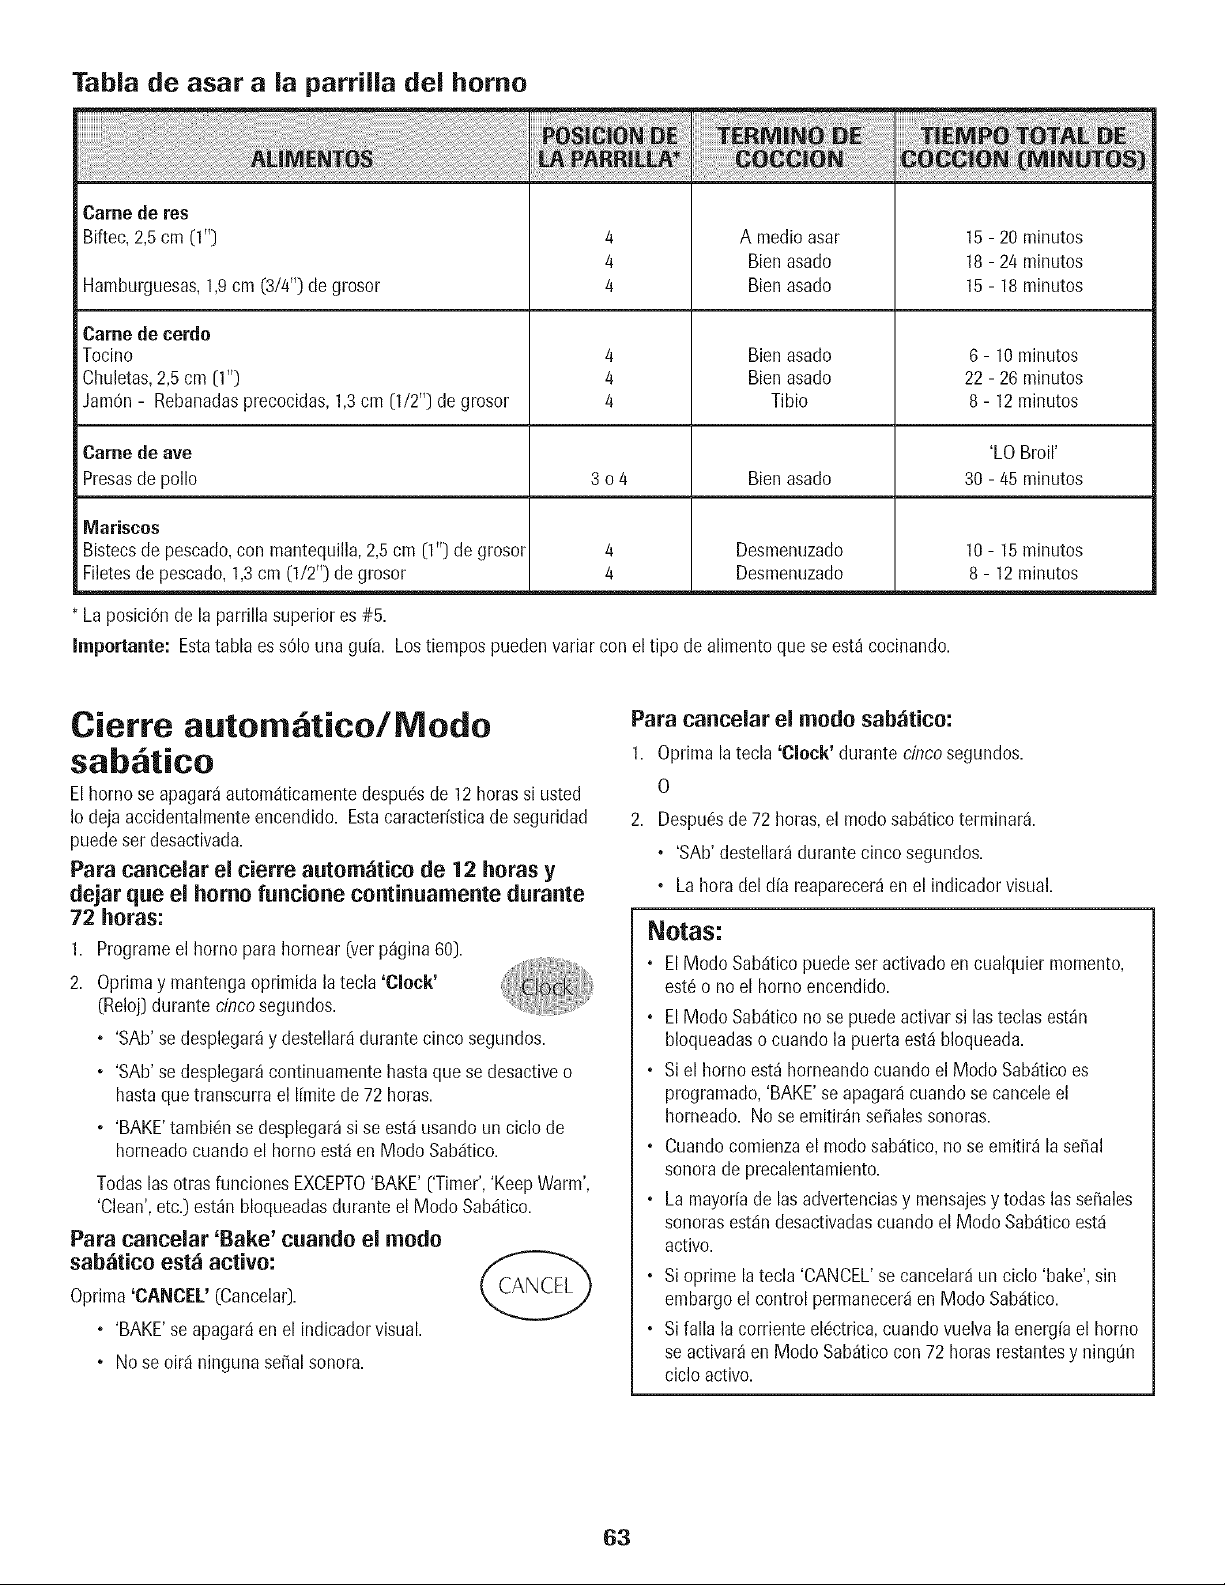
Tabla de asar a la parrilla dei homo
Came de res
Biftec,2,5cm (1"]
Hamburguesas,1,9cm (3/4") degrosor
Came de cerdo
Tocino
Chuletas,2,5 cm [1")
JamOn- Rebanadasprecocidas,1,3cm [1/2"] de grosor
4
4
4
4
4
4
A medicasar
Bienasado
Bienasado
Bienasado
Bienasado
Tibio
15 - 20 minutes
18 - 24 minutes
15 - 18 minutes
6 - 10 minutes
22 - 26 minutes
8 - 12 minutes
Came de ave 'LO Broil'
Presasde polio 3 o 4 Bienasado 30- 45 minutes
Mariscos
Bistecsde pescado,con mantequilla,2,5cm [l"] de grosor 4 Desmenuzado
Filetesde pescado,1,3cm [112")de grosor 4 Desmenuzado
La posiciOnde la parrillasuperiores #5.
Importante: Estatabla es sOIouna gu[a. Lostiempos puedenvariar con el tipo de alimento que se est_ cocinando.
10- 15minutes
8 - 12minutes
Cierre autom tico/Modo
sab tico
Elhomo se apagaraautomaticamentedespuBsde 12 horassi usted
Io dejaaccidentalmenteencendido. Estacaracter[sticade seguridad
puedeser desactivada.
Para cancelar el cierre aurora;trice de 12 horas y
dejar que el homo funcione continuamente durante
72 horas:
1. Programeel borne para hornear [ver p_gina 60].
2. Oprimay mantengaoprimida latecla 'Clock'
[Reloj] duranteciflco segundos.
• 'SAb' se desplegar_y destellar4durante cinco segundos.
• 'SAb' se desplegar_continuamentehastaquese desactiveo
hastaque transcurrael I[mite de 72 betas.
• 'BAKE'tambiBn se desplegar_si se est4usando unciclo de
horneadocuandoel homo est4en Mode Sab4tico.
Todaslasotras funciones EXCEPTO'BAKE'['Timer','KeepWarm',
'Clean',etc.) est_n bloqueadasduranteel Mode Sab4tico.
Para cancelar 'Bake' cuando el mode
sab_tico est_ active:
Oprima'CANCEL' (Cancela0.
• 'BAKE'se apagar4en el indicadorvisual.
• No se oir4 ningunasepalsonora.
CANCEL
Para cancelar el mode sab;itico:
1. Optima latecla 'Clock' durante cincosegundos.
O
2. DespuBsde 72 horas,el mode sab4ticoterminar_.
. 'SAb'destellar_durante cinco segundos.
• Laheradel dfa reaparecer_en el indicadorvisual.
NOtaS:
• ElMode Sab4ticopuedeseractivadoen cualquier memento,
est6o no el homo encendido.
• ElMode Sab4ticonose puedeactivarsi lasteclas est_n
bloqueadaso cuando la puerta est,1bloqueada.
• Siel homo est_horneandocuando el Mode Sab_ticoes
programatic,'BAKE'se apagar4cuandose cancele el
horneado. No se emitir_nse_alessonoras.
• Cuandocomienzael mode sab4tico,no se emitir_ la sepal
sonorade precalentamiento.
• La mayoriade las advertenciasy mensajesy todas lasse_ales
sonorasest4ndesactivadascuandoel Mode Sab4ticoest4
active.
• Sioprime la tecla 'CANCEL'se cancelar4 un ciclo 'bake', sin
embargoel control permanecer_ien Mode Sab4tico.
• Sifalla lacorrienteelc!ctrica,cuandovuelva la energ[ael homo
se activar_en Mode Sab_ticocon 72 horasrestantesy ningOn
ciclo active.
63
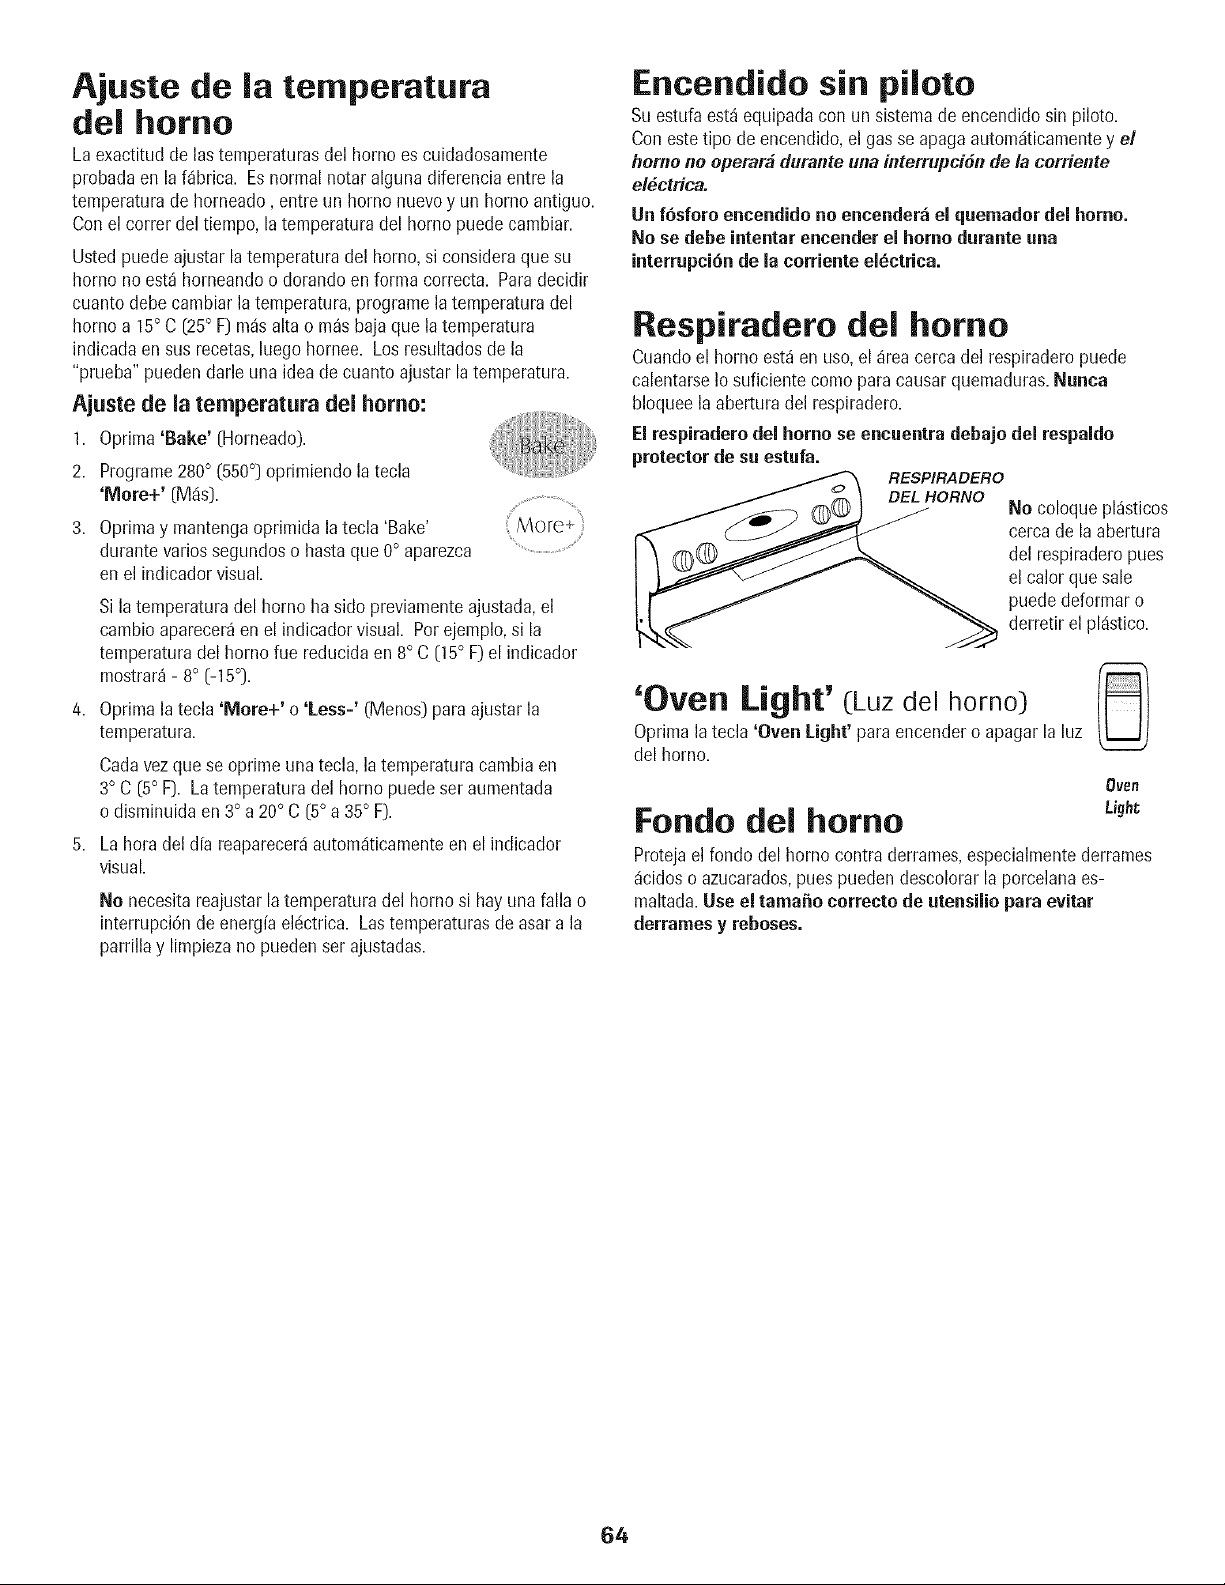
Ajuste de la ternperatura
del homo
La exactitudde las temperaturasdel homo es cuidadosamente
probadaen laf_brica. Es normalnotar alguna diferencia entre la
temperaturade horneado, entre un homo nuevoy un homo antiguo.
Con el correrdel tiempo, la temperaturadel homo puede cambiar.
Usted puedeajustar latemperaturadel homo,si consideraquesu
homo noest_ horneandoo dorandoenforma correcta. Paradecidir
cuantodebecambiarla temperatura,programelatemperaturadel
homo a 15° C (25° F) m_salta o m_sbajaque latemperatura
indicadaen sus recetas,luego hornee. Los resultadosde la
"prueba" puedendarleuna ideade cuantoajustar latemperatura.
Ajuste de la temperatura del homo:
1. Oprima'Bake' [Horneado).
2. Programe280° (550°) oprimiendola tecla
'More+' (Mds).
3. Oprimay mantengaoprimida la tecla 'Bake' More+
durantevariossegundoso hastaque0° aparezca
enel indicadorvisual.
Si latemperaturadel homo ha sido previamenteajustada,el
cambioaparecer_enel indicadorvisual. Porejemplo,si la
temperaturadel homo rue reducidaen 8° C 05 ° F) el indicador
mostrar_- 8° [-15°).
4. Oprimala tecla 'More+' o 'Less-' (Menos) para ajustar la
temperatura.
Cadavezque se oprimeuna tecla, la temperaturacambia en
3° C [5° F). La temperaturadel homo puedeset aumentada
o disminuidaen 3° a 20° C [5° a 35° F).
5. Lahora del d[a reaparecerdautomdticamenteen el indicador
visual.
No necesitareajustarlatemperaturadel homo si hayuna falla o
interrupciBnde energfaeldctrica. Lastemperaturasde asara la
parrillay limpiezano puedenser ajustadas.
Encendido sin piloto
Su estufaest_ equipadacon un sistemade encendidosin piloto.
Con estetipo deencendido,el gas se apagaautomdticamentey el
homo no operar_ duranteuna interrupciBnde la corriente
el_ctrica.
Un fBsforo encendido no encender_ el quemadordel homo,
No se debe intentar encender el homo durante una
interrupciBnde la corriente el_ctrica.
Respiradero del homo
Cuandoel hornoest_en uso,el _reacercadel respiraderopuede
calentarseIo suficientecomoparacausarquemaduras.Nunca
bloqueelaabertura del respiradero.
El respiraderodel homo se encuentra debajo del respaldo
protectorde su estufa.
RESPIRADERO
No coloquepl_sticos
cercade la abertura
del respiraderopues
el calor quesale
puededeformaro
derretir el pldstico.
'Oven Light' (Luz del homo)
Oprimala tecla 'Oven Light' para encendero apagarla luz
del homo.
Fondo del homo
Oven
Light
Protejael fondo del homo contraderrames,especialmentederrames
_cidoso azucarados,puespuedendescolorarla porcelanaes-
maltada.Use el tama_o correcto de utensiliopara evitar
derrames y reboses.
64
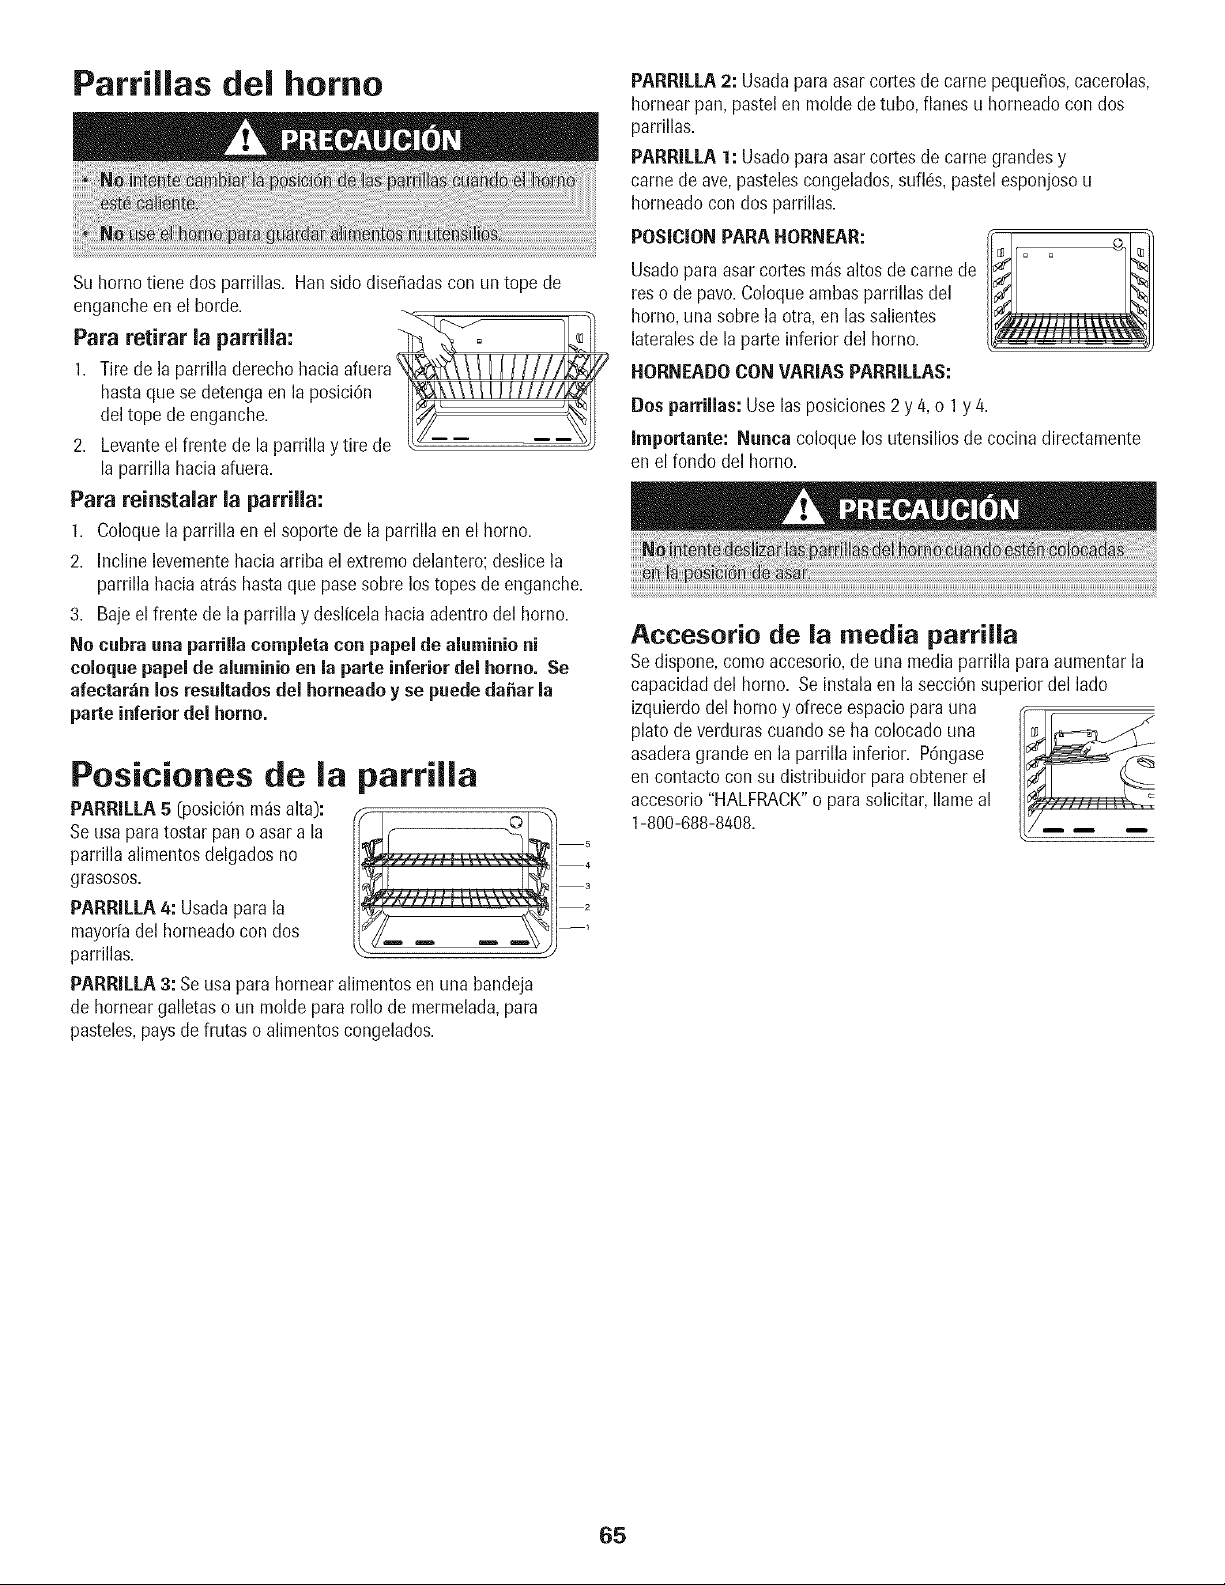
Parrillas del homo
Su homo tiene dos parrillas. Han sido dise_adascon untope de
engancheen el borde.
Para retirar la parrilla: __/1
1. Tirede la parrilla derechohaciaafuera_k_\///] I//_
hastaquese detengaen laposici6n I_[
deltope de enganche. U_ _]]
2. Levanteel frente de laparrilla y tire de ?
la parrilla haciaafuera.
Para reinstalar la parrilla:
1. Coloquela parrilla en el soporte de la parrilla en el homo.
2. Incline levementehaciaarriba el extremodelantero;deslice la
parrilla haciaatrds hastaque pasesobre los topes de enganche.
3. Bajeel frente de la parrillay deslfcelahaciaadentro del homo.
No cubra unaparrilla completa conpapel de aluminio ni
coloque papel de aluminio en la parte inferior del homo. Se
afectarztn los resultadosdel horneadoy se puede da_ar la
parte inferiordel homo.
Posiciones de la parrilla
PARRILLA5 (posiciOnmdsalta):
Seusa paratostar pano asar a la
parrillaalimentosdelgadosno
grasosos.
PARRILLA 4: Usadapara la
mayoriadel homeadocon dos
parrillas.
PARRILLA 3: Se usa para hornear alimentos en una bandeja
de hornear galletas o un molde para rollo de mermelada, para
pasteles, pays de frutas o alimentos congelados.
PARRILLA2: Usadapara asarcortesde came peque_os,cacerolas,
hornearpan, pastelen molde detubo, flanesu horneadocon dos
parrillas.
PARRILLA1: Usado para asarcortes de came grandesy
camede ave,pastelescongelados,sufids, pastel esponjosou
horneadocon dos parrillas.
POSICIONPARA HORNEAR:
Usadopara asarcortes mds altos de came de
res o de pavo.Coloqueambasparrillasdel
homo,una sobre la otra,en lassalientes
lateralesde la parte inferior del homo.
ItORNEADO CON VARIASPARRIL[AS:
Dos parrillas:Uselasposiciones2 y 4, o 1y 4.
Importante: Nunca coloquelos utensiliosde cocinadirectamente
en el fondo del homo.
Accesorio de ia media parrilla
Sedispone,comoaccesorio,de una mediaparrilla paraaumentarla
capacidaddel homo. Seinstalaen lasecciOnsuperiordel lado
izquierdodel homo y ofrece espaciopara una
plato de verdurascuandose hacolocadouna
asaderagrandeen la parrilla inferior. POngase
en contactocon su distribuidor paraobtener el
accesorio"HALFRACK"o parasolicitar,Ilameal
1-800-688-8408.
65

66

P P
GARANTIA DE LOS ELECTRODOMESTICOS PRINCIPALES
DE MAYTAG CORPORATION
GARANTJA LIMITADA
Durante un afio a partir de la fecha de compra, siempre y cuando se de a este electrodomestico principal un uso y mantenimiento de
conformidad con las instrucciones adjuntas o provistas con el producto, la marca Maytag de Whirlpool Corporation o Whirlpool
Canada LP (en Io sucesivo denominado "Maytag") se hara cargo del costo de las piezas especificadas de fabrica y del trabajo de
reparaci6n para corregir defectos en los materiales o en la mano de obra. El servicio debera ser suministrado por una compah[a de
servicio designada por Maytag, Esta garantfa limitada es valida solamente en Estados Unidos o en CanadA, y se aplica solamente
cuando el electrodomestico principal se use en el pals en el que se ha comprado. Esta garantia limitada no tiene vigor fuera de los
cincuenta Estados Unidos y CanadA, Se requiere una prueba de la fecha de compra original para obtener servicio bajo esta garantfa
limitada.
EXCLUSlONES DE LA GARANTJA
Esta garantia limitada no cubre:
1. Visitas de servicio tecnico para corregir la instalaci6n de su electrodomestico principal, para enser_arle a usar su electrodomestico
principal, para cambiar o reparar fusibles domesticos o para corregir la instalacidn electrica o de la tuberia de la casa.
2. Visitas de servicio tecnico para reparar o reemplazar focos para electrodomesticos, filtros de aire o filtros de agua. Estas piezas de
consumo estan excluidas de la cobertura de la garantia,
3. Reparaciones cuando su electrodomestico principal se use de un modo diferente al domestico normal de una familia, o cuando se
use de un modo contrario alas instrucciones publicadas para el usuario u operador y/o las instrucciones de instalaci6n,
4. Dafios causados por accidente, alteracidn, uso indebido, abuso, incendio, inundacidn, actos fortuitos, instalacidn incorrecta,
instalaci6n que no este de acuerdo con los c6digos electricos o de plomerfa, o el empleo de artfculos de consumo o productos de
limpieza no aprobados por Maytag,
5. Dafios esteticos, incluyendo rayaduras, abolladuras, desportilladuras u otro dafio al acabado de su electrodomestico principal, a
menos que el mismo sea debido a defectos en los materiales o la mano de obra y se le informe a Maytag en un lapso de 30 dias a
partir de la fecha de compra.
6. Cualquier perdida de comida debido a fallas del refrigerador odel congelador.
7. Costos relativos a la remoci6n de su electrodomestico principal desde su hogar para obtener reparaciones. Este electrodomestico
principal esta diseSado para ser reparado en el hogar y Qnicamente el servicio de reparaci6n en el hogar esta cubierto bajo esta
garantia.
8. Reparaciones de piezas o sistemas como resultado de modificaciones no autorizadas que se hayan efectuado en el
electrodomestico.
9. Gastos de viaje y transporte para obtener servicio para el producto, si su electrodomestico principal esta ubicado en un lugar
remoto en el cual no haya disponible un tecnico de servicio autorizado por Maytag,
10. La remoci6n y reinstalaci6n de su electrodomestico principal, si estuviera instalado en un lugar inaccesible o si no estuviera
instalado de conformidad con las instrucciones de instalaci6n publicadas.
11. Electrodomesticos principales con nQmeros de modelo/serie que se hayan removido, alterado o que no puedan ser identificados
con facilidad, Esta garantia se anulara si el n_mero de serie aplicado en la fabrica ha sido alterado o removido de su
electrodomestico principal.
El costo de la reparaci6n o el reemplazo bajo estas circunstancias excluidas, correra por cuenta del cliente.
EXCLUSION DE GARANTIAS IMPLJCITAS; LIMITACION DE RECURSOS
EL 0NICO Y EXCLUSIVO RECURSO DEL CLIENTE SEGUN LOS TERMINOS DE ESTA GARANTIA LIMITADA SERA EL DE REPARAR
EL PRODUCTO SEGUN SE ESTIPULA EN LA PRESENTE, LAS GARANTIAS IMPLIC,ITAS, INCLUYENDO LAS GARANTIAS DE
COMERCIABILIDAD O DE CAPACIDAD PARA UN PROPOSITO PART!CULAR, SERAN LIMITADAS A UN ANO O AL PERIODO MAS
CORTO PERMITIDO POR LEY. MAYTAG NO SE RESPONSABILIZARA POR DANOS INCIDENTALES O CONSECUENTES. ALGUNOS
ESTADOS Y PROVlNCIAS NO PERMITEN LAS EXCLUSlONES O LIMITACIONES POR DANOS INCIDENTALES O CONSECUENTES, O
LIMITACIONES ACERCA DE CUANTO DEBE DURAR UNA GARANTIA IMPLICITA DE COMERCIABILIDAD O CAPACIDAD, DE MODO
QUE LAS LIMITACIONES O EXCLUSIONES ARRIBA MENCIONADAS PUEDEN NO APLICARSE EN SU CASO, ESTA GARANTIA LE
OTORGA DERECHOS LEGALES ESPECIFICOS Y ES POSIBLE QUE USTED TENGA TAMBICN OTROS DERECHOS QUE PUEDEN
VARIAR DE UN ESTADO A OTRO O DE UNA PROVlNCIA A OTRA.
Si usted se encuentra fuera de los cincuenta Estados Unidos y CanadA, p6ngase en contacto con su distribuidor autorizado de Maytag
para determinar si corresponde otra garantfa,
Si necesita servicio, consulte primero la secci6n "Soluci6n de problemas" del Manual de uso y cuidado. Despues de consultar la
secci6n "Soluci6n de problemas", puede encontrar ayuda adicional en la secci6n "Ayuda o servicio tecnico," o Ilamando a Maytag. En
EE.UU,, Ilame al 1-800-688-9900, En CanadA, Ilame al 1-800-807-6777.
9/07
Form No. A/01/08 Part No. 8113P704-60 @2006 Maytag Appliances Sales Co. All rights reserved. Litho U.S.A.