T 20 DOG COLLAR DEVICE
Owner’s Manual

© 2023 Garmin Ltd. or its subsidiaries
All rights reserved. Under the copyright laws, this manual may not be copied, in whole or in part, without the written consent of Garmin. Garmin reserves the right to change
or improve its products and to make changes in the content of this manual without obligation to notify any person or organization of such changes or improvements. Go to
www.garmin.com for current updates and supplemental information concerning the use of this product.
Garmin
®
, the Garmin logo, and Alpha
®
are trademarks of Garmin Ltd. or its subsidiaries, registered in the USA and other countries. Garmin Express
™
is a trademark of Garmin Ltd. or
its subsidiaries. These trademarks may not be used without the express permission of Garmin.
TORX
®
is a registered trademark of Acument Intellectual Properties, LLC in the United States or other countries. Wi‑Fi
®
is a registered mark of Wi-Fi Alliance Corporation. Other
trademarks and trade names are those of their respective owners.

Table of Contents
Getting Started................................. 1
Dog Collar Device.................................... 1
Turning On the Device............................. 1
Turning Off the Device............................ 1
Charging the Dog Collar Device..............2
Acquiring Satellite Signals...................... 2
Adding a Dog to the Alpha® Navigator
Using Wireless Pairing............................ 2
Fitting the Collar on Your Dog................ 3
Dog Tracking and Training................3
Dog Tracking........................................... 3
Dog Training............................................ 4
Communication with the Dog Collar
Device...................................................... 4
Using a Dynamic Update Rate................ 4
Using Sleep Mode................................... 5
Device Information........................... 5
Getting the Owner's Manual................... 5
Product Updates..................................... 5
VHF Radio Information........................... 6
Dog Collar Device Specifications........... 6
Appendix.......................................... 6
Purchasing Accessories......................... 6
Replacing the Dog Collar Battery........... 7
Replacing the Dog Collar Flex Band....... 8
Replacing the Dog Collar Strap.............. 8
Replacing the Dog Collar VHF
Antenna.................................................... 9
Table of Contents i


Getting Started
WARNING
See the Important Safety and Product Information guide in the product box for product warnings and other
important information.
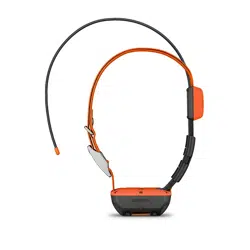
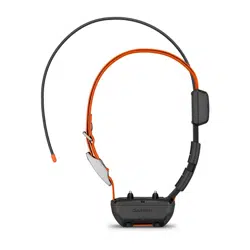
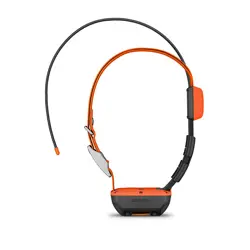
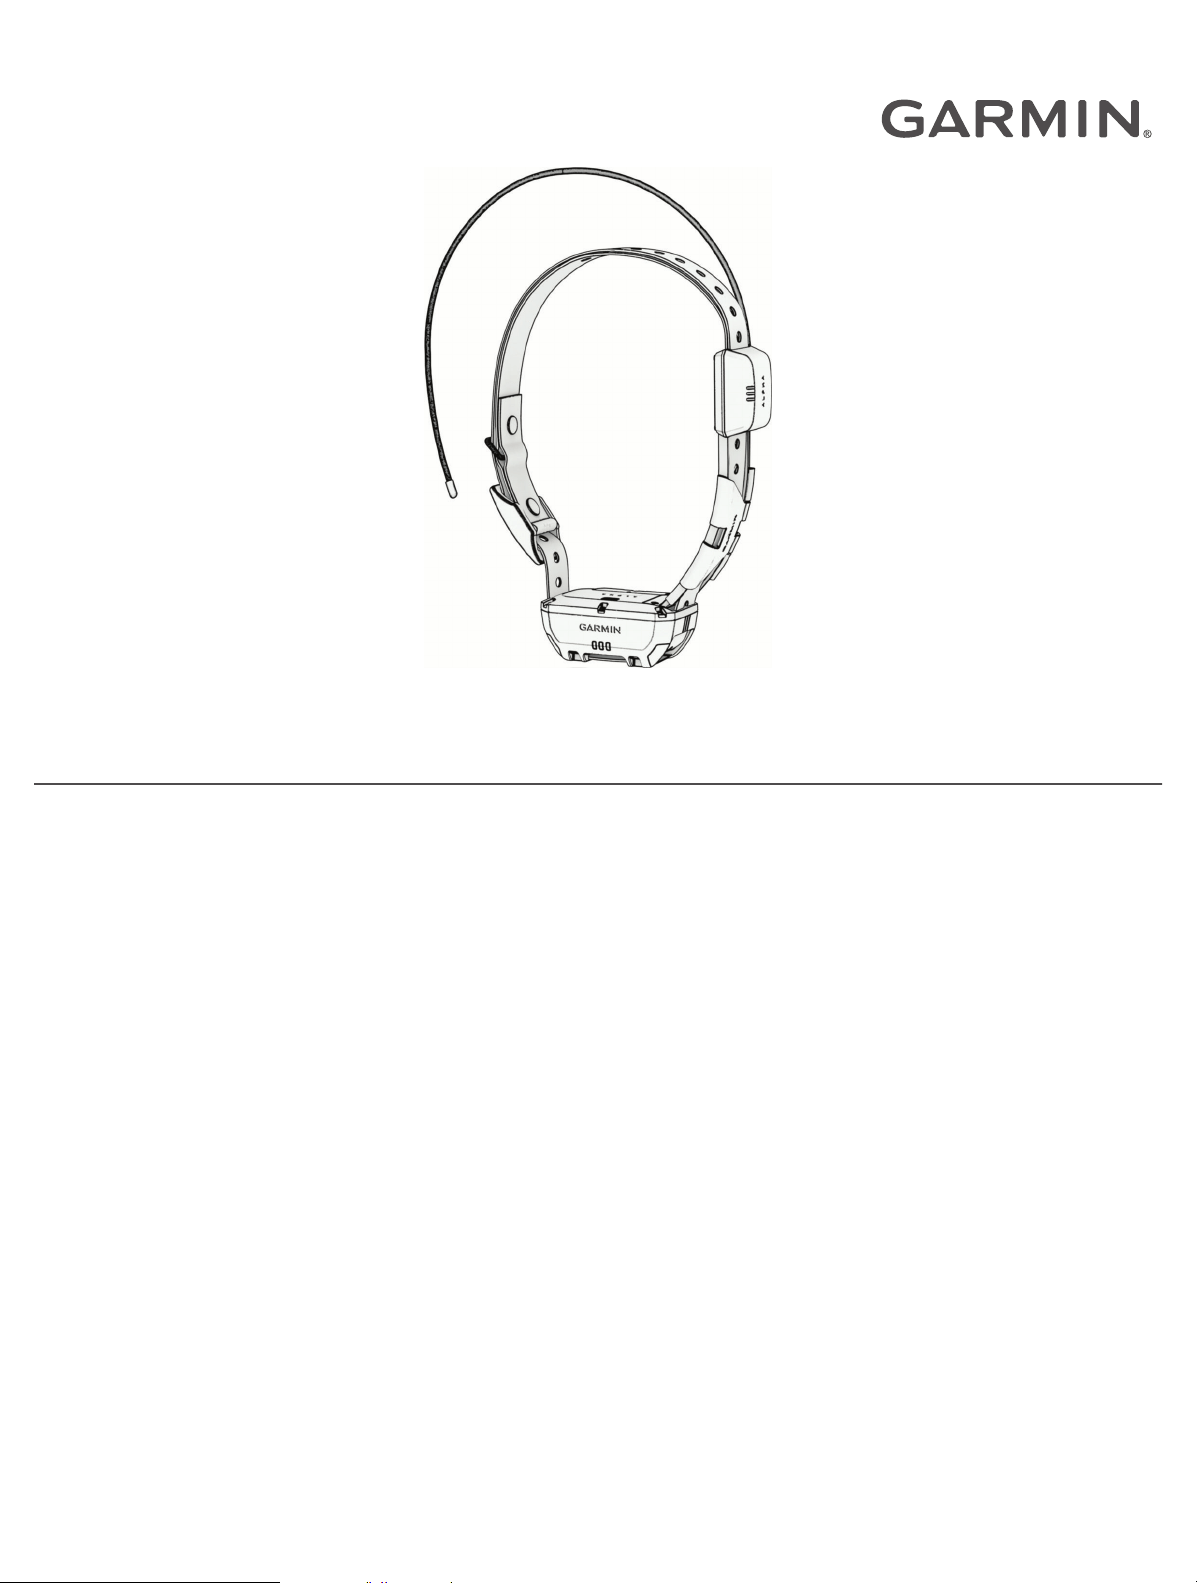
Dog Collar Device
VHF antenna
GPS antenna
Power button
Status LED
Flashing beacon LEDs
Turning On the Device
• On the dog collar device, hold the power button until the status LED flashes and the collar beeps.
Turning Off the Device
Hold the power button until the status LED turns solid red.
The dog collar device beeps and turns off.
Getting Started 1

Charging the Dog Collar Device
NOTICE
To prevent corrosion, thoroughly dry the contacts on the dog collar device and the surrounding area before
connecting the charging clip.
You should fully charge the battery before you use the dog collar device for the first time. Charging a fully
depleted battery takes about five hours.
1 Snap the charging clip onto the dog collar device .
2 Plug the small end of the power cable into the USB port on the charging clip.
3 Plug the power cable into a power source.
The status LED is solid red when the collar is charging.
4 After the status LED turns solid green, remove the charging clip from the collar.
Acquiring Satellite Signals
Both the dog collar device and navigator must acquire satellite signals before you put the dog collar device on
your dog. Acquiring satellites can take a few minutes.
1 Go outdoors to an open area.
2 Turn on both devices.
in the status bar shows the GPS signal strength.
When the dog collar device has acquired satellite signals, the status LED flashes green.
Adding a Dog to the Alpha
®
Navigator Using Wireless Pairing
To pair wirelessly, the dog collar device must be within range of the Alpha navigator.
1 Hold the power button on the dog collar device until the device emits two series of beeps (about 2 seconds),
and then release the power button.
The status LED flashes blue. The dog collar device is now ready to be paired with a navigator.
2 On the navigator, select Dog List > Add Dog.
3 Select Pair Collar, and follow the on-screen instructions.
4 After successfully adding the dog collar device, enter the name of the dog, and select .
5 Select a beacon color for this dog collar device, and select .
2 Getting Started

Fitting the Collar on Your Dog
CAUTION
Do not spray the device or collar with harsh chemicals including but not limited to flea or tick spray. Always
ensure that any flea or tick spray that is applied to the dog is completely dry before placing the collar on the dog.
Small amounts of harsh chemicals can damage the plastic components and collar strap.
Before you can put the collar on the dog, you must pair the navigator and dog collar device (Adding a Dog to
the Alpha
®
Navigator Using Wireless Pairing, page2), and acquire satellite signals (Acquiring Satellite Signals,
page2).
1 Position the collar with the communication antenna pointing up, the GPS antenna facing up, and the LEDs
facing forward.
2 Place the collar around the middle of the dog's neck.
3 Tighten the strap so it is snug around the dog's neck, and fasten the buckle.
NOTE: The collar should fit tightly and should not be able to rotate or slide on the dog's neck. The dog must
be able to swallow food and water normally. You should observe your dog's behavior to verify the collar is
not too tight.
4 If the strap is too long, cut off the excess, leaving at least 7.62cm (3in.) to spare.
Dog Tracking and Training
One navigator can track multiple dog collar devices and other navigators.
Dog Tracking
The navigator allows you to track your dog or multiple dogs, using the tracking compass or map. The map
displays your location and your dog's location and tracks. The compass pointer indicates the direction of the
dog's current location.
Dog Tracking and Training 3

Dog Training
NOTICE
You should research and investigate the training methods best suited for you, your dog, and your needs. This
manual provides some basic guidelines for training, but each dog has unique training needs.
When used properly, the Alpha training system is a very effective training tool to aid your dog in reaching its full
potential. The use of the training system should be part of an overall training program.
Begin training your dog on a leash, without the Alpha training system. You should train your dog how to heel, sit,
and come to you. After the dog understands these three basic commands, you can begin training with the dog
collar device and the leash. Finally, when the dog consistently obeys commands using the leash and collar, you
may be able to remove the leash to train with only the dog collar device.
Training Methods
NOTE: Training features are not available in all areas for tracking collars.
Tone: Activates an audible tone the entire time you press the training button.
Vibration: Applies vibration to the dog the entire time you press the training button, for a maximum of 8
seconds. The effectiveness of vibration may vary based on the dog's temperament and experience.
Communication with the Dog Collar Device
You should keep an unobstructed line of sight between your navigator and dog collar device to produce the best
communication signal. To achieve the best line-of-sight conditions, you should move to the highest elevation
point in your area (for example, on the top of a hill).
Best
Good
Poor
Using a Dynamic Update Rate
When you are actively tracking your dog, the dog collar device can use a dynamic update rate to help conserve
battery power based on the activity of your dog.
1 Select Dog List.
2 Select a dog.
3 Select Update Rate > Dynamic.
4 Dog Tracking and Training

Using Sleep Mode
Before you can enter sleep mode, you must track your dog's location using the compatible dog collar device.
When paired with a navigator, the dog collar device can be put into sleep mode to conserve the battery when
you are not actively tracking your dog.
1 Select Dog List.
2 Select a dog.
3 Select > Adjust Collar Sleep Mode.
4 Select an option:
• Select Sleep to enter sleep mode.
• Select Wake to exit sleep mode.
Device Information
Getting the Owner's Manual
You can get the latest owner's manual from the web.
1 Go to www.garmin.com/support.
2 Select Manuals.
3 Follow the on-screen instructions to select your product.
Product Updates
On your computer, install Garmin Express
™
(www.garmin.com/express).
This provides easy access to these services for Garmin
®
devices:
• Software updates
• Product registration
Setting Up Wi‑Fi
®
for the Dog Collar Device
When paired with a navigator that supports the setup of Wi‑Fi technology on a dog collar device, the dog
collar device can scan for nearby Wi‑Fi networks and pair to a selected network. When the dog collar device is
connected to a Wi‑Fi network, it automatically checks for available software updates and installs them when the
dog collar device is charging, and in range of the connected Wi‑Fi network.
1 Select Dog List.
2 Select a dog.
3 Select > Collar Wi-Fi Setup, and follow the on-screen instructions.
Setting Up Garmin Express
1 Connect the device to your computer using a USBcable.
2 Go to garmin.com/express.
3 Follow the on-screen instructions.
Connecting the Dog Collar Device to a Computer
NOTICE
To prevent corrosion, you should dry the contacts on the dog collar device and the surrounding area before
connecting the charging clip.
1 Snap the charging clip onto the dog collar device.
2 Plug the small end of the USB cable into the USB port on the charging clip.
3 Plug the other end of the USB cable into a USB port on the computer.
Device Information 5

VHF Radio Information
This product may be used only on specific radio frequencies, which vary depending on the country of use. The
navigator and dog collar device allow the user to install a different antenna. Changing the antenna can result in
improved radio performance and higher radiated power. You must not use the device with a third party antenna
or an antenna not approved by Garmin. Go to www.garmin.com/tracking-legal for details about the performance
and radio frequency of this product, lawful accessories, and power limits for countries.
Dog Collar Device Specifications
Battery type
Rechargeable, replaceable lithium-ion
1
Optional extended battery box accessory available
2
Battery life
Up to 68hr.
Up to 136hr. with optional extended battery box accessory
Operating temperature range From -20° to 60°C (from -4° to 140°F)
Charging temperature range From 0° to 40°C (from 32° to 104°F )
Storage temperature range From -20° to 70°C (from -4° to 158°F)
ANT
®
wireless range Up to 10m (32.8ft.)
VHF radio range Up to 14.48km (9mi.)
Wireless frequencies/protocols 152-169 MHz @ 23.1 dBm maximum, 2.4 GHz @ 12.33 dBm maximum
EU SAR 0.15 W/kg simultaneous torso, 0.15 W/kg simultaneous limb
Water rating 1ATM
3
Appendix
Purchasing Accessories
• Optional accessories are available at garmin.com or from your Garmin dealer.
1
Only for use with Garmin part number 361-00035-16.
2
Only for use with Garmin part number 361-00148-00.
3
The device withstands pressure equivalent to a depth of 10m. For more information, go to www.garmin.com/waterrating.
6 Appendix

Replacing the Dog Collar Battery
Before you replace the battery, you must remove all dirt, water, and debris from the dog collar device. You must
also have a small Phillips (#2) screwdriver and a small TORX
®
(T5) screwdriver.
1 Remove the 2 screws from the cover over the VHF antenna.
2 Remove the VHF antenna cover.
3 Remove the screw securing the VHF antenna to the back plate.
4 Remove the six screws from the outer edges of the back plate.
Note the orientation of the status LED and charging clip connectors on the battery. You must install the new
battery the same way.
5 Remove the battery.
NOTE: Ensure the gasket, or battery seal, is removed with the used battery. Verify that the gasket with the
new battery is not damaged and that it is completely seated in the groove.
6 Connect the new battery to the back plate, and tighten the screws.
7 Replace the screw securing the VHF antenna to the back plate.
8 Replace the cover over the VHF antenna.
9 Replace and tighten the 2 screws on the VHF antenna cover.
After you remove the old battery, contact your local waste disposal department to properly recycle the battery.
Appendix 7

Replacing the Dog Collar Flex Band
Before you replace the dog collar flex band, you must remove all dirt, water, and debris from the dog collar
device. You must also have a small Phillips (#2) screwdriver.
1 Remove the 2 screws securing the dog collar flex band to the back plate.
2 Remove the old dog collar flex band.
3 Place the new dog collar flex band on the back plate, and tighten the 2 screws to secure it.
Replacing the Dog Collar Strap
Before you replace the dog collar strap, you must remove all dirt, water, and debris from the dog collar device.
1 Pull the dog collar strap out of the antenna guide and the dog collar device.
You may need to push and pull the dog collar strap to properly remove it.
2 Thread the new dog collar strap through the dog device and antenna guide.
8 Appendix

Replacing the Dog Collar VHF Antenna
Before you replace the VHF antenna, you must remove all dirt, water, and debris from the dog collar device. You
must also have a small Phillips (#2) screwdriver.
1 Remove the 2 screws from the cover over the VHF antenna.
2 Remove the VHF antenna cover.
3 Remove the screw securing the VHF antenna to the back plate.
4 Pull the length of the antenna from the antenna guide to remove the old antenna.
5 Thread the new VHF antenna through the antenna guide.
6 Replace the screw securing the VHF antenna to the back plate.
7 Replace the cover over the VHF antenna.
8 Replace and tighten the 2 screws securing the VHF antenna cover.
9 Secure the antenna with additional antenna clips (optional).
Appendix 9

support.garmin.com
GUID-74035D64-33C8-4CC0-8053-23CB54692716 v1May 2023