
Loading ...
Loading ...
Loading ...
18
English
Mounting and Using Type 1/Type 41
Cutting Wheels
NOTE: The Type 1 guard MUST be used and is available at extra cost
from your local dealer or authorized service center.
Cutting wheels include diamond wheels and abrasive discs. Abrasive
cutting wheels for metal and concrete use are available. Diamond
blades for concrete cutting can also be used.
WARNING: A closed, two-sided cutting wheel guard is re quired
when using cutting wheels. Fail ure to use proper flange and guard
can re sult in injury resulting from wheel breakage and wheel contact.
See the Accessories Chart for more information.
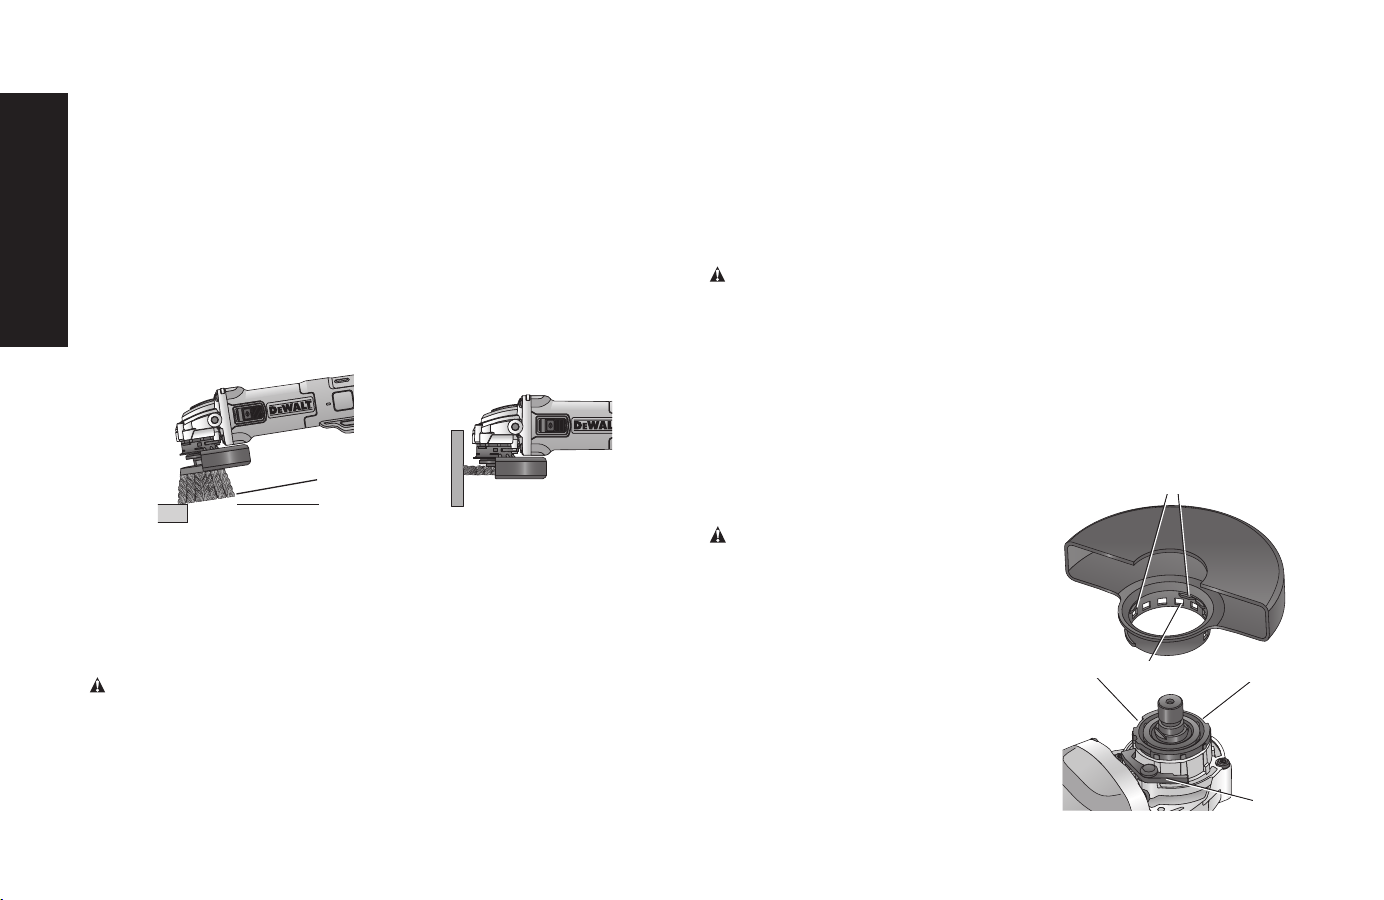
MOUNTING AND REMOVING (TYPE 1) ONE-TOUCH™
GUARD (FIG. 18)
Cutting wheels include diamond wheels and abrasive discs. Abrasive
cutting wheels for metal and concrete use are available. Diamond
blades for concrete cutting can also be used.
MOUNTING CLOSED (TYPE 1)
GUARD
CAUTION: Turn off and unplug the
tool before making any adjustments or
removing or installing attachments or
accessories. Before reconnecting the
tool, depress and release the paddle
switch to ensure that the tool is off.
1. Press the guard release lever (J).
2. While holding the guard release
lever open, align the lugs (L) on the
guard with the slots (M) on the gear
case.
FIG. 18
NM
M
J
L
NOTE: The same precautions should be taken when wire brushing
paint as when sanding paint (refer to Precautions To Take When
Sanding Paint).
1. Allow the tool to reach full speed before touching the tool to the
work surface.
2. Apply minimum pressure to work surface, allowing the tool to
operate at high speed. Material removal rate is greatest when the
tool operates at high speed.
3. Maintain a 5° to 10° angle between the tool and work surface
for wire cup brushes.
4. Maintain contact between the edge of the wheel and the work
surface with wire wheels.
5˚-10˚
FIG. 16 FIG. 17
5. Continuously move the tool in a forward and back motion to avoid
creating gouges in the work surface. Allowing the tool to rest on
the work surface without moving, or moving the tool in a circular
motion causes burning and swirling marks on the work surface.
6. Remove the tool from the work surface before turning the tool off.
Allow the tool to stop rotating before setting it down.
CAUTION: Use extra care when working over an edge, as a
sudden sharp movement of grinder may be experienced.
Loading ...
Loading ...
Loading ...