Loading ...
Loading ...
Loading ...
E-47
Advanced Altimeter Mode Operations
Use the information in this section to obtain more accurate altimeter readings, especially while mountain
climbing or trekking.
Using an Altitude Differential Value
If you specify a reference altitude, the second hand of the watch will
indicate the difference between the current altitude and the reference
altitude. The displayed altitude differential value is updated each time the
watch obtains a new altitude reading value.
• Depending on the currently selected display range, the allowable
range for the altitude differential value is 100 meters to –100 meters
(100 meters = 328 feet), or 1,000 meters to –1,000 meters (1,000
meters = 3,280 feet).
• If a reading value is outside the allowable range either
OVER
(
) or
UNDER
(
) appears on the digital display.
• The second hand will move to 9 o’clock if a sensor reading could not
be taken for some reason or if the reading is outside the allowable
range.
• See “Using the Altitude Differential Value While Mountain Climbing or
Hiking” (page E-48) for some real-life examples of how to use this feature.
Altitude differential
E-46
To specify a reference altitude value
1. In the Altimeter Mode, pull out the crown.
• This will cause the current altitude reading value to fl ash on the
digit
al display.
2. Rotate the crown to change the altitude value in one-meter (fi ve-foot)
increments.
• Change the reference altitude value to an accurate altitude reading
t
hat you get from a map or other source.
• You can set the reference altitude value within the range of –3,000
to 1
0,000 meters (–9,840 to 32,800 feet).
• Pressing
A
a
nd
C
at the same time returns to OFF (no reference
altitude value), so the watch performs air pressure to altitude
conversions based on preset data only.
3. After the setting is the way you want, push the crown back in to exit the
setting screen.
l
l
l
l
l
l
l
l
l
l
l
l
l
E-45
• The altitude tendency graph shows changes in altitude over the past 6 readings while readings are
being taken automatically.
50 meters
(10 meters for
each block )
Current
reading
6 readings
ago
Using Reference Altitude Values
To minimize the chance of reading error, you should update the reference altitude value before setting off
on a trek or any other activity where you plan to take altitude readings. During a trek, keep checking the
readings produced by the watch against altitude information provided by markers and other information,
and update the reference altitude value as required.
• Reading error can be caused by changes in barometric pressure, atmospheric conditions, and
elevation.
• Before performing the procedure below, look up the altitude of your current location on a map, the
Internet, etc.
E-44
To take altitude readings
1. Make sure the watch is in the Timekeeping, Digital Compass, or
Altimeter Mode (page E-20).
2. Press
A
to start auto altimeter readings.
• The current altitude value is displayed in units of 1 meter (5 feet).
• For information about the measurement interval, see page E-42.
Note
• When you press
A
above, the second hand may indicate seconds (of
the current time) or the altitude differential (page E-47). The initial second
hand function will be the same as what was selected the last time you
took an altitude reading. To toggle between the two second hand
functions (indicating seconds or indicating the altitude differential)
press
D
.
• To restart a reading operation from the beginning, press
A
.
• After you are fi nished,
press
B
to return to the Timekeeping Mode and
stop auto altimeter readings.
• The watch will return to the Timekeeping Mode automatically if you do
not perform any operation (page E-22).
• The measurement range for altitude is –700 to 10,000 meters (–2,300
to 32,800 feet).
• The displayed altitude value changes to
- - - -
if an altitude reading falls outside the measurement
range. An altitude value will reappear as soon as the altitude reading is within the allowable range.
• You can change the unit for displayed altitude values to either meters (m) or feet (ft). See “To specify
altitude, barometric pressure, and temperature units” (page E-41).
Altitude Tendency Graph
Altitude
E-43
Note
• If you do not perform any button operation while in the Altimeter Mode, the watch will return to the
T
imekeeping Mode automatically after 12 hours (altitude auto reading interval: 2'00) or after one
hour (altitude auto reading interval: 0'05).
To specify the altitude auto reading interval
1. In the Altimeter Mode (page E-21), pull out the crown.
• This will cause the current altitude reading value to appear.
2. Press
B
.
• This will cause INT to a
ppear on the digital display, along with the
fl ashing current auto reading interval setting.
3. Rotate the crown to select either fi ve second (
0'05
) or two minutes
(
2'00
) as the interval setting.
4. After the setting is the way you want, push the crown back in to exit the
setting screen.
Taking Altitude Readings
Use the procedure below to take basic altitude readings.
• See “Using Reference Altitude Values” (page E-45) for information about how to make altimeter readings
more accurate.
• See “How does the altimeter work?” (page E-55) for information about how the watch measures altitude.
l
l
l
l
l
l
l
l
l
l
l
l
l
l
l
l
E-42
Using the Altimeter Mode
The watch takes altitude readings and displays results based on air pressure measurements taken by a
built-in pressure sensor. It also saves various types of altitude records and data.
• The displayed altitude reading is a relative altitude that is calculated based on measurement of
changes in barometric pressure by the watch’s pressure sensor. This means that barometric pressure
changes can cause readings taken at different times at the same location to be different. Also note that
the value displayed by the watch may be different from the actual elevation and/or sea level elevation
indicated for the area where you are located. When using the watch’s altimeter while mountain
climbing, it is recommended that you perform regular calibration in accordance with the local altitude
(elevation) indications.
Important!
• See “To specify a reference altitude value” (page E-46) and “Altimeter Precautions” (page E-56) for information
about how to minimize differences between readings produced by the watch and values provided by
local altitude (elevation) indications.
Getting Ready
Before actually taking an altitude reading you need to select an altitude reading interval.
Selecting the Altitude Auto Reading Interval
You can select either of the following two altitude auto reading interval.
0'05
: Readings at one-second intervals for the fi rst three minutes, and then every fi ve seconds for
approximately the next hour
2'00
: Readings at one-second intervals for the fi rst three minutes, and then every two minutes for
approximately the next 12 hours
E-41
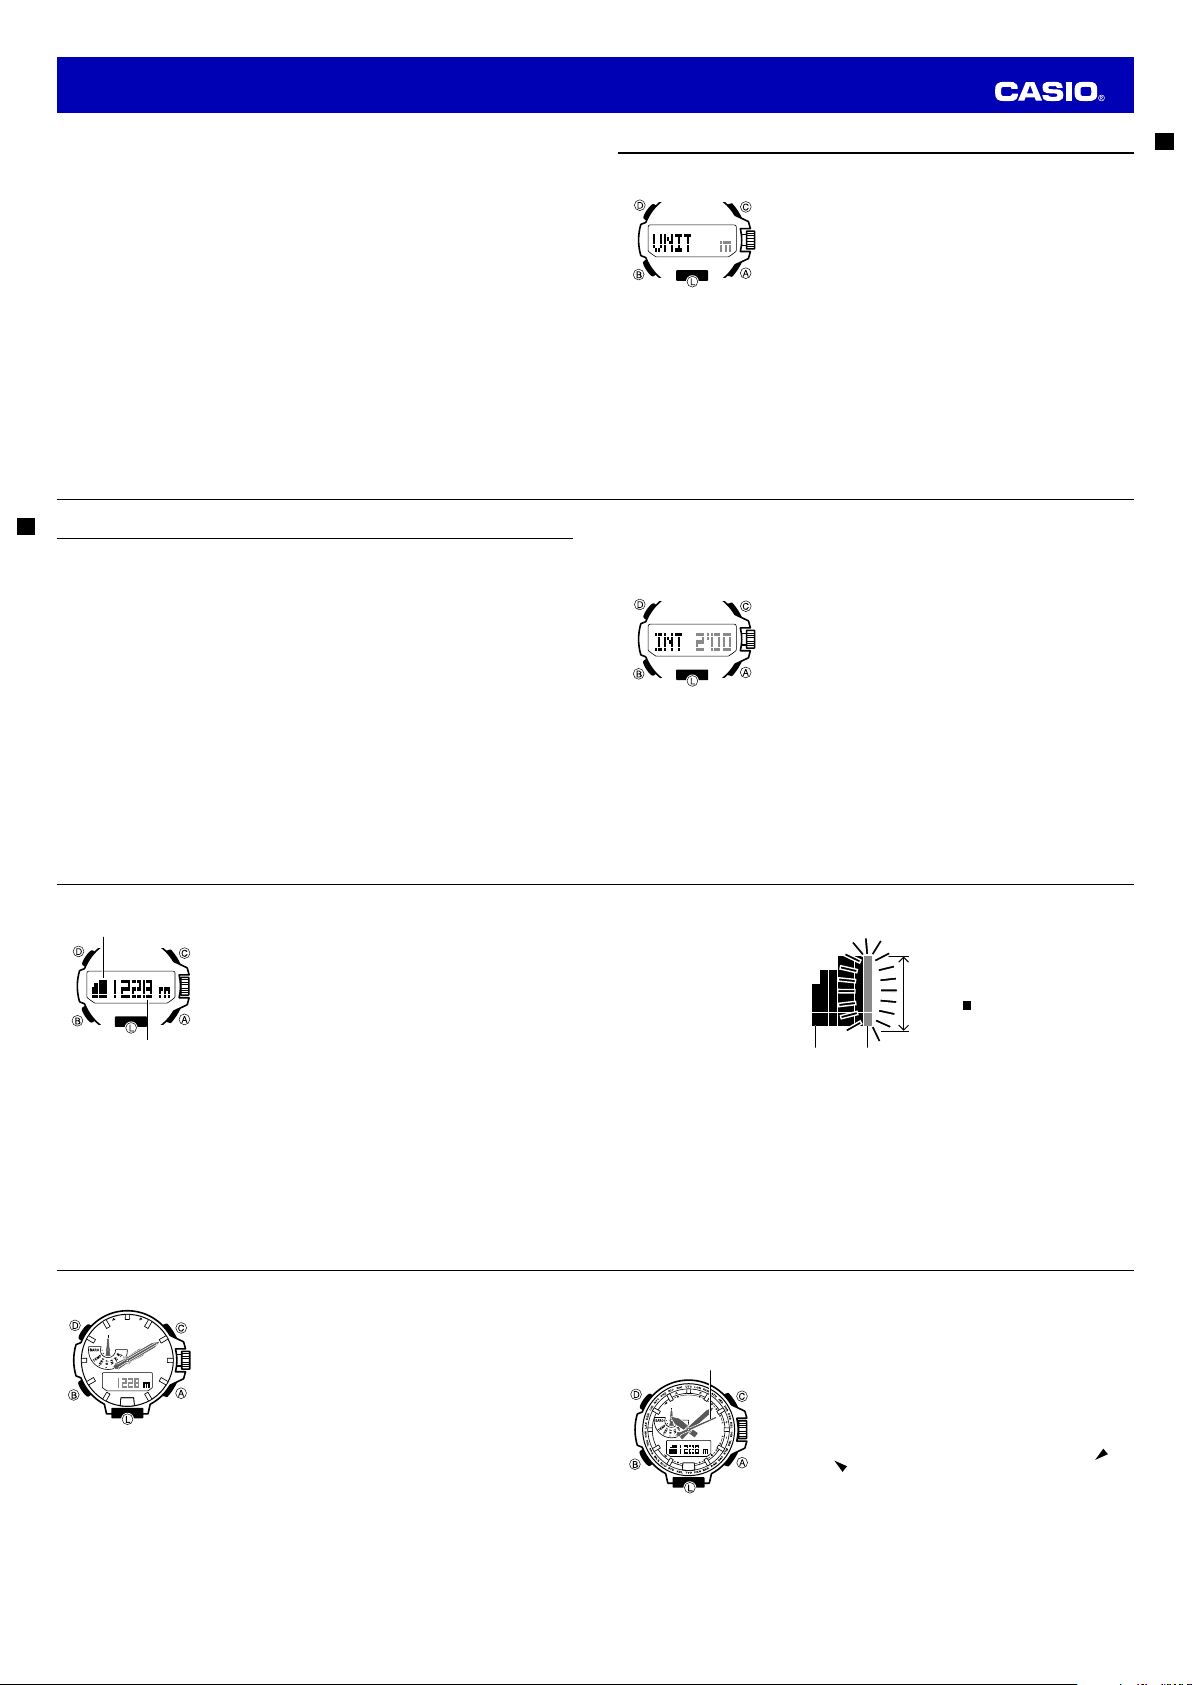
Specifying Altitude, Barometric Pressure, and Temperature Units
Use the procedure below to specify the altitude, barometric pressure, and temperature units to be used in
the Altimeter Mode, Barometer Mode and the Thermometer Mode.
Important!
• When
TYO
(Tokyo) is selected as the Home City, the altitude unit is set
automatically to meters (
m
), the barometric pressure unit to
hectopascals (
hPa
), and the temperature unit to Celsius (
°C
). These
settings cannot be changed.
To specify altitude, barometric pressure, and temperature units
1. Make sure the watch is in the mode for the type of unit you want to
specify (Altimeter, Barometer, or Thermometer Mode).
• For information about changing modes, see “Selecting a Mode”
(pag
e E-20).
2. Pull out the crown.
3. Press
B
as many times as necessary until
UNIT
appear on the digital
display.
• For altitude, press
B
t
hree times. For barometric pressure and
temperature, press
B
once.
4. Rotate the crown to change the unit setting.
5. After the settings are the way you want, push the crown back in.
l
l
l
l
l
l
l
l
l
l
E-40
Location
• Taking a direction reading when you are near a source of strong magnetism can cause large errors in
readings. Because of this, you should avoid taking direction readings while in the vicinity of the
following types of objects: permanent magnets (magnetic necklaces, etc.), concentrations of metal
(metal doors, lockers, etc.), high tension wires, aerial wires, household appliances (TVs, personal
computers, washing machines, freezers, etc.).
• Accurate readings are also impossible indoors, especially inside ferroconcrete structures. This is
because the metal framework of such structures picks up magnetism from appliances, etc.
• Accurate direction readings are impossible while in a train, boat, air plane, etc.
Storage
• The precision of the bearing sensor may deteriorate if the watch becomes magnetized. Because of
this, you should store the watch away from magnets or any other sources of strong magnetism,
including: permanent magnets (magnetic necklaces, etc.), concentrations of metal (metal doors,
lockers, etc.), and household appliances (TVs, personal computers, washing machines, freezers, etc.).
• Whenever you suspect that the watch may have become magnetized, perform the procedure under “To
perform bidirectional calibration” (page E-37).
Operation Guide 5497
Loading ...
Loading ...
Loading ...