Loading ...
Loading ...
Loading ...
If you drop the trimmer, carefully inspect it for damage. If the blade is
bent or cracked, handles broken or if you see any other condition that
may affect the trimmer’s operation, it must be repaired before putting it
back into use. Call our customer service help line at 1-800-313-5111 for
assistance.
CAUTION: Do not at any time let brake fluids, gasoline, petroleum
based products, penetrating oils, etc., come in contact with plastic parts.
They contain chemicals that can damage, weaken or destroy plastic.
Make sure the battery is detached from the unit, then use only mild soap
and a damp cloth to clean the tool. Never let any liquid get inside the
tool; never immerse any part of the tool into a liquid.
IMPORTANT: To assure product SAFETY and RELIABILITY, repairs,
maintenance and adjustment should be performed by a qualified
individual using only identical replacement parts.
The cutting blades are made from high quality, hardened steel and with
normal usage, they will not require re-sharpening. However, if you
accidentally hit a wire fence, stones, glass or other hard objects, you
may put a nick in the blade. There is no need to remove this nick as long
as it doesn’t interfere with the movement of the blade. If it does interfere,
make sure the battery is detached from the unit and use a fine toothed
file or sharpening stone to remove the nick.
Fertilizers and other garden chemicals contain agents which greatly
accelerate the corrosion of metals Do not store the tool on or adjacent to
fertilizers or chemicals.
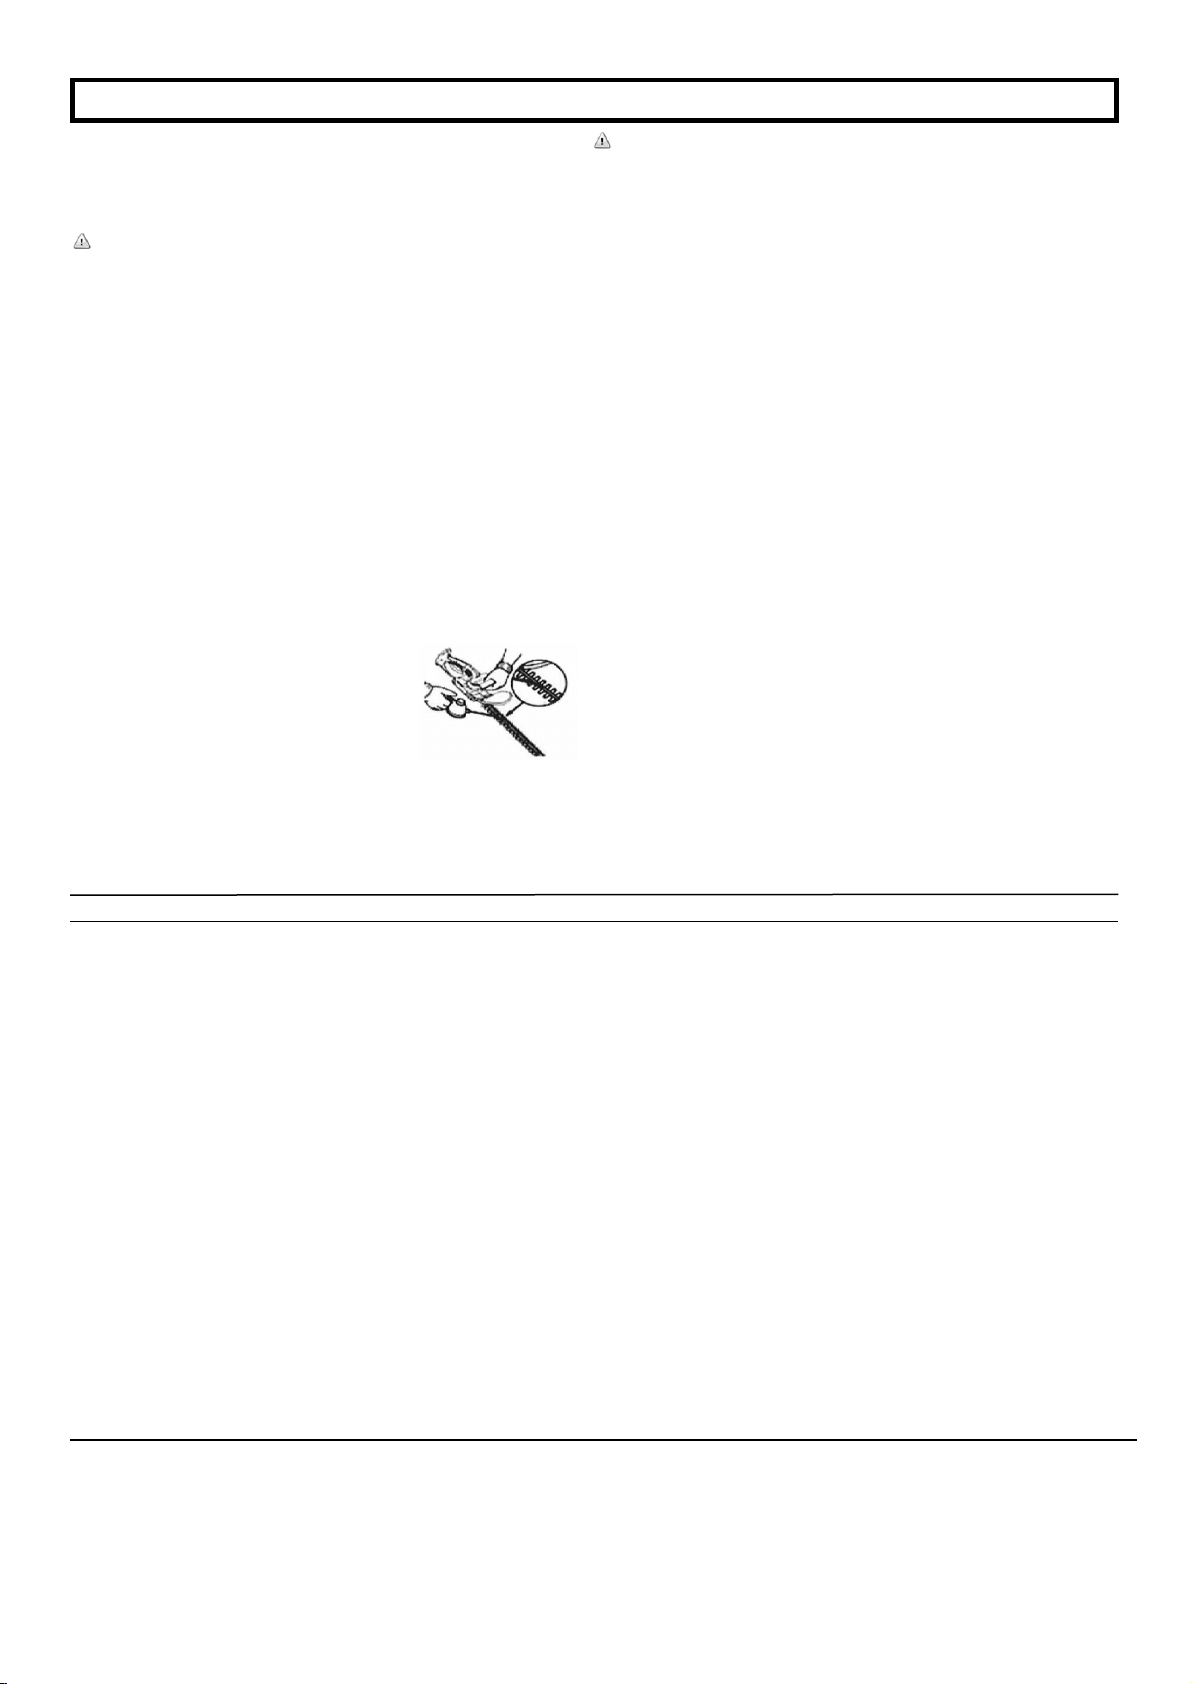
LUBRICATE BLADES - Stop the unit and
remove the battery pack. Then remove any
debris on blades. Apply a light machine oil
along the edge of the top and bottom blade
supports. Make sure handles remain clean and
dry.
TROUBLESHOOTING
MAINTENANCE
Problem Possible Cause Possible Solution
− Unit does not run − Battery not making contact − Check battery is fully inserted
− Trigger switch not operational − Check that lock off button is fully depressed before moving trigger
− Battery not installed properly − Check battery installation
− Battery not charged − Check battery charging requirements
− Slow running, noisy or hot blades − Dry, corroded blades − Lubricate blades
− Blades or blade support bent − Straighten blade or blade support
− Bent or damaged teeth − Straighten teeth
− Loose blade bolts − Tighten blade bolts
− Battery will not charge − Battery not inserted into charger − Insert battery into charger until red LED appears
− Charger not plugged in − Plug charger into a working outlet
− Check current at receptacle by plugging in a lamp or other appliance
− Check to see if receptacle is connected to a light switch which turns
power off when you turn out the lights.
− Surrounding air temperature too hot
or too cold
− Move charger and tool to a surrounding air temperature between 39°
F (4° C) and 104° F (40°C)
NOTE:Do not use any strong detergents on the plastic housing or the
handle. They can be damaged by certain aromatic oils such as pine and
lemon, and by solvents such as kerosene.
■ Moisture can cause a shock hazard. Wipe off any moisture with a soft dry
cloth.
■ Use a small brush or the air discharge of a small vacuum cleaner brush to
clear dust or debris from the air vents on the motor housing.
Storing the Hedge Trimmer
■ Remove the battery pack and store it out of the reach of children when
storing the hedge trimmer.
■ Clean the hedge trimmer thoroughly before storing. Store the hedge
trimmer in a dry, well-ventilated place that is inaccessible to children. Keep
away from corrosive agents such as garden chemicals and de-icing salts.
■ Always place the blade cover on the cutting blades before storing.
Lubricating the Gear Housing
The gear housing needs regular lubrication every 25 hours of use to
maximize the performance of this product.
Performing this service will require a commercially available lithium-base
grease, along with common hand tools. If you are unsure of your ability to
perform the service as indicated, please take your unit to an authorized
service center for maintenance.
■ Remove the gear housing cover plate.
■ Clean all loose debris from the gear head.
■ Check the level of grease present. Grease should fill the gear case and be
visible at the bottom of the gear housing.
■ If necessary, add grease using a manual grease gun or squeeze tube just
until it reaches the bottom of the grease plug hole. DO NOT OVERFILL.
■ Reinstall the screw and tighten securely.
Cleaning the Hedge Trimmer
■ Stop the motor and remove the battery pack.
■ Slide the blade cover over the blade.
■ Clean dirt and debris from the body of the hedge trimmer, using a damp
cloth with a mild detergent.
8
Model LHT12021
CALL US FIRST !!
Call us first with questions about operating or maintaining your product
at 1.800.313.5111 between 8:00 a.m. – 5:00 p.m. Eastern Standard Time,
or get assistance on www.americanlawnmower.com.
Loading ...
Loading ...
Loading ...