Loading ...
Loading ...
Loading ...
OPERATING
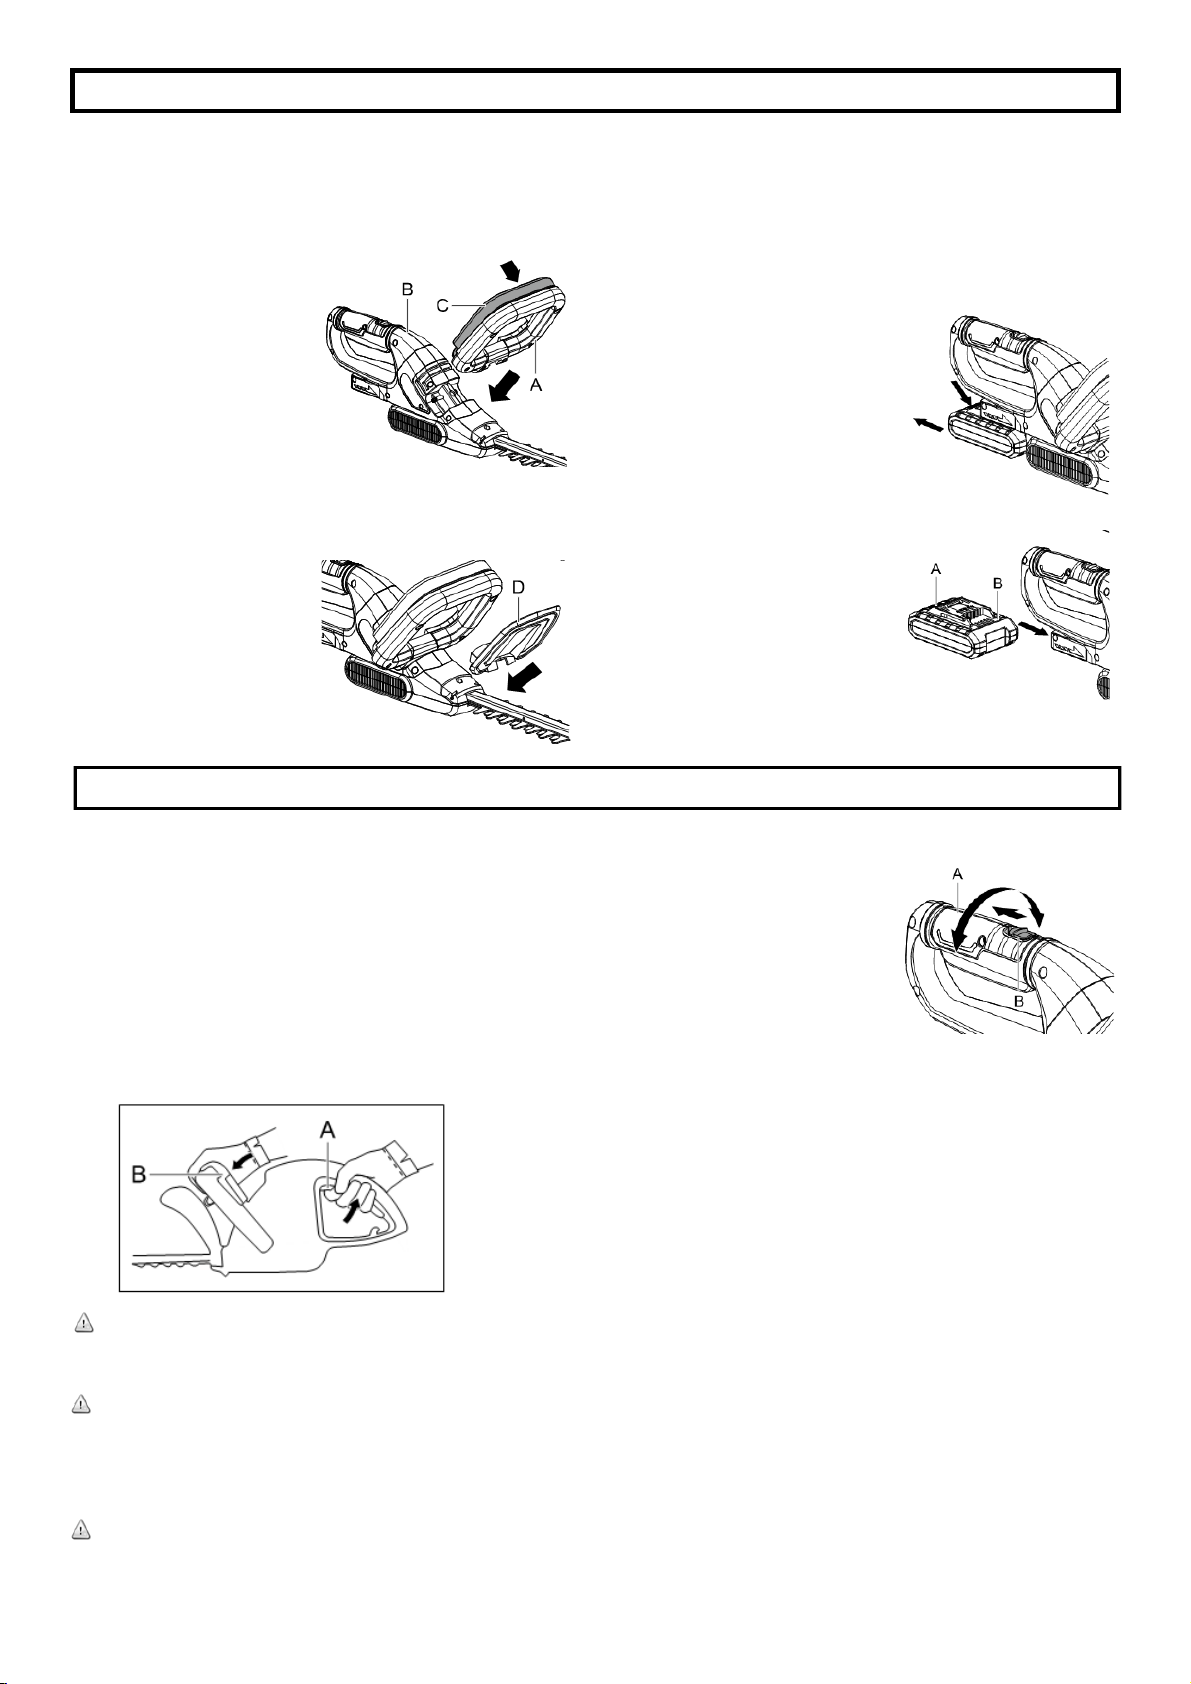
Starting / Stopping the Hedge Trimmer
To start:
• Remove the blade cover.
• Hold the unit by both handles.
• Press the switch trigger (A) on the grip handle and then
press the switch trigger (B) on the auxiliary handle to turn
the trimmer on.
To stop:
• Release the switch trigger (A) or the secondary switch
(B) to stop the hedge trimmer.
CAUTION: Blade coasts after turned off.
Do not use under wet conditions.
Do not store with switch locked on.
WARNING: To guard against injury, observe the following:
− Read instruction manual before using,
− Save instruction manual.
− Keep hands away from blades.
− Keep hands on handles. Don’t overreach.
WARNING: Do not allow familiarity with this type of product
to make you careless. Remember that a careless fraction of a
second is sufficient to inflict serious injury.
ROTATING THE REAR HANDLE
The grip handle (A) can turn left or
right up to 90° for cutting hedge
vertically.
Slightly pull out the lock-off button,
turn slightly, then release, and
continue to turn the rotating
handle in your desired direction
until the lock-off button snaps
back into position at the +- 90 degree point.
Note: The hedge trimmer can only be used in the 3 preset
positions of the rear handle.
Start-up
Start slowly. When you have gained experience, you will be
able to use the trimmer to its full potential.
Maintain proper footing and balance and do not overreach.
Wear safety goggles, ear muffs, non-skid footwear and rubber
gloves when trimming.
Install battery to the trimmer.
Hold the trimmer with both hands and pull the switch trigger
(A) or (B) and then move it in front of your body.
Move the blade lightly through the surface hedge. Try not to
cut too deeply.
ASSEMBLY
ATTACHING THE AUXILIARY HANDLE
Attach the auxiliary handle
(A) to the motor housing (B).
Secure auxiliary handle from
each side of the tool with 2
supplied screws in place.
Push down the Secondary
Switch (C) on the auxiliary
handle; you should hear a
“click” once the handle is
correctly installed.
Secure the screws firmly on both sides of auxiliary handle.
ATTACHING THE SAFETY GUARD
Install safety guard (D) to the
motor housing from both
sides of tool with supplied 2
screws.
Secure the screws, and
ensure the guard is securely
tightened.
5
Model LHT12021
The trimmer must be assembled correctly before
operation. Failure to assemble the tool correctly may
cause the tool malfunction and a personal injury.
BATTERY INSTALLATION AND REMOVAL
Hold the tool and the battery firmly when installing or
removing battery
Failure to hold the tool and the battery firmly may cause them to
slip from your hands and may result in damage to the tool and/
or battery and a personal injury.
To remove:
• Depress release button (A) on
the back of battery cartridge
(B) to release the battery.
• Pull the battery out of tool.
To install:
• Align the battery with the cavity
in the handle.
• Insert the battery into the
handle until the battery release
button locks into place. You
should hear a “click” once the
battery is installed.
• Note: The battery can only be
installed one way.
A
B
Loading ...
Loading ...
Loading ...