Loading ...
Loading ...
Loading ...

16
MAINTENANCE
The dethatcher cylinder can cause injuries! Prior to making adjustments, unplug unit and wait until
the dethatcher cylinder has stopped. Wear heavy-duty work gloves when making adjustments. If
the dethatcher cylinder is not yet worn but individual springs have broken, these must be replaced.
Only identical replacement springs may be used.
Toll-free helpline:
1-888- 909-6757.
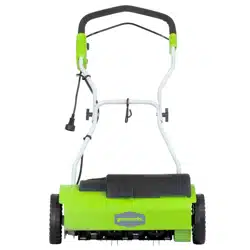
REPLACING THE TINES (See Figure 7 - 8.)
•
Disconnect dethatcher from the power source. Allow sufcient time for moving parts to totally
stop.
• Turn the dethatcher over.
• Remove the two star-shaped screws (1), the flat washer (2) and the lock washer (3) which
secure the tine casing. Remove the two nuts on the opposite side with a star-head screwdriver.
• Press the lock (4) on the edge of the shaft with a slotted screwdriver to separate the tine casing
from the shaft.
• Replace the worn or broken tines with new ones.
• Fasten the tine casing back together using the at washer and the lock washer in their original
order.
WARNING
All the screws to mount the halves of the tine holder must have at washer (2) and lock washer (3)
on their threads
to prevent screws from loosening during usage.
Fig. 7 Fig. 8
1
4
2
3
Loading ...
Loading ...
Loading ...