Loading ...
Loading ...
Loading ...
_. , , ,, i,rl,,,,,llU,U.....
TO REPLACE HEADLIGHT BULB
o Raise hood,
° Pull bulb holder out of the hole in the backside of the
grill
- Replace bulb in holder and push bulb holder securely
back into the hole in the backside of the grill.
° Close hood°
INTERLOCKS AND RELAYS
Loose or damaged wiring may cause your tractor to run
poorty, stop running, or prevent it from starting,
- Check wiring., See electrical wiring diagram in Repair
Parts section of this manual
SERVICE AN ADJUSTMENTS
i
TO REPLACE FUSE
Replace with 30 amp automotive-type plug-in fuse, The
fuse holder is located behind the dash.
TO REMOVE HOOD AND GRILL (See Fig, 29)
,, Raise hood.
. Unsnap headlight wire connector,
, Stand in front of tractor. Grasp hood at sides, tilt
forward and lift off of tractor.
° To reinstall, slide hood pivot brackets into slots in
frame
• Reconnect headlight wire connector and close hood,
HOOD
HEADLIGHT
WIRE
CONNECTOR
FIG. 29
ENGINE
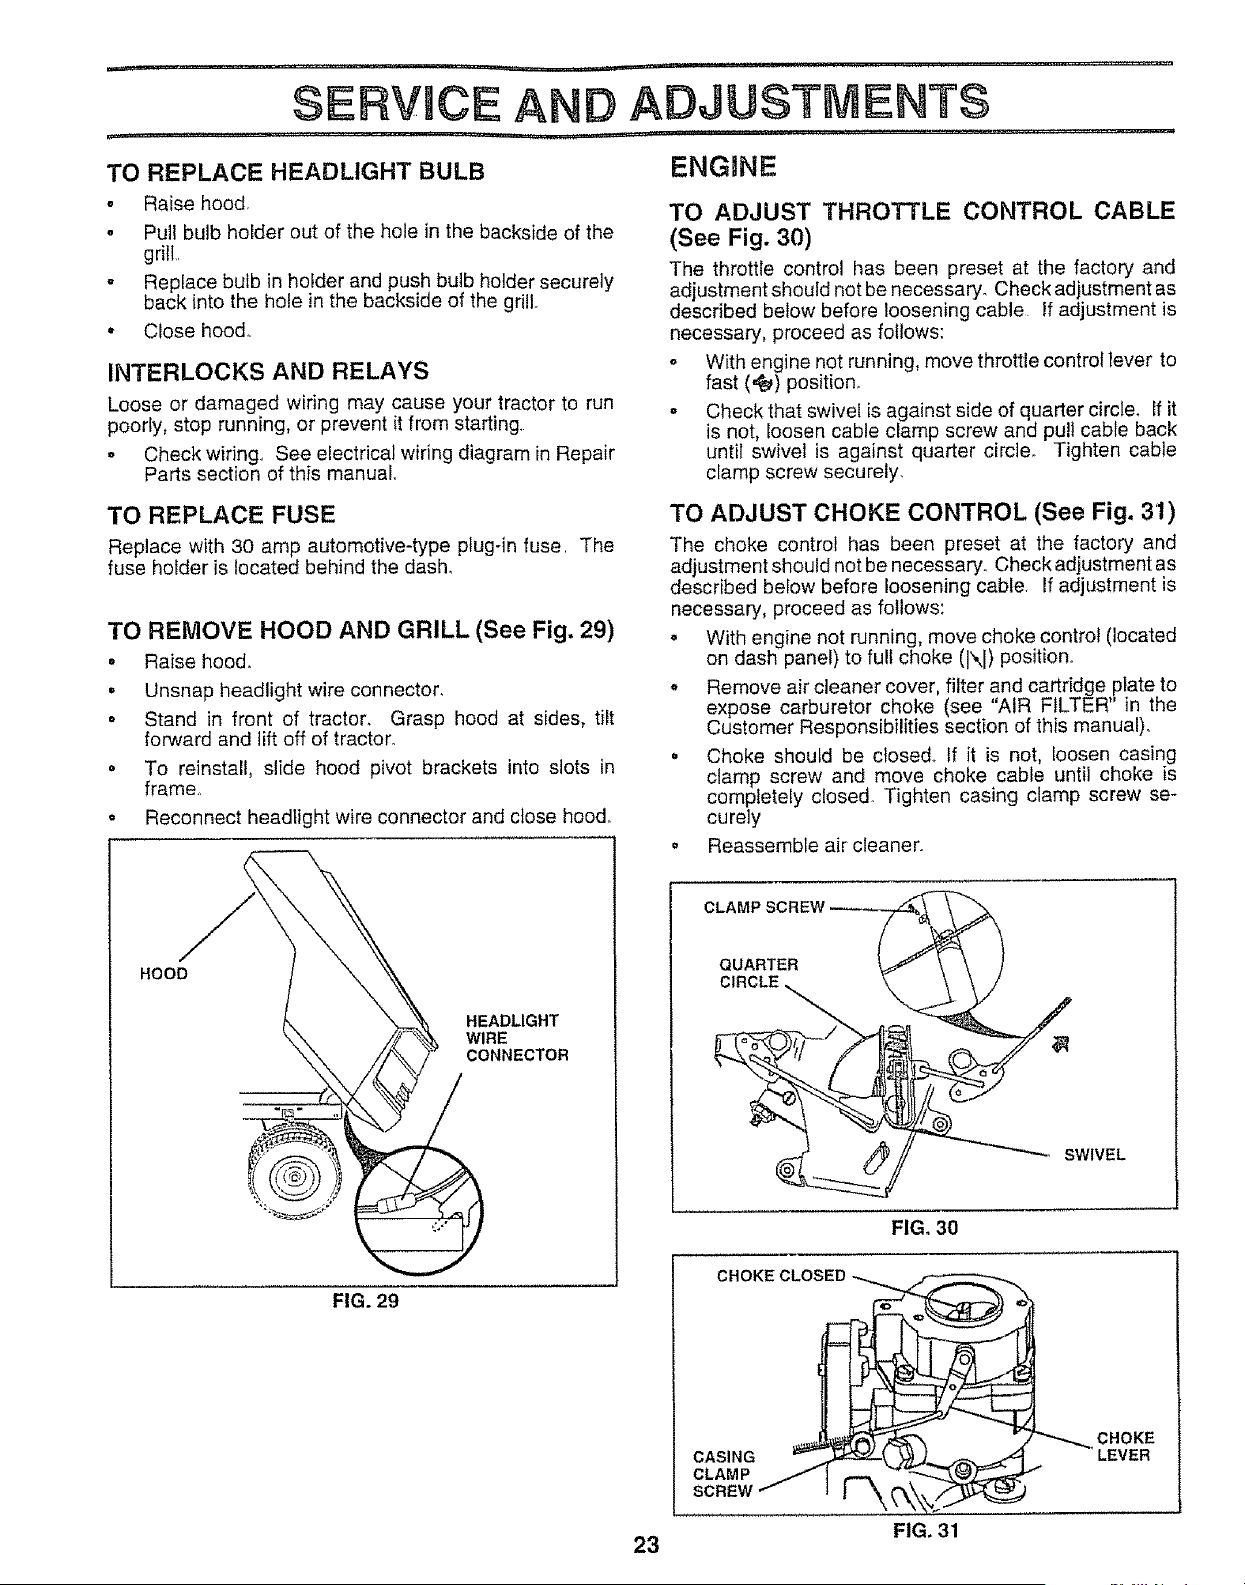
TO ADJUST THROTTLE CONTROL CABLE
(See Fig. 30)
The throttle control has been preset at the factory and
adjustment should net be necessary. Check adjustment as
described below before loosening cable if adjustment is
necessary, proceed as follows:
o With engine not running, move throttle controftever to
fast (,_) posifion_
= Check that swivel is against side of quarter circle. If it
is not, loosen cable clamp screw and pul! cable back
until swivel is against quarter circle. Tighten cable
clamp screw securely.
TO ADJUST CHOKE CONTROL (See Fig. 31)
The choke control has been preset at the factory and
adjustment should not be necessary° Check adjustment as
described below before loosening cable If adjustment is
necessary, proceed as follows:
. With engine not running, move choke control (located
on dash panel) to full choke (IXI) position.
o Remove air cleaner cover, filter and cartridge plate to
expose carburetor choke (see "AIR FILTER" in the
Customer Responsibilities section of this manual).
= Choke should be closed° If it is not, loosen casing
clamp screw and move choke cable until choke is
completely closed Tighten casing clamp screw se-
curely
• Reassemble air cleaner°
CLAMP SCREW
QUARTER
CIRCLE
SWIVEL
FIG, 30
CHOKE
CASING
CLAMP
SCREW
CHOKE
LEVER
FIG. 31
23
Loading ...
Loading ...
Loading ...