Loading ...
Loading ...
Loading ...
Service
ServicingAugers
The augers are secured to the spiral shaft with four shear pins and
cotter pins. If you hit a foreign object or ice jam, the snow thrower
is designed so that the pins may shear. Refer to Fig. 6-1.
If the augers do not turn, check if the pins have sheared. Replace,
if needed, with proper shear pins. Refer to Parts List for correct
part number.
IMPORTANT: NEVERreplace the auger shear pins with
standard pins or fasteners. Any damage to the auger gearbox or
other components, as a result of doing so, will NOT be covered
by your snow thrower's warranty.
ReplacingBelts
NOTE:There are two belts on this snow thrower: an auger belt
and drive belt. It is recommended that both belts be replaced at
the same time.
1. Remove the spark plug wire from spark plug and ground it
against the engine to prevent accidental starting.
2. Drain gasoline from the gas tank or place a piece of plastic
sheet underneath the gas cap to prevent gasoline leakage.
WARNING! Perform belt maintenance outdoors as
some gas may possibly leak from the carburetor
even though you placed a sheet of plastic
underneath the gas cap to prevent the gas cap from
leaking.
Remove the self-tapping screw shown in Fig. 7-1, and press
the plastic tabs to release the belt cover. Pull the belt cover
up and out from around the engine and chute assembly.
Set it aside and save.
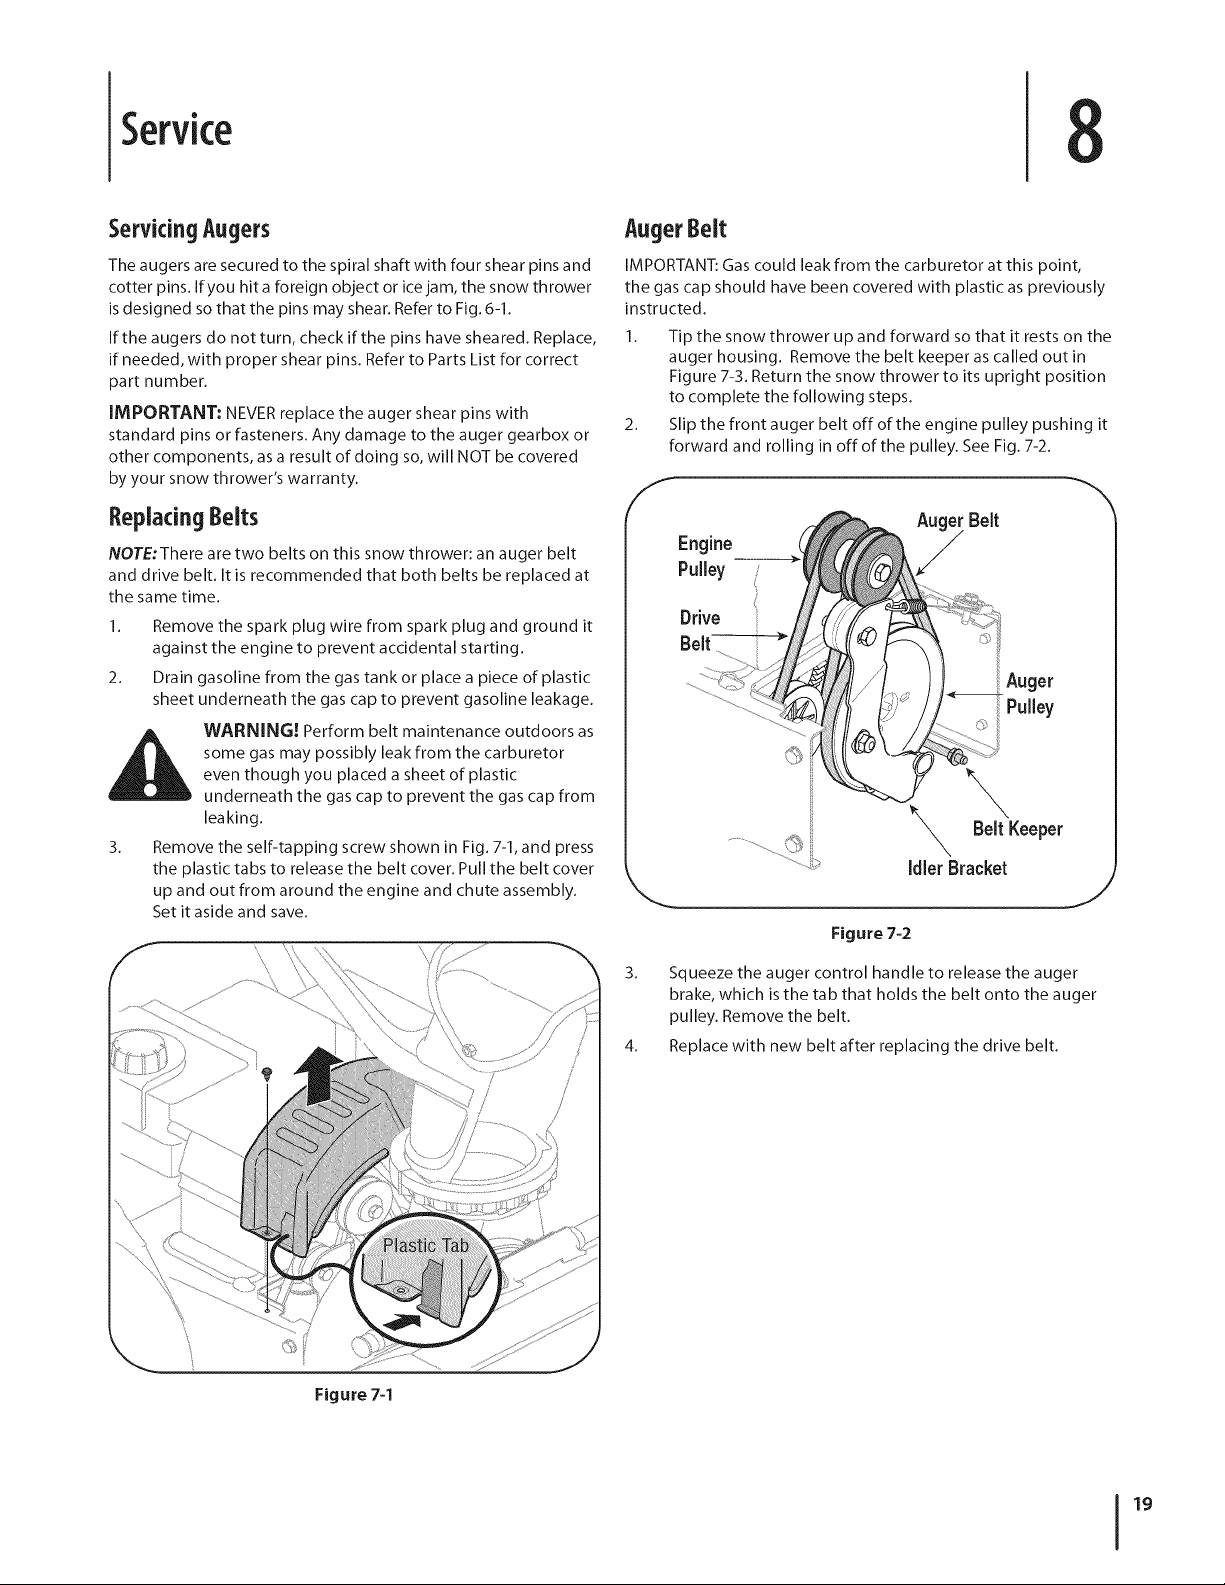
AugerBelt
IMPORTANT: Gas could leak from the carburetor at this point,
the gas cap should have been covered with plastic as previously
instructed.
1. Tip the snow thrower up and forward so that it rests on the
auger housing. Remove the belt keeper as called out in
Figure 7-3. Return the snow thrower to its upright position
to complete the following steps.
2. Slip the front auger belt off of the engine pulley pushing it
forward and rolling in off of the pulley. See Fig. 7-2.
Engine
Pulley
Drive
Belt-
Belt
Idler Bracket
Figure 7-2
3. Squeeze the auger control handle to release the auger
brake, which is the tab that holds the belt onto the auger
pulley. Remove the belt.
4. Replace with new belt after replacing the drive belt.
Figure 7-1
19
Loading ...
Loading ...
Loading ...