Loading ...
Loading ...
Loading ...

14
To close hydraulic flow, turn lever (R
2
) down,
perpendicular to cylinder, as shown. To open
hydraulic flow, turn lever (R
2
) parallel to cylinder.
Feed rate is adjusted by operator until saw is
operating efficiently, usually determined by
observing chip formation. See sect. 8.4, Evaluating
cutting efficiency.
Do not push down on bow to
increase feed pressure – allow cylinder to do the
work.
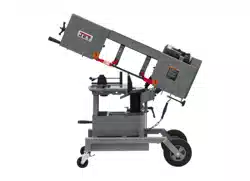
Figure 7-11: feed rate adjustment
7.10 Counterbalance spring
The counterbalance spring helps control amount of
weight, or feed pressure, the bow puts on workpiece
when hydraulic control valve is fully open. The
hydraulic cylinder will not compensate for improper
counterbalance. If spring is improperly set, one can
expect poor performance, crooked cuts, tooth
stripping, stalling, and/or blade running off wheels.
Spring tension has been set by the manufacturer,
and should not require adjustment. If future
problems arise, indicating improper counterbalance,
adjust spring with knob (S, Figure 7-12).
Figure 7-12
A good indication of proper feed pressure is the
color and shape of the cutting chips. If chips are thin
or powdered, increase feed pressure. If chips are
burned and heavy, decrease feed pressure. If they
are still burned and heavy, reduce blade speed.
Optimum feed pressure has been set when chips
are curled, silvery, and warm.
7.11 Vertical bow position
1. Disconnect band saw from power source.
2. Position bow at 90-degrees (zero swivel).
3. Pull linch pin (R
3
, Figure 7-11) out of cylinder,
and raise bow to vertical position. Make sure
swivel locking handle (A, Figure 7-11) does not
obstruct bow positioning.
4. Install cutting platform (Figure 7-13). Push vise
jaw against it, and clamp tightly.
5. Place a machinists’ square on cutting platform
and against back edge of blade to verify
perpendicularity. If adjustment is needed,
loosen nut and turn vertical stop screw (T,
Figure 7-12). Tighten stop screw nut against
bow to secure setting.
Figure 7-13: vertical cutting platform
7.12 Auto shut-off adjustment
The saw is properly adjusted when blade shuts off
just after cut completion. This should occur when
blade is about 1/8-inch below table surface. To
adjust:
If saw completes cut but blade continues
moving, adjust limit switch bracket (U, Figure
7-11) downward.
If blade stops before cut is complete, adjust
limit switch bracket (U, Figure 7-11) upward.
If blade stops descending and continues
running without completing the cut, turn stop
bolt down (Figure 7-14).
Loading ...
Loading ...
Loading ...