Loading ...
Loading ...
Loading ...

5
Installation
9
10
11
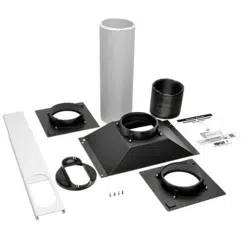
Ceiling Panel
(From Below)
Ceiling Panel
(From Above)
Exhaust Panel
9
Insert the Ceiling Adapter into the oblong hole in the Ceiling Tile
Insert. The adapter will snap into place.
10
Slide the ceiling panel out of the way and place the exhaust
panel inside the ceiling space. Allow the exhaust panel to rest on
top of the ceiling grid.
Note: There must be at least 10 inches (25.4 cm) of open space above
the exhaust panel to allow adequate airflow.
11
Slide the ceiling panel back into place so that it adjoins the
exhaust panel and closes any gaps in the ceiling. A tight seal
will permit maximum cooling efficiency. If the installation is
permanent, trim the ceiling panel so it doesn’t overlap the ceiling
grid.
Note: The Long Flexible Tube can extend to a maximum length of 118 inches (300 cm). Provide the straightest, shortest path available. Excessive bending or
stretching of the duct will reduce cooling efficiency.
Loading ...
Loading ...
Loading ...