Loading ...
Loading ...
Loading ...
Auto-accompaniment (style mode)
17
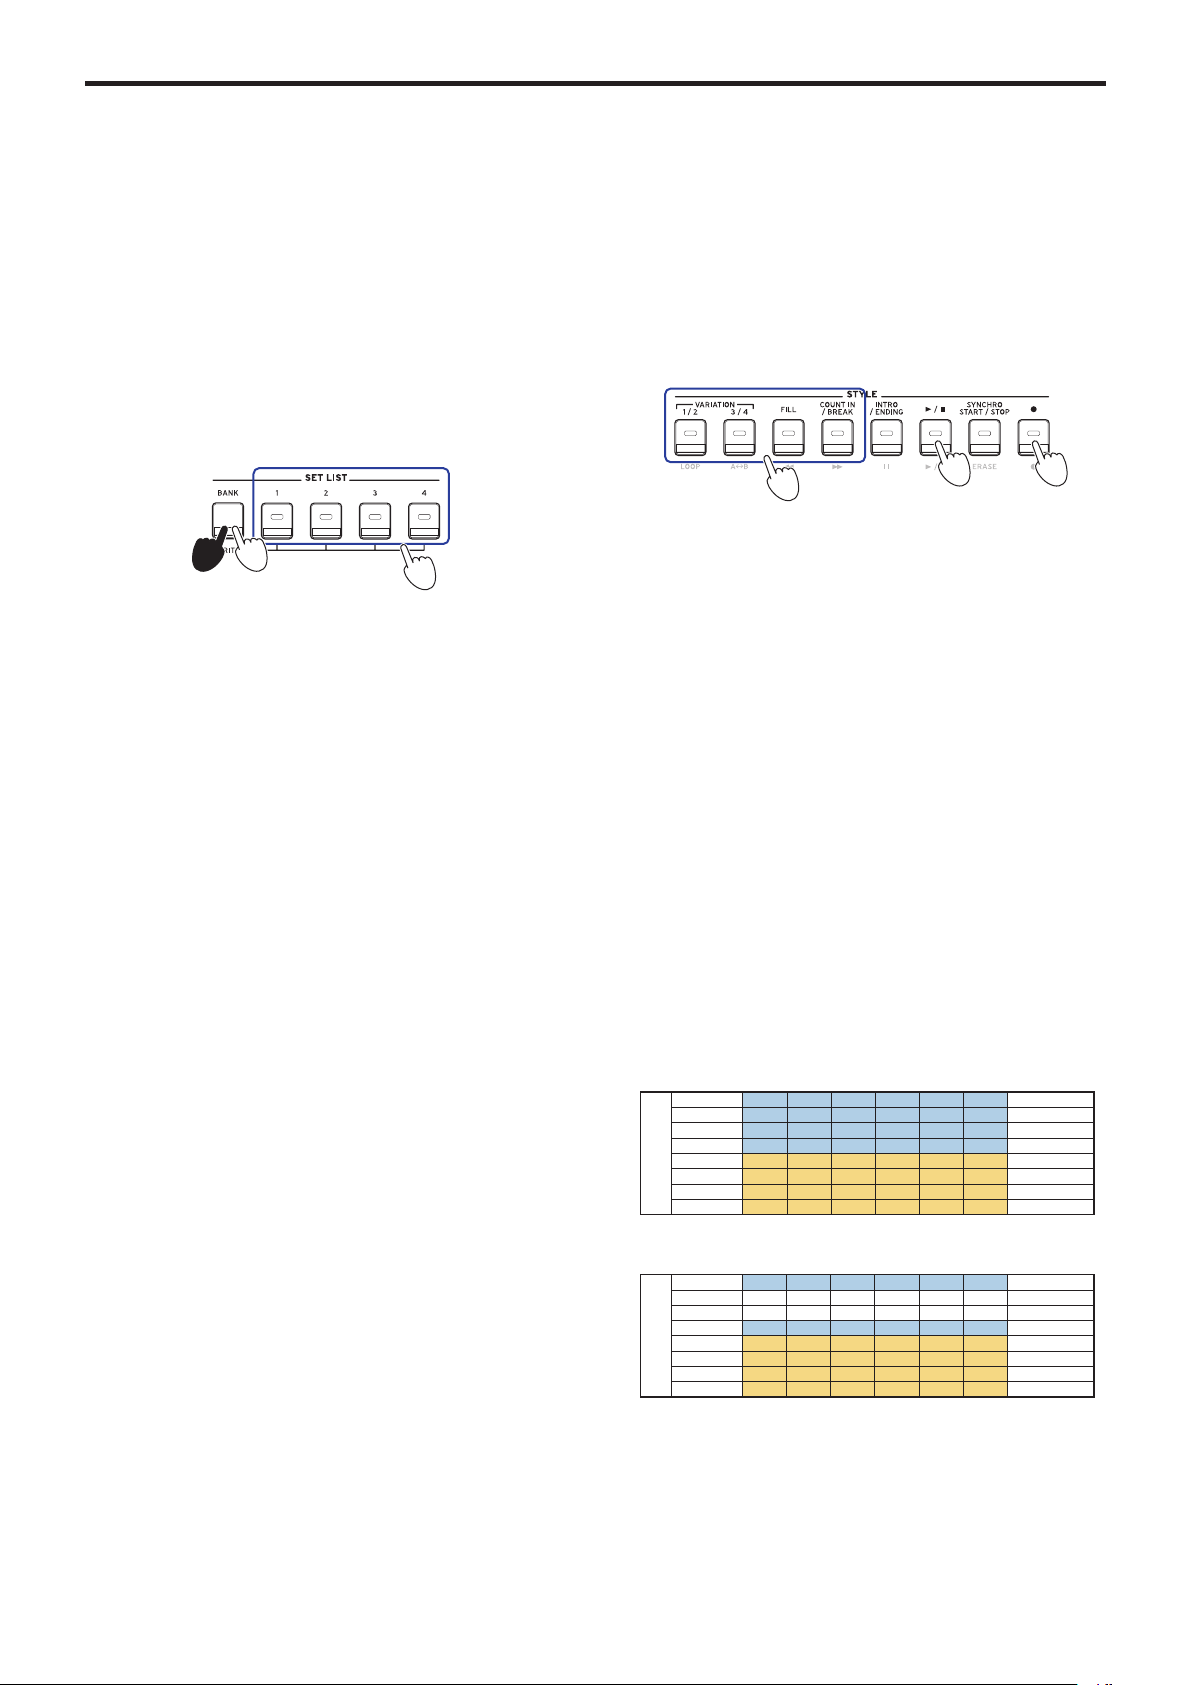
Saving the set list (WRITE)
A set list contains saved seings such as style, tempo, keyboard
set and eect seings. Once you have customized the seings
for a style, we recommend that you save your seings as a set
list.
1.
In style mode, customize the style such as changing the
sound of the keyboard part, changing the octave and so
on.
2.
Press the BANK/WRITE buon to select the bank to save
to.
The bank will change in sequential order (A
"
B
"
C...J
"
A...)
with each press of the BANK/WRITE buon.
• Bank A: preloaded
• Banks B–J: initialized
Tip:
Press the BANK/WRITE buon while holding the
[SHIFT] buon to reverse the order.
3.
Press one of buons 1–4 while holding down the BANK/
WRITE buon.
Your seings will be saved to the set list, and the buon you
pressed will light.
Tip:
Bank A-1 will be selected right after the power is
turned on.
The seings shown below are saved in the set list.
y
Styles
Style number, volume, variation*, intro*
y
Keyboard sets
Keyboard set number, volume, octave seings
y
Part
Sounds assigned to each part, volume, mute, octave seings
y
Other seings
Eect selected for eect 1 and 2, send level for eect 1 and 2,
tempo, transpose, split on/o, split point, ensemble on/o,
metronome volume.
* Supported in software ver.2.0 and later
When you select the variation and intro and save the set list,
these seings will be saved in the set list. The variation and
intro seings can be recalled along with the set list for you to
play.
Note:
Note that the section may not correctly change when you
switch set lists while playing, depending on the set list.
Recording your performance
You can record as you play along with the auto-accompaniment.
1.
Follow steps 1–5 in “Playing with a style you choose”
(page 14), or steps 1–4 in “Adding an intro or seing a
variation” (page 15).
Tip:
You can also mute the sound or adjust the volume
of the part, as shown in “Making changes to the auto-
accompaniment” (page 15).
2.
Press the record buon to put the instrument in record
standby mode (the buon will light red).
Note:
Parts that are muted will not be recorded. To record
a part, make sure that muting is canceled (see page 12
“Muting parts and changing sounds”).
3.
Press the start/stop buon to begin recording.
4.
Play the chords with your left hand and the melody with
your right hand.
5.
Press VARIATION buons 1/2 and 3/4, as well as the FILL
buon and COUNT IN/BREAK buon to change the
playback of the song while you play.
6.
To nish recording, press the start/stop buon or the
INTRO/ENDING buon.
The data that you recorded will automatically be saved as a
user song.
Tip:
The name of the user song will be “UserSong,” with a
sequential number added to the end. Up to 999 songs can be
recorded.
Tip:
See “Playing along with a song” (page 18) when you
want to listen to a user song.
Tip:
You can make simple edits to user songs (see page 19
“Editing a song”).
Rec Start Rec Stop
↓ ↓
Mute
Mute
Upper 1 MIDI ch 1
Upper 2 MIDI ch 2
Upper 3 MIDI ch 3
Lower MIDI ch 4
Bass MIDI ch 9
Drum MIDI ch 10
Percussion MIDI ch 11
Other Parts MIDI ch 12-16
Part
Recording
Rec Start Rec Stop
↓ ↓
Upper 1 MIDI ch 1
Upper 2 MIDI ch 2
Upper 3 MIDI ch 3
Lower MIDI ch 4
Bass MIDI ch 9
Drum MIDI ch 10
Percussion MIDI ch 11
Other Parts MIDI ch 12-16
Part
3 2
3
3,6 2
5
Loading ...
Loading ...
Loading ...