Loading ...
Loading ...
Loading ...
11
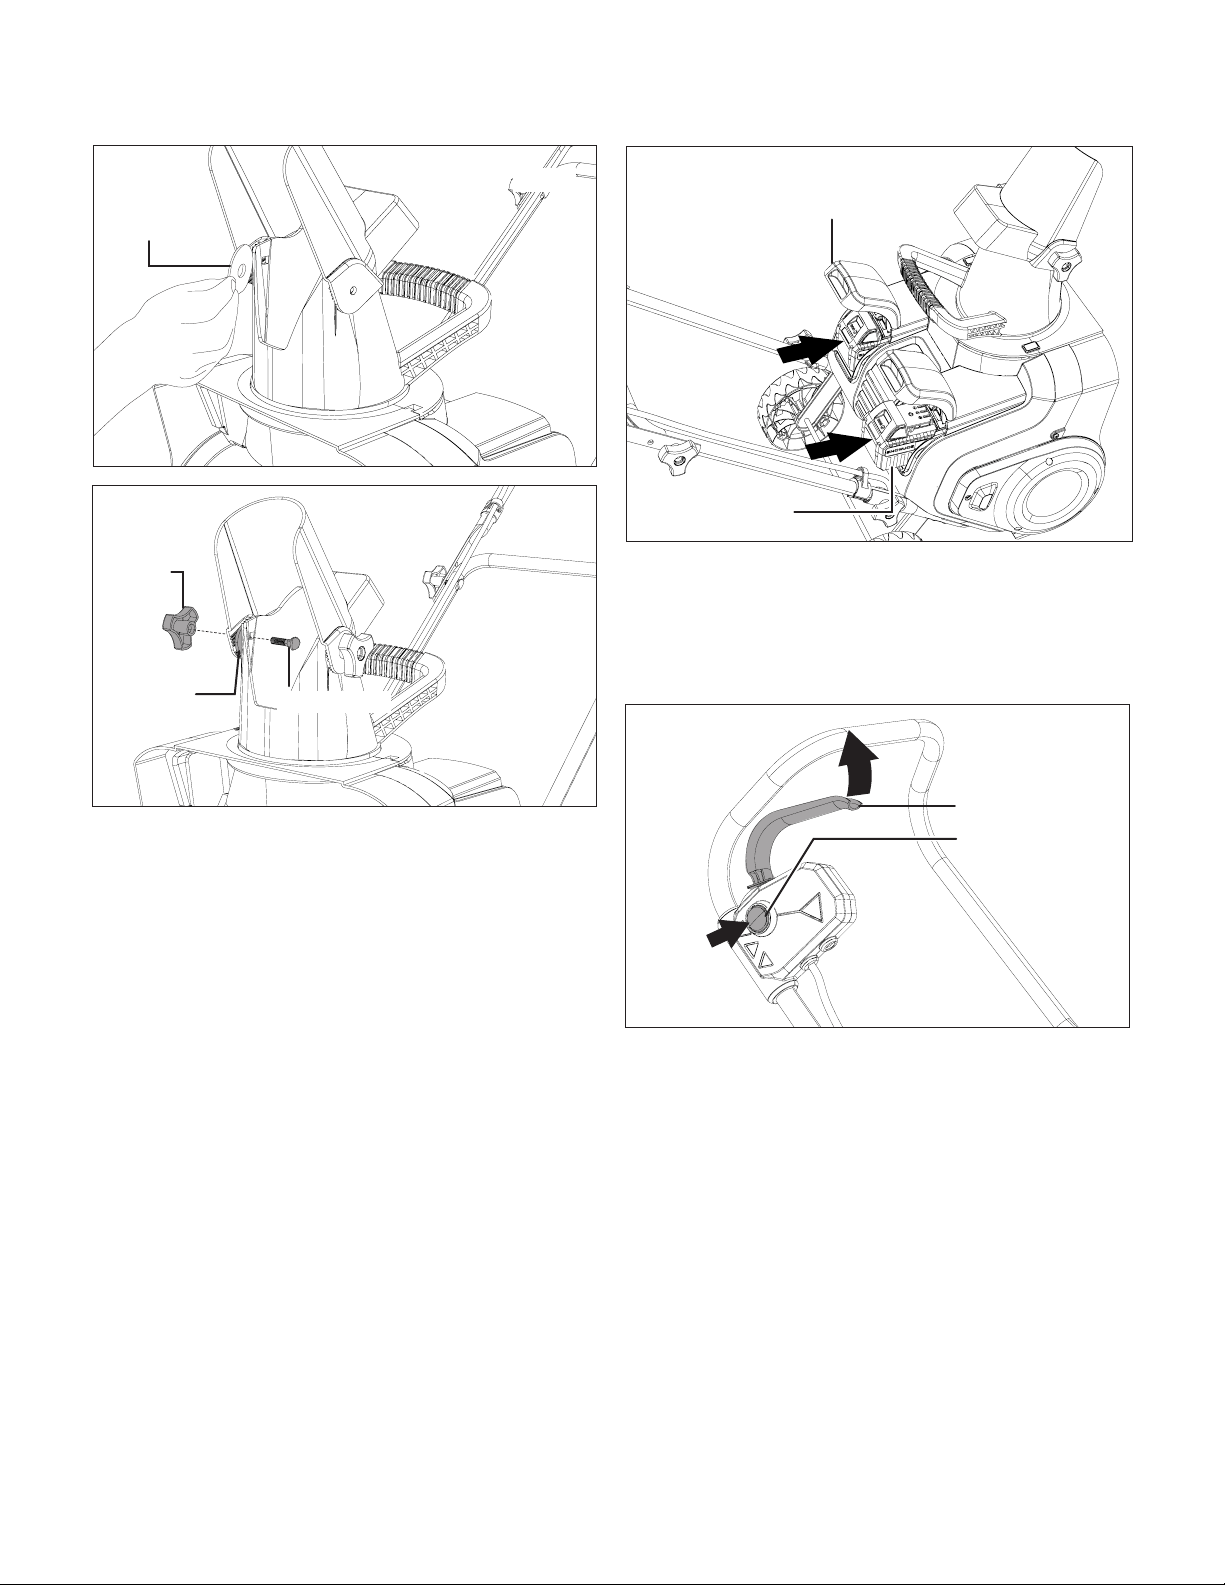
mCAUTION! Ensure the carriage bolt is fully aligned with
square hole on the chute to ensure a secure t. Then, tighten
completely.
Operation
mWARNING! Keep the area to be cleared free of stones,
toys or other foreign objects that the auger blades might pick
up and throw. Such items could be covered by snow and are
easy to overlook, so be sure to conduct a thorough inspection
of the area before beginning work.
NOTE: Before using this machine, make sure that the snow
blower’s auger blades are rmly secured with screws. Perform
a test run to ensure that the auger turns freely.
Starting + Stopping
1. Open the battery compartment covers and slide both
batteries in until they click to lock it into position. Close
the battery compartment covers (Fig. 10).
2. While depressing the safety lock button, pull the
switch lever toward you. Once the machine powers on,
release the safety lock button and begin operation
(Fig. 11). The machine can only be started by depressing
the safety switch button rst, followed by squeezing the
switch lever; reverse operation will not start the machine.
3. To power o, release your grip on the switch lever.
Operating Tips
mWARNING! Foreign objects, such as rocks, broken
glass, nails, wire, or string, can be picked up and thrown by
the snow blower, causing serious personal injury. Remove all
foreign objects from the area to be plowed before operating
the snow blower.
1. Keep the area of operation free of foreign objects that
can become thrown by the blades. Perform a thorough
inspection of the area since some objects may be hidden
from view by surrounding snow. If the snow blower hits
an obstruction or picks up a foreign object during use,
stop the snow blower, remove the batteries, remove the
obstruction, and inspect the unit for damage. Repair or
replace any damaged part before restarting and operating
the unit.
Washer
Fig. 8
Fig. 9
Carriage bolt
Knob
Washer
Fig. 10
Battery pack
Battery compartment
cover
Fig. 11
Switch lever
Safety lock
button
Loading ...
Loading ...
Loading ...