Loading ...
Loading ...
Loading ...
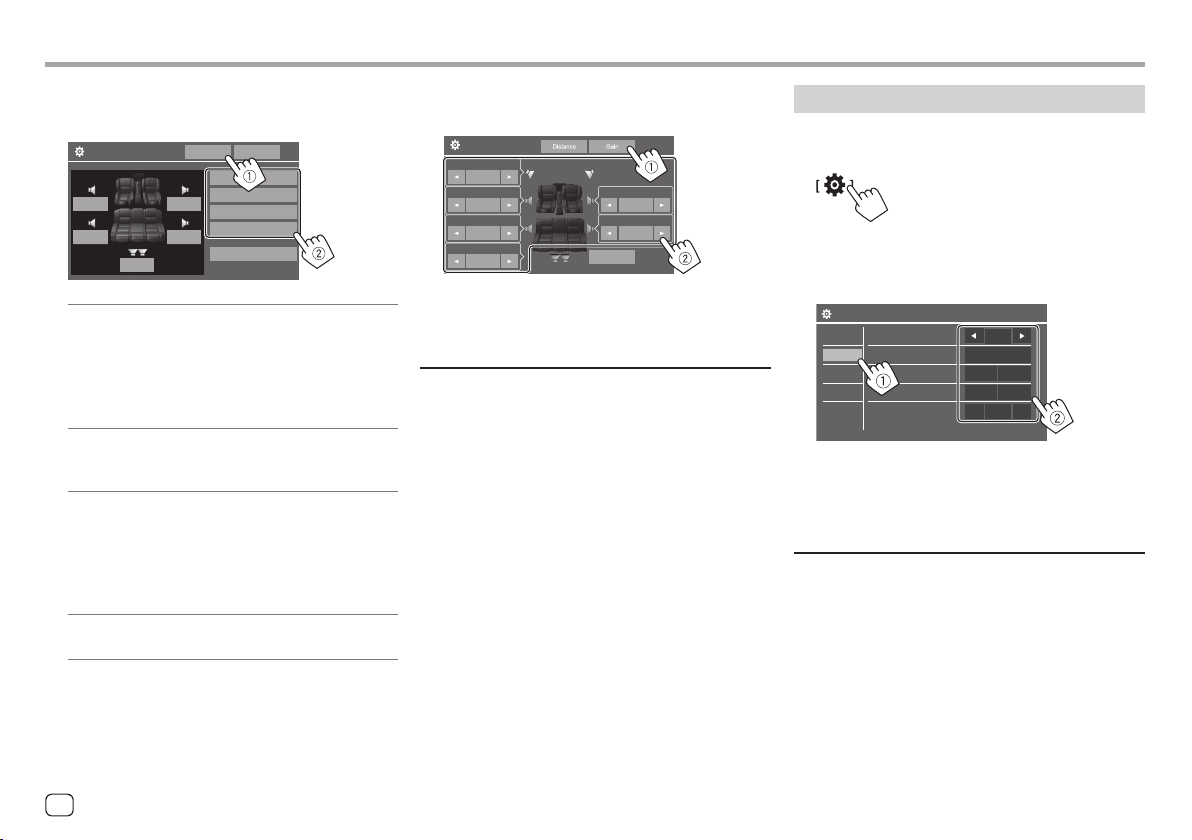
2 Touch [Distance] (1), and then adjust the
following parameters (2).
Sound Image LR(Front)
Sound Image LR(Rear)
Size of the Virtual Sound Field
Subwoofer Delay
Distance Gain
Initialize
0.94ms
0.94ms
0.94ms
0.94ms
0.94ms
Front Focus Adjust
[Sound Image
LR (Front)]
Locates the sound image in
front of the front seats, and
adjust the balance.
• You can mute the sounds
of the rear speakers and
subwoofer.
[Sound Image
LR (Rear)]
Locates the sound image in
front of the rear seats, and
adjust the balance.
[Size of the
Virtual Sound
Field]
Adjusts the virtual sound field to
the desired field size.
• If the sound image moves out
of the front position, adjust
[Sound Image LR (Front)]/
[Sound Image LR (Rear)].
[Subwoofer
Delay]
Adjusts the delay time of
subwoofer sound.
• To close and finish the parameter setting, touch
[Close].
SettingsSettings
3 Touch [Gain] (1), and then adjust the
sound level of each speaker (2).
Front Focus Adjust
Tweeter
0.0 dB
Front L
0dB
Rear L
0dB
Subwoofer
0dB
Front R
0dB
Rear R
0dB
Initialize
To initialize the setting value: Touch [Initialize].
<Volume Offset>
Adjust and store the auto-adjustment volume level for
each source.
The volume level will automatically increase or
decrease when you change the source.
• –5 to +5 (Initial: 0)
Display settings
1 Display the <Display> screen.
On the source/option selection screen (page 12):
Then, on the <Setup> screen, touch as follows:
[Display] (1) → [Enter] for the item you adjust or
the appropriate setting for the item (2).
Setup
Dimmer
User Customize
OSD Clock
Demonstration
Scroll
Enter
Auto
ON
OFF
ON OFF
Once
ON
OFF
Input
System
Audio
Display
2 Adjust the item if more steps are required.
See the respective explanation that follows.
<Dimmer>
• Auto (Initial): Dims the screen and button
illumination when you turn on the headlights.
– The ILLUMI lead connection is required
(page 59).
• ON: Activates dimmer.
• OFF: Deactivates dimmer.
46
ENGLISH
00DMX809SKN.indb4600DMX809SKN.indb46 2022/10/0717:492022/10/0717:49
Loading ...
Loading ...
Loading ...