Loading ...
Loading ...
Loading ...
9 ENGLISH
Installing or removing drill bit
For model XAD03
To install the drill bit, place it in the chuck as far as it will
go. Tighten the chuck by hand. Place the chuck key in
each of the three holes and tighten clockwise. Be sure
to tighten all three chuck holes evenly.
To remove the drill bit, turn the chuck key counterclock-
wise in just one hole, then loosen the chuck by hand.
1
Fig.12
► 1. Chuck key
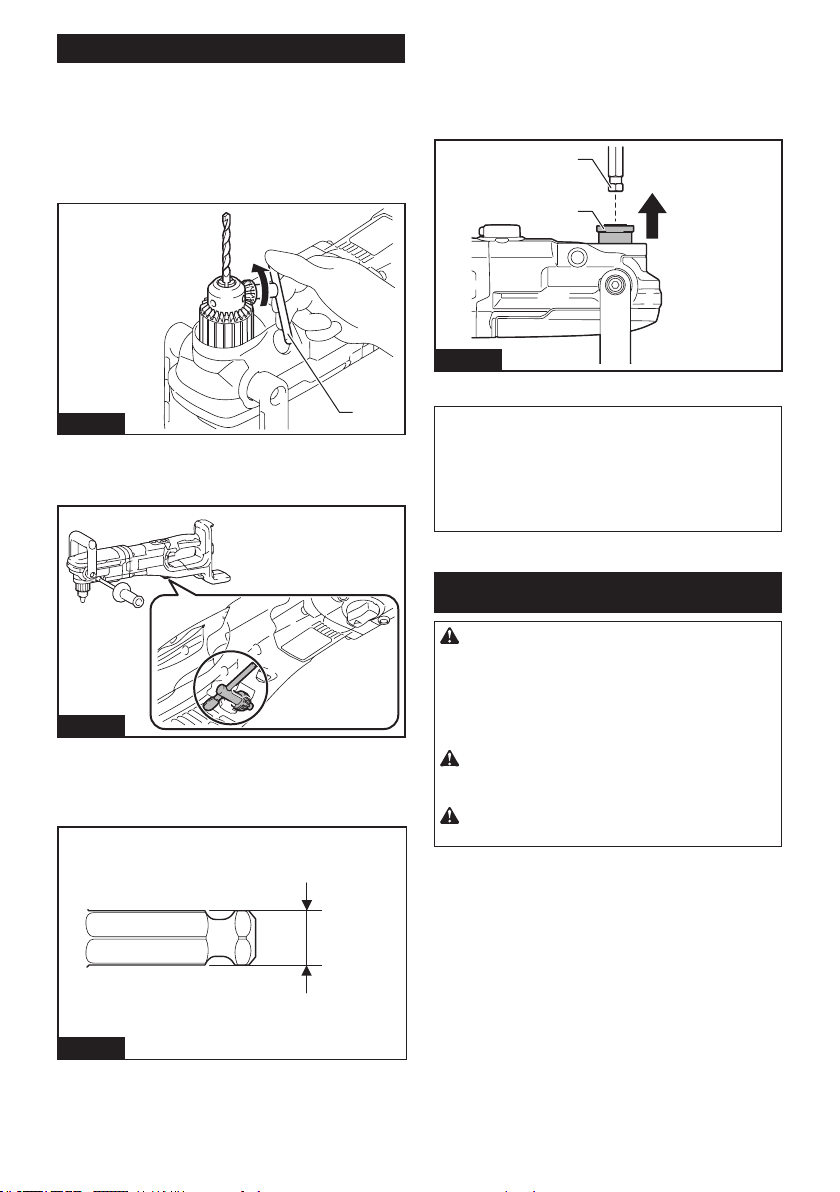
After use, return the chuck key to the storage cavity on
the tool as illustrated.
Fig.13
For model XAD04
Use only the drill bit designed with dimensions shown
in the gure.
A=11.2 mm (7/16″)
A
Fig.14
To install the drill bit, pull the sleeve in the direction of
the arrow and insert the drill bit into the sleeve as far as
it will go.
Then release the sleeve to secure the drill bit.
To remove the drill bit, pull the sleeve in the direction of
the arrow and pull the drill bit out.
1
2
Fig.15
► 1. Drill bit 2. Sleeve
NOTE: If the drill bit is not inserted deep enough into
the sleeve, the sleeve will not return to its original
position and the drill bit will not be secured. In this
case, try re-inserting the drill bit according to the
instructions above.
NOTE: After inserting the drill bit, make sure that it is
rmly secured. If it comes out, do not use it.
OPERATION
CAUTION: Always insert the battery cartridge
all the way until it locks in place. If you can see the
red indicator on the upper side of the button, it is not
locked completely. Insert it fully until the red indicator
cannot be seen. If not, it may accidentally fall out of
the tool, causing injury to you or someone around
you.
CAUTION: When the speed comes down
extremely, reduce the load or stop the tool to
avoid the tool damage.
CAUTION: Hold the tool rmly when operat-
ing the tool.
Loading ...
Loading ...
Loading ...