Loading ...
Loading ...
Loading ...
8 ENGLISH
Speed change
NOTICE: Use the speed change knob only after
the tool comes to a complete stop. Changing the
tool speed before the tool stops may damage the tool.
NOTICE: Always set the speed change knob
carefully into the correct position. If you operate
the tool with the speed change knob positioned half-
way between the position 1 and the position 2, the
tool may be damaged.
Two speed ranges can be preselected with the speed
change knob.
To change the speed, depress the lock button and turn
the speed change knob so that the pointer points to the
position 1 for low speed or the position 2 for high speed.
2
3
1
Fig.8
► 1. Lock button 2. Pointer 3. Speed change knob
Torque limiter
The torque limiter will actuate when a certain torque
level is reached at the low speed setting (position 1).
The motor will disengage from the output shaft. When
this happens, the drill bit will stop turning.
ASSEMBLY
CAUTION: Always be sure that the tool is
switched o and the battery cartridge is removed
before carrying out any work on the tool.
Installing side grip (auxiliary handle)
CAUTION: Always be sure that the side grip is
installed securely before operation.
Screw the side grip on the tool securely. The side grip can be
installed on either side of the tool, whichever is convenient.
1
Fig.9
► 1. Side grip
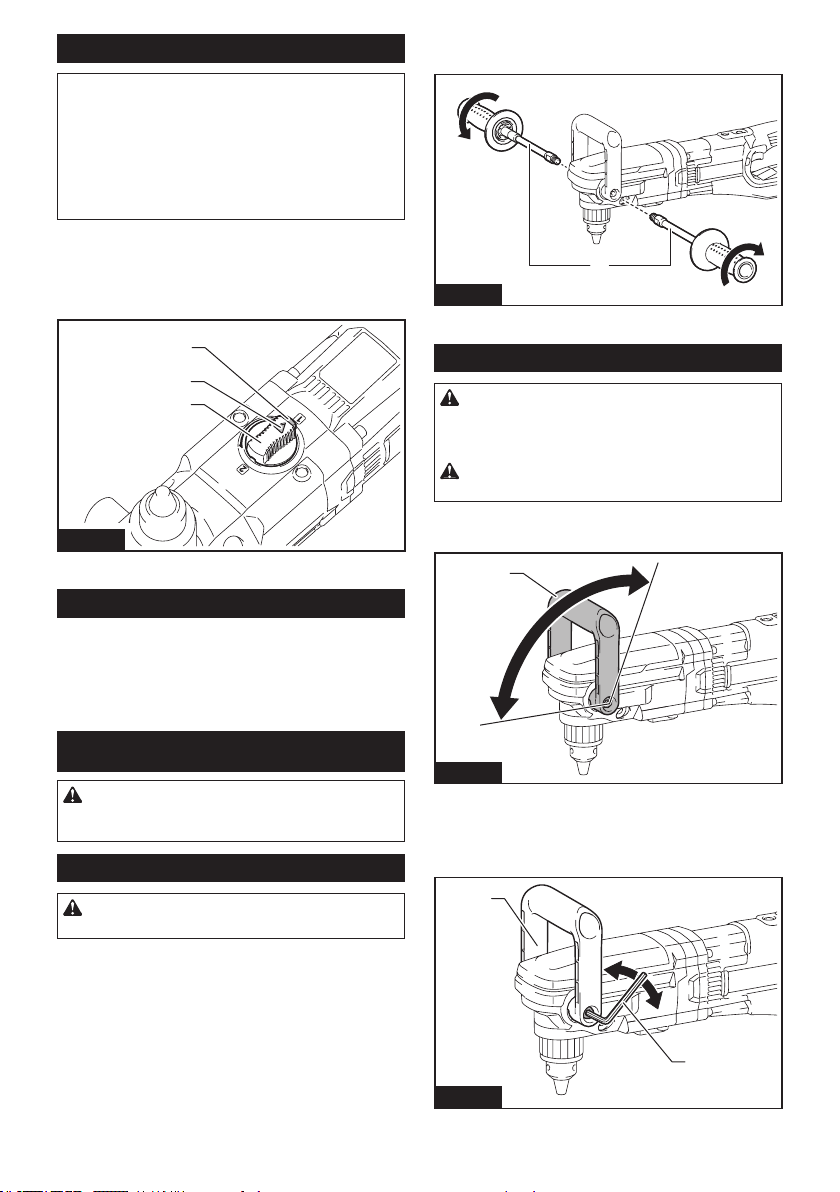
Front handle
CAUTION:
Do not x the front handle beyond the
limits of the arrow as illustrated. Be cautious that your
hand is not caught in the grip. Keep the hand away
from the drill chuck. They can lead to serious accidents.
CAUTION:
Always be sure that the hex bolts
(both sides) of the front handle are tightened securely.
The front handle can be installed in any position within
0° - 112.5° as illustrated.
1
Fig.10
► 1. Front handle
To change the position, loosen the hex bolts (both
sides) with a hex wrench and turn the front handle to the
desired position. Then tighten the hex bolts securely.
1
2
Fig.11
► 1. Front handle 2. Hex wrench
Loading ...
Loading ...
Loading ...