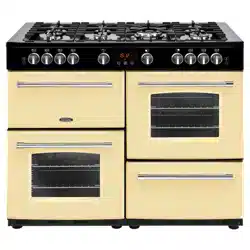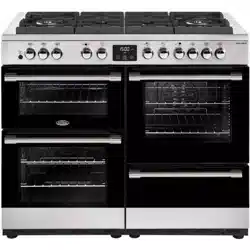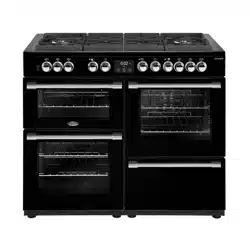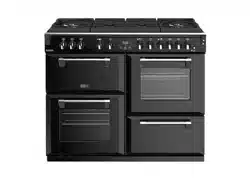
SANDRINGHAM/COOKCENTRE/FARMHOUSE
User manual - Gas (100/110 cm)
2
COUNTRIES OF DESTINATION:
GB - Great Britain
IE - Ireland
DE - Germany
ES - Spain
FR - French
IT - Italy
PL - Poland
NL - Netherlands
SE - Sweden
CN - China
NZ - New Zealand
AU - Australia
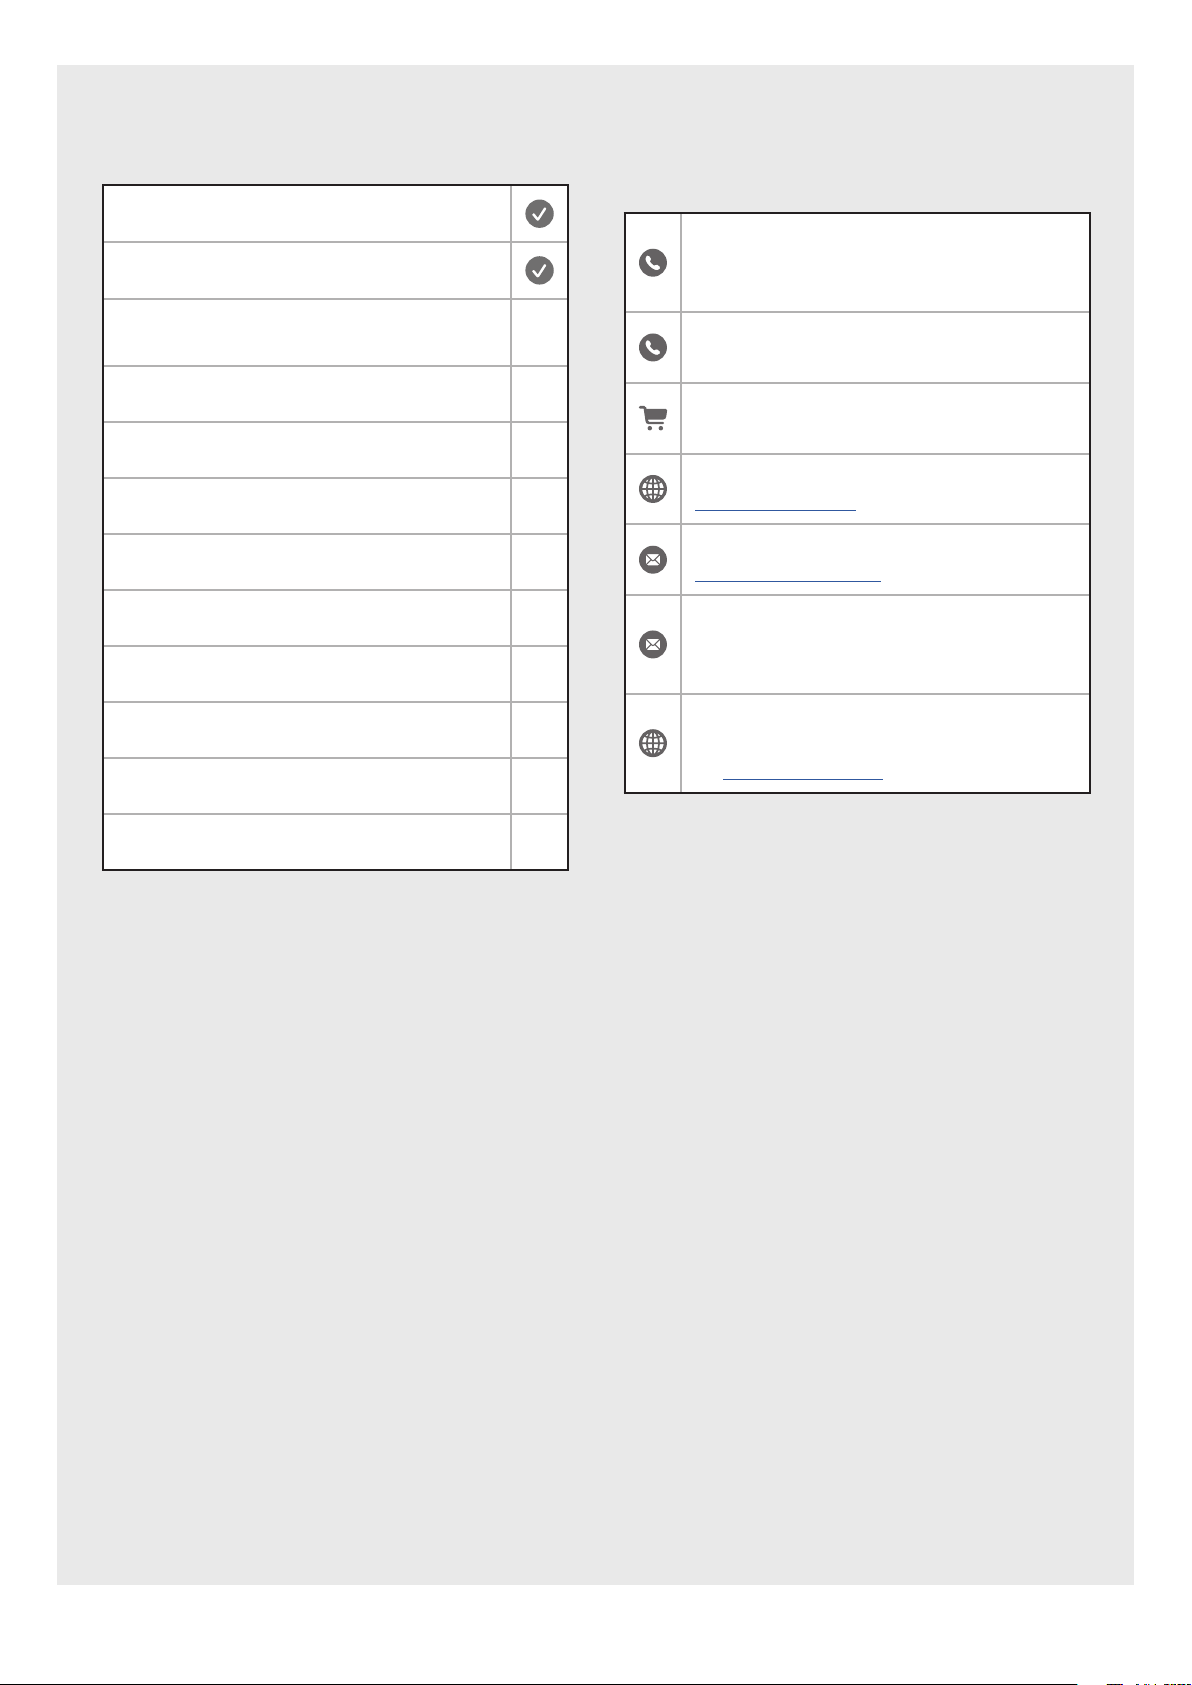
TO CONTACT BELLING ABOUT YOUR
APPLIANCE, PLEASE CALL:
Customer Care Helpline
0344 815 3746
In case of diculty within the UK
Warranty Registration
0800 952 1068
Spares Store
0344 815 3745
To register your appliance online:
www.belling.co.uk
To contact us by email:
gdhainfo@gdha.com
To register your appliance by mail: Please
complete the warranty card and return to
the address supplied
Alternatively general, spares and service
information is available from our website
at: www.belling.co.uk
Calls are charged at the basic rate, please check with
your telephone service provider for exact charges
Your new appliance comes with our 12-month
guarantee (UK only), protecting you against electrical
and mechanical breakdown. To register, please
complete the registration form included, register
online or by phone. For full terms & conditions of the
manufacturer’s guarantee, please refer to the website
above. In addition, you may wish to purchase an
extended warranty. A leaflet explaining how to do this
is included with your appliance.
Our policy is one of constant development and
improvement, therefore we cannot guarantee
the strict accuracy of all of our illustrations and
specifications. Changes may have been made
subsequent to publishing.
Glen Dimplex Home Appliances, Stoney Lane,
Prescot, Merseyside, L35 2XW
3
INTRODUCTION
SAFETY
GETTING TO KNOW YOUR PRODUCT
USING YOUR APPLIANCE
USING THE GRILL
USING THE MAIN OVEN GAS
COOKING GUIDE
BAKING GUIDE
ROASTING GUIDE
CLOCKPROGRAMMER
REMOVING SHELF RUNNERS
CLEANING YOUR APPLIANCE
TECHNICAL DATA
CONTENTS

4
INTRODUCTION
Thank you for buying this British-built appliance from
us.
This user guide book is designed to help you through
each step of owning your new product.
Please read it carefully before you start using your
appliance, as we have endeavored to answer as many
questions as possible, and provide you with as much
support as we can.
General information, spares and service information is
available from our website.
If you should find something missing from your
product or have any questions that are not covered
in this user guide, please contact us (see contact
information inside the front cover).
EUROPEAN DIRECTIVES
As a producer and a supplier of cooking appliances we
are committed to the protection of the environment
and are in the compliance with the WEEE directive.
All our electric products are labelled accordingly with
the crossed out wheeled bin symbol. This indicates, for
disposal purposes at end of life, that these products
must be taken to a recognized collection points, such
as local authority sites/local recycling centres.
This appliance Complies with European Community
Directives (CE) for household and similar electrical
appliances and Gas appliances where applicable.
This appliance conforms to European Directive
regarding Eco design requirements for energy-related
products. Our policy is one of constant development
and improvement, therefore we cannot guarantee
the strict accuracy of all of our illustrations and
specifications – changes may have been made
subsequent to publishing.
DISPOSAL OF PACKAGING
MATERIAL
The packaging materials used with this
appliance can be recycled. Please dispose of
the packaging materials in the appropriate
container at your local waste disposal
facilities.
6 GAS WARNING! - If you smell gas: Do
not try to light any appliance, Do not
touch any electrical switch. Contact your
local gas supplier immediately.

5
SAFETY
WARNING
6 Never put items directly on the base
of the oven or cover the oven with foil,
as this can cause the base element to
overheat.
6 Accessible parts may become hot when
the grill is in use. Children should be kept
away
6 Do not place articles on or against the
appliance.
6 Always switch off your appliance and
allow it to cool down before you clean
any part of it.
6 Although every care has been taken to
ensure this appliance has no sharp edges,
we recommend that you wear protective
gloves when installing and moving this
appliance. This will prevent injury.
6 This appliance must be fitted to a switch
providing all pole disconnection with a
minimum contact separation of 3mm.
6 Connection should be made with a
suitable flexible cable with a minimum
temperature of 70°C.
6 Do not use a steam cleaner on any
cooking range, hob or oven appliance.
6 If your appliance is fitted with a lid, any
spillage should be removed from the lid
before opening. The hob surface should
be allowed to cool before closing the lid
(if fitted).
6 To avoid electric shock, ensure that the
appliance is switched off before replacing
the lamp.
6 The appliance is not intended to be
operated by means of an external timer
or separate control system.
6 Unattended cooking on a hob with fat or
oil can be dangerous and may result in
fire.
6 NEVER try to extinguish a fire with water,
but switch off the appliance and then
cover the flame with a lid or damp cloth.
6 Danger of fire: Do not store items on the
cooking surfaces.
6 Only use hob guards designed by the
manufacturer of the cooking appliance
or indicated by the manufacturer of the
appliance in the instructions for use as
suitable or hob guards incorporated in
the appliance. The use of inappropriate
hob guards can cause accidents.
6 If the cooker is placed on a base,
measures have to be taken to prevent the
appliance slipping from the base.
6 The cooking process has to be supervised.
A short term cooking process has to be
supervised continuously.
6 This appliance must not be installed
behind a decorative door in order to avoid
overheating.
6 Ensure shelving is correctly installed. See
the sections on the shelf runners and
shelf location within this book.
6 This appliance is for cooking purposes
only. It must not be used for other
purposes, for example room heating.

6
CAUTION
6 The use of a gas cooking appliance
results in the production of heat,
moisture and products of combustion
in the room in which it is installed.
Ensure that the kitchen is well ventilated
especially when the appliance is in use:
keep natural ventilation holes open or
install a mechanical ventilation device
(mechanical extractor hood). Prolonged
intensive use of the appliance may call
for additional ventilation, for example
opening of a window, or more effective
ventilation, for example increasing the
level of mechanical ventilation where
present.
6 If the appliance is turned off at the wall,
it needs to be left for 60 seconds before
using the main oven. Failure to do this
will mean the main oven interrupter will
shut off the main oven within 60 seconds
of turning the main oven on. This is a
design feature and not a fault.
FIRE SAFETY ADVICE
6 If you do have a fire in the kitchen, don’t
take any risks – get everyone out of your
home and call the Fire Service.
If you have an electrical fire in the
kitchen:
1. Pull the plug out, or switch off the
power at the fuse box – this may be
enough to stop the fire immediately
2. Smother the fire with a fire blanket,
or use a dry powder or carbon dioxide
extinguisher
6 Remember: never use water on an
electrical or cooking oil fire.
OTHER SAFETY ADVICE
6 Servicing should be carried out only by
authorised personnel.
6 Do not operate the appliance without the
glass panel correctly fitted.
6 There is a risk of electric shock, so always
make sure you have turned off and
unplugged your appliance. Always allow
the product to cool down before you
change a bulb.
6 Do not modify the outer panels of this
appliance in any way.
6 This appliance must be earthed.
6 The appliance must never be
disconnected from the mains supply
during use, as this will seriously affect
the safety and performance, particularly
in relation to surface temperatures
becoming hot and gas operated parts
not working efficiently. The cooling fan
(if fitted) is designed to run on after the
control knob has been switched off.
7
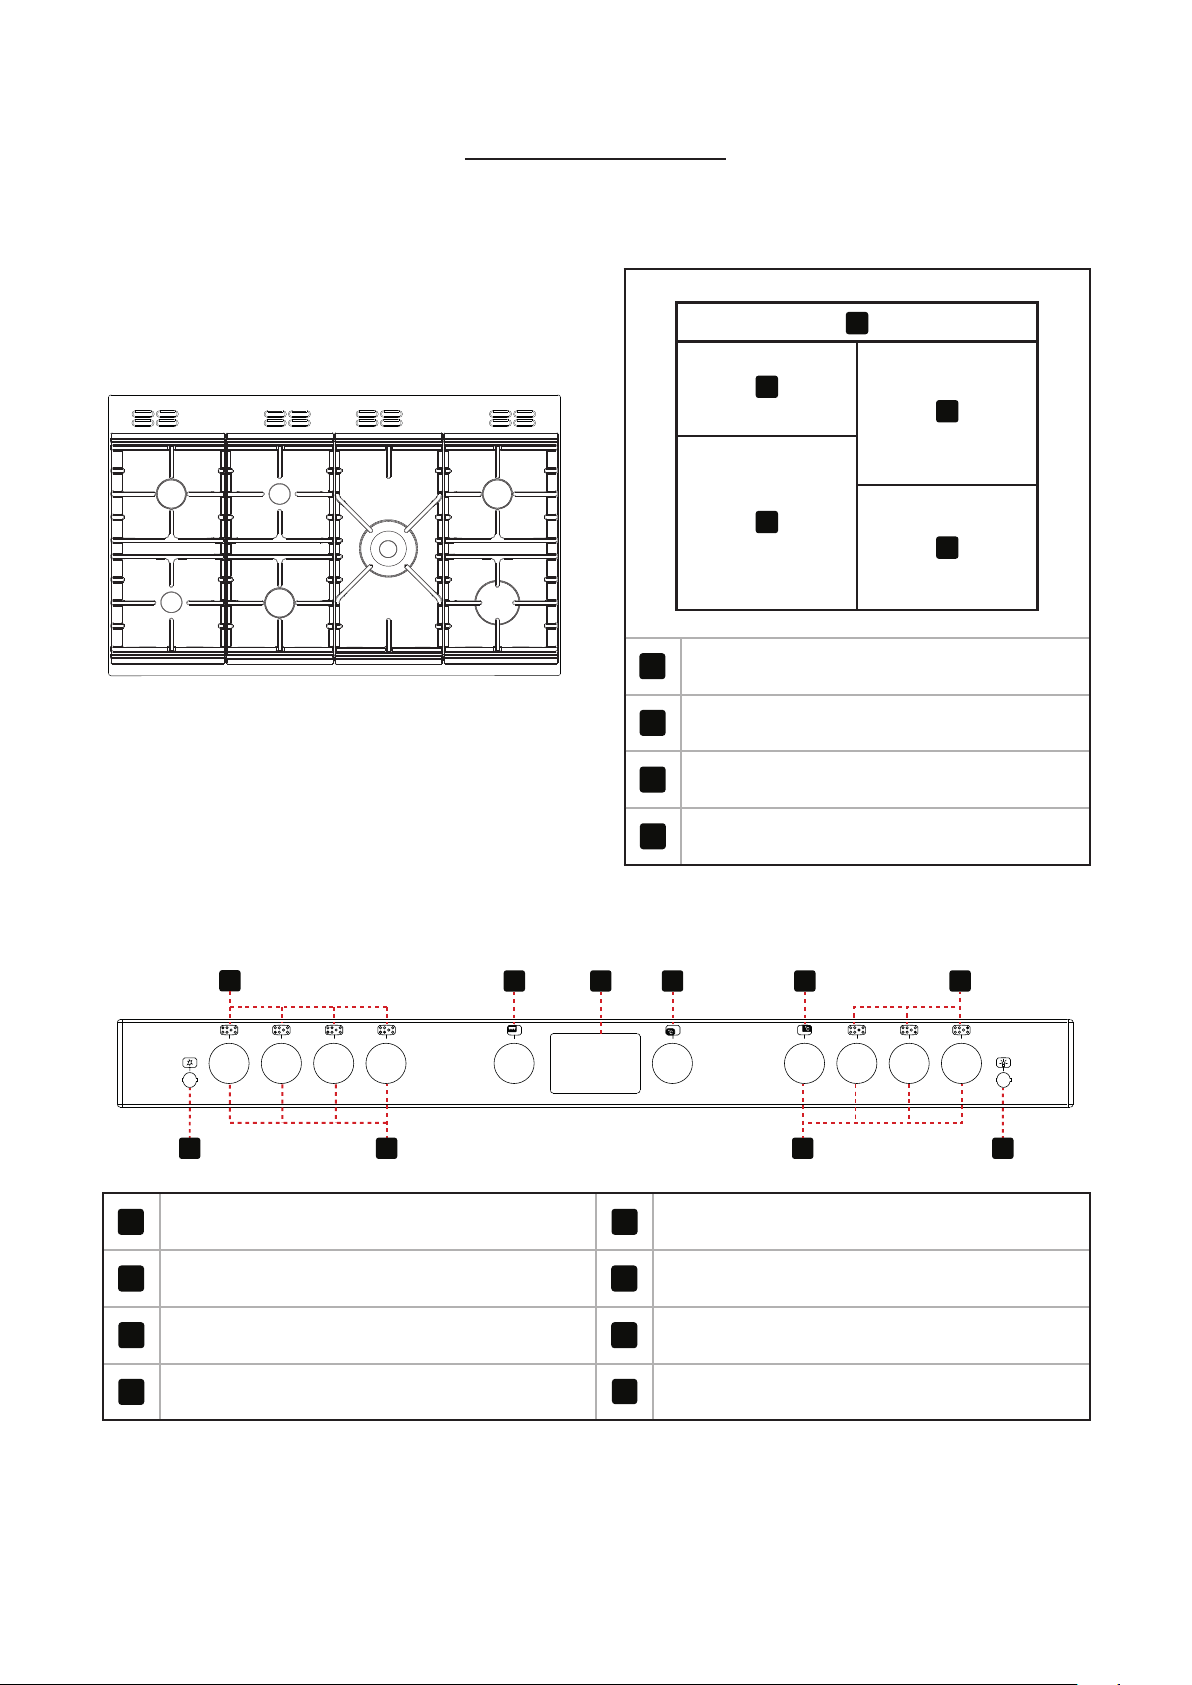
GETTING TO KNOW YOUR PRODUCT
4
Note: Your appliance layout may differ
depending on the model.
HOB
12
2
1
4
2
3
OVERVIEW
100/110cm
2
3
3
6
1
1
Fascia
2
Grill
3
Main Oven
6
Storage drawer
CONTROL PANEL
1
14 336
810 98
1
Cook Zones
6
Grill
3
Oven
8
Hob and Oven controls
4
Clock/Programmer
9
Light switch
5
Thermostat indicator
10
Ignition switch
8
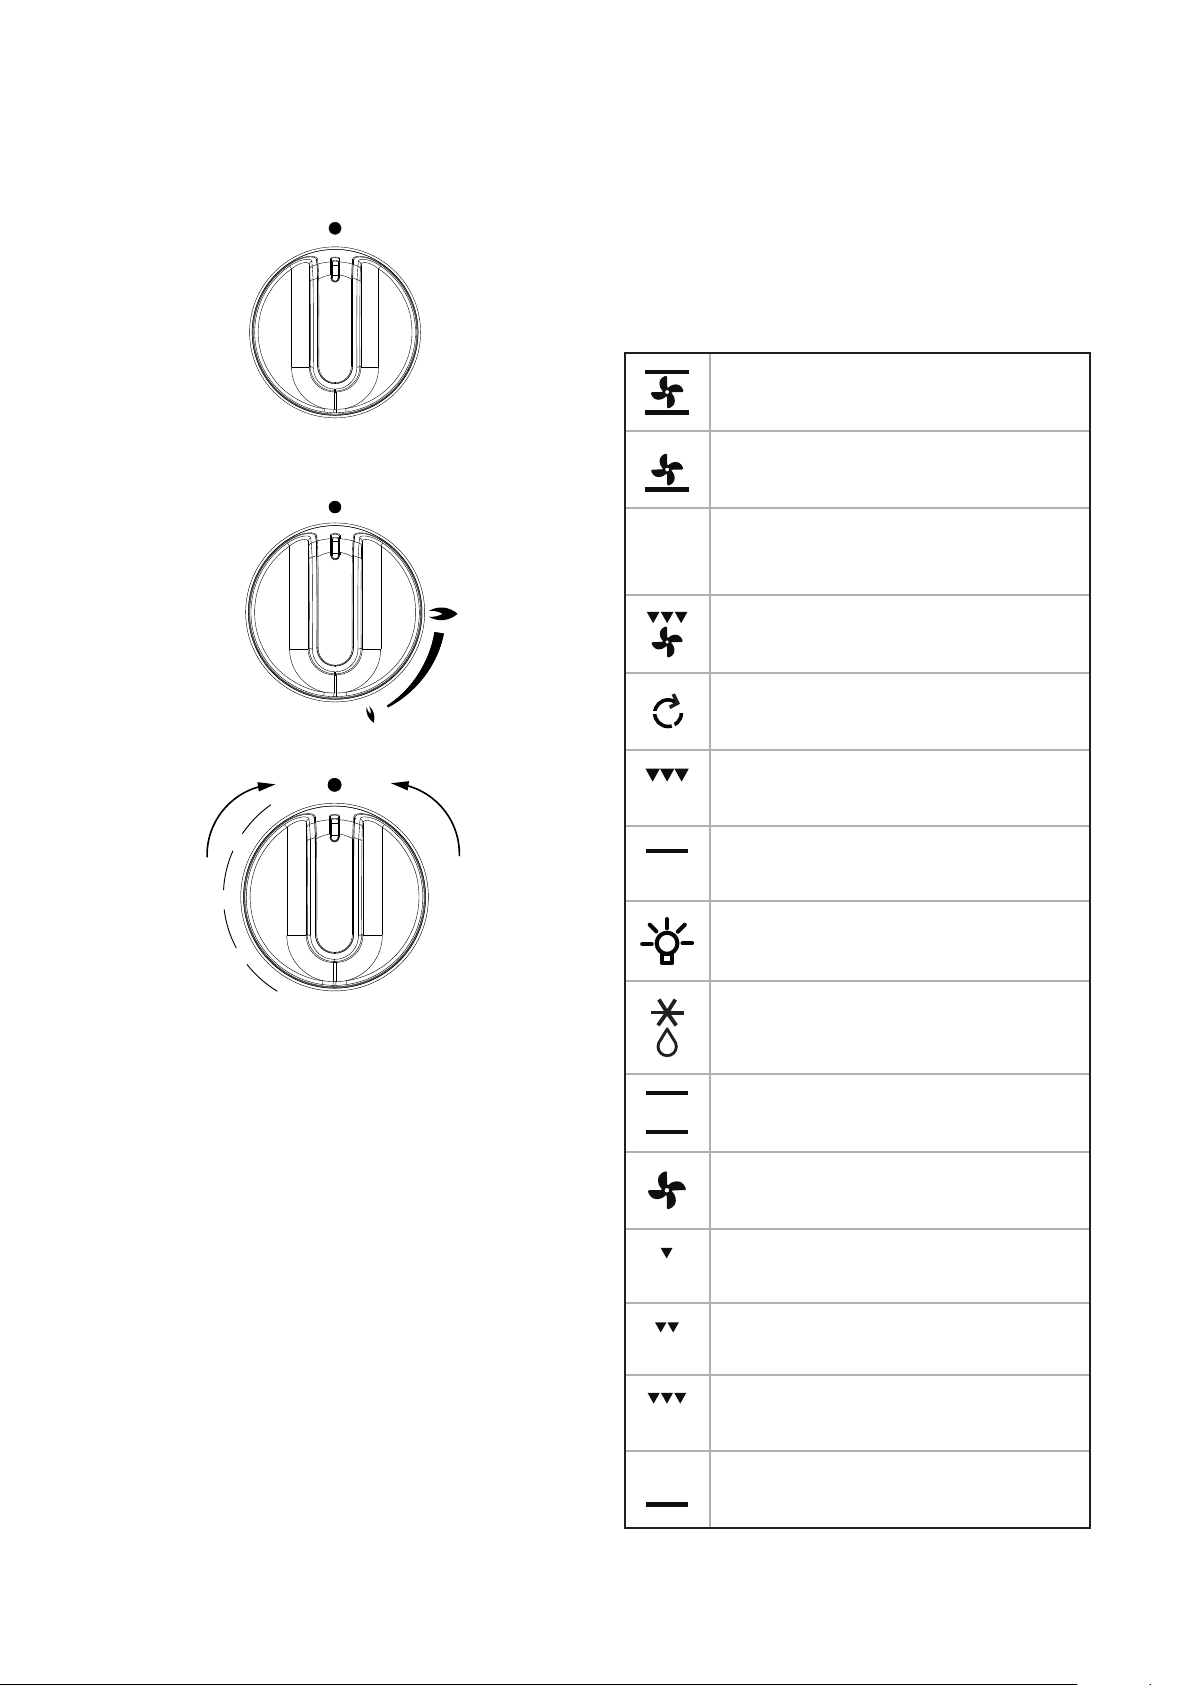
OVEN CONTROLS
Gas oven
OFF
S
1/2
1
2
3
4
5
6
7
8
9
Gas Grill/Hob
OFF
Electric grill
OFF
1
2
3
4
5
1
2
3
4
5
D
u
a
l
G
r
i
l
l
S
i
n
g
l
e
G
r
i
l
l
APPLIANCE FUNCTIONS
4
Note: Your oven may not have all of the
functions shown here. We recommend
for best cooking results, please preheat
your oven for 15 minutes and 3−5
minutes for grilling.
Intense Baking
Base Heat with Fan
S
Slow Cook
Fanned Grill
Oven Selector Control
Conventional Grill
Top Heat
Lights Only
Defrost
Conventional oven
Fanned Oven
Low Grill
Single Grill
Dual Grill
Base Heat
9
USING YOUR APPLIANCE
OVENS AND GRILL
6 The door must be open when the grill is
used for conventional grilling.
4
Some appliances are automatic ignition
and do not have an ignition switch fitted.
Choose the required setting and press the ignition
switch (if fitted).
When the Top oven/grill or grill is switched on, the
cooling fans come on to keep the fascia and control
knobs cool during cooking/grilling. The cooling
fans may operate when the main ovens are in use,
depending on the temperature setting. The fans may
continue to operate for a period after the oven/grill
has been switched off. During use the fan may cycle
on and off, this is normal.
6 Important: Never put items directly on
top the base of the oven, or cover the
oven base with foil, as this may cause
the element to overheat. Always position
items on the shelf.
6 Never operate the grill between the large
flame and the 'OFF' position.
4
If you find that over a period of time
the oven becomes hotter when used at
a certain gas mark, the thermostat may
need to be replaced.
GRILL PAN, TRIVET AND
DETACHABLE GRILL PAN HANDLE
The grill trivet (inside the grill pan) can be inverted
to give a high or low position, or it may be removed.
The speed of grilling can be controlled by selecting a
higher or lower shelf position, or adjusting the grill
setting.
4
Note: Grill pan handle not included. This
can be purchased as an optional extra
from our spares store.
Inverted
6 The door must be open when the grill is
used for conventional grilling.
HOB
10
1. Hold the control knob and press the ignition in for
up to 15 seconds then release. For the wok, please
allow the burner to warm up for a few minutes.
2. Once lit, turn the control knob to the required
setting.
4
If the burner fails to ignite within this
time, release the control knob and wait 1
minute before attempting to re-ignite.
FITTING BURNER CAPS AND HEADS
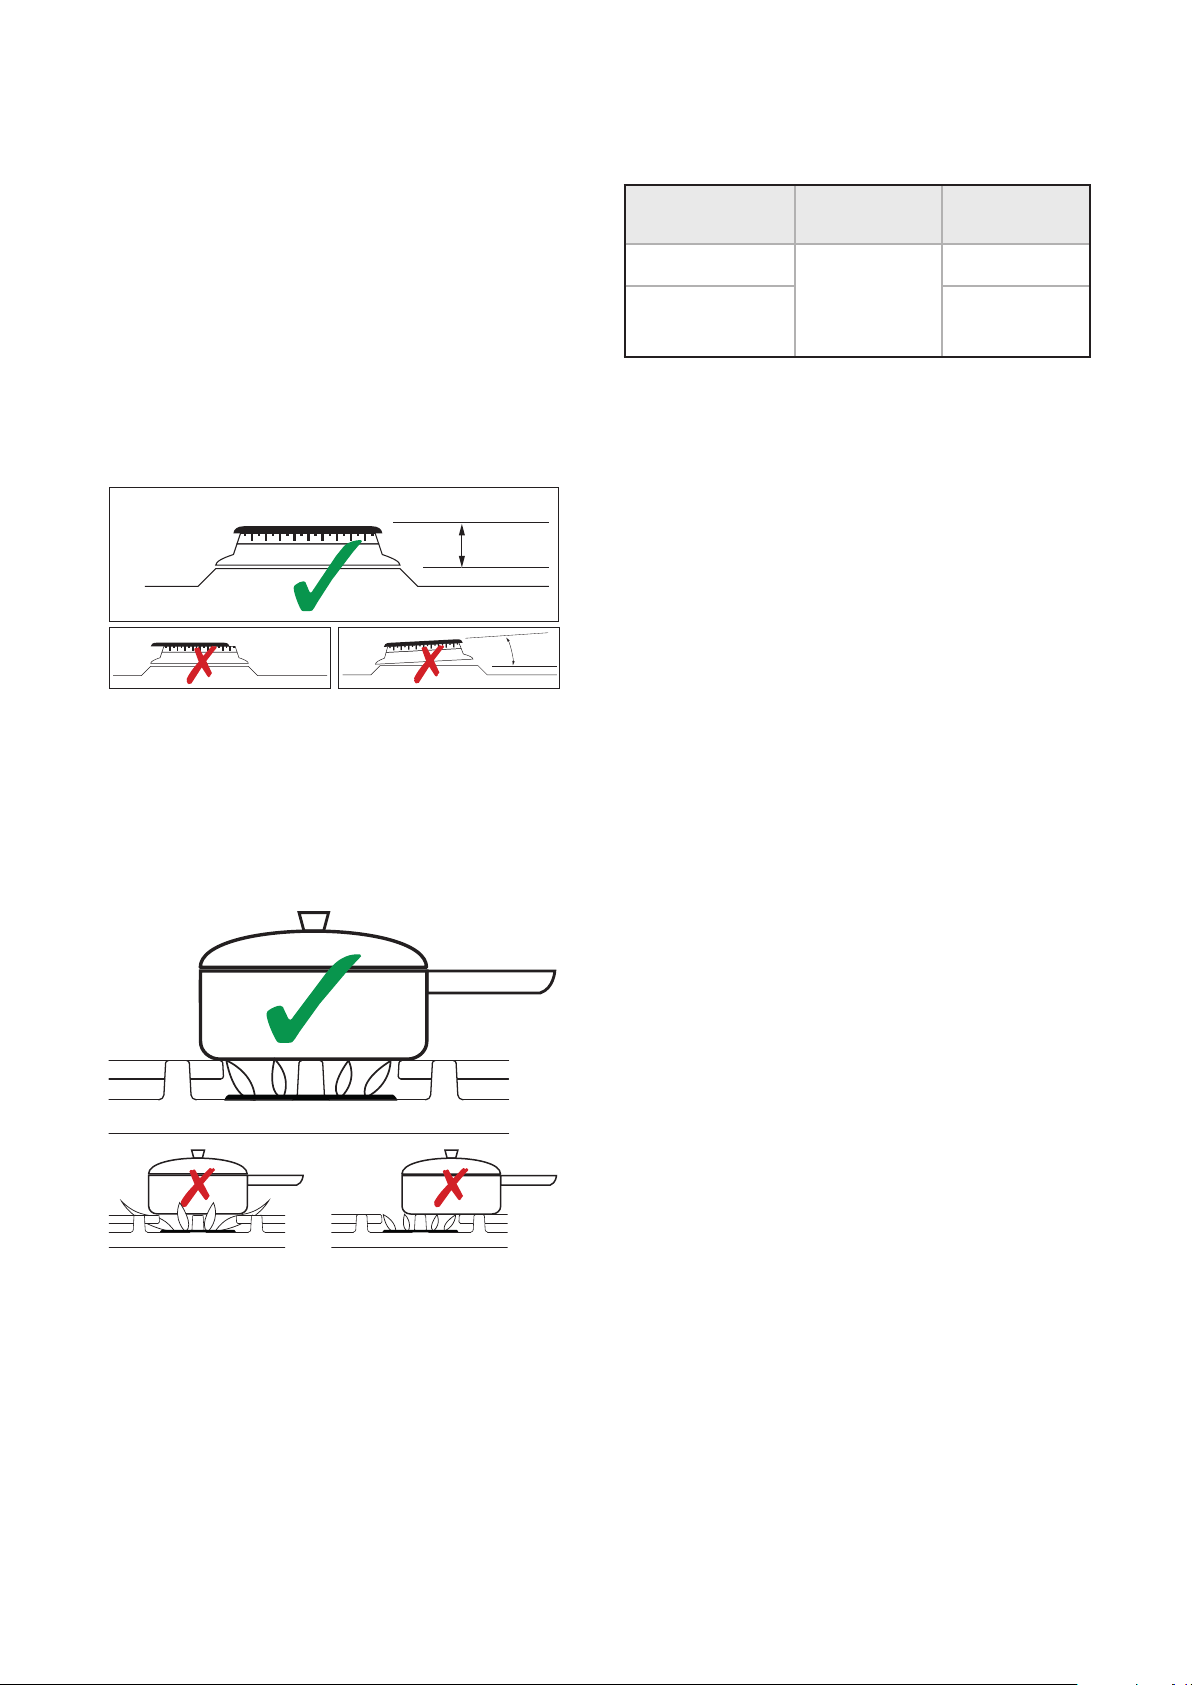
PAN PLACEMENT
Always make sure that your pans are placed centrally
and do not allow the flame to extend over the base of
the pan. Do not place pans directly onto the burners.
PAN SIZES REQUIRED
Hob Cook Zones Minimum Pan
Sizes (mm)
Maximum Pan
Sizes (mm)
Rapid & Wok
100
260
All other cook
zones
250
6 Warning: Do not allow cooking vessels to
overlap cooking zones

11
USING THE GRILL
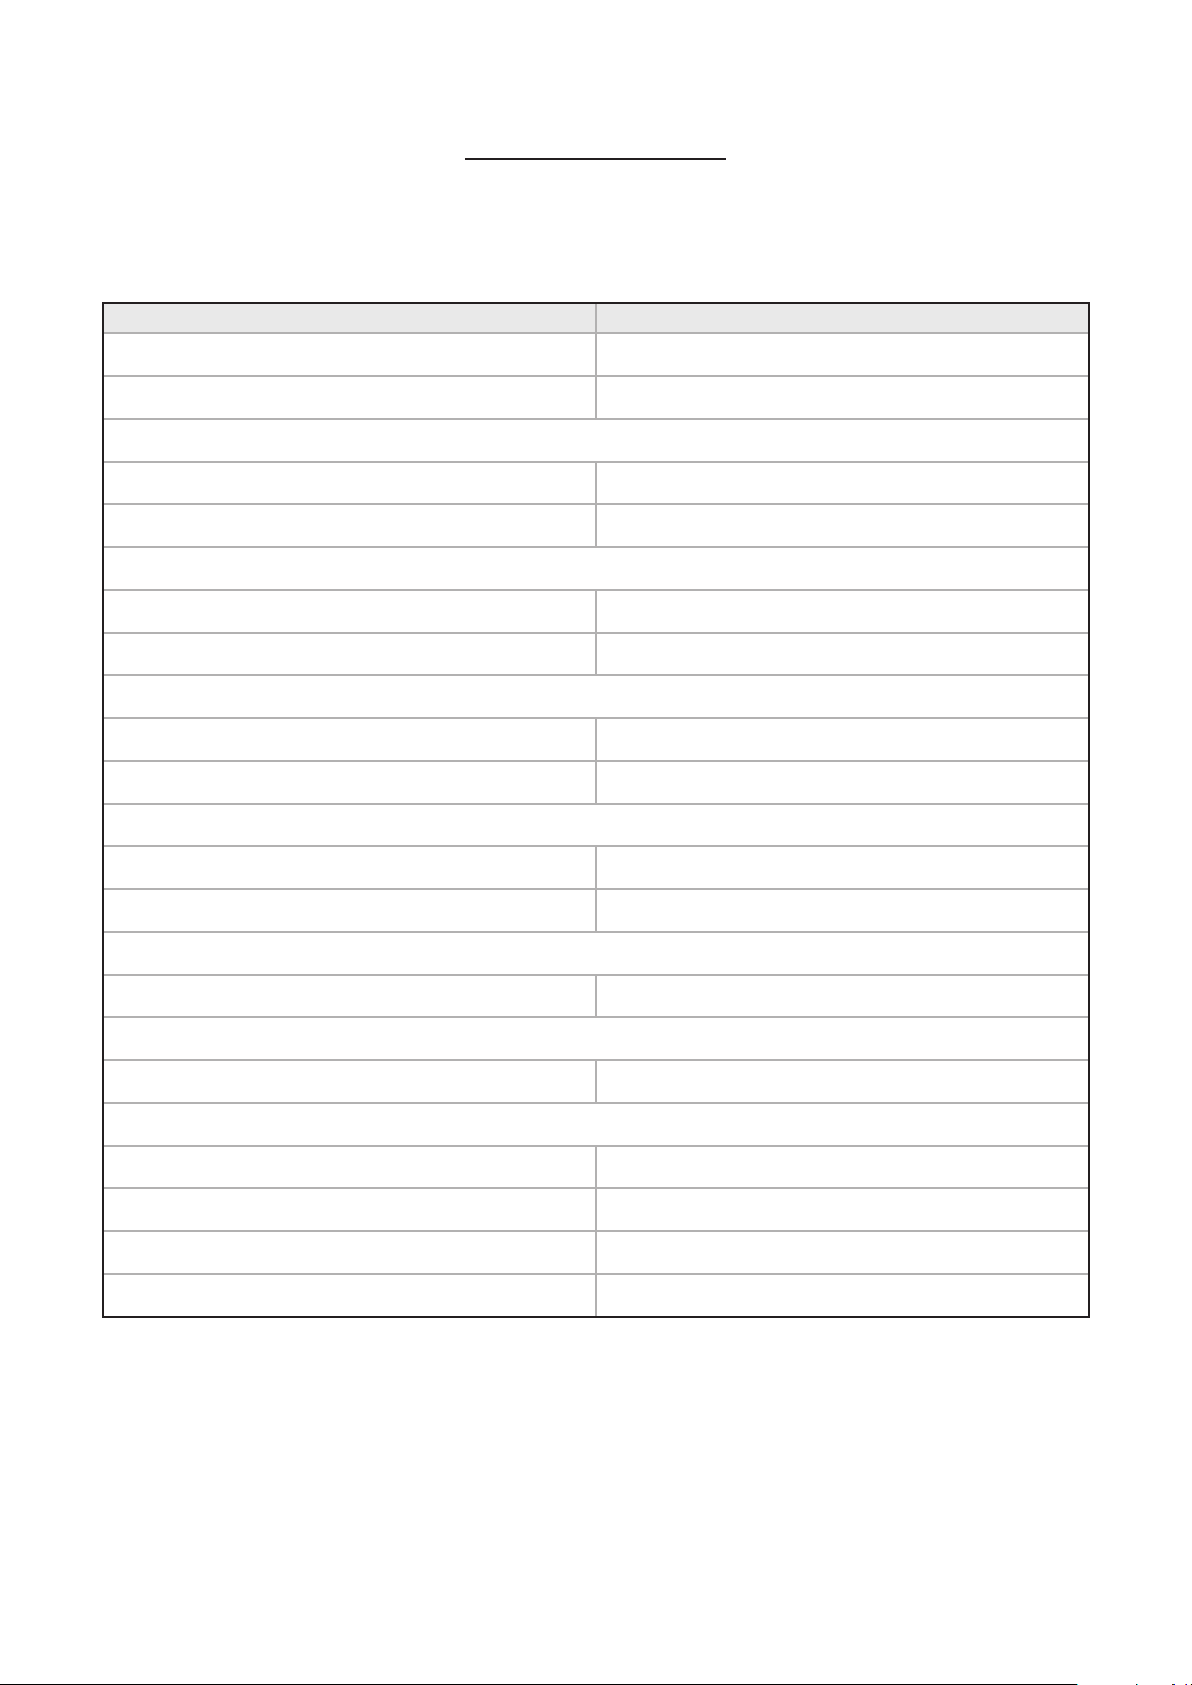
BEFORE YOU START GRILLING. . . .
Before you use the grill, make sure you have placed the
grill shelf in the position you need as once the grill is
on you may injure yourself if you try to move the shelf.
Do not close the door while the grill is in use.
Turn the top oven control knob to the required grill
setting.
Turn the grill control knob (if fitted) to the heat
setting you require.
To switch off, return the control knob(s) to the ‘off’
position.
The cooling fan will come on during use, and may
continue to run for some time afterwards.
To adjust your results, you can turn the grid over,
or remove it altogether.
The dual grill uses all of the top element and is
ideal for grilling large quantities of food.
The single grill uses part of the element only, and
is better suited to grill smaller amounts of food.
THE GRILL PAN
This appliance comes with a grill pan and trivet.
SHELF & TRIVET ADJUSTMENTS
Speed of grilling can be adjusted by changing the shelf
position or the turning the trivet.
High: For thin foods and toasting
Low: For thicker meat pieces.
ALUMINIUM FOIL
6 Never cover the grill pan or grill trivet
with foil, or allow fat to build up in the
grill pan, as this creates a fire hazard.
6 Accessible parts may become hot when
the grill is in use. Children should be kept
away
TYPES OF GRILL
6 Caution: Accessible parts may be hot
when the grill is used – young children
should be kept away.
6 Important: The grill door must be fully
open when the grill is used.
6 Important: Never operate the grill
between the large flame and the ‘OFF’
position.
6 If cleaning the grill pan when it is hot,
use oven gloves to move it.
4
Food for grilling should be positioned
centrally on the trivet.
Dual grill: has two grill elements which can be used
together, or as a single grill.
For best results: Pre-heat the single grill for 5
minutes and the dual grill for 3 minutes.

12
USING THE GRILL
The top oven must be turned off to enable the grill to
be used.
Open the grill door. Turn the grill control knob to
the required setting. For best cooking results, we
recommend that you preheat the grill for about 3
minutes.
The speed of grilling can be controlled by selecting
a higher or lower shelf position. For toasting, and for
grilling foods such as bacon, sausages or steaks, use a
higher shelf position. For thicker foods such as chops
or chicken joint pieces, use a middle to low shelf
position.
The grill trivet, inside the grill pan, can be inverted to
give a high or low position, or it may be removed. The
HIGH trivet position is suitable for toasting bread. The
LOW trivet position is suitable for grilling all types of
meat & fish.
With the grill trivet removed the food is placed
directly on the base of the grill pan – eg: when cooking
whole fish or browning dishes such as cauliflower
cheese.
To switch off, turn the control knob to the off position.
THE COOLING FAN
During use the fan may cycle on and off, this is
normal.
When the grill is switched on, the cooling fan comes
on to keep the fascia and control knobs cool during
grilling. The fan may continue to operate for a period
after the grill has been switched off.

13
USING THE MAIN OVEN - GAS
6 Accessible parts may be hot when the
oven is used. Young children should be
kept away.
OVEN FURNITURE
Oven shelves
The oven shelf must be positioned with the upstand at
the rear of the oven and facing upwards.
4
Extra shelves may be ordered from your
local supplier.
Baking tray and roasting tins
For best cooked results and even browning, the
recommended size baking trays and roasting tins that
should be used are as follows;
Baking tray 350mm x 330mm
This size of baking tray will hold up to 12 small cakes.
Roasting tin 370mm x 320mm
4
Position baking trays and roasting tins on
the middle of the shelves, and leave one
clear shelf-position between shelves, to
allow for circulation of heat.
4
We recommend that you use good quality
cookware. Poor quality trays and tins may
warp when heated, leading to uneven
baking results.
Shelf positions
As a general guide, when cooking frozen or chilled
food, use the highest possible shelf position, while
allowing some clearance between the food and the top
element. Follow the instructions given on packaging.
IGNITION
1. Push in and turn the main oven control knob to
the ‘FULL ON’ position. Hold the control knob in. If
after 15 seconds, the burner has not lit, turn off the
oven and leave the compartment door open. Wait
at least one minute before a further attempt to
ignite the burner.
4
Do not hold the control knob in for more
than 15 seconds.
2. Turn the control knob to the required setting.
3. To turn off, return the control knob to the “off”
position.
4. Preheat the main oven for 15 minutes. If you are
not preheating the oven, the cooking times in the
baking guides may need to be extended, as they are
based on a preheated oven.
4
The oven must be preheated when
reheating frozen or chilled foods, and
we recommend preheating for yeast
mixtures, batters, soufflés and whisked
sponges. Put the oven shelves in the
position required before preheating the
oven.

14
ZONES OF HEAT
The temperature at the centre of the oven corresponds
with the selected gas mark and is slightly higher
towards the top of the oven and slightly lower towards
the oven base. These zones of heat can be useful as
different dishes requiring different temperatures can
be cooked at the same time, when more than one shelf
is used.
4
The temperature at the oven base is
suitable for cooking baked vegetables,
baked fruit, milk pudding etc, and for
warming bread rolls, soup, coffee, or
ovenproof plates and dishes.
4
If you find that over a period of time,
the oven becomes hotter when used at a
particular gas mark, the thermostat may
need to be replaced.
15
COOKING GUIDE
GRILL
Food Type Time Approx (mins)
Bacon
8 - 15
Sausages
12 - 15
Chops
- Lamb 10 - 15
- Pork 15 - 25
Toast
- 2 rounds 1 - 2 (per side)
- 4 rounds 1 - 2 (per side)
Bread products
- Buns 1 - 2 (per side)
- Tea cakes 1 - 2 (per side)
Cheese on toast
- 2 rounds 4 - 5
- 4 rounds 4 - 5
Fish
- Fillets 10 - 15
Chicken
- Fillets 20 - 30
Beef Steaks
- Rare 7 - 10
- Medium 10 - 15
- Well done 15 - 20
Gammon Steaks
12 - 15
4
As with any cooking guide, all times are
approximate and can be adjusted to suit
personal taste.
16
BAKING GUIDE
TOP OVEN
Dish Recommended gas mark Suggested shelf
position
Approximate cooking time
(preheated oven)
Scones 7 top - middle 10 - 15 mins
Meringues “S” slow cook setting bottom 2 - 3 hours
Cakes
Small cakes 5 middle 10 - 15 mins
Whisked sponge 5 middle 20 - 30 mins
Swiss roll 6 middle 10 - 12 mins
Victoria sandwich (2 x
180mm / 7” per shelf)
4
middle (side by
side)
20 - 35 mins
Genoese Sponge (2 x
180mm / 7” per shelf)
5 middle 25 - 30 mins
Pastry
Rough Pu pastry 7 middle
cooking time depends on
recipe & type of filling
Flaky / Pu 6 middle
Shortcrust 6 middle
Flan 6 middle
Biscuits
Shortbread fingers 5 middle - top
Nut brownies 5 middle
Brandy snaps 4 middle - top
Flapjacks 4 middle - top
Ginger nuts 5 middle - top
17
MAIN OVEN
Dish Recommended gas mark Suggested shelf position Approximate cooking
time (preheated oven)
Scones 7 middle - top 8 - 15 mins
Meringues “S” slow cook setting bottom 2 - 3 hours
Cakes
Small cakes 5 middle - top 15 - 25 mins
Whisked sponge 5 middle - top 20 - 25 mins
Swiss roll 6 middle - top 10 - 12 mins
Victoria sandwich (2 x
180mm / 7”)
4 middle - top 20 - 30 mins
Genoese sponge 4 middle 20 - 30 mins
Madeira (180mm/7”) 3 middle 1 - 1¼ hours
Gingerbread 3 middle 1 - 1¼ hours
Semi rich fruit cake
(205mm/8”)
2 or 3 middle - top 2½ - 3 hours
Christmas cake
(205mm/8”)
1 or 2 bottom depending on recipe
Dundee cake
(205mm/8”)
3 middle - bottom 2 - 2½ hours
Pastry
Rough Pu pastry 7 middle - top
cooking time depends
on recipe & type of
filling
Pu / flaky pastry 6 middle - top
Shortcrust pastry 6 middle - top
Flan 6 middle - top
Biscuits
Nut brownies 5 middle - top 25 - 35 mins
Brandy snaps 4 middle - top 10 - 12 mins
Flapjacks 4 middle - top 20 - 25 mins
Ginger nuts 4 middle - top 10 - 20 mins
4
Slow cooking times will be about 3 times
as long as conventional cooking times.

18
GENERAL BAKING GUIDE
Traditional fruit cakes
It should be remembered that ovens can vary over
time, therefore cooking times can vary, making it
difficult to be precise when baking fruit cakes.
It is necessary therefore, to test the cake before
removal from the oven. Use a fine warmed skewer
inserted into the centre of the cake. If the skewer
comes out clean, then the cake is cooked.
4
Follow the temperatures suggested in the
recipe and then adjust accordingly to the
conversion table.
4
Do not attempt to make Christmas cakes
larger than the oven can cope with, you
should allow at least 25mm (1”) space
between the oven walls and the tin.
4
Always follow the temperatures
recommended in the recipe.
4
To protect a very rich fruit cake during
cooking, tie 2 layers of brown paper
around the tin.
4
We recommend that the cake tin is not
stood on layers of brown paper, as this
can hinder effective circulation of air.
4
Do not use soft tub margarine for rich
fruit cakes, unless specified in the recipe.
4
Always use the correct size and shape of
tin for the recipe quantities.
Trouble-shooting – fruit cakes
Problem Possible Cause
Fruit sinking to
the bottom
Low oven temperature which
may cause the cake to take
longer to set, allowing the
fruit to sink. Or, too much
liquid, or raising agent. The
fruit may not have been
properly washed and dried.
Cake sinking /
dipping in the
centre
Too much raising agent in
the mixture. Too hot, or
too cool an oven. Or, not
enough liquid or insucient
creaming.
Surface cracks
Too small a tin, or too much
mixture in the tin. Too much
raising agent in the mix,
plus not enough liquid or
insucient creaming. The
oven may be too hot.
Hard outer
crust with a
damp patch
inside
Oven too hot, therefore the
cake baked too quickly. Too
much sugar, or insucient
liquid.
Burnt outside
Oven temperature too high.
Oven too small for the size of
cake. Insucient protection
around the tin. Cake baked
on too high a shelf.
Texture with
pronounced
holes.
Too much raising agent. Flour
unevenly mixed.
Texture too
close and cake
insuciently
risen.
Not enough raising agent.
Not enough liquid. Too
cool an oven. Insucient
creaming.
Cake crumbles
when cut
Not enough liquid. Baked for
too long. Not enough sugar.
Too much baking agent.
Too dry
Over baking. Insucient egg
or liquid. Too much raising
agent.

19
Trouble-shooting – sponge cakes
Problem Possible Cause
Domed top
Insucient creaming of
mixture. Cake baked on
too high a shelf position, or
at too high a temperature.
Paper liners can cause the
outer edge not to rise and
the centre to peak.
Hollowed /
sunken top
Too much raising agent.
Oven temperature too low, or
incorrect shelf position. Cake
removed from oven before
it’s cooked. Use of soft tub
margarine.
Very pale, but
cooked
Oven temperature too low.
Baked too low in the oven
Overflowing tin
Tin too small for the amount
of mixture

20
ROASTING GUIDE
The times given in the roasting guide are only
approximate, because the size and age of the bird will
influence cooking times as will the shape of a joint
and the proportion of the bone.
Frozen meat should be thoroughly thawed before
cooking. For large joints it is advisable to thaw over
night.
Frozen poultry should be thoroughly thawed before
cooking. The time required depends on the size of the
bird – eg; a large turkey may take up to 48 hours to
thaw.
Use of a trivet with a roasting tin will reduce fat
splashing and will help to keep the oven interior clean.
Alternatively, to help reduce fat splashing, potatoes
or other vegetables can be roasted around the meat/
poultry.
Notes:
4
When cooking stuffed meat or poultry
calculate the cooking time from the total
weight of the meat plus the stuffing.
4
For joints cooked in foil or covered
roasters, and for lidded casseroles, add 5
minutes per 450g (1lb) to the calculated
cooking time.
4
Smaller joints weighing less than 1.25kg
(2½lb) may require 5 minutes per 450g
(1lb) extra cooking time.
4
Position the oven shelf so that the meat
or poultry is in the centre of the oven.
4
It is recommended that the appliance is
cleaned after open roasting.
Cook in oven at Gas
Mark 5
Approximate Cooking
Time (preheated oven)
Beef
Rare
20 minutes per 450g
(1lb), plus 20 minutes
Medium
25 minutes per 450g
(1lb), plus 25 minutes
Well
done
30 minutes per 450g
(1lb), plus 30 minutes
Lamb
Medium
25 minutes per 450g
(1lb), plus 25 minutes
Well
done
30 minutes per 450g
(1lb), plus 30 minutes
Pork
35 minutes per 450g
(1lb), plus 35 minutes
Poultry
20 minutes per 450g
(1lb), plus 20 minutes

21
ROAST TURKEY
Roasting turkey involves cooking two different types
of meat – the delicate light breast meat, which must
not be allowed to dry out, and the darker leg meat,
which takes longer to cook.
The turkey must be roasted long enough for the legs
to cook, so frequent basting is necessary. The breast
meat can be covered once browned.
To test if the turkey is cooked, push a fine skewer into
the thickest part of the thigh. If the juices run clear,
the turkey is cooked. If the juices are still pink, the
turkey will need longer cooking.
4
Always make sure that the turkey is
completely thawed and that the giblets
are removed before cooking.
4
Turkey should be roasted at gas mark 5
for 20 minutes per lb, plus 20 minutes,
unless packaging advises otherwise.
4
The turkey can be open roasted, breast
side down, for half of the cook time, and
then turned over for the remainder of the
cooking time.
4
If the turkey is stuffed, add 5 minutes per
1lb to the cooking time.
4
If roasting turkey covered with foil, add 5
minutes per 1lb to the cooking time.
4
Please note: for all other Roasting guides
refer to main oven section and see table.
22
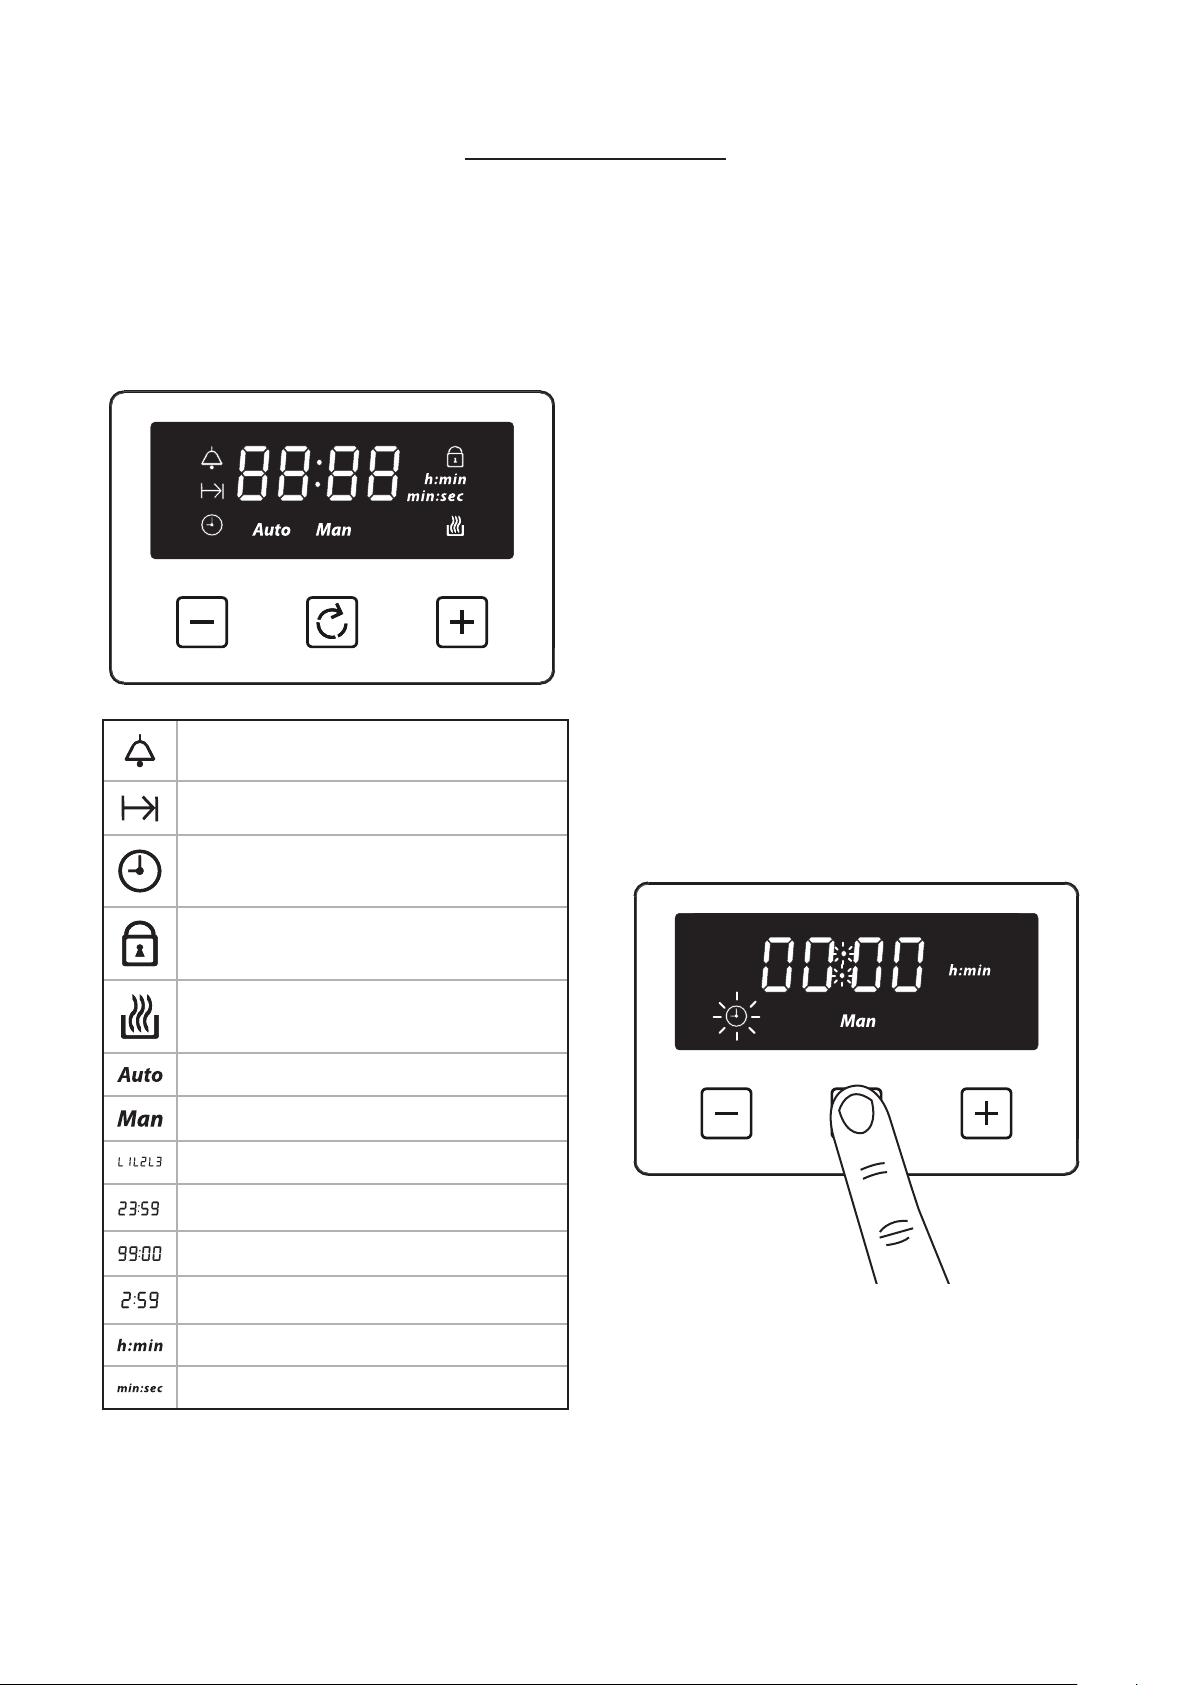
CLOCK/PROGRAMMER
4
Please be aware that only the main oven
is controlled by the programmer.
4
Note: Your clock / programmer may not
have all these functions
MenuMinus Plus
Minute minder
Cooking time / Duration
Time of day
Key Lock
Auto cooking
Automatic mode
Manual mode
, ,
Volume level
, ,
7-segment display
Max. adjustable minute minder
Max. adjustable cooking time
Display hours:minutes
Display minutes:seconds
USING THE TOUCH CONTROLS
Menu – Scroll through to select a function
Plus – Increase time or volume
Minus – Decrease time or volume
4
When a function is selected and the time
or volume is set, the chosen function will
automatically start seven seconds after
setting.
MANUAL MODE
If the programmer is not in 'cook to off' mode you can
use oven functions manually. The manual icon is also
on the display.
SETTING THE TIME OF DAY
By pressing menu, scroll through the functions until
you reach ‘time of day’.
1. Press the function button until the 'time of day'
symbol appears
23
2. Press the plus or minus buttons to set a time
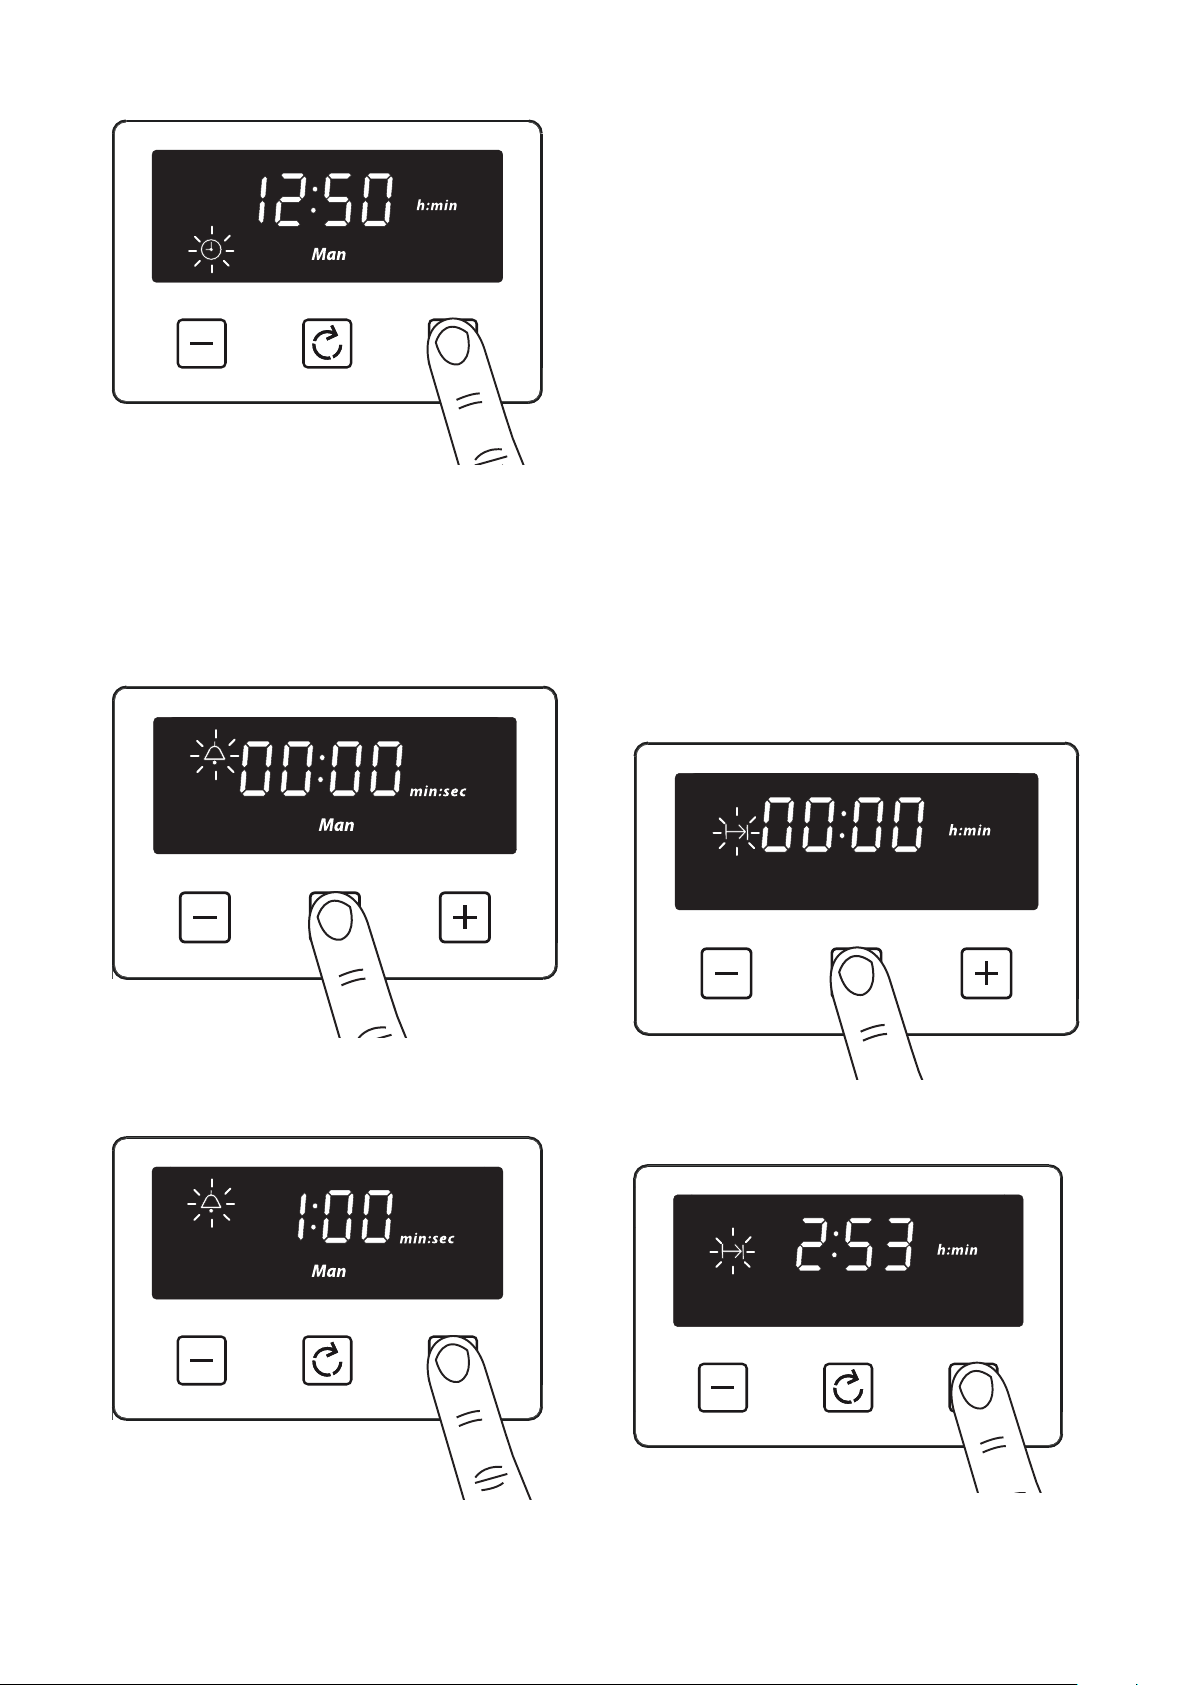
SETTING THE MINUTE MINDER
The maximum cooking time that can be set is 99
minutes.
1. Press the function button until the 'minute minder'
symbol appears
2. Press the plus or minus buttons to set a time
Once set, the minute minder will start to countdown
in steps of seconds. The display will show the
minute minder symbol and the remaining time. The
countdown will continue in the background, if other
functions are being set.
When the set time for the minute minder has
completed, an alarm is heard and the minute minder
symbol will flash on the display. Press any button to
stop the alarm and the time of day is displayed.
To modify or cancel the minute minder
Return to the minute minder function and use
either the plus or minus buttons to adjust the time.
By setting the time to ‘0.00’, this will cancel the
countdown.
SETTING THE COOKING TIME (COOK
TO OFF)
1. Press the function button until the 'cooking time'
symbol appears
2. Press the plus or minus buttons to set a time
24
Once set, the auto cooking symbol and the time of day
is displayed.
When cooking is completed, an alarm is heard and the
manual mode symbol flashes on the display. Press the
Menu button to stop the alarm and then the ‘time of
day’ will then be displayed. Pressing the Menu button
again will return to manual mode.
4
Note: Only the bottom left hand oven
can use the Semi Automatic cooking
function.
4
The maximum cooking time that can be
set is 23 hours and 59 minutes.
To modify or cancel the cooking time
Return to the ‘cooking time’ function and use either
the plus or minus buttons to set the time. By setting
the time to ‘0.00’, this will cancel the countdown.
Enter cooking duration as described in ‘Setting the
cooking time’ section.
The display shows the current ‘time of day’ plus
the ‘end of cooking time’ symbol. The latest ‘end of
cooking time’ is limited to the current ‘time of day’
plus the maximum time that can be set (23 hours and
59 minutes).
The auto cooking symbol disappears from the display
once the time, the required cooking settings and
temperature have been set. The appliance will not be
switched on until the set cooking start time, that is
the difference between the cooking end time and the
cooking duration.
When cooking is completed, an alarm is heard and the
manual mode symbol flashes on the display. Press the
Menu button to stop the alarm and then the ‘time of
day’ will then be displayed. Pressing the Menu button
again will return to manual mode.
To modify or cancel the end cooking time
Return to the ‘end of cooking time’ function and use
either the plus or minus buttons to set the time. The
‘end of cooking time’ can be deleted by counting back
using the minus button until it equals the current
time of day.
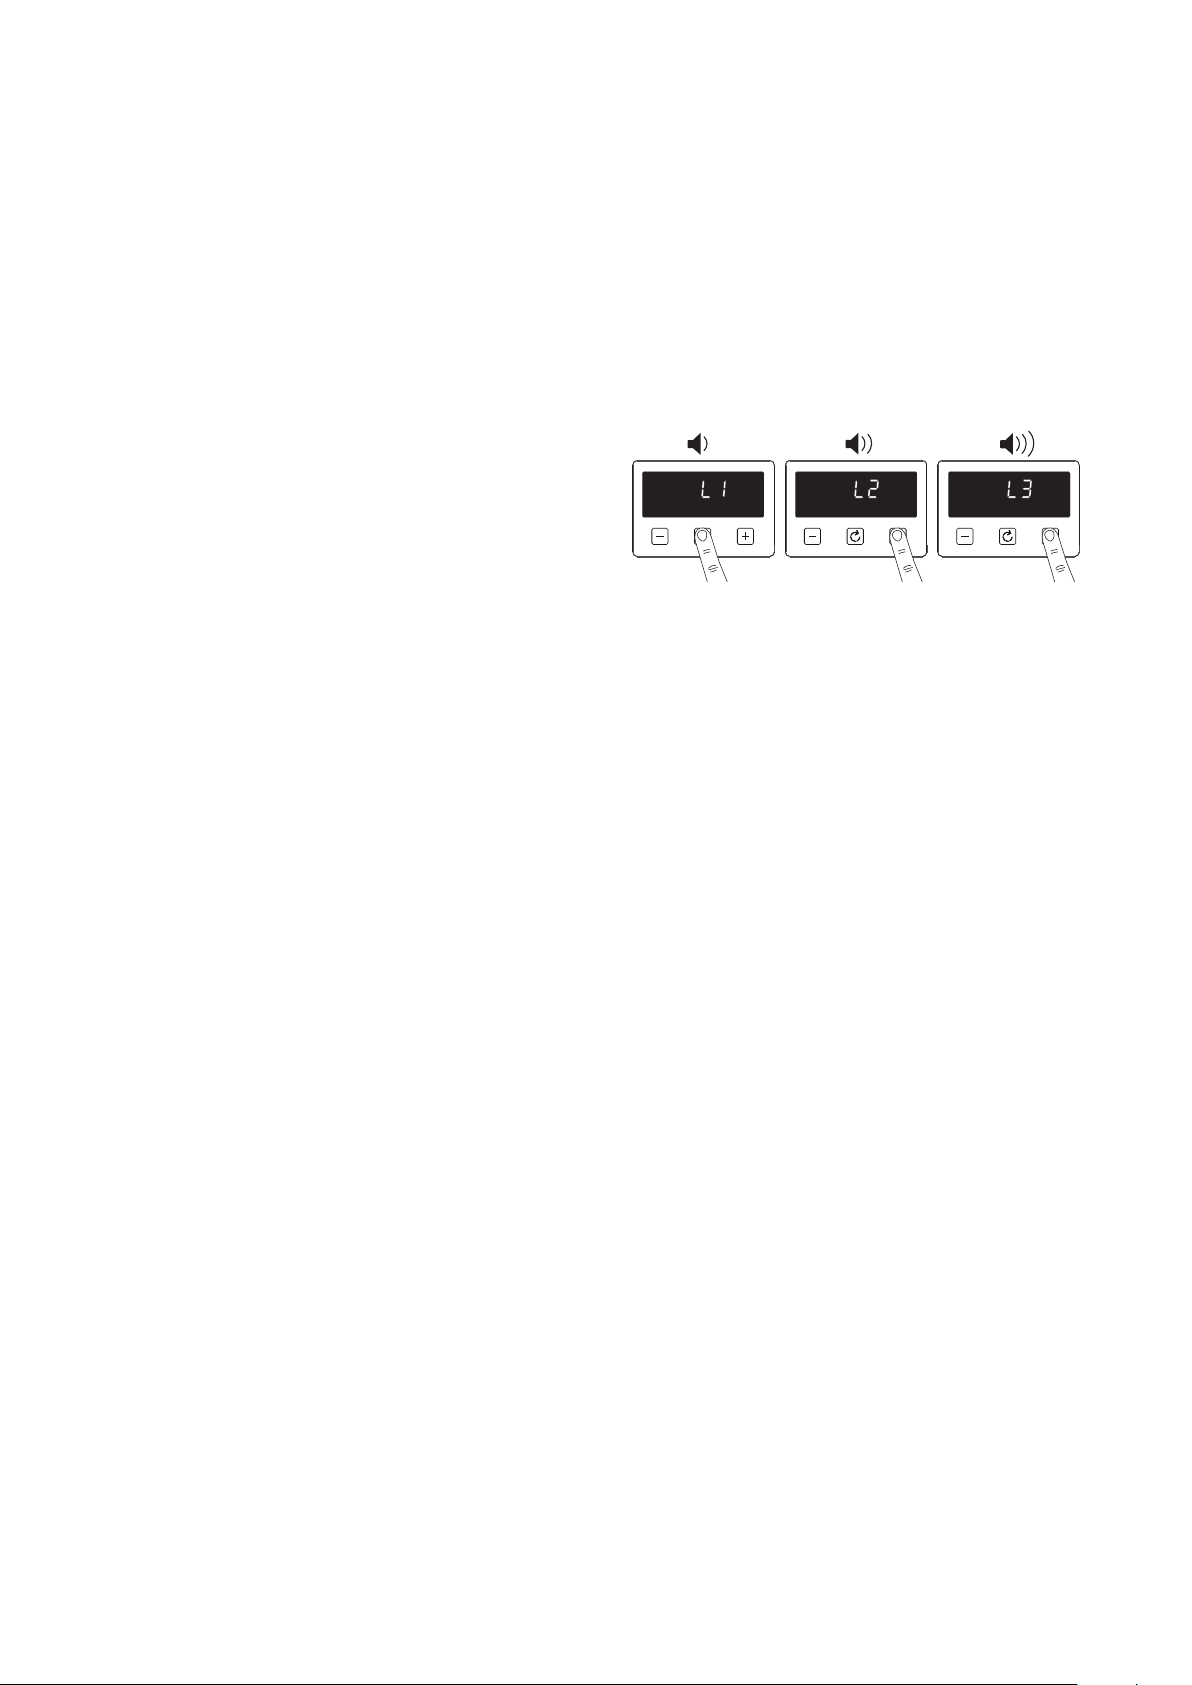
SETTING THE VOLUME
Press the menu button until “LX” (X = 1, 2 or 3)
flashes on the display. Use the plus or minus
buttons to select a tone.
4
Note: Default tone is L3
25
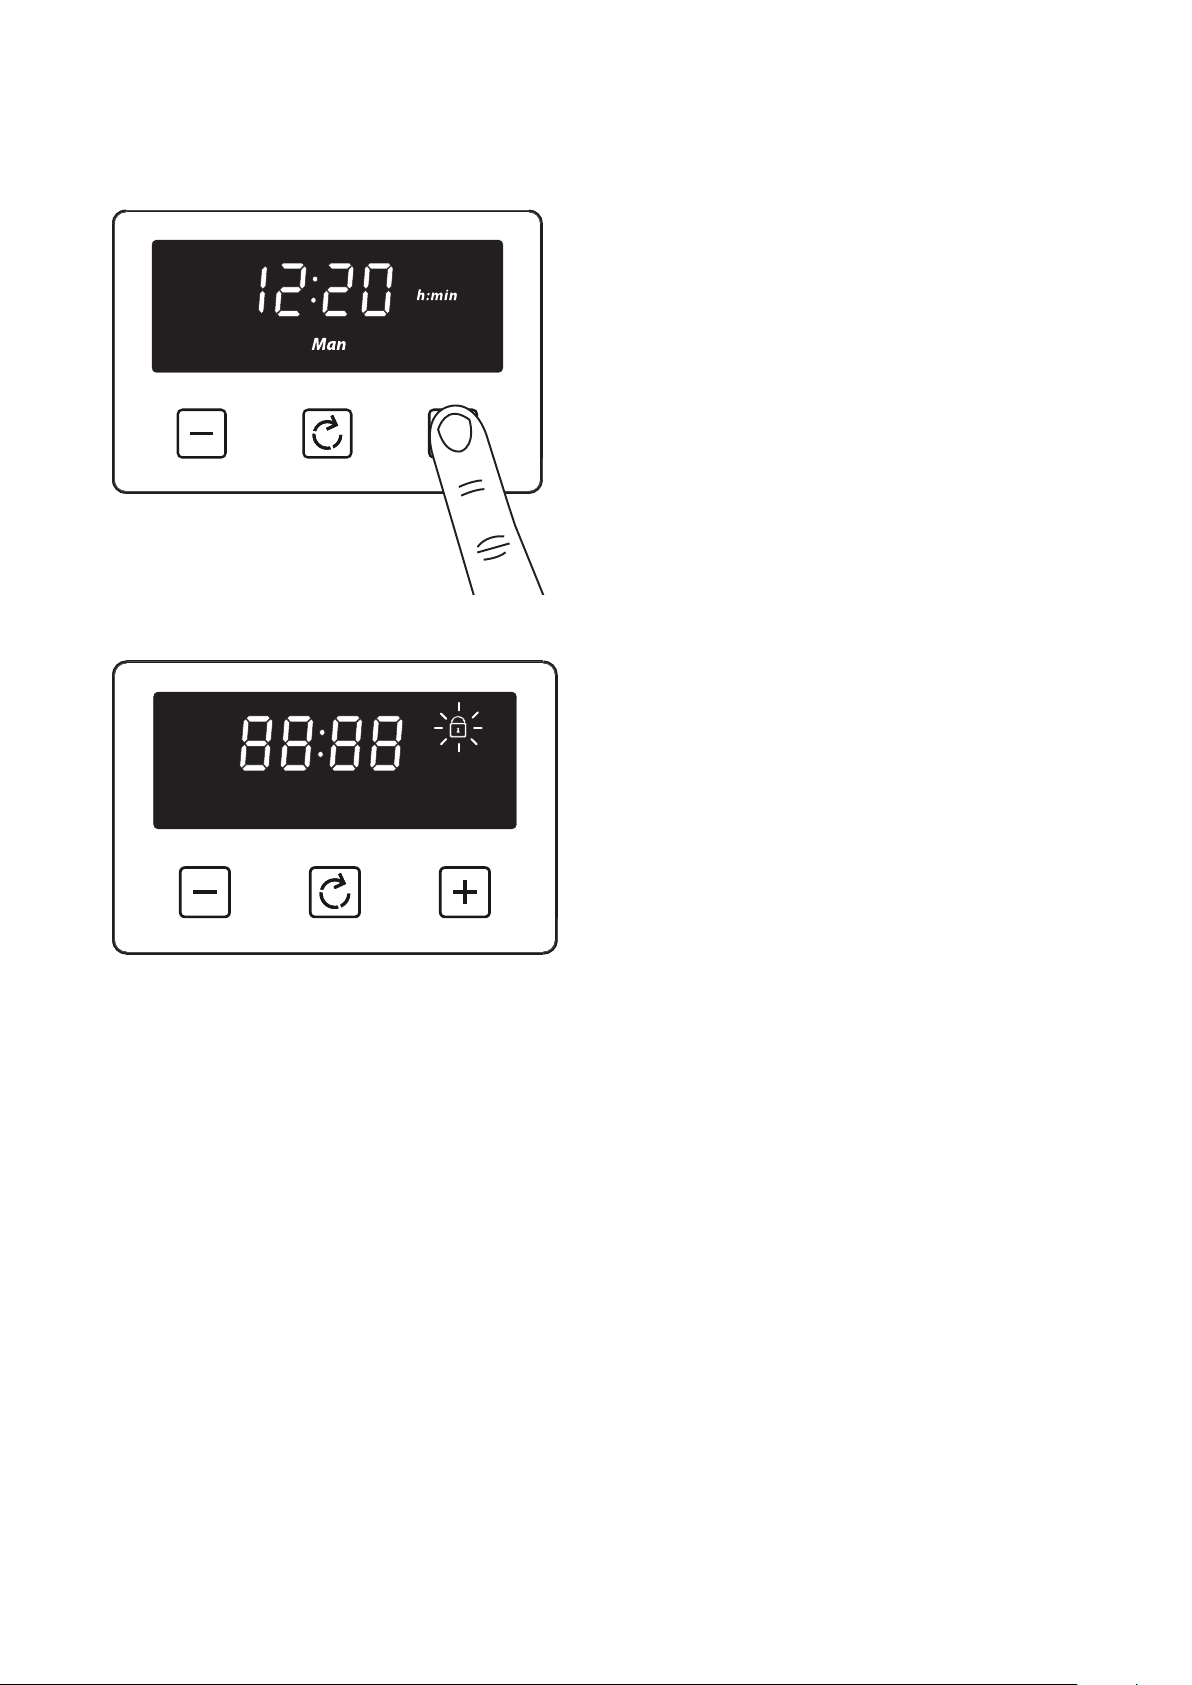
ACTIVATING / DEACTIVATING KEY
LOCK
1. Press and hold the plus button for 3−5 seconds
Once the Key lock is active, the buttons will be
inactive. A two beep signal will be heard if the buttons
are pressed.
To deactivate the Key lock
Press and hold the plus button for 3−5 seconds. The
Key lock symbol will disappear and the appliance
can continue to be used.
4
Note: In case of main power loss for a
short time (about 1.5 minutes), timer
maintains its status.
4
Key lock status and buzzer tone are
memorized independent of the power
loss duration.
26
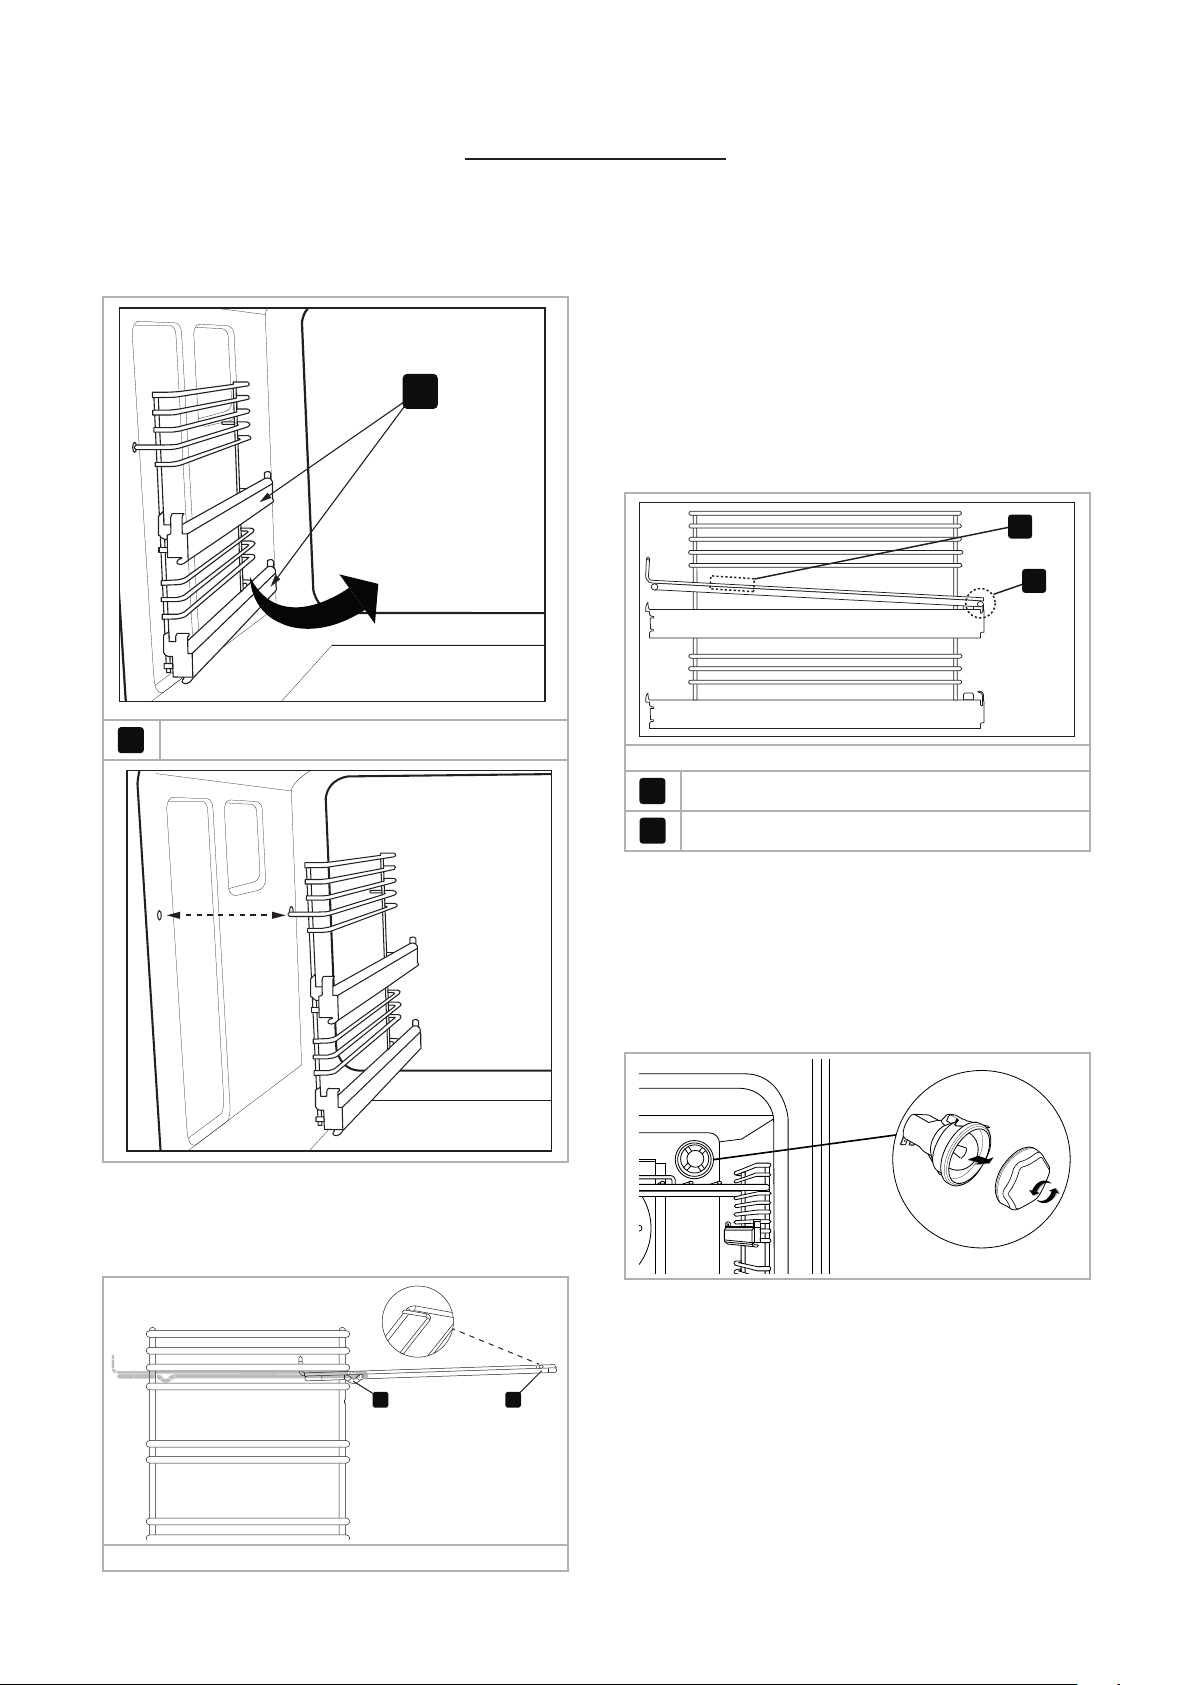
REMOVING SHELF RUNNERS
REMOVING SHELF RUNNERS
Telescopic positions
(if fitted)
1
1
Telescopic positions (if fitted)
STANDARD SHELVES
1 2
Front of appliance
1. Slightly raise the shelf and insert in the chosen
shelf position
2. Ensure the shelf is fully pushed back towards the
back of the oven, until the shelf stopper is reached.
REMOVING TELESCOPIC SHELVES
(IF FITTED)
2
1
2
Front of appliance
1
Grasp and lift shelf
2
Lift shelf from the retaining tabs
4
Before removing the shelves completely,
please make sure that the shelf is
unclipped from the retaining tabs.
CHANGING THE LIGHT BULB
6 Warning! Switch off the power before
you change the light bulb.
4
Not all appliances have the same number
and type of bulbs. Before you replace
your bulb, check to see what type you
have. Please remember that bulbs are not
covered by your warranty.
27
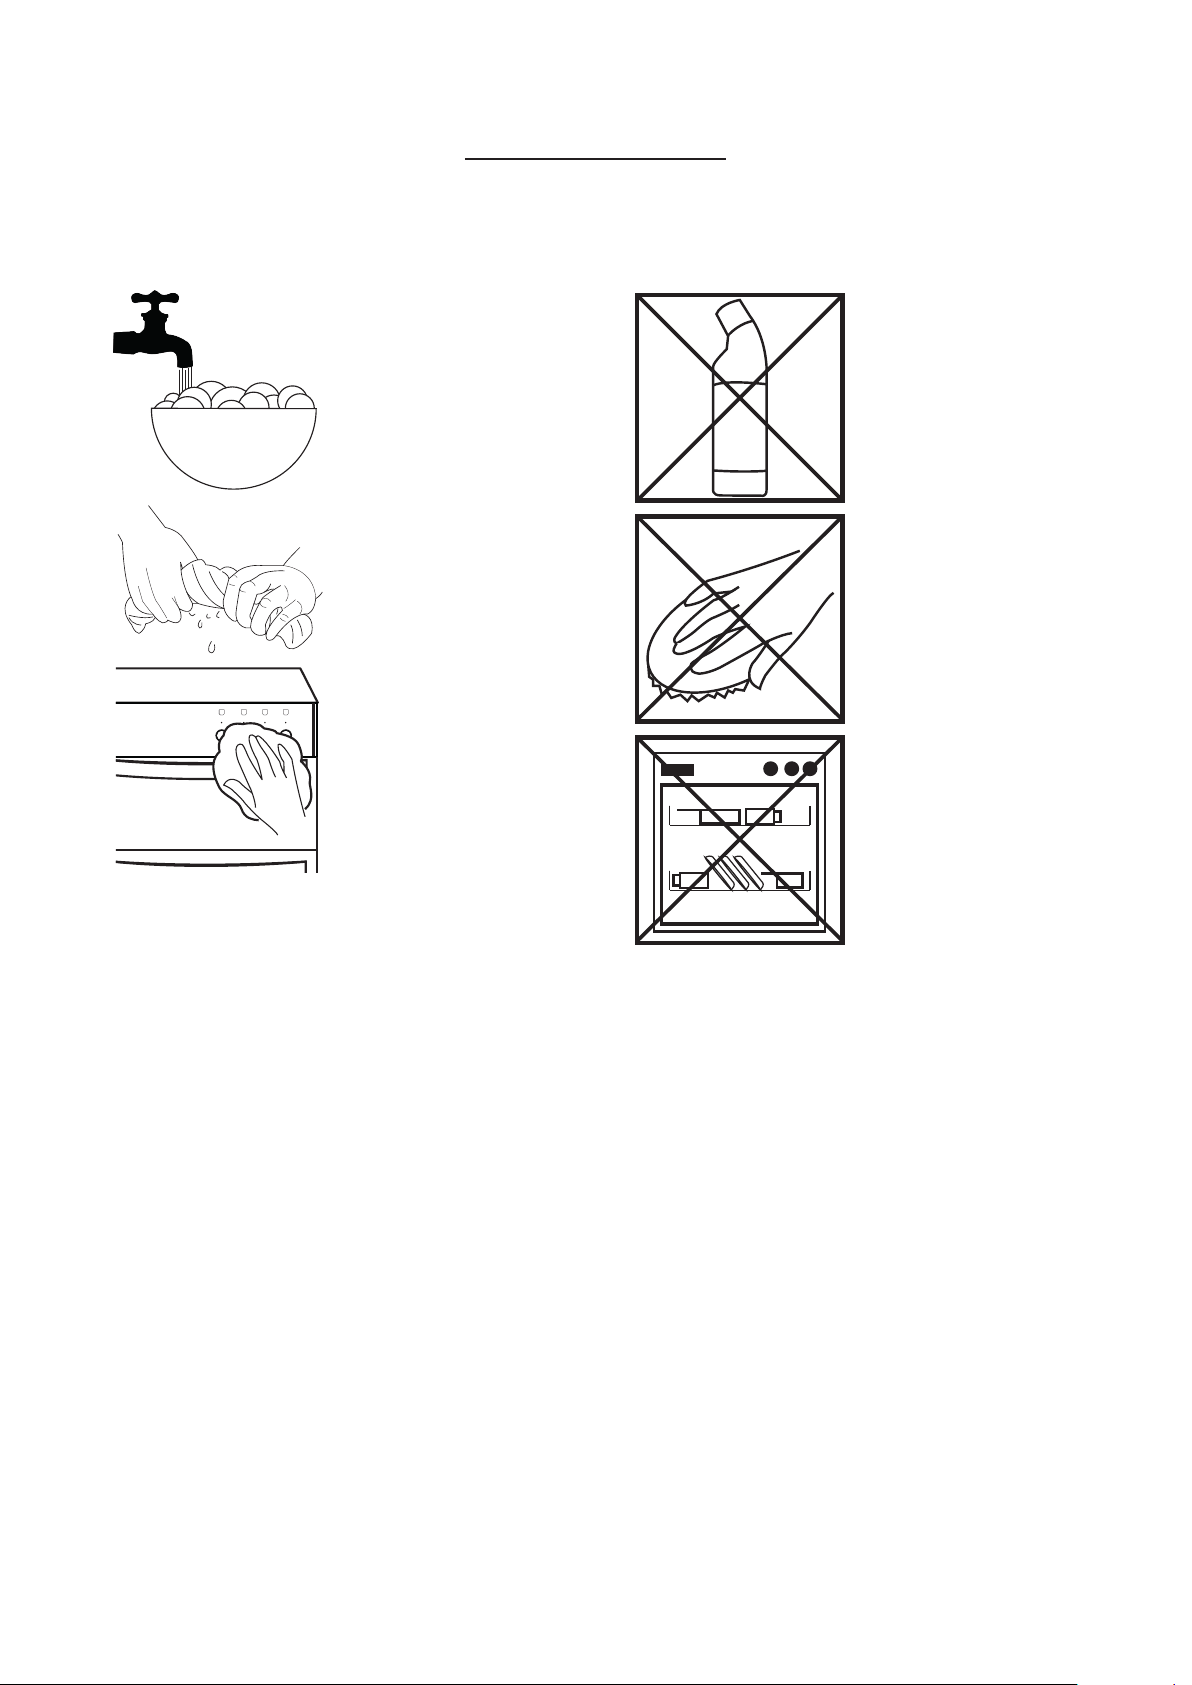
CLEANING YOUR APPLIANCE
DO'S
H
Warm, soapy water
Clean, wrung out cloth
Wipe with damp cloth
Dry with a soft cloth
4
Note: Always switch off your appliance
and allow it to cool down before you
clean any part of it.
4
Note: Please take extra care when
cleaning over the symbols on the control
panel, as this can lead to them fading.
4
Tips: Some foods can mark or damage
the metal or paint work e.g.; Vinegar,
fruit juices and salt. Always clean food
spillages as soon as possible.
DON’TS
Undiluted bleaches
Chloride products
Wire Wool
Abrasive cleaners
Nylon pads
Steam cleaners
Do not place in the
dishwasher:
Cast iron griddle
Pan supports
6 It is important to clean your appliance
regularly as a build up of fat can affect
its performance or damage it and may
invalidate your guarantee.
6 In addition to the above, do not use metal
scrapers to clean the oven door glass.
4
We offer a great range of cleaning
products and accessories for your
appliance. To shop, please visit our
website located at the front of this User
Guide.
28
TECHNICAL DATA
6 WARNING – This cooker must be earthed
GAS - RANGE
Data badge
Lower part of the front frame
Appliance class
Class 1 - freestanding cooker
Electrical supply
220 - 240 V
Gas category
Natural Gas I2H & LP Gas I3+
Type of gas
Please see data badge for your specified gas type. Can be converted from
natural gas to LPG. Never attempt to convert an appliance unless the data
badge states you can.
Gas pressure settings
G20 Natural gas @ 20 mbar
G30 Butane @ 28-30mbar
G31 Propane @ 37mbar
Pressure test point
Use the oven injector.
Burner Aeration
Fixed
Burner / Element Nat Gas LPG Butane g/h Propane g/h
(kW) Injector (kW) Injector
Hob - small x 2 1.00 77 1.00 50 73 72
Hob - medium x 3 2.00 104 2.00 70 145 143
Hob - large 3.00 129 3.00 87 218 215
Hob - wok 4.00 152 4.00 100 291 286
Grill 2.40 115 2.40 76 176 172
Main Oven 2.50
180
amal
2.40 70 amal 182 179
ELECTRICAL SUPPLY / LOAD
Electrical supply Max load (W)
240 V 70
Oven Lamps / Fans
Lamps 25 W each
Cooling fans 10 W each

29

30

31
084014500
Stoney Lane, Prescot, Merseyside L35 2XW
belling.co.uk
Customer Care
0344 815 3740
Product Information Helpline
0344 248 4149
WWW.BELLING.CO.UK