Loading ...
Loading ...
Loading ...
11
Before using the oven for the first time
In this section, you can find out what you must do before using
your appliance to prepare food for the first time. Read the
Safety information section beforehand.
Remove the appliance packaging and dispose of it
appropriately.
Setting the clock
After the appliance has been connected, the 0 symbol and
four zeros flash in the display. Set the clock.
1. Press the 0 button.
The clock in the display shows 12:00. The time symbols light
up and the brackets are around
0.
2. Use the @ or A button to set the clock.
After a few seconds, the time that has been set is adopted.
Baking out the oven
Precleaning the oven
1. Remove accessories and hook-in racks from the cooking
compartment.
2. Fully remove any remaining packaging, such as small pieces
of polystyrene, from the cooking compartment.
3. Some parts are covered with a protective film. Remove the
protective film.
4. Clean the outside of the appliance with a soft, damp cloth.
5. Clean the cooking compartment with hot soapy water.
Heating up the oven
To remove the new cooker smell, heat up the oven when it is
empty and closed.
1. Turn the temperature selector to the maximum temperature.
2. Switch off the oven after 45 minutes.
Recleaning the oven
1. Clean the cooking compartment with hot soapy water.
2. Fit the hook-in racks.
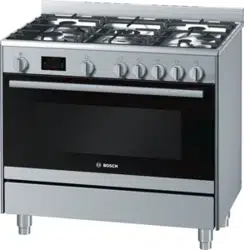
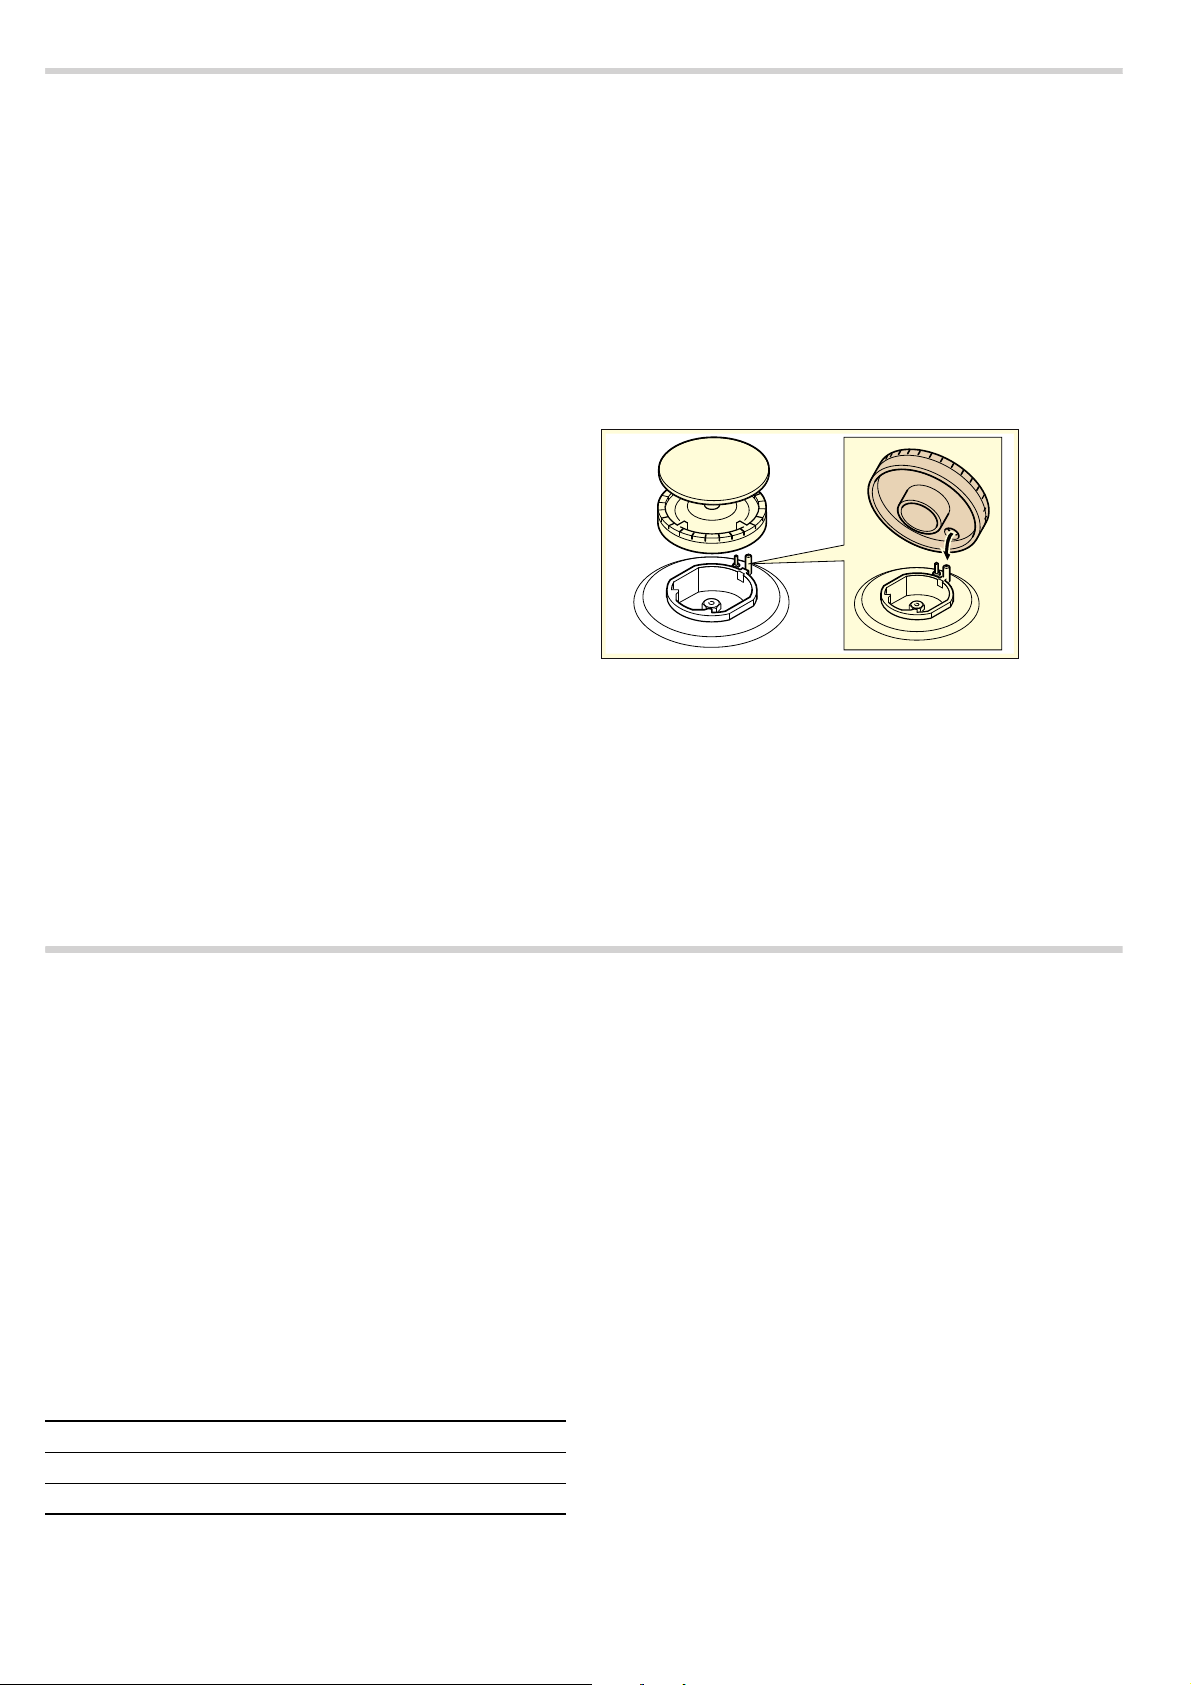
Cleaning the burner caps and cups
1. Clean the burner caps (A) and cups (B) with water and
washing-up liquid.
2. Dry the parts well.
3. Place the burner cup (B) onto the burner (C).
4. Position the burner cap (A) exactly on the burner cup (B).
Cleaning the accessories
Before using the accessories, clean them thoroughly using a
cloth and warm soapy water.
Operating the hob
Notes
■ Appliances with a hob cover must only be switched on if the
hob cover is open.
■ The burner caps must always be positioned exactly on top of
the burner cups. The slots on the burner cup must be free
from obstruction. All parts must be dry.
■ Ensure that the burner is not subjected to draughts caused
by air conditioning systems, fans or similar appliances.
Switching on the gas burner
1. Press the control knob for the required burner and turn it to
the
— position.
The gas burner ignites.
2. Keep the control knob pressed for a few seconds until the
flame stabilises.
3. Set the desired flame setting.
The flame is not stable between positions
Û and —. Always
select a position between
— and ˜.
If the flame goes out
Switch off the control knob. Wait one minute and switch the
burner on again.
: Risk of fire!
If the flame goes out, gas will escape. Never leave the gas
burner unattended during operation. Ensure that there are no
draughts.
If the gas burner does not ignite
In the event of a power cut or damp ignition plugs, light the gas
burner with a gas lighter or a match.
Switching off the gas burner
Turn the control knob for the required hotplate to position
Û.
Abnormal operation
Flames are usually blue and sharply defined. If the flames are
yellowish or noisy or if the gas does not ignite whitin the period
specified under “switching on the gas burner” abnormal
operation is indicated. Refer to chapter “After-sales service” of
this manual for service contact details.
$
%
&
Setting Meaning
˜
Economy flame, lowest power
—
Large flame, highest power
Loading ...
Loading ...
Loading ...