DJI Mini 3 Easy-to-Use Guide for
Beginners

Content
About DJI Mini 3 ....................................................................................................................5
Video Tutorial ................................................................................................................. 5
User Manual .................................................................................................................... 5
Unboxing and Getting Started .......................................................................................... 5
Unboxing ..........................................................................................................................6
Removing the Storage Cover ..................................................................................... 9
Powering on or off the Device ................................................................................. 10
Status Indicator Descriptions ................................................................................... 12
Replacing the Propellers ............................................................................................13
Mounting and Removing the Battery ....................................................................14
Activating Your Device .......................................................................................................15
Step 1: Download the app. ........................................................................................15
Step 2: Connect the drone to other devices. ....................................................... 16
Step 3: Activate for the First Time .......................................................................... 16
Checking Activation Information ............................................................................ 16
Charging Instructions .........................................................................................................16
Choose an Adapter ......................................................................................................17
Charging Method .........................................................................................................18
Charging Duration.......................................................................................................20

Battery Maintenance .................................................................................................. 21
Using for the First Time .....................................................................................................21
Preparing the Aircraft .................................................................................................21
Preparing the Remote Controller ............................................................................ 22
Getting Ready For First Flight .................................................................................. 23
Updating the Firmware .............................................................................................. 23
Intermediate Operations ................................................................................................... 24
QuickShots .....................................................................................................................24
Portrait Mode ............................................................................................................... 24
Zooming ......................................................................................................................... 25
Live Streaming.............................................................................................................. 25
Smart RTH ...................................................................................................................26
Exporting Footage .............................................................................................................. 26
Storage............................................................................................................................26
Installing and Removing a Memory Card ............................................................. 27
Exporting the Photos/Videos ...................................................................................28
Tips for Flight Safety .......................................................................................................... 29
Environmental Considerations .................................................................................29
Pre-flight Checklist ......................................................................................................30
Available Accessories ......................................................................................................... 31
Popular Accessories .................................................................................................... 31
Accessories Compatibility ........................................................................................ 31

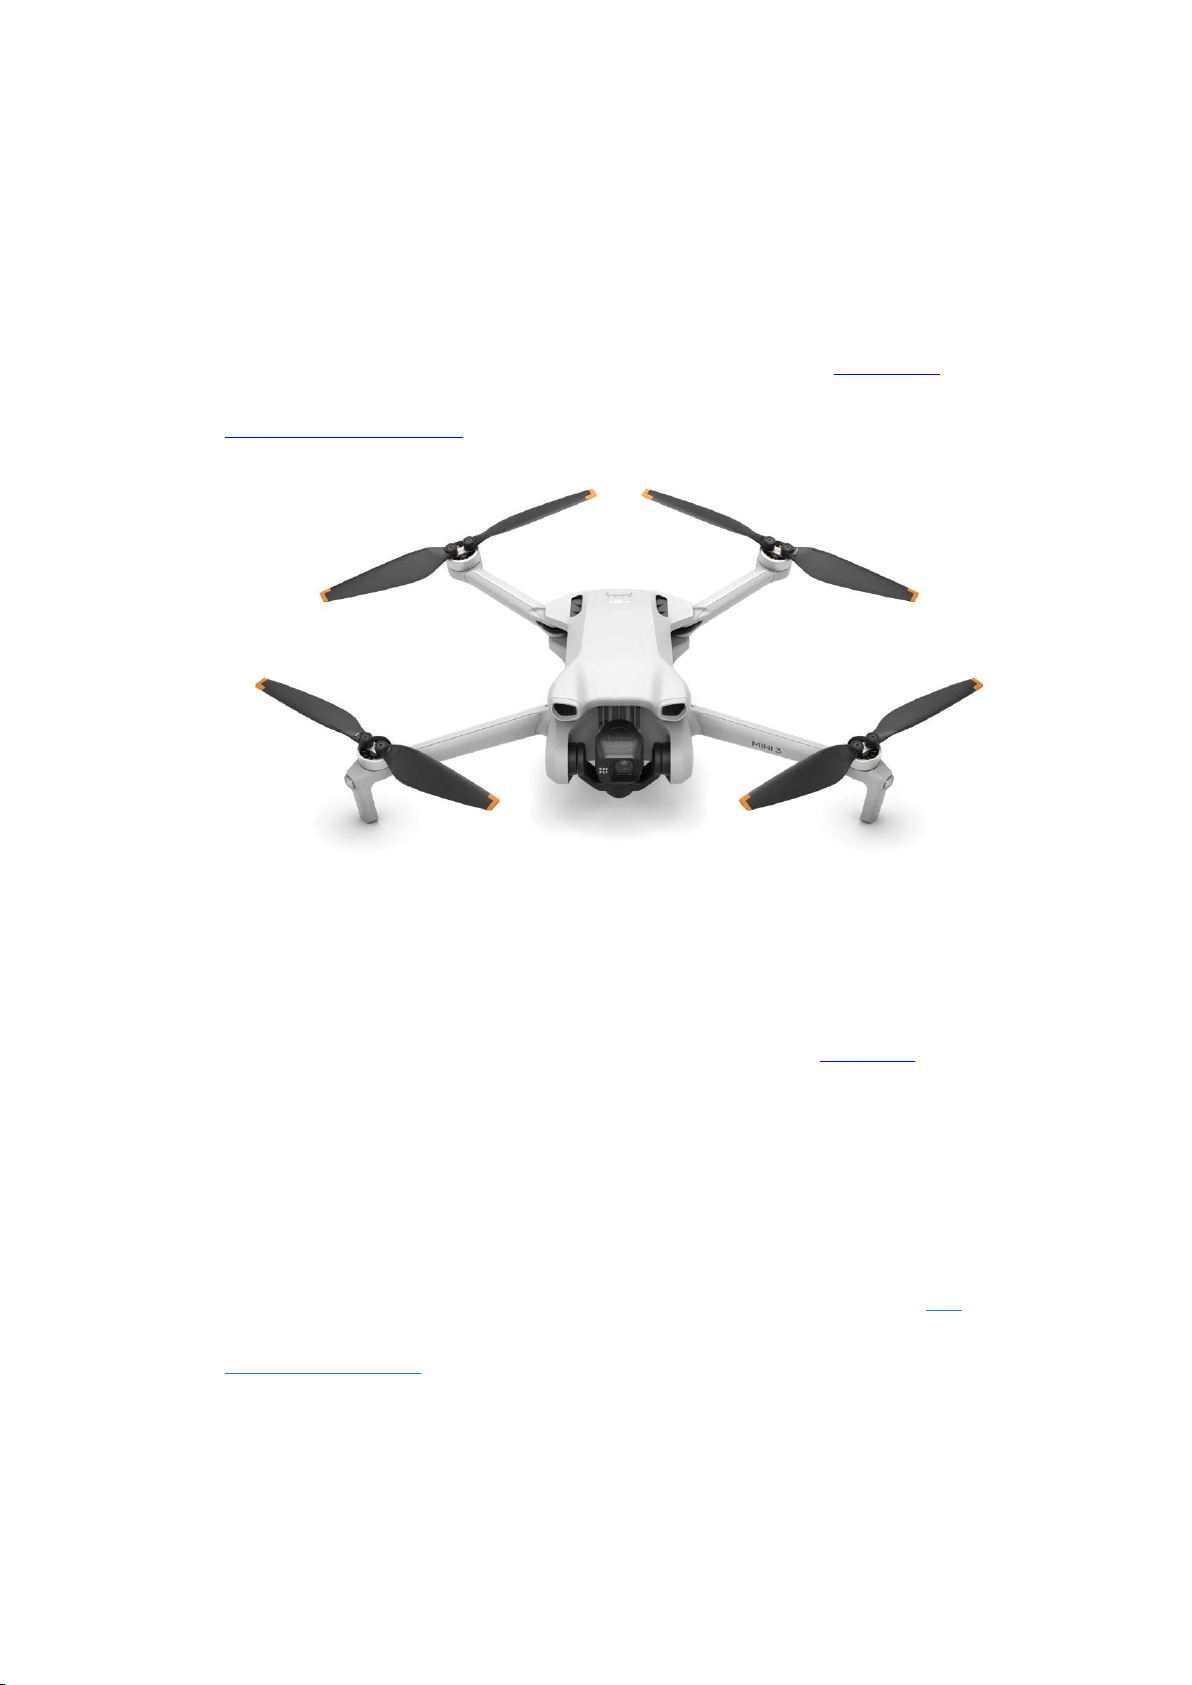
About DJI Mini 3
With Intelligent Flight Battery Plus, DJI Mini 3 can fly for up to 51 min. It
supports abundant intelligent flight features, such as Quickshots, Portrait
Mode, and QuickTransfer. Click here to know details about DJI Mini 3
Technical Specifications.
Video Tutorial
For a step-by-step guide to the usage of DJI Mini 3, please click here to
view the tutorials.
User Manual
For more information about the product, please see the user manual: DJI
Mini 3 User Manual
Unboxing and Getting Started
DJI Mini 3 requires activation before using for the first time. Download DJI
Fly, and connect the drone to remote controller and mobile device. Then
you will need to follow the prompts on the screen to activate the drone.
Here are some helpful tips on how to power on and activate DJI Mini 3.
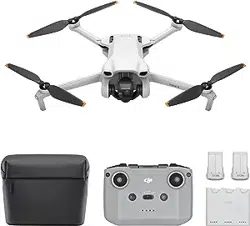
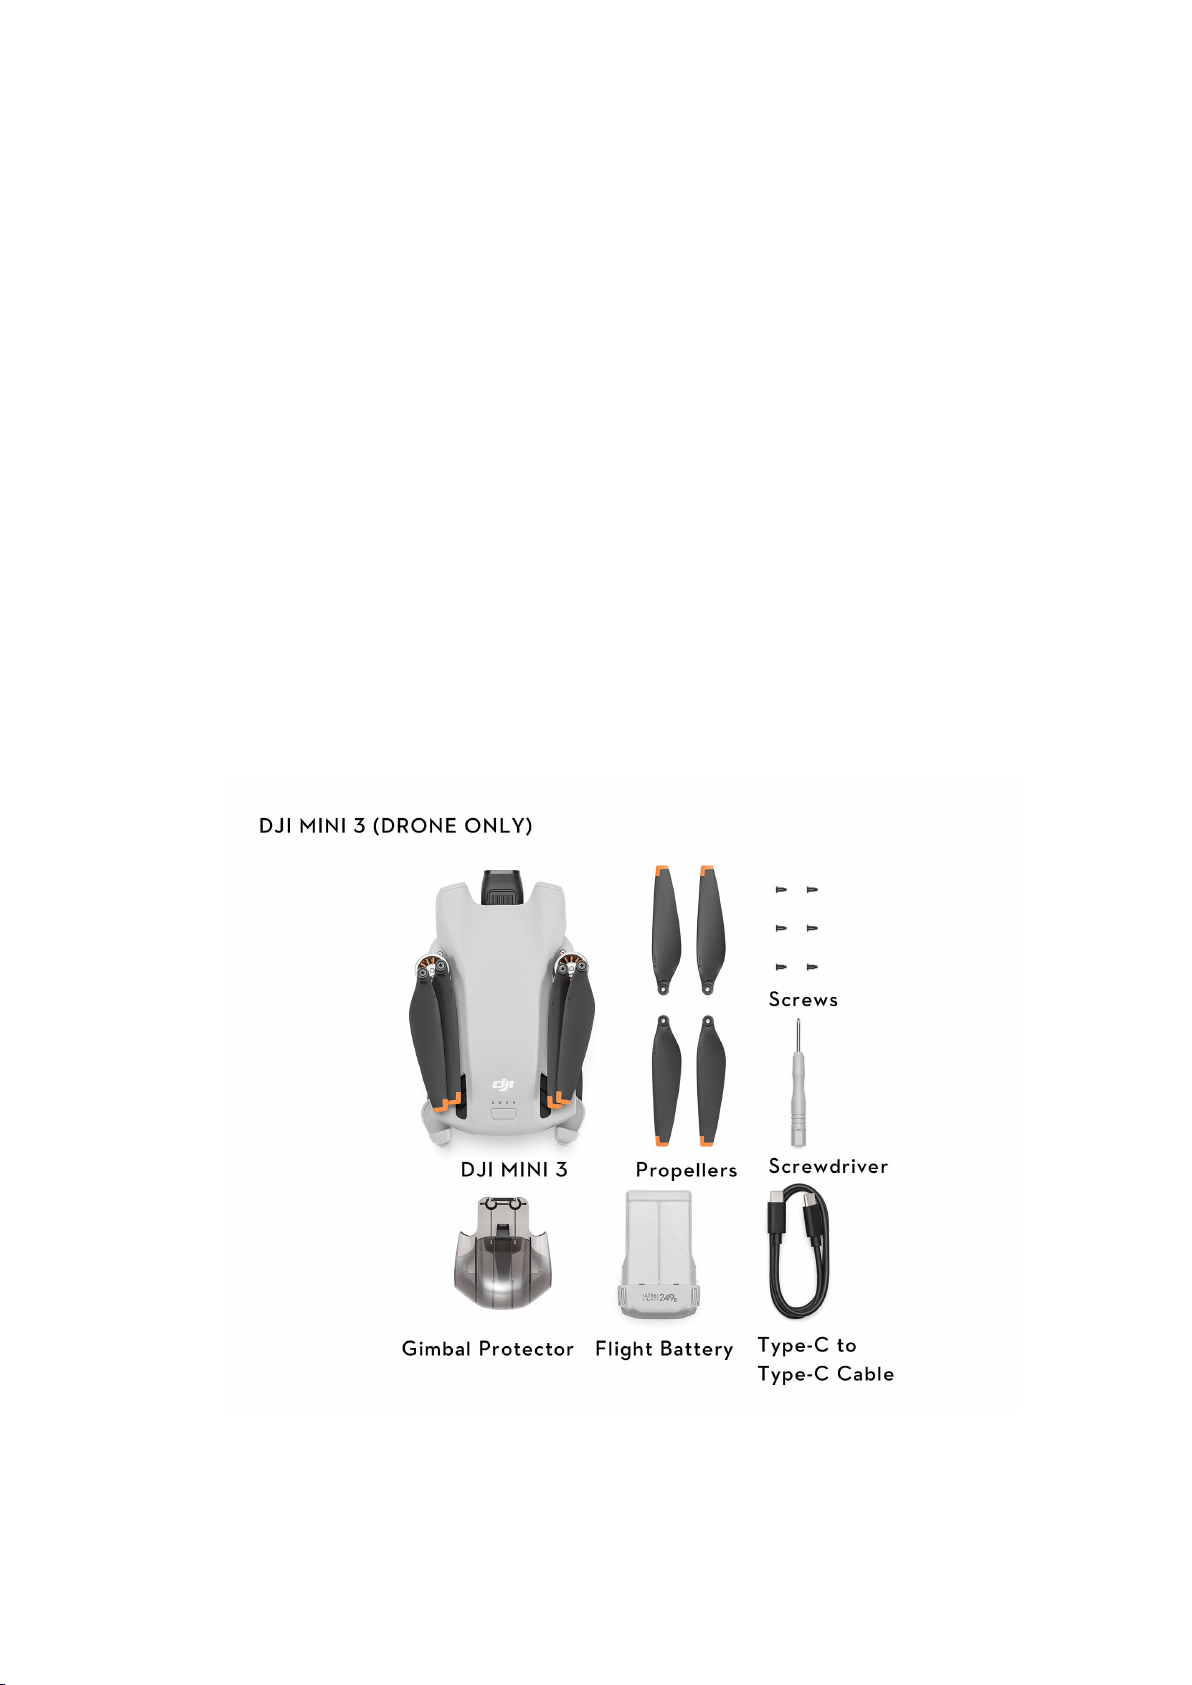
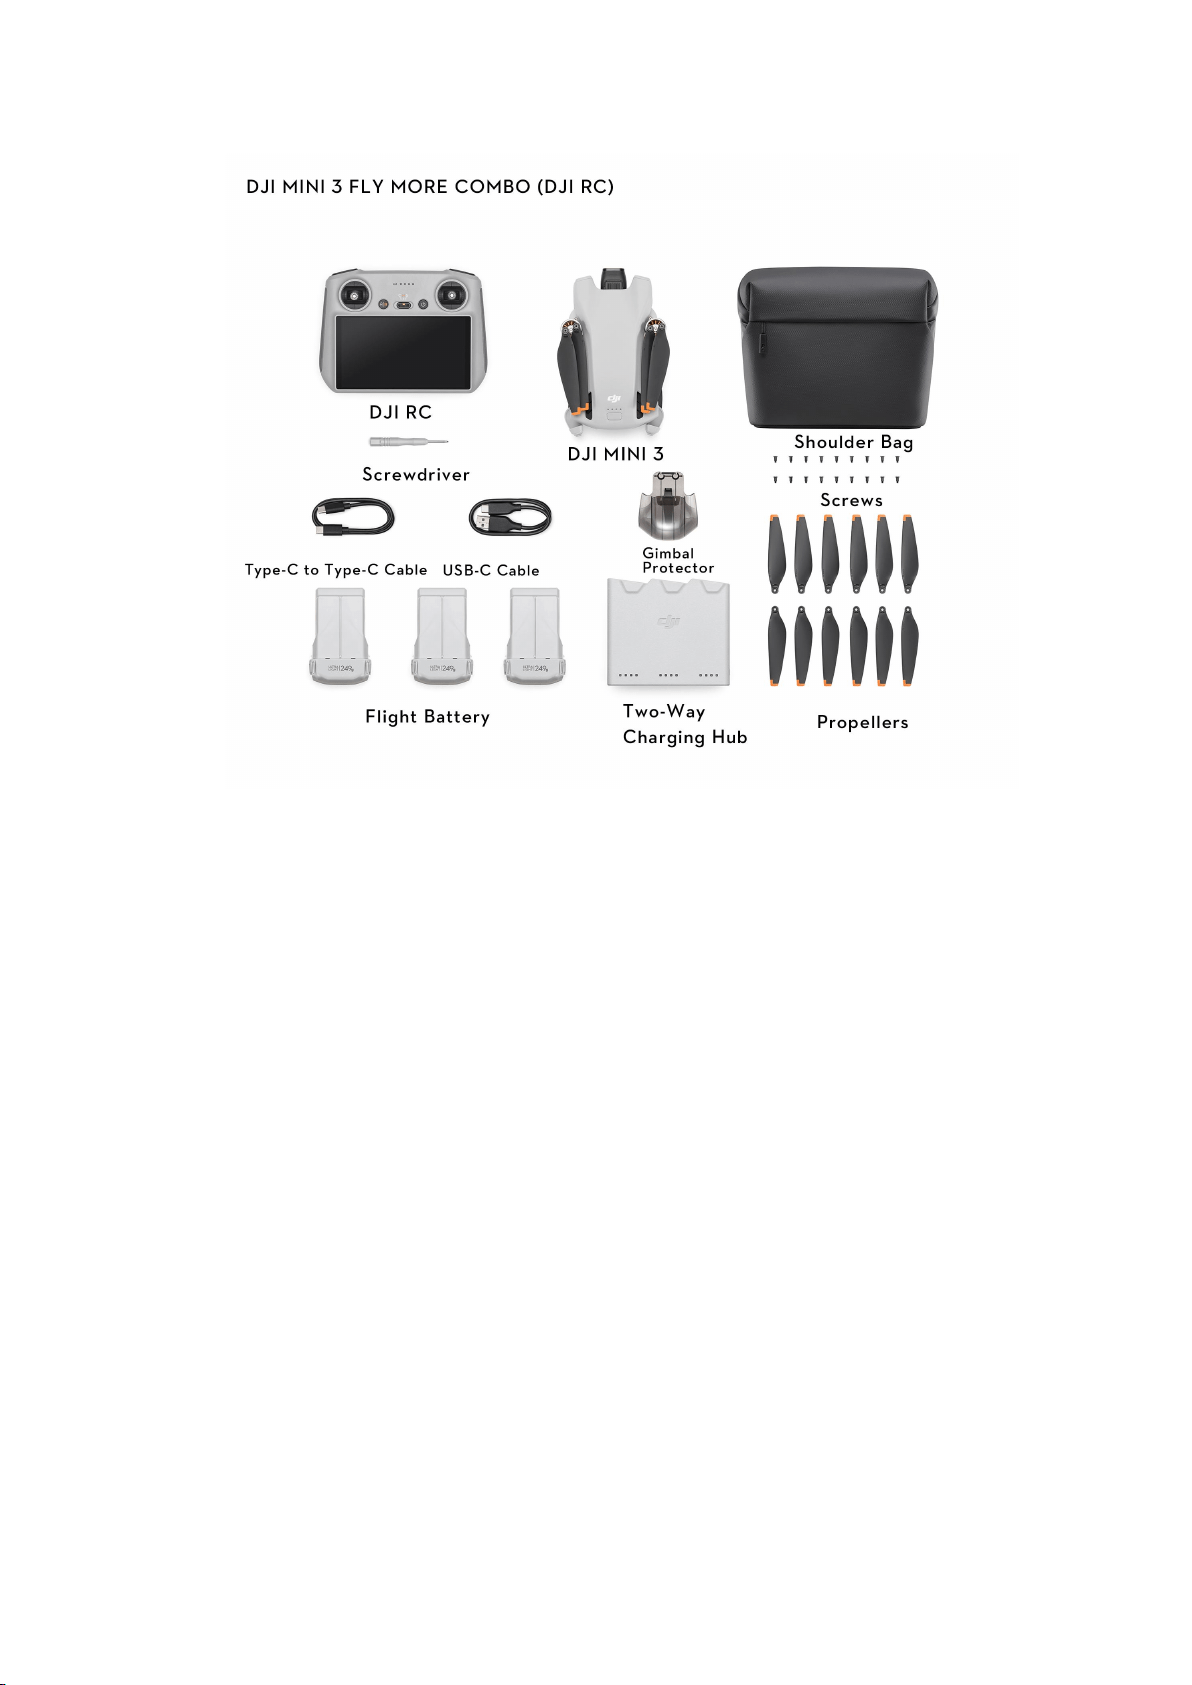
Unboxing
DJI Mini 3 packages vary among different regions. The ones available in
DJI Online Store in your region shall prevail.
In the Box for Different Combos:
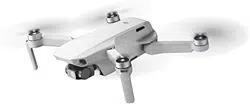
· DJI Mini 3 (Drone Only)
· DJI Mini 3
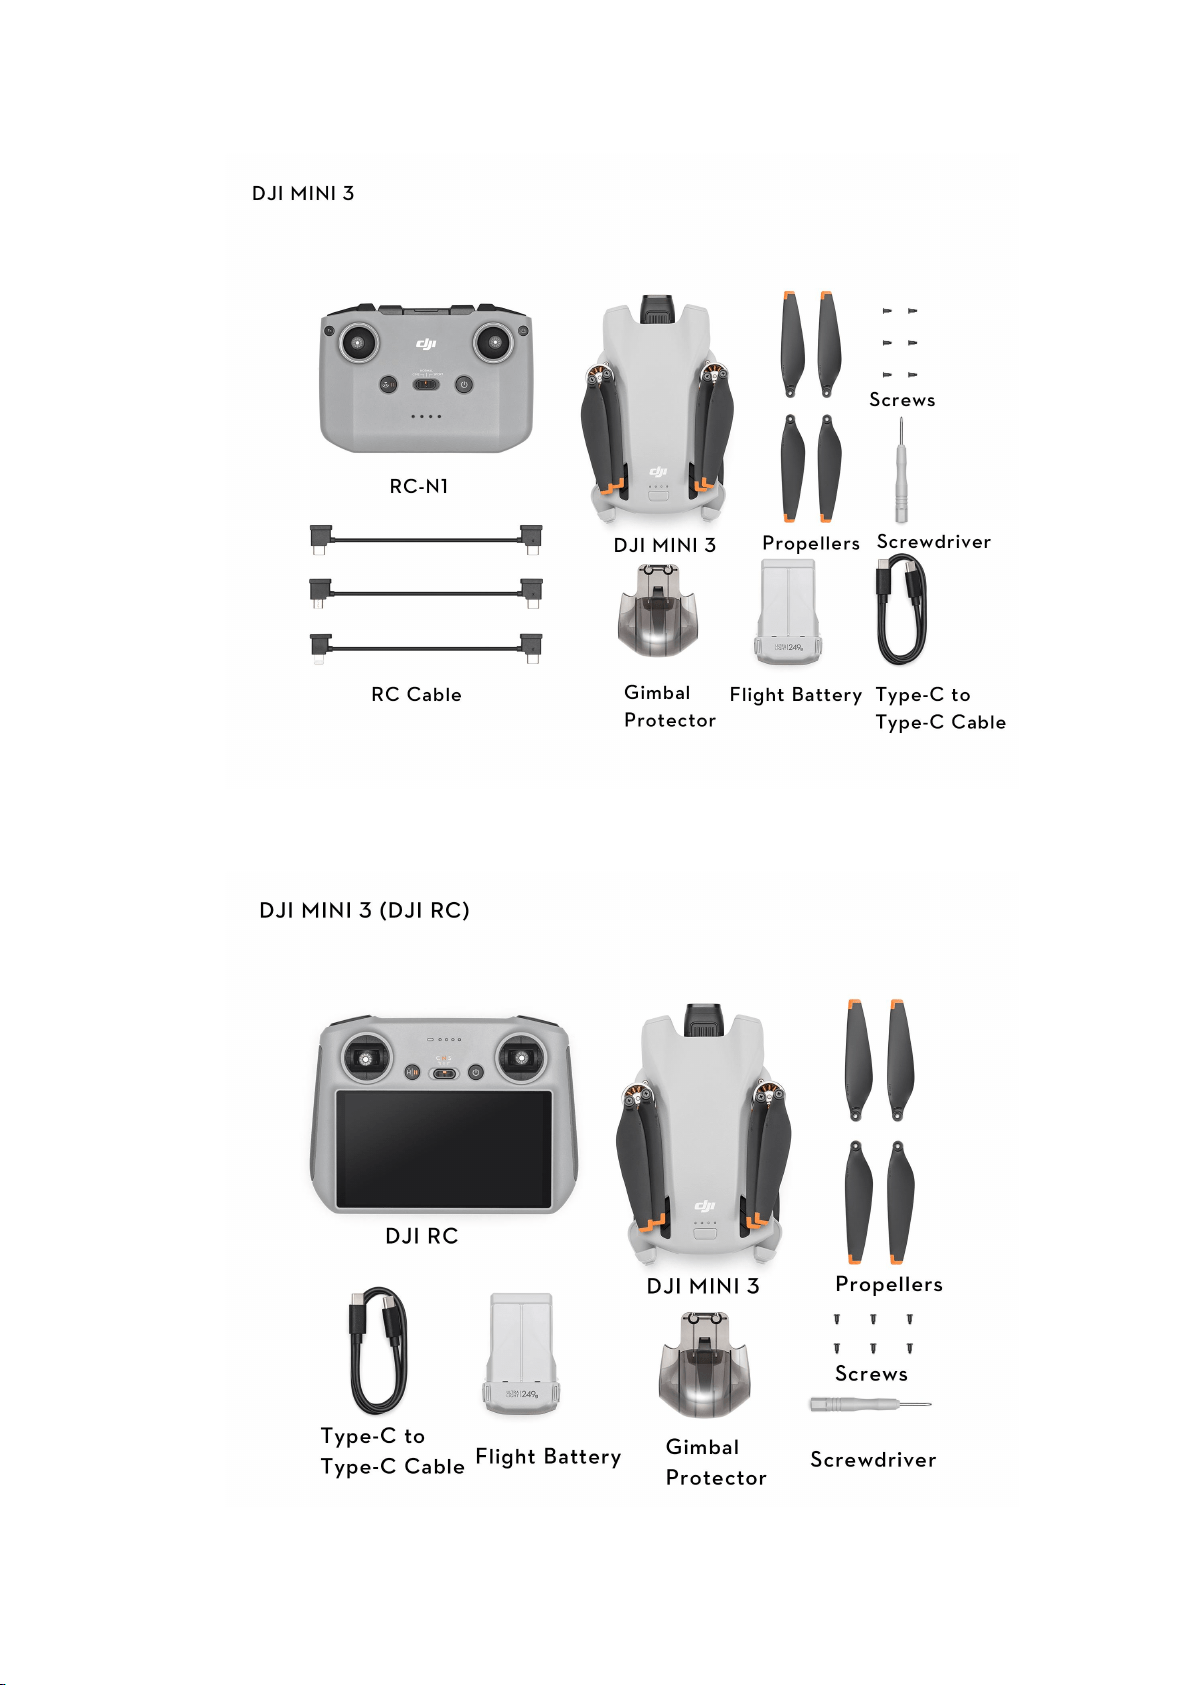
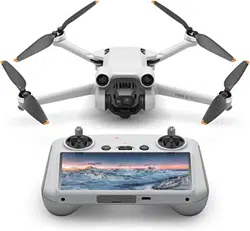
· DJI Mini 3 (DJI RC)
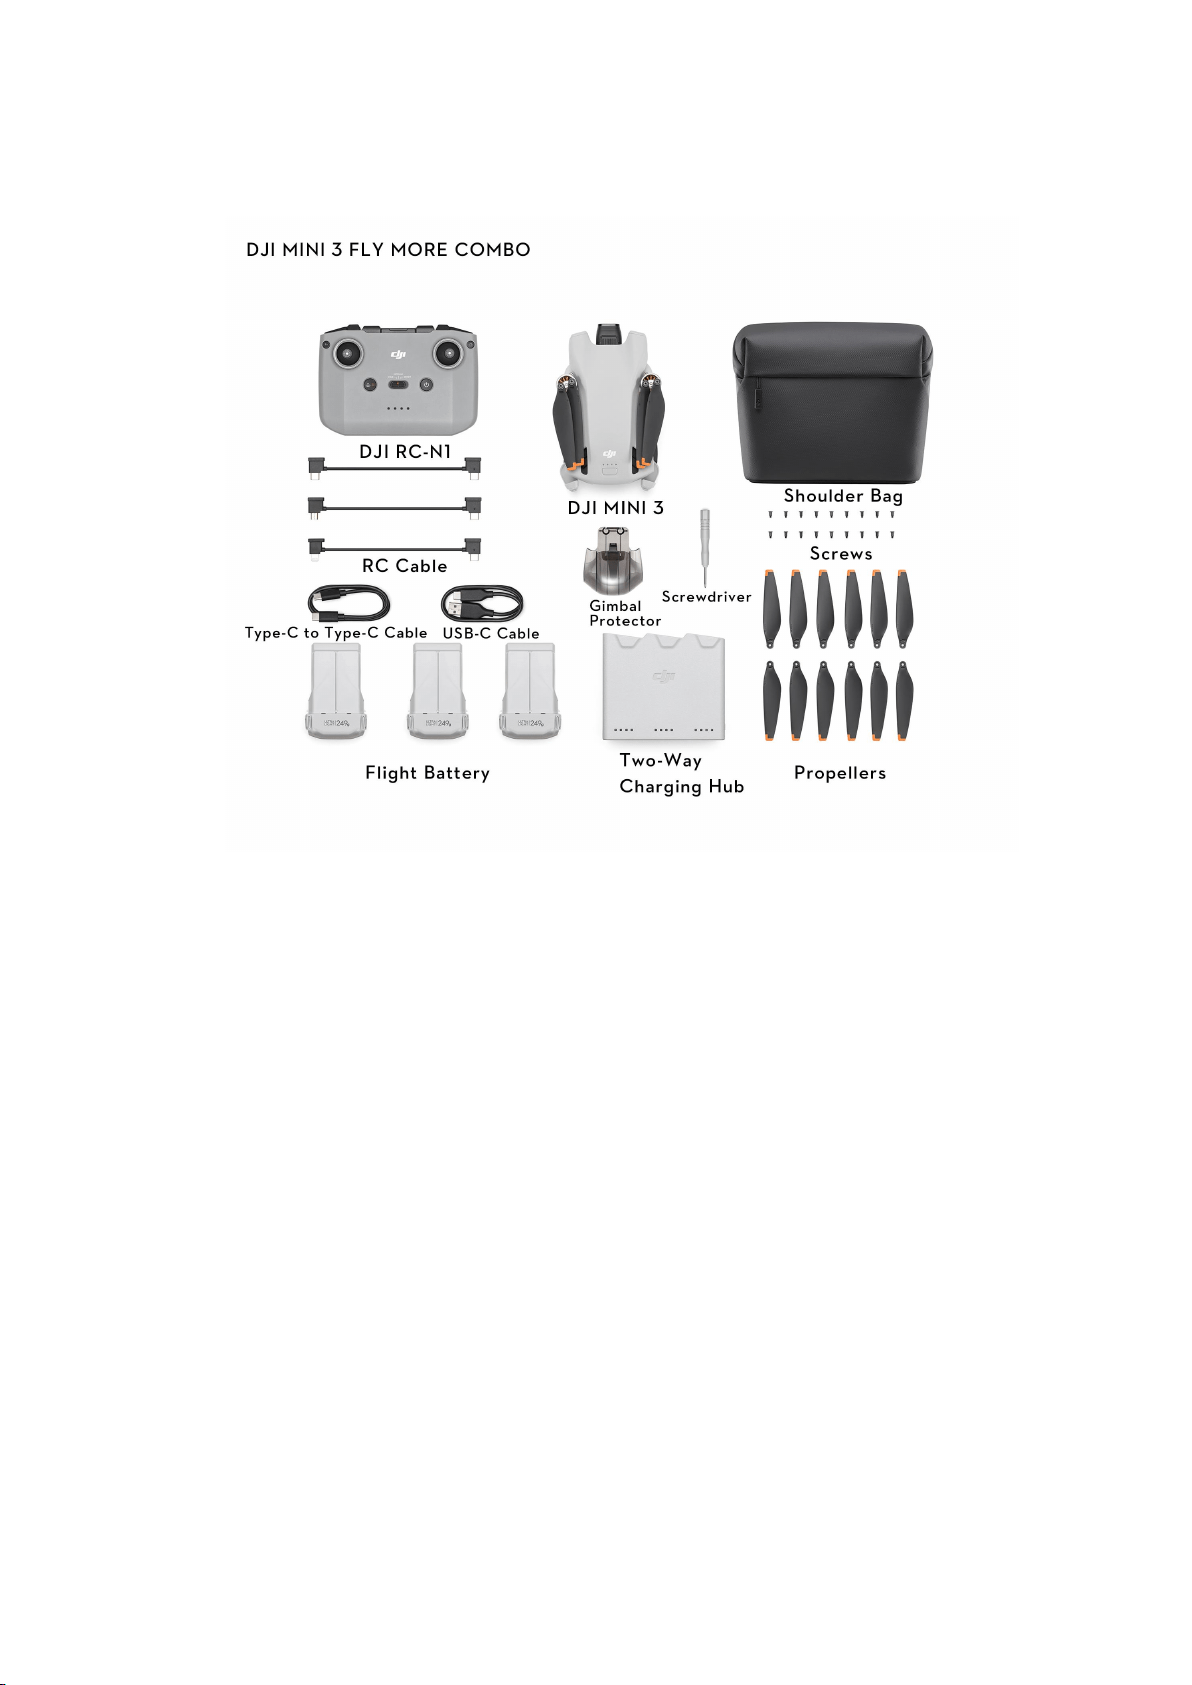
· DJI Mini 3 Fly More Combo
· DJI Mini 3 Fly More Combo (DJI RC)
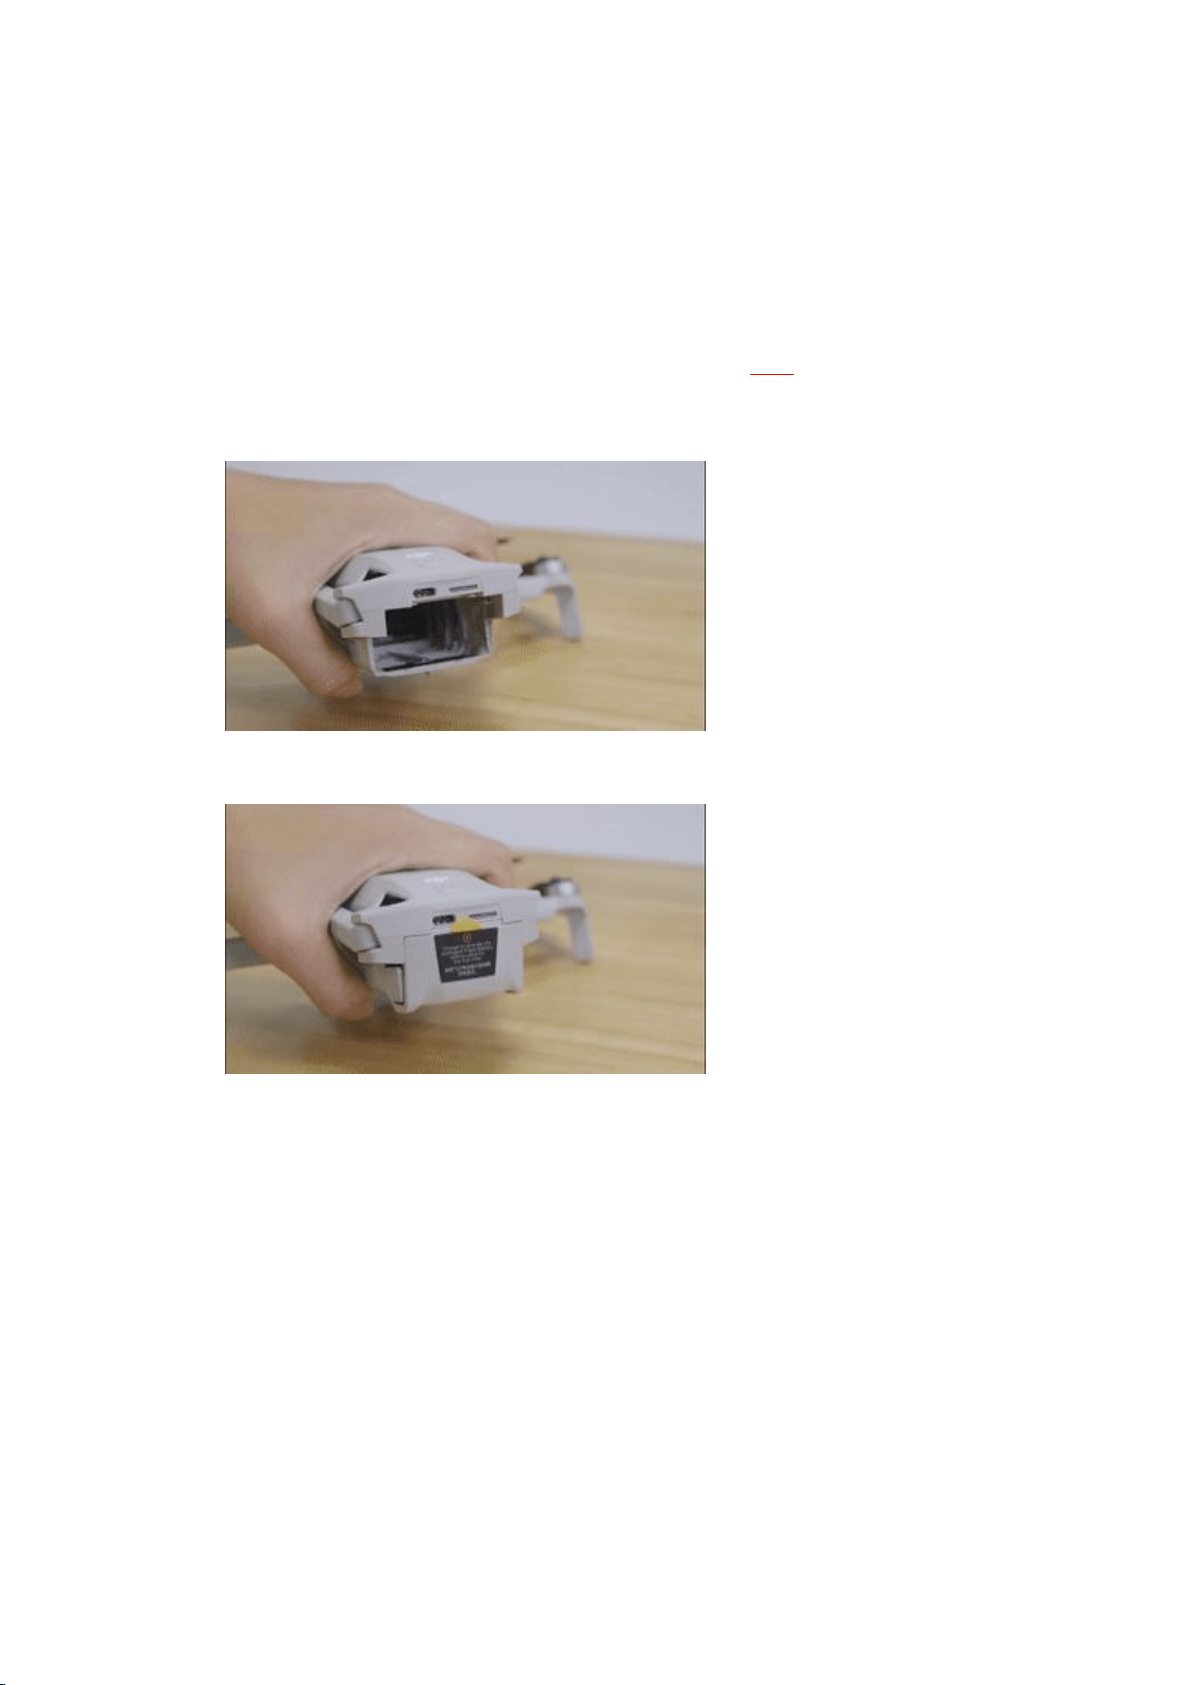
Removing the Storage Cover
[Important] Remove the storage cover before powering on the drone.
· When powering on the drone, the gimbal will rotate and perform
self-check*. If the storage cover is not removed, the motor may be
damaged or the service life will be affected, or even impact the flight
safety after takeoff.
· To safeguard the camera lens and aircraft arm, you’d better attach the
storage cover to your drone during daily storage or carrying outdoors.
* If the drone is powered on without activation, the gimbal will not vibrate
and run self-check.
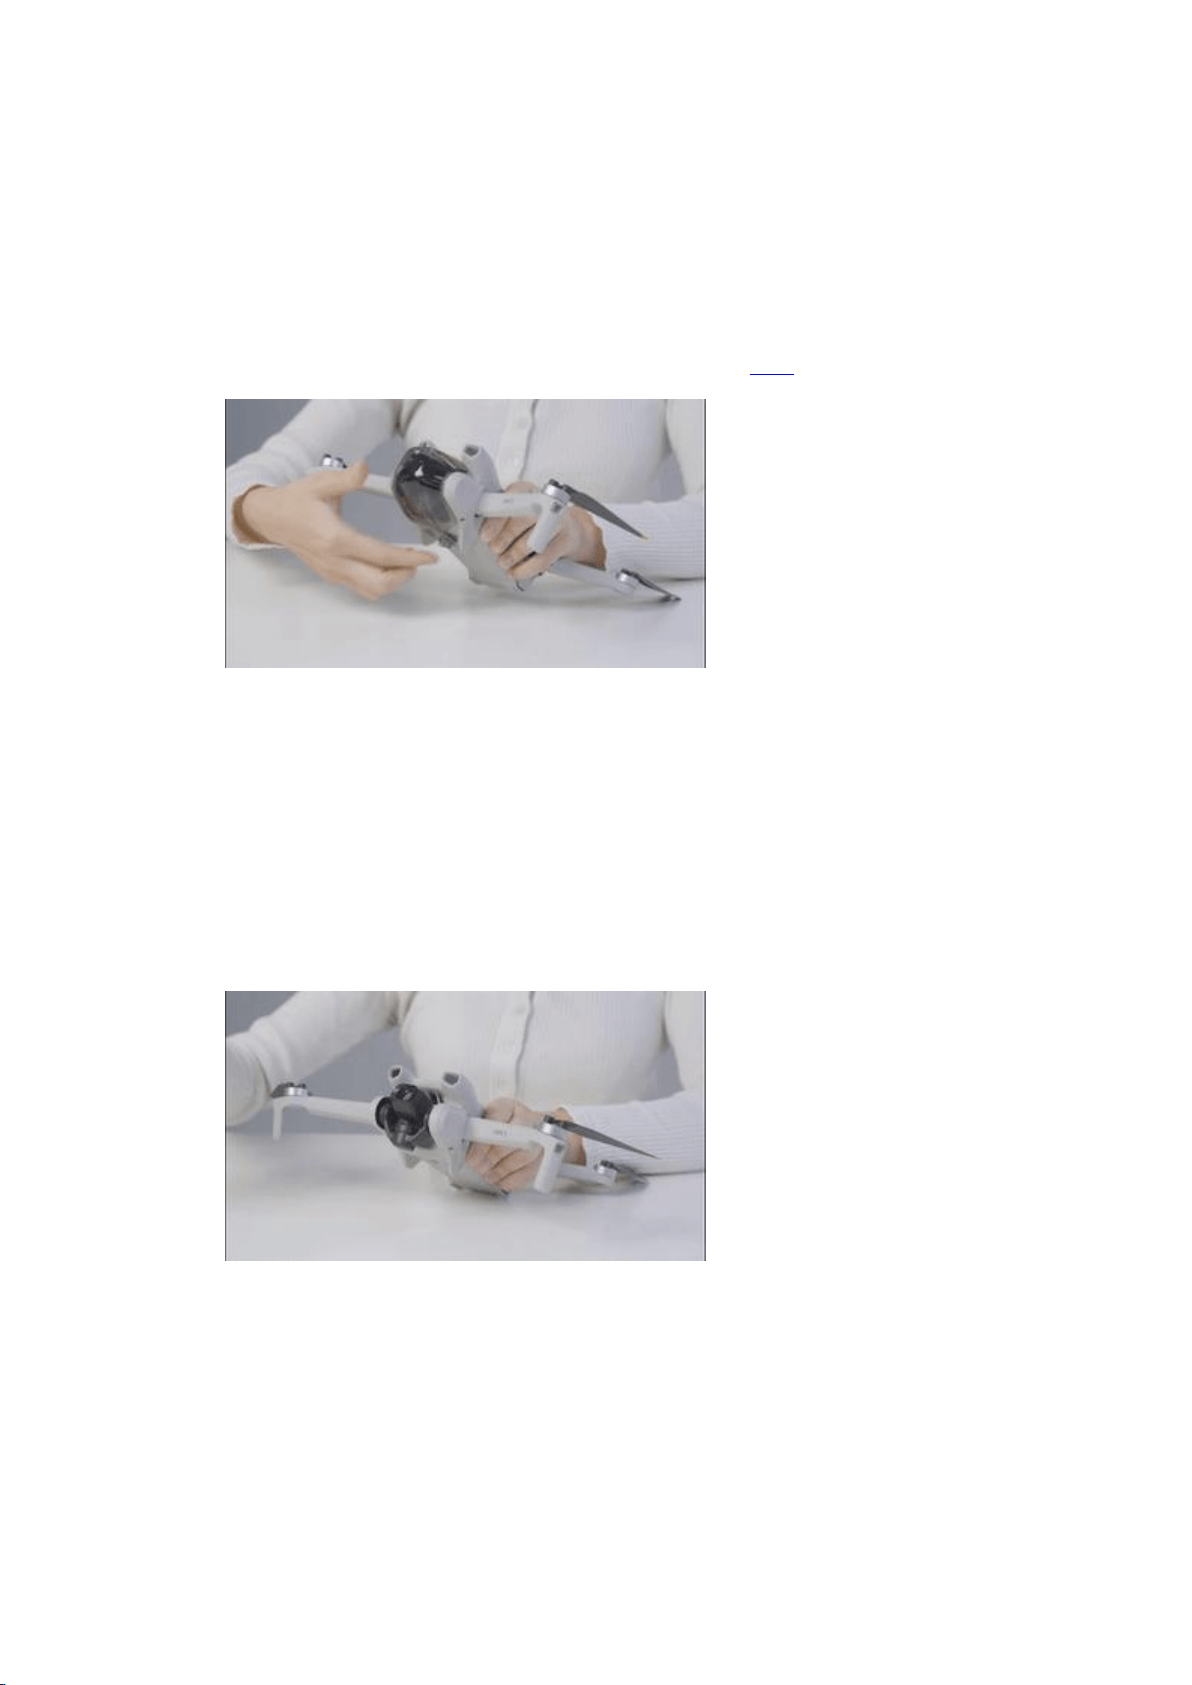
· Removing the Storage Cover
Push the lower buckle of the storage cover towards the camera to remove
the storage cover.
Note: If GIF images are not displayed properly, click here fordetails.
· Attaching the Storage Cover
1. Snap the buckle at the upper part of the storage cover into the slot on
the aircraft.
2. In the same way, snap the lower buckle into the slot at the bottom of
the aircraft.
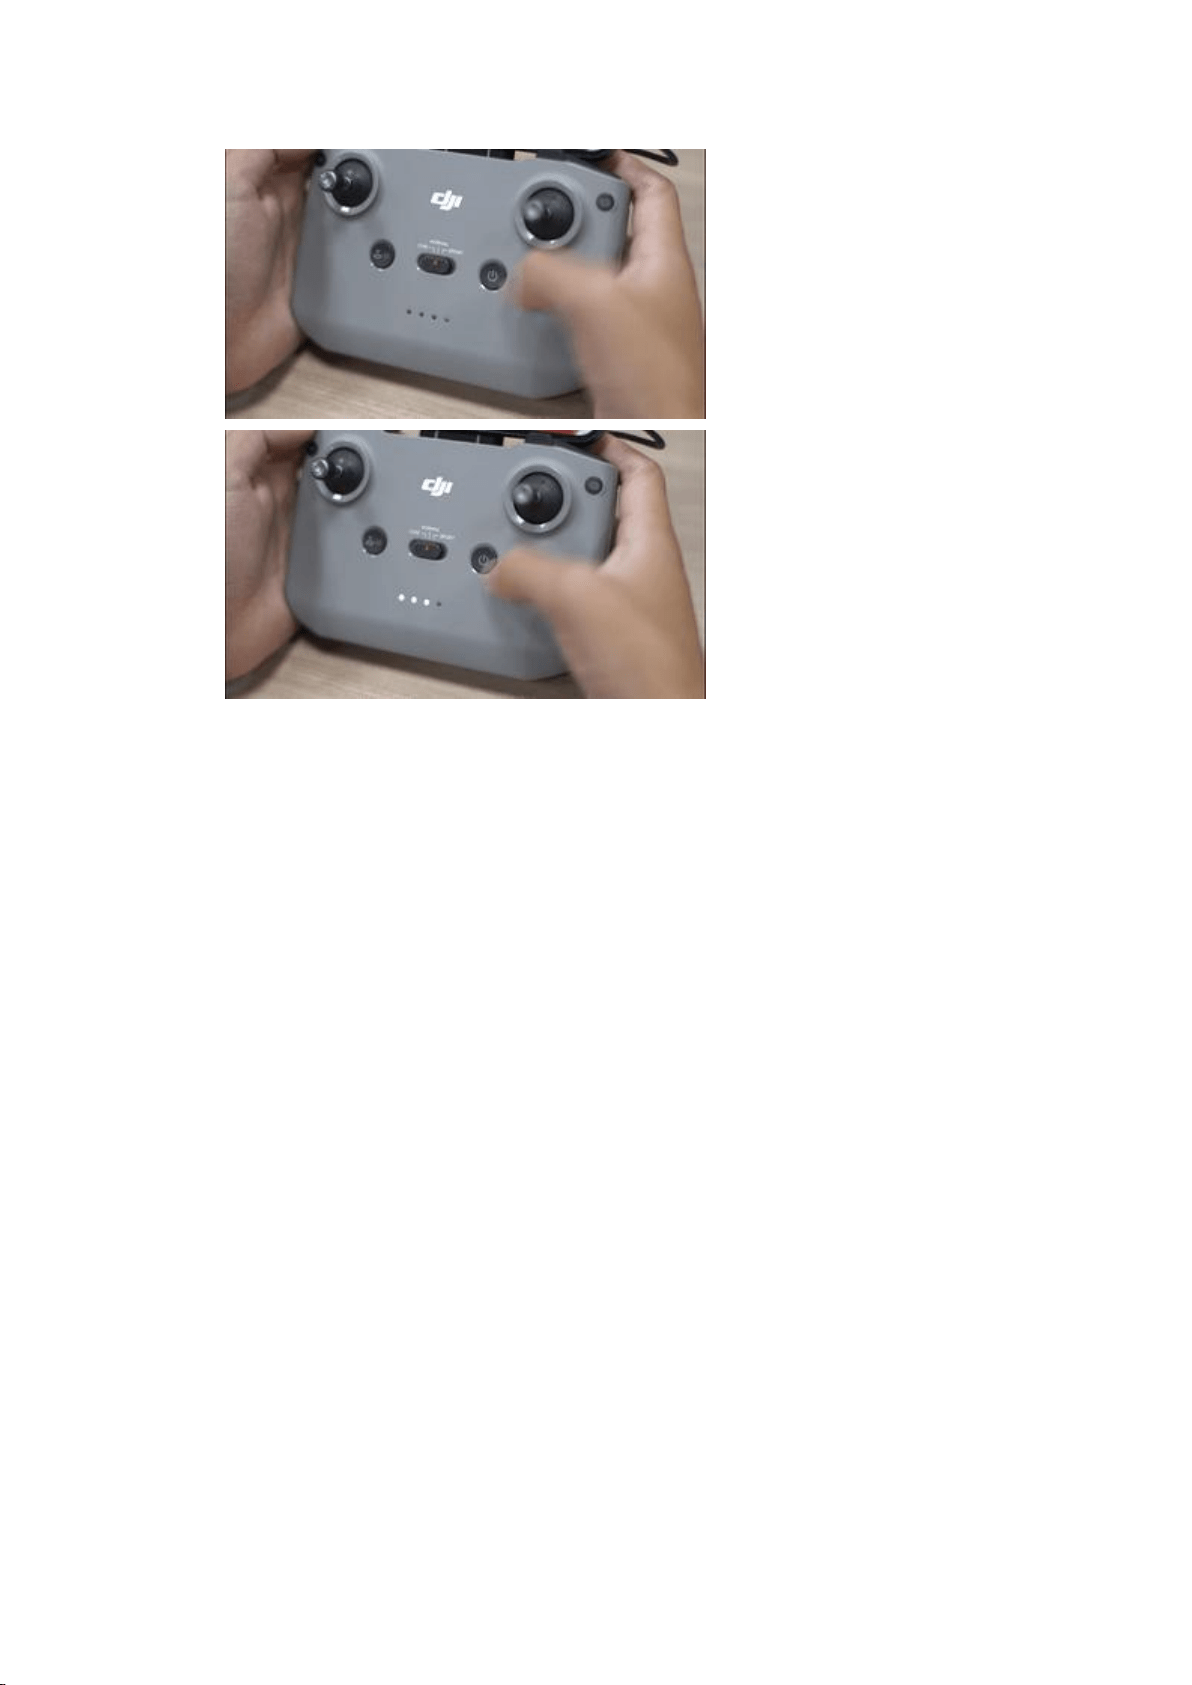
Powering on or off the Device
Press and hold the power button on the aircraft or remote controller to
power on or off the device.
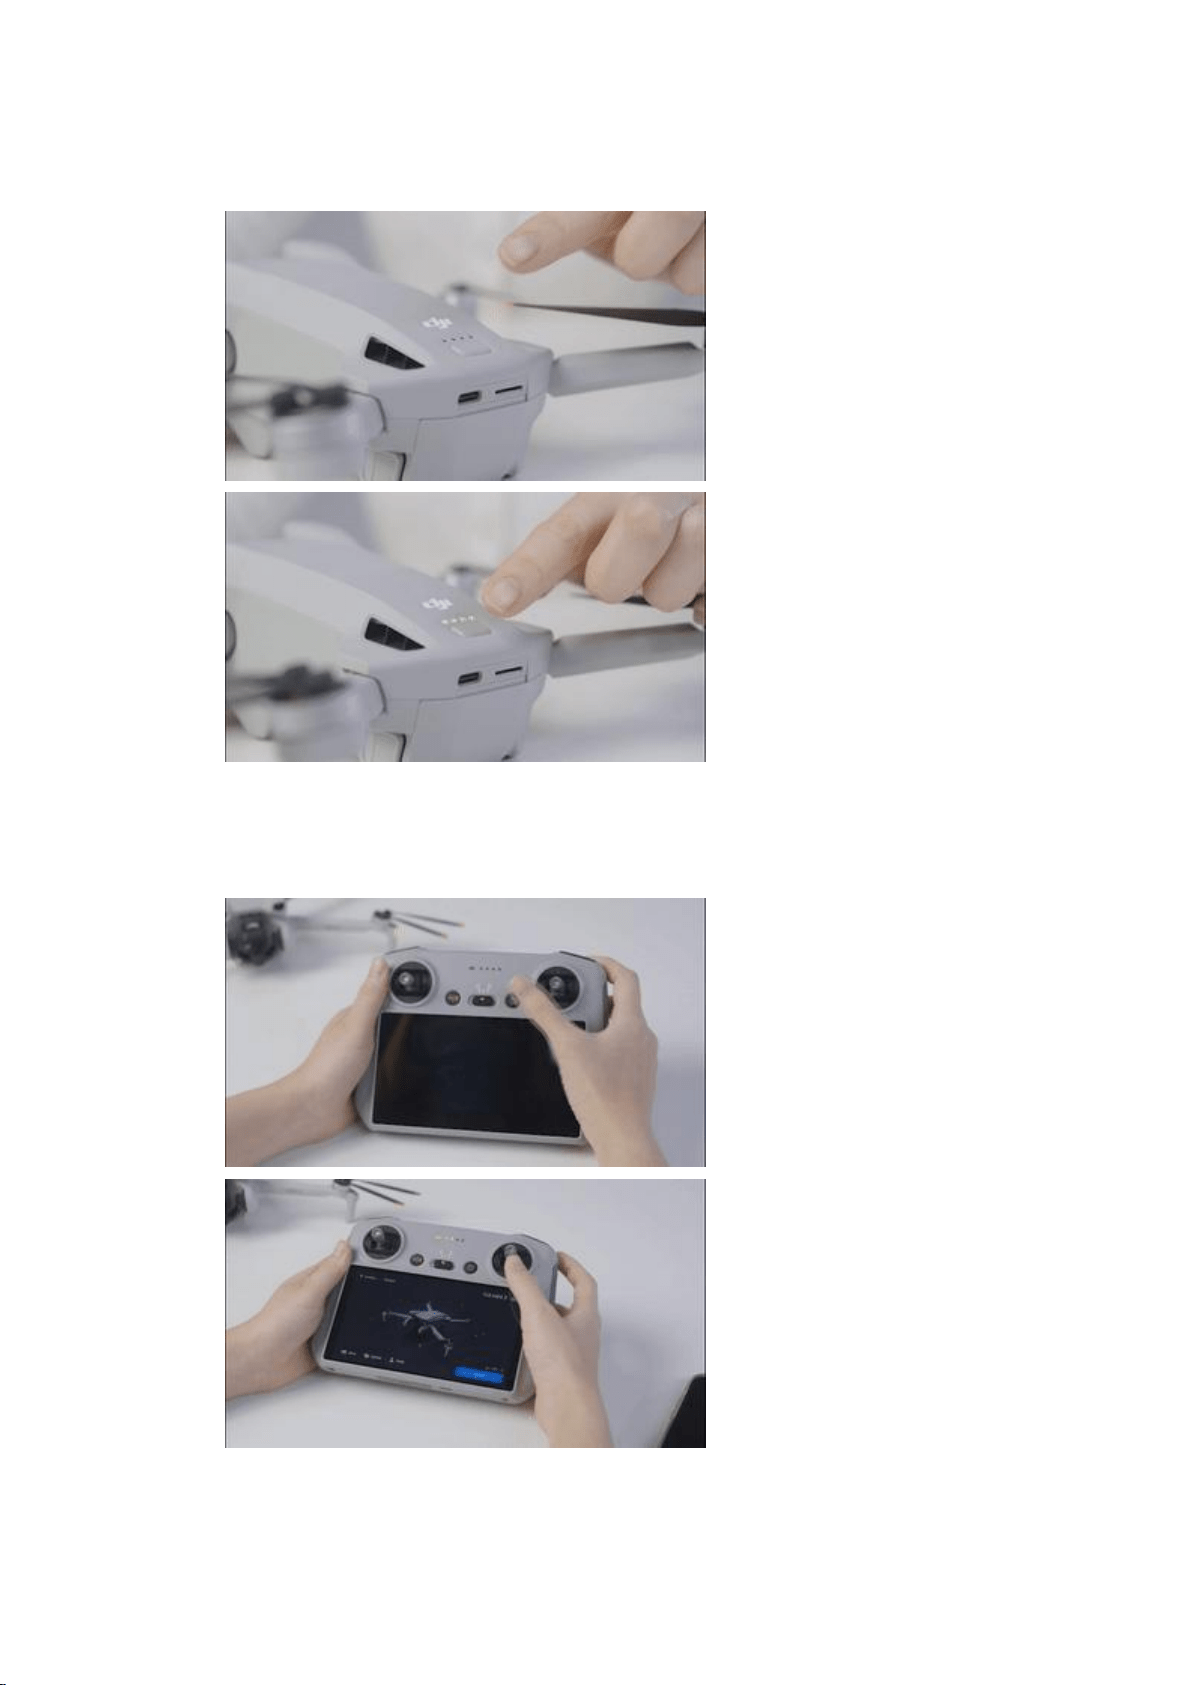
· Aircraft
· Remote Controller
DJI RC
RC-N1
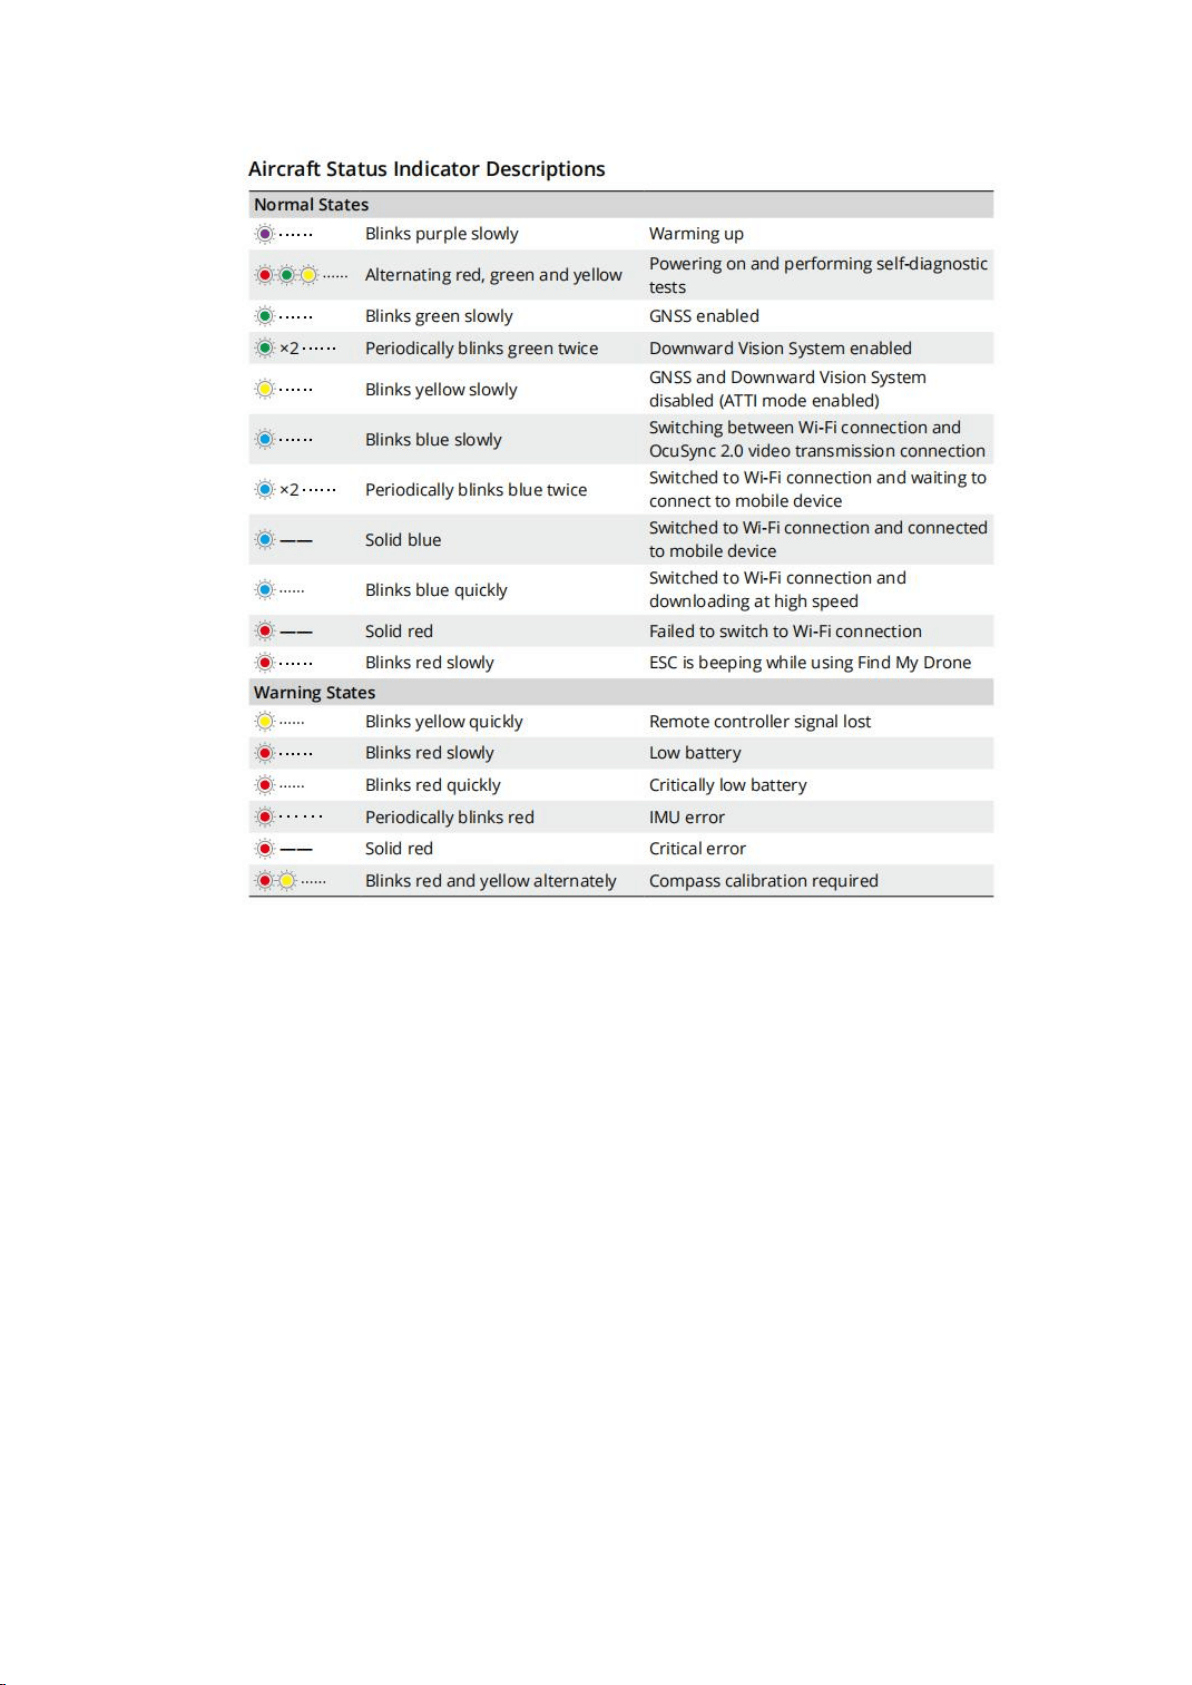
Status Indicator Descriptions
You can tell the status of your device through the blinking patterns of the
aircraft status indicator. Different color indicates different status of the
aircraft, and the blinking frequency as well. Refer to the table below for
more information about the aircraft status indicators.
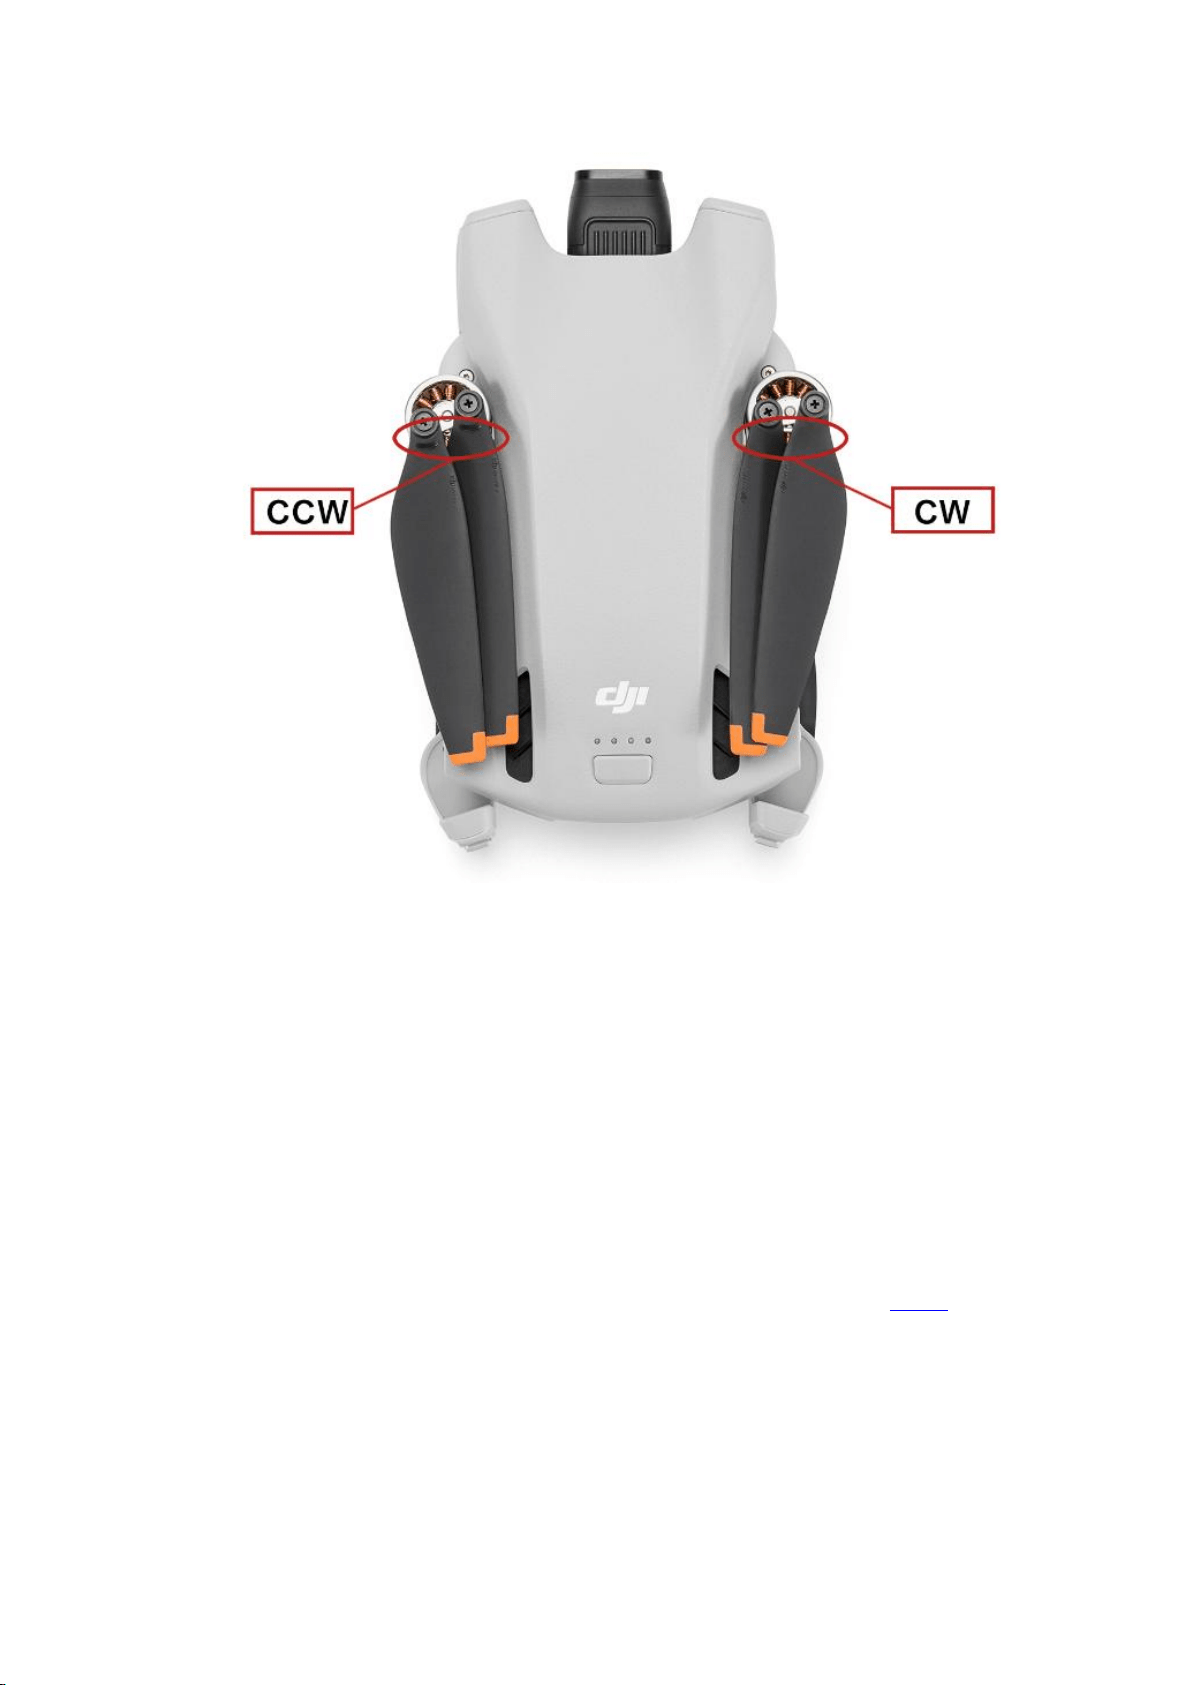
Replacing the Propellers
As we all know, there are two types of propeller/motor: CW and CCW, and
you can easily recognize it through the mark on it. Before mounting the
propeller, better confirm the mark on each first.
DJI Mini 3 has been installed with propellers before leaving the factory. In
case of a propeller replacement, please refer to the steps below.
· Distinguishing between Propellers
If the propeller is mounted in an improper way, the drone cannot take off.
· Replacing the Propellers
Step 1: Place the drone horizontally and make sure that the drone’s
camera faces forwards;
Step 2: Tighten the propellers with a mark onto the motors using the
provided screwdriver.
Step 3: Tighten the propellers without a mark onto the remaining motors.
To learn more about how to replace the propellers, Watch this video
for the more details:
Mounting and Removing the Battery
Note that the battery can be charged without being removed from the
drone. If you would like to install or remove the battery from the drone,
please see below:
Note: If GIF images are not displayed properly, click here fordetails.
· Installing the Battery
· Removing the Battery
Activating Your Device
DJI Mini 3 requires activation before first use. After powering on the
aircraft and remote controller, follow the on-screen prompts to activate
the device using DJI Fly.
Step 1: Download the app.

DJI Fly is required for product activation and connection. Click Here to
download and install the app.
Step 2: Connect the drone to other devices.
Before takeoff, connect the drone to the remote controller and mobile
device. (There is no need to connect the mobile device for DJI RC.)
Watch this video to learn more about linking:
Step 3: Activate for the First Time
Make sure that the aircraft, remote controller, and mobile device are
connected (there is no need to connect the mobile device for DJI RC) and
linking is successfully. Launch the DJI Fly app, and then complete the
activation according to the on-screen instructions (An Internet connection
is required for activation).
Watch this video for the more details.
Checking Activation Information
You can go to the Activation Info page for the specific information.
* You may need to learn more about How to Check Your Product's Serial
Number.
Charging Instructions

Press the power button on the aircraft and remote controller for one
second respectively, and the status LEDs will light up. When only one LED
is on, please charge the device in time.
Choose an Adapter
As DJI Mini 3 does not come with an adapter, please refer to the following
content to select an appropriate adapter.
· DJI Mini 3 supports PD fast charging protocol. You can charge your
drone using a PD fast charger with the included PD charging cable
(Type-C to Type-C).
If you would like to purchase a charger, we recommend you add DJI 30W
USB-C Charger to your cart.
· Other common PD fast charging chargers are supported, such as Apple
USB- C power adapters and Android GaN chargers.
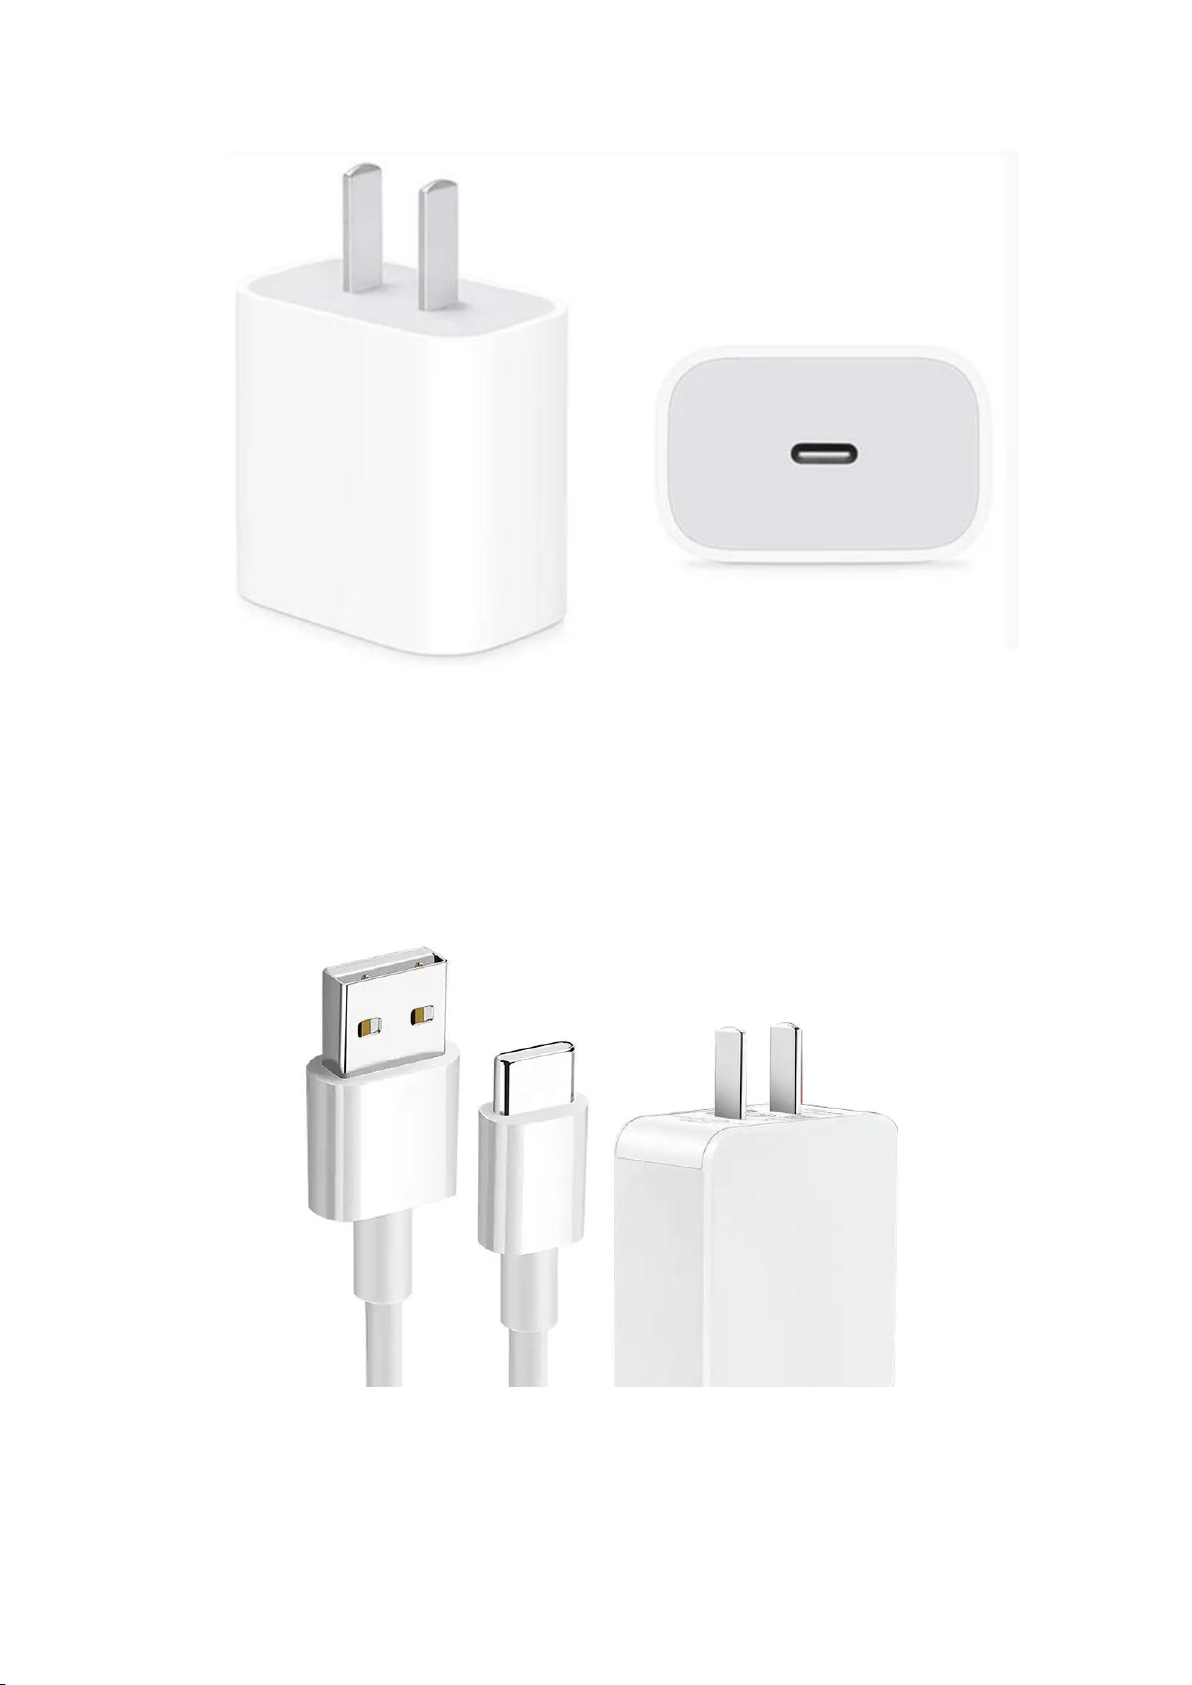
· If a PD fast charger is currently not available, you can also use a charger
with a Type-C port for charging, but the charging speed may be relatively
slower.
Charging Method


Charging Duration
· Charging the aircraft
Charging a Battery With DJI 30W USB-C Charger Only
It takes approximately 1 hour and 4 minutes to charge an Intelligent Flight
Battery with the DJI 30W Charger (and approximately 1 hour and 41
minutes to fully charge an Intelligent Flight Battery Plus).
Charging a Battery Using DJI 30W USB-C Charger and the Battery
Charging Hub
It takes approximately 56 minutes to charge an Intelligent Flight Battery
with DJI 30W USB-C Charger and the Battery Charging Hub (and
approximately 1 hour and 18 minutes to fully charge an Intelligent Flight
Battery Plus).
· Charging a Remote Controller
DJI RC
It takes about one and a half hours to charge a DJI RC using a 15 W
charger.
DJI RC-N1

It takes about three and a half hours to charge a DJI RC-N1 using a 10 W
charger.
Battery Maintenance
1. Discharge the battery to 40%-65% (the third battery level LED lights up
or blinks) if it will not be used for 10 days or more.
2. Charge and discharge the battery about every three months to maintain
good battery health. If the battery is stored after completely drained, it
may over-discharge and be damaged.
3. Always store Intelligent Flight Batteries in a well-ventilated place.
4. The battery will enter hibernation mode if depleted and stored for an
extended period of time. Recharge the battery to bring it out of
hibernation.
To learn more about battery maintenance, click: Battery Routine
Maintenance Guide
Using for the First Time
Follow the steps below to prepare to use the aircraft and remote
controller.
Preparing the Aircraft
Step 1: Remove the storage cover.

Step 2: Check the battery level of the flight battery, power on the drone,
and place it on a flat ground. Note that the rear of the drone should face
towards you.
Watch this video for the more details.
Preparing the Remote Controller
· DJI RC
Step 1: Remove the control sticks from the storage slots on the remote
controller and screw them into place.
Step 2: Check the battery level of the remote controller and power on the
remote controller.
Watch this video for the more details.
· DJI RC-N1
Step 1: Remove the control sticks from the storage slots on the remote
controller and screw them into place.
Step 2: Put out the mobile device holder and choose an appropriate
remote controller cable based on the type of mobile device. Then connect
the mobile device.
Step 3: Check the battery level of the remote controller and power on the
remote controller. Then launch DJI Fly.
Watch this video for the more details.

Getting Ready For First Flight
Watch this video to guide you through your first flight with DJI Mini 3:
Updating the Firmware
Using DJI Fly or DJI Assistant 2 (Consumer Drones Series) to update DJI
Mini 3 firmware.
1. Update the whole firmware package including the drone and remote
controller firmware using DJI Fly (Recommended).
2. Update the aircraft and remote controller firmware separately using DJI
Assistant 2 (Consumer Drones Series).
· Using DJI Fly
Power on the aircraft and remote controller, and make sure that the
remote controller is linked to the aircraft. Follow the on-screen
instructions to update the firmware and note that Internet is required.
· Using DJI Assistant 2 (Consumer Drones Series)
Follow the instructions below to update the aircraft and remote controller
firmware separately:
1. Power on the device and connect to a computer via the USB-C port
using a Micro USB cable.

2. Launch DJI Assistant 2 (Consumer Drones Series), and log in with your
DJI account.
3. Select the device icon and click “Firmware Updates” on the left panel.
4. Select the firmware version that you wish to update to.
5. Wait for the firmware to download, and the firmware update will start
automatically.
6. The device will automatically restart after the firmware update is
complete.
Intermediate Operations
QuickShots
DJI Mini 3 supports shooting in Dronie, Rocket, Circle, Helix, and
Boomerang modes.
Portrait Mode
The DJI Mini 3 camera can be rotated 90° for lossless shooting in Portrait
mode, allowing for more freedom in composition. Tap the vertical
shooting icon on the app interface to enter Portrait mode.
Zooming
DJI Mini 3 supports up to 4x digital zoom to create the perfect
composition.
Live Streaming
When using DJI RC-N1 remote controller with your mobile device, you can
live stream with your DJI Mini 3 via DJI Fly. Live streaming is not available
when using DJI RC.
Go to 「“...” > Transmission > Enable Livestreaming」to broadcast the
camera view in real time. DJI Mini 3 supports livestream platforms and
multiple resolutions for you to choose from and connect with your world
face-to-face at any time.

Note to input the RTMP address as below: RTMP address/stream key.
Please do add the “/” (forward slash) between the RTMP address and the
stream key. Only in this way, can the live streaming screen be displayed.
Smart RTH
Smart RTH is initiated either by tapping the RTH icon at the left side of the
app screen or by pressing and holding the RTH button on the remote
controller.
Watch this video for the more details.
Exporting Footage
DJI Mini 3 does not have internal storage. It is recommended that you
install a memory card to save the raw materials taken by the camera.
Storage
· The combo does not come with a microSD card. DJI Mini 3 supports up
to 512 GB cards, and it is recommended that you use the following ones.
SanDisk Extreme 32GB V30 A1 microSDXC
SanDisk Extreme 64GB V30 A1 microSDXC
SanDisk Extreme 128GB V30 A2 microSDXC
SanDisk Extreme 256GB V30 A2 microSDXC
SanDisk Extreme Pro 32GB V30 A1 microSDXC

Kingston Canvas Go!Plus 64GB V30 A2 microSDXC
Kingston Canvas Go!Plus 256GB V30 A2 microSDXC
Kingston Canvas React Plus 64GB V30 A1 microSDXC
Kingston Canvas React Plus 128GB V30 A1 microSDXC
Samsung Pro Plus 256GB V30 A2 microSDXC
· DJI RC does not come with internal storage, but supports installing a
microSD card. After a memory card is inserted, you are allowed to cache
files while shooting or recording, and to download your raw materials to
the remote controller.
* DJI Mini 3 supports QuickTransfer, which allows quick drone footage
downloads directly to your smartphone. If you do not have demands for
caching materials, it is unnecessary to insert a microSD card.
Installing and Removing a Memory Card
If you have purchased a memory card, you can insert it into the black
memory card adapter, which can be attached to the TF slot on PC for
further file transfer. Please note that the memory card is inserted into the
drone without the card adapter.
Please see below for how to install and remove a memory card from the
drone or DJI RC:
Note: If GIF images are not displayed properly, click here fordetails.
· Installing a Memory Card
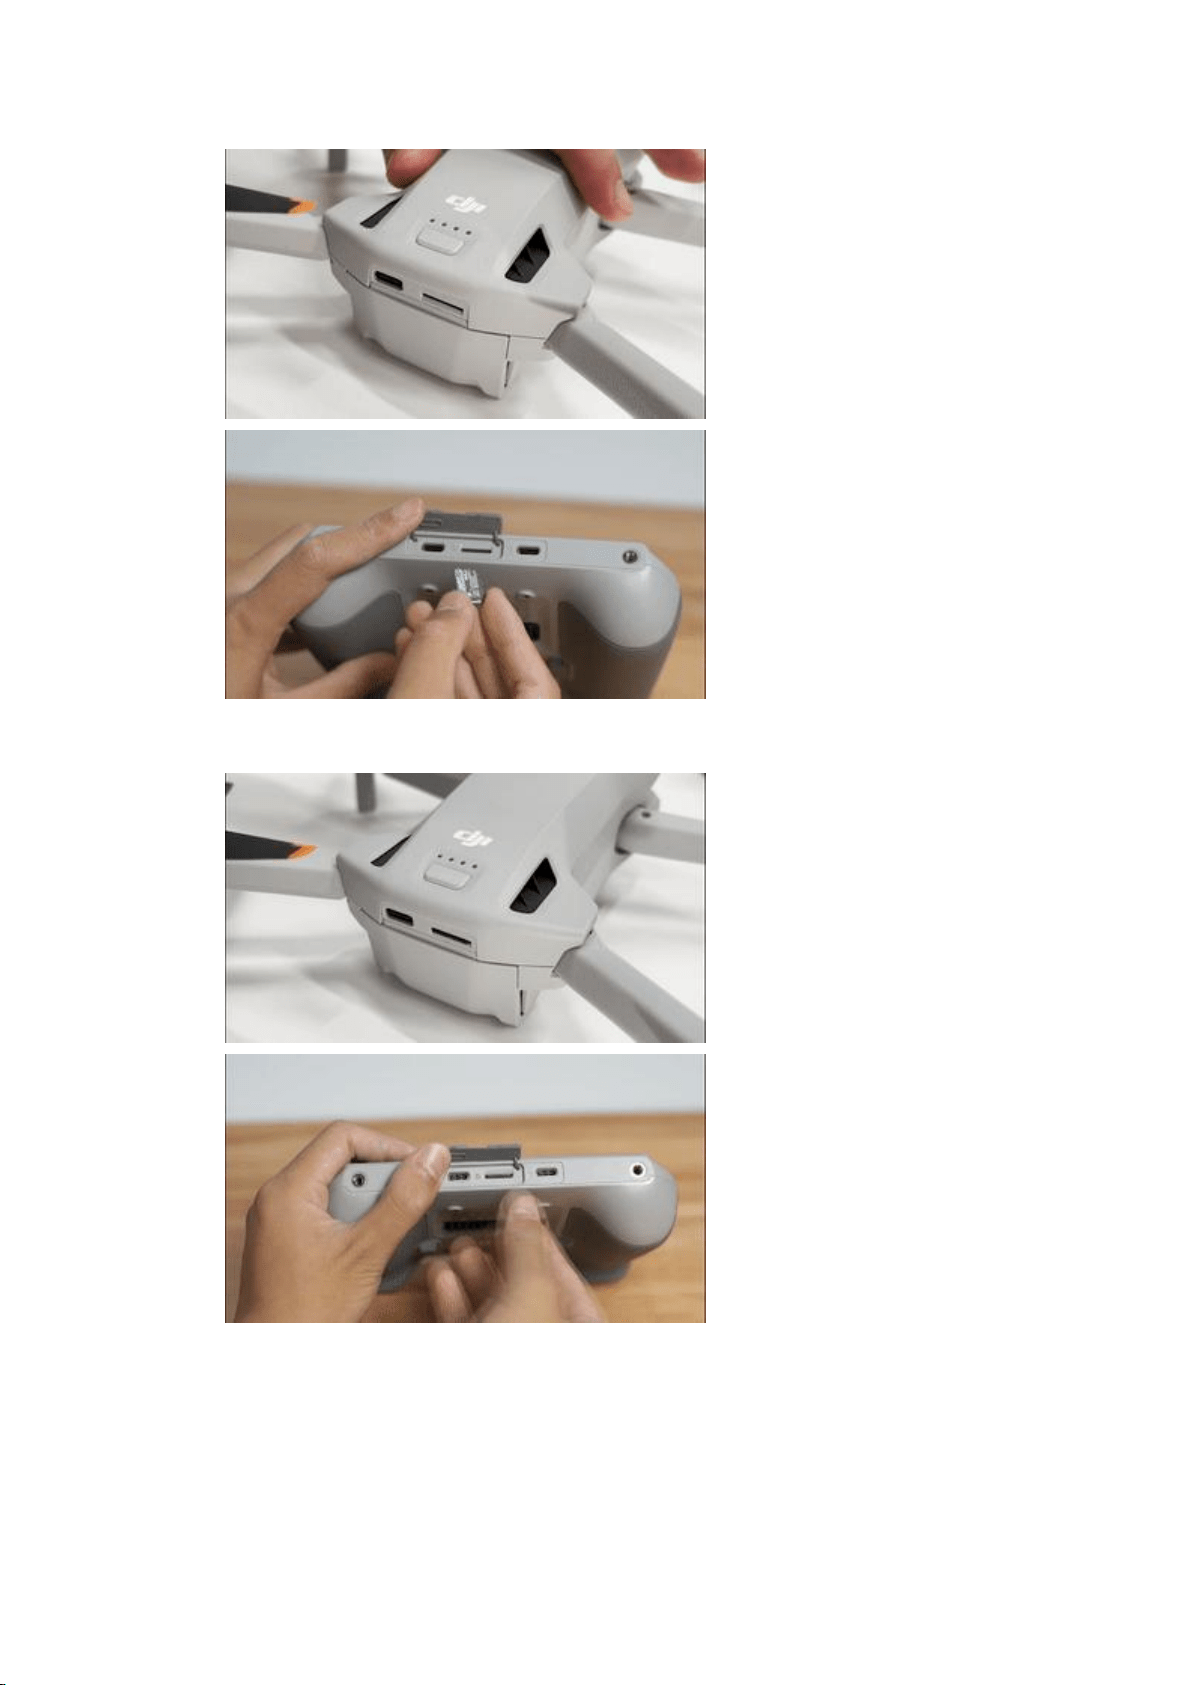
· Removing a Memory Card
Exporting the Photos/Videos

The raw footage captured by DJI Mini 3 is stored in the internal storage or
microSD card.
Watch this video for the more details.
Tips for Flight Safety
Before a takeoff, have a glance at the nearby restricted and GEO
zones. Click to check the GEO ZONE MAP. Please fly your drone in a safe
environment, and strictly abide by local laws and regulations.
Environmental Considerations
1. Only fly in environments that are clear of magnetic or radio interference,
buildings, and other obstacles.
2. Do not fly above or near large crowds.
3. Only fly in authorized areas. Stay well away from GEO zones and
restricted zones to prevent your drone from entering these zones by
mistake and getting flyaway.
4. It is not recommended to fly your drone in scenic spots, historical sites,
parks, and the vicinity of government and military institutions. Although
these places are not officially demarcated as restricted zones, they are
very likely to be controlled areas. The signal of the remote controller may
be lost during the flight if you fly the drone in these areas, and the drone
may unexpectedly fly away.

5. Do not fly the aircraft near areas with magnetic or radio interference,
including Wi-Fi hotspots, routers, Bluetooth devices, high-voltage lines,
large-scale power transmission stations, radar stations, mobile base
stations, and broadcasting towers. Otherwise, the wireless transmission
performance of the aircraft may be affected by interference, and the
aircraft cannot fly normally.
Pre-flight Checklist
1. Make sure that the remote controller and aircraft batteries are fully
charged. (It is recommended to fully charge the battery and then fly the
drone.)
2. Make sure that the propellers are mounted properly. Check whether the
propellers are broken or bent, and whether all the propellers are unfolded.
3. Connect your mobile device to the remote controller. Power on the
remote controller first and then power on the aircraft. Unfold the remote
controller antennas and check whether the remote controller is linked with
the aircraft. Check whether there are any warnings shown under Aircraft
Status in the app, such as compass, IMU, or vision sensors error). Check
whether the image transmission signal is strong at the takeoff point.
When "Ready to Go" is shown on the app screen and a "HomePoint
updated" prompt is displayed, enjoy your flight.

4. It is recommended to set "No RC Signal Action" to "RTH" under the
remote controller Settings in the app. (The aircraft will automatically
return to the Home Point when the remote controller signal is lost.)
5. It is recommended to set the RTH Altitude higher than the height of
obstacles in the surrounding environment to avoid collisions during RTH.
Available Accessories
With its great accessories, DJI Mini 3 helps you put the icing on the cake.
Popular Accessories
DJI Mini 3 Series 360° Propeller Guard: Specially designed with light
texture, the propeller guard protects the propellers from collisions, and
improves flight safety. It is especially applicable in indoor scenes with
many obstacles, bringing more safety guarantees for beginners.
DJI Mini 3 Propeller Holder: The Propeller Holder secures and protects the
propellers for safer storage and transportation.
For more information about accessories, please go to DJI Store.
Accessories Compatibility
To know more about the compatibility of DJI Mini 3, click: Aircraft
Accessory Compatibility

DJI Care Service Plans
DJI Care Refresh is a comprehensive and reliable protection plan that
provides DJI products with coverage for a range of accidental damages
such as collision, water damage, flyaway, and natural wear.
There are two DJI Care Refresh options available for you, 1-Year Plan and
2-Year Plan. By selecting the 2-Year Plan, the official warranty can be
extended to two years, providing you with efficient, flexible, and optional
protection solutions, and allowing you to enjoy your DJI product with
greater peace of mind wherever you go.
Add DJI Care Refresh 1-Year Plan (DJI Mini 3)
Add DJI Care Refresh 2-Year Plan (DJI Mini 3)
· [DJI Care Express] A DJI service center will ship you a replacement as
soon as they receive your product. DJI will cover shipping costs both ways
anytime a product is sent back for replacement service.
· [Comprehensive Coverage] DJI Care Refresh covers collisions, flyaway,
water damage, natural wear, and other accidental damage.
· [Replacement at an Additional Low Cost] The 1-Year Plan provides up
to two replacement units at an additional low cost, while 2-Year Plan
offers up to three replacement units.
· [Flyaway Coverage] If a flyaway incident occurs, synchronize flight
records and complete DJI Care Flyaway Aircraft Report on the remote

controller, and simply pay the corresponding service fee to obtain a
replacement product.
· [Rewards for Safe Flight] Throughout the service period, if you haven’
t used any replacements or repair services, DJI will provide you with a
1-year warranty extension as reward.