
Español
Français
English
EN FR ES
DIGITAL PIANO
PIANO NUMÉRIQUE
PIANO DIGITAL
P
-
S500
Owner’s Manual
Mode d’emploi
Manual de instrucciones
Before using the instrument, be sure to read “PRECAUTIONS” on pages 4-5.
Avant d'utiliser l'instrument, lisez attentivement la section « PRÉCAUTIONS D'USAGE » aux pages 4 et 5.
Antes de utilizar el instrumento, lea las “PRECAUCIONES”, en las páginas 4-5.
Smart Device App “Smart Pianist” (page 20)
You can get even more enjoyment out of this instrument—with additional functions and highly
intuitive controls—by connecting to the “Smart Pianist” smart device app.
Application « Smart Pianist » pour appareil intelligent (page 20)
Profitez davantage encore de l'instrument, grâce à des fonctions supplémentaires et des
commandes extrêmement intuitives, en vous connectant à l'application « Smart Pianist » pour
appareil intelligent.
Aplicación para smartphones o tablets “Smart Pianist” (página 20)
Puede disfrutar aun más este instrumento si lo conecta a la aplicación “Smart Pianist” para
smartphones o tablets, que proporciona más funciones y controles muy intuitivos.

P-S500 Owner’s Manual
2
* This applies only to products distributed by
Yamaha Corporation of America.
COMPLIANCE INFORMATION STATEMENT
(Supplierʼs declaration of conformity procedure)
Responsible Party : Yamaha Corporation of America
Address : 6600 Orangethorpe Ave., Buena Park, Calif. 90620
Telephone : 714-522-9011
Type of Equipment : Digital Piano
Model Name : P-S500
This device complies with Part 15 of the FCC Rules.
Operation is subject to the following two conditions:
1) this device may not cause harmful interference, and
2) this device must accept any interference received including interference
that may cause undesired operation.
(FCC SDoC)
1. IMPORTANT NOTICE: DO NOT MODIFY THIS
UNIT!
This product, when installed as indicated in the instruc-
tions contained in this manual, meets FCC require-
ments. Modifications not expressly approved by Yamaha
may void your authority, granted by the FCC, to use the
product.
2. IMPORTANT: When connecting this product to acces-
sories and/or another product use only high quality
shielded cables. Cable/s supplied with this product
MUST be used. Follow all installation instructions. Fail-
ure to follow instructions could void your FCC authoriza-
tion to use this product in the USA.
3. NOTE: This product has been tested and found to com-
ply with the requirements listed in FCC Regulations, Part
15 for Class “B” digital devices. Compliance with these
requirements provides a reasonable level of assurance
that your use of this product in a residential environment
will not result in harmful interference with other elec-
tronic devices. This equipment generates/uses radio fre-
quencies and, if not installed and used according to the
instructions found in the users manual, may cause inter-
ference harmful to the operation of other electronic
devices. Compliance with FCC regulations does not
guarantee that interference will not occur in all installa-
tions. If this product is found to be the source of interfer-
ence, which can be determined by turning the unit “OFF”
and “ON”, please try to eliminate the problem by using
one of the following measures:
Relocate either this product or the device that is being
affected by the interference.
Utilize power outlets that are on different branch (circuit
breaker or fuse) circuits or install AC line filter/s.
In the case of radio or TV interference, relocate/reorient
the antenna. If the antenna lead-in is 300 ohm ribbon
lead, change the lead-in to co-axial type cable.
If these corrective measures do not produce satisfactory
results, please contact the local retailer authorized to
distribute this type of product. If you can not locate the
appropriate retailer, please contact Yamaha Corporation
of America, Electronic Service Division, 6600 Orangeth-
orpe Ave, Buena Park, CA90620
The above statements apply ONLY to those products
distributed by Yamaha Corporation of America or its sub-
sidiaries.
* This applies only to products distributed by Yamaha Corporation of America. (class B)
FCC INFORMATION (U.S.A.)

P-S500 Owner’s Manual
3
For the AC adaptor
The model number, serial number, power requirements, etc., may be
found on or near the name plate, which is at the bottom of the unit.
You should note this serial number in the space provided below and
retain this manual as a permanent record of your purchase to aid iden-
tification in the event of theft.
Model No.
Serial No.
(bottom_en_01)
Explanation of Graphical Symbols
The lightning flash with arrowhead
symbol within an equilateral triangle is
intended to alert the user to the presence
of uninsulated “dangerous voltage”
within the product’s enclosure that may
be of sufficient magnitude to constitute a
risk of electric shock to persons.
The exclamation point within an
equilateral triangle is intended to alert the
user to the presence of important
operating and maintenance (servicing)
instructions in the literature
accompanying the product.
IMPORTANT SAFETY INSTRUCTIONS
1 Read these instructions.
2 Keep these instructions.
3 Heed all warnings.
4 Follow all instructions.
5 Do not use this apparatus near water.
6 Clean only with dry cloth.
7 Do not block any ventilation openings. Install in
accordance with the manufacturer’s instructions.
8 Do not install near any heat sources such as
radiators, heat registers, stoves, or other
apparatus (including amplifiers) that produce
heat.
9 Do not defeat the safety purpose of the polarized
or grounding-type plug. A polarized plug has two
blades with one wider than the other. A
grounding type plug has two blades and a third
grounding prong. The wide blade or the third
prong are provided for your safety. If the
provided plug does not fit into your outlet,
consult an electrician for replacement of the
obsolete outlet.
10 Protect the power cord from being walked on or
pinched particularly at plugs, convenience
receptacles, and the point where they exit from
the apparatus.
11 Only use attachments/accessories specified by
the manufacturer.
12 Use only with the cart, stand,
tripod, bracket, or table
specified by the manufacturer,
or sold with the apparatus.
When a cart is used, use
caution when moving the cart/
apparatus combination to
avoid injury from tip-over.
13 Unplug this apparatus during lightning storms or
when unused for long periods of time.
14 Refer all servicing to qualified service personnel.
Servicing is required when the apparatus has
been damaged in any way, such as power-supply
cord or plug is damaged, liquid has been spilled
or objects have fallen into the apparatus, the
apparatus has been exposed to rain or moisture,
does not operate normally, or has been dropped.
CAUTION: TO REDUCE THE RISK OF
ELECTRIC SHOCK, DO NOT REMOVE
COVER (OR BACK). NO USER-SERVICEABLE
PARTS INSIDE. REFER SERVICING TO
QUALIFIED SERVICE PERSONNEL.
CAUTION
RISK OF ELECTRIC SHOCK
DO NOT OPEN
(UL60065_03)
WARNING
TO REDUCE THE RISK OF FIRE OR ELECTRIC SHOCK, DO NOT EXPOSE THIS APPARATUS TO RAIN OR MOISTURE.
The name plate is located
on the bottom of the unit.
P-S500 Owner’s Manual
4
PRECAUTIONS
PLEASE READ CAREFULLY BEFORE PROCEEDING
Please keep this manual in a safe and handy place for future reference.
WARNING
• This AC adaptor is designed for use with only Yamaha electronic
instruments. Do not use for any other purpose.
• Indoor use only. Do not use in any wet environments.
CAUTION
• When setting up, make sure that the AC outlet is easily accessible. If
some trouble or malfunction occurs, immediately turn off the power
switch of the instrument and disconnect the AC adaptor from the
outlet. When the AC adaptor is connected to the AC outlet, keep in
mind that electricity is flowing at the minimum level, even if the power
switch is turned off. When you are not using the instrument for a long
time, make sure to unplug the power cord from the wall AC outlet.
WARNING
Always follow the basic precautions listed below to avoid the possibility of serious injury or even death from electrical
shock, short-circuiting, damages, fire or other hazards. These precautions include, but are not limited to, the
following:
• Do not place the power cord near heat sources such as heaters or
radiators. Also, do not excessively bend or otherwise damage the cord,
or place heavy objects on it.
• Only use the voltage specified as correct for the instrument. The
required voltage is printed on the name plate of the instrument.
• Use the specified adaptor (page 35) only. Using the wrong adaptor can
result in damage to the instrument or overheating.
• Use only the supplied power cord/plug.
• Check the electric plug periodically and remove any dirt or dust which
may have accumulated on it.
• This instrument contains no user-serviceable parts. Do not open the
instrument or attempt to disassemble or modify the internal
components in any way. If it should appear to be malfunctioning,
discontinue use immediately and have it inspected by qualified
Yamaha service personnel.
• Do not expose the instrument to rain, use it near water or in damp or
wet conditions, or place on it any containers (such as vases, bottles or
glasses) containing liquids which might spill into any openings. If any
liquid such as water seeps into the instrument, turn off the power
immediately and unplug the power cord from the AC outlet. Then have
the instrument inspected by qualified Yamaha service personnel.
• Never insert or remove an electric plug with wet hands.
• Do not put burning items, such as candles, on the unit. A burning item
may fall over and cause a fire.
• When one of the following problems occur, immediately turn off the
power switch and disconnect the electric plug from the outlet. Then
have the device inspected by Yamaha service personnel.
- The power cord or plug becomes frayed or damaged.
- It emits unusual smells or smoke.
- Some object has been dropped into the instrument.
- There is a sudden loss of sound during use of the instrument.
- If any cracks or breakages exist on the instrument.
For the AC adaptor
For the instrument
Power supply/AC adaptor
Do not open
Water warning
Fire warning
If you notice any abnormality
DMI-7 1/2
P-S500 Owner’s Manual
5
CAUTION
Always follow the basic precautions listed below to avoid the possibility of physical injury to you or others, or damage
to the instrument or other property. These precautions include, but are not limited to, the following:
• Do not connect the instrument to an electrical outlet using a multiple-
connector. Doing so can result in lower sound quality, or possibly
cause overheating in the outlet.
• When removing the electric plug from the instrument or an outlet,
always hold the plug itself and not the cord. Pulling by the cord can
damage it.
• Remove the electric plug from the outlet when the instrument is not to
be used for extended periods of time, or during electrical storms.
• Do not place the instrument in an unstable position where it might
accidentally fall over.
• Do not go near the instrument during an earthquake. Strong shaking
during an earthquake could cause the instrument to move or tip over,
resulting in damage to the instrument or its parts, and possibly
causing injury.
• When transporting or moving the instrument, always use two or more
people. Attempting to lift the instrument by yourself may damage your
back, result in other injury, or cause damage to the instrument itself.
• Before moving the instrument, remove all connected cables, to prevent
damage to the cables or injury to anyone who might trip over them.
• When moving the instrument, hold the bottom of the instrument.
Holding the niche where the connectors are located may damage the
connectors or the instrument, and result in injury.
• When setting up the product, make sure that the AC outlet you are
using is easily accessible. If some trouble or malfunction occurs,
immediately turn off the power switch and disconnect the plug from the
outlet. Even when the power switch is turned off, electricity is still
flowing to the product at the minimum level. When you are not using
the product for a long time, make sure to unplug the power cord from
the wall AC outlet.
• Use only the stand specified for the instrument (page 17). When
attaching it, use the provided screws only. Failure to do so could cause
damage to the internal components or result in the instrument falling
over.
• Do not lean the instrument up against a wall or lay it with the
connectors side down. The instrument may fall over and result in
damage or cause injury. Make sure to put the instrument horizontally
on a desk or use the stand specified for the instrument (page 17).
• Before connecting the instrument to other electronic components, turn
off the power for all components. Before turning the power on or off for
all components, set all volume levels to minimum.
• Be sure to set the volumes of all components at their minimum levels
and gradually raise the volume controls while playing the instrument to
set the desired listening level.
• Do not insert a finger or hand in any gaps on the instrument.
• Never insert or drop paper, metallic, or other objects into the gaps on
the panel or keyboard. This could cause physical injury to you or
others, damage to the instrument or other property, or operational
failure.
• Do not rest your weight on, or place heavy objects on the instrument,
and do not use excessive force on the buttons, switches, music rest or
connectors.
• Do not use the instrument/device or headphones for a long period of
time at a high or uncomfortable volume level, since this can cause
permanent hearing loss. If you experience any hearing loss or ringing
in the ears, consult a physician.
Always turn the power off when the instrument is not in use.
Even when the [ ] (Standby/On) switch is in standby status (power lamp
is off), electricity is still flowing to the instrument at the minimum level.
When you are not using the instrument for a long time, make sure you
unplug the power cord from the wall AC outlet.
Power supply/AC adaptor
Location
Yamaha cannot be held responsible for damage caused by improper use or
modifications to the instrument, or data that is lost or destroyed.
Connections
Handling
DMI-7 2/2

P-S500 Owner’s Manual
6
NOTICE
To avoid the possibility of malfunction/ damage to the
product, damage to data, or damage to other property,
follow the notices below.
Handling
• Do not connect this product to a public Wi-Fi and/or Internet
service directly. Only connect this product to the Internet
through a router with strong password protections. Consult
your router manufacturer for information on optimum
security practices.
• Do not use the instrument in the vicinity of a TV, radio,
stereo equipment, mobile phone, or other electric devices.
Otherwise, the instrument, TV, or radio may generate noise.
When you use the instrument along with an application on
your smart device such as a smartphone or tablet, we
recommend that you set Wi-Fi to on after setting “Airplane
Mode” to on on that device in order to avoid noise caused by
communication.
• Do not expose the instrument to excessive dust or vibrations,
or extreme cold or heat (such as in direct sunlight, near a
heater, or in a car during the day) to prevent the possibility of
panel disfiguration, damage to the internal components or
unstable operation. (Verified operating temperature range: 5°
– 40°C, or 41° – 104°F.)
• Do not place vinyl, plastic or rubber objects on the
instrument, since this might discolor the panel or keyboard.
Maintenance
• When cleaning the instrument, use a soft and dry/slightly
damp cloth. Do not use paint thinners, solvents, alcohol,
cleaning fluids, or chemical-impregnated wiping cloths.
Saving data
• Some of the data of this instrument (page 29) are retained
when the power is turned off.
To protect against data loss due to some failure, and operation
mistake, etc., save your important data to the smart device
application “Smart Pianist.” You can back up the data and
setting of this instrument to “Smart Pianist” as a backup file.
Information
About copyrights
• Copying of the commercially available musical data including
but not limited to MIDI data and/or audio data is strictly
prohibited except for your personal use.
• This product incorporates and bundles contents in which
Yamaha owns copyrights or with respect to which Yamaha
has license to use others' copyrights. Due to copyright laws
and other relevant laws, you are NOT allowed to distribute
media in which these contents are saved or recorded and
remain virtually the same or very similar to those in the
product.
* The contents described above include a computer program,
Accompaniment Style data, MIDI data, WAVE data, voice
recording data, a score, score data, etc.
* You are allowed to distribute medium in which your
performance or music production using these contents is
recorded, and the permission of Yamaha Corporation is not
required in such cases.
About functions/data bundled with the
instrument
• Yamaha may from time to time update firmware of the
product without notice for improvement in functions and
usability. To take full advantage of this instrument, we
recommend that you upgrade your instrument to the latest
version. The latest firmware can be downloaded from the
website below:
https://download.yamaha.com/
• Some of the preset songs have been edited for length or
arrangement, and may not be exactly the same as the original.
• This device is capable of using various types/formats of music
data by optimizing them to the proper format music data for
use with the device in advance. As a result, this device may
not play them back precisely as their producers or composers
originally intended.
About this manual
• The illustrations and LCD screens as shown in this manual
are for instructional purposes only, and may appear
somewhat different from those on your instrument.
• The letters at the end of the model name (such as “B,” “WH”)
indicate the color of the instrument. Since they simply
indicate the appearance, these letters are omitted in this
manual.
• Windows is a registered trademark of Microsoft® Corporation
in the United States and other countries.
• Apple, iTunes, iPhone, iPad, iPod touch and Lightning are
trademarks of Apple Inc., registered in the U.S. and other
countries.
• Android and Google Play are trademarks of Google LLC.
• The company names and product names in this manual are
the trademarks or registered trademarks of their respective
companies.

P-S500 Owner’s Manual
7
Compatible formats for this instrument
GM2
“GM (General MIDI)” is one of the most common Voice allocation formats. “GM System Level 2” is a standard specification that
enhances the original “GM” and improves Song data compatibility. It provides for increased polyphony, greater Voice selection,
expanded Voice parameters, and integrated effect processing.
XG
XG is a major enhancement of the GM System Level 1 format, and was developed by Yamaha specifically to provide more Voices
and variations, as well as greater expressive control over Voices and effects, and to ensure compatibility of data well into the
future.
GS
GS was developed by the Roland Corporation. In the same way as Yamaha XG, GS is a major enhancement of the GM specifically
to provide more Voices and Drum kits and their variations, as well as greater expressive control over Voices and effects.
XF
The Yamaha XF format enhances the SMF (Standard MIDI File) standard with greater functionality and open-ended
expandability for the future. This instrument is capable of displaying lyrics when an XF file containing lyric data is played.

P-S500 Owner’s Manual
8
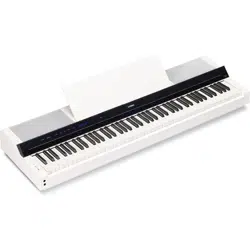
Thank you for purchasing this Yamaha Digital Piano!
This instrument gives you the pleasure of playing your favorite songs by yourself with the help of the
Stream Lights feature. We recommend that you read this manual carefully so that you can fully take
advantage of the advanced and convenient functions of the instrument. We also recommend that you keep
this manual in a safe and handy place for future reference.
About the Manuals
This instrument has the following documents and instructional materials.
Included Documents
Owner’s Manual (this book)
Explains how to use this instrument.
Online Materials (Downloadable from the web)
Data List
Contains lists of Voices and Styles, as well as MIDI-related information of this instrument.
Computer-related Operations
Includes instructions on connecting this instrument to a computer, and operations related to transmitting/
receiving data.
To obtain these manuals, access the Yamaha Downloads, enter the model name for searching the desired files.
Included Accessories
Owner’s Manual (this book) × 1
Online Member Product Registration × 1
AC adaptor × 1, Power cord × 1 (May not be included depending on your area. Check with your
Yama h a d e a ler.)
Music rest × 1
Footswitch × 1
Yama h a D ow n l o a d s
https://download.yamaha.com/

P-S500 Owner’s Manual
9
Table of Contents
PRECAUTIONS .........................................................................................................................................................................4
NOTICE....................................................................................................................................................................................... 6
Information ................................................................................................................................................................................. 6
About the Manuals .....................................................................................................................................................................8
Included Accessories .................................................................................................................................................................. 8
Main Features – A World of Piano Performance and Control with Smart Pianist – 10
Panel Controls and Terminals 12
Top Panel....................................................................................................................................................................12
Rear Panel ..................................................................................................................................................................13
Starting Up 14
Turning the power on or off....................................................................................................................................14
Adjusting the Master Volume .................................................................................................................................15
Attaching the music rest...........................................................................................................................................16
Using a pedal (footswitch) – [AUX PEDAL] jack ................................................................................................17
Using a pedal unit and keyboard stand (sold separately) – [PEDAL UNIT] jack ...........................................17
Using headphones – [PHONES] jacks...................................................................................................................19
Playing with Smart Pianist 20
Installing Smart Pianist ............................................................................................................................................20
Connecting with Smart Pianist ...............................................................................................................................20
Playing the Instrument Stand-alone 24
Playing various musical instrument sounds (Voices) – [VOICE] .....................................................................24
Playing a Style with the auto accompaniment – [STYLE]...................................................................................25
Playing back a Song – [SONG] ...............................................................................................................................26
Adjusting the tempo – [TEMPO] ...........................................................................................................................26
Practice along with the Stream Lights by using the Guide function – [GUIDE] .............................................27
Using the metronome – [METRONOME] ...........................................................................................................27
Make settings of various functions – [FUNCTION] ...........................................................................................28
Restoring the factory-programmed settings (initializing)...................................................................................29
Connecting to other devices 30
Connecting with a smart device for using an app
– [iPad] terminal, [USB TO DEVICE] terminal, [USB TO HOST] terminal ..................................................30
Connecting to an external audio device – [AUX IN] jack, AUX OUT [R]/[L/L+R] jacks.............................30
Connecting a microphone – [MIC INPUT] jack .................................................................................................31
Connecting to a computer – [USB TO HOST] terminal.....................................................................................32
Transmitting/receiving audio data (USB Audio Interface function)
– [iPad] terminal, [USB TO HOST] terminal .......................................................................................................33
Troubleshooting 34
Specifications 35
Index 37
P-S500 Owner’s Manual
10
Main Features – A World of Piano Performance and Control with Smart Pianist –
Main Features
– A World of Piano Performance and Control with Smart Pianist –
By using this instrument with the smart device app “Smart Pianist,” you can fully enjoy various functions,
such as playing along with a favorite song, or performing with a band or ensemble. Try installing the app to
your smart device and connect with this instrument to take advantage of those added features.
For details on the app and compatible devices, see the website below or search “Yamaha Smart Pianist” on a
web search engine. For connection, refer to page 20.
https://www.yamaha.com/kbdapps/
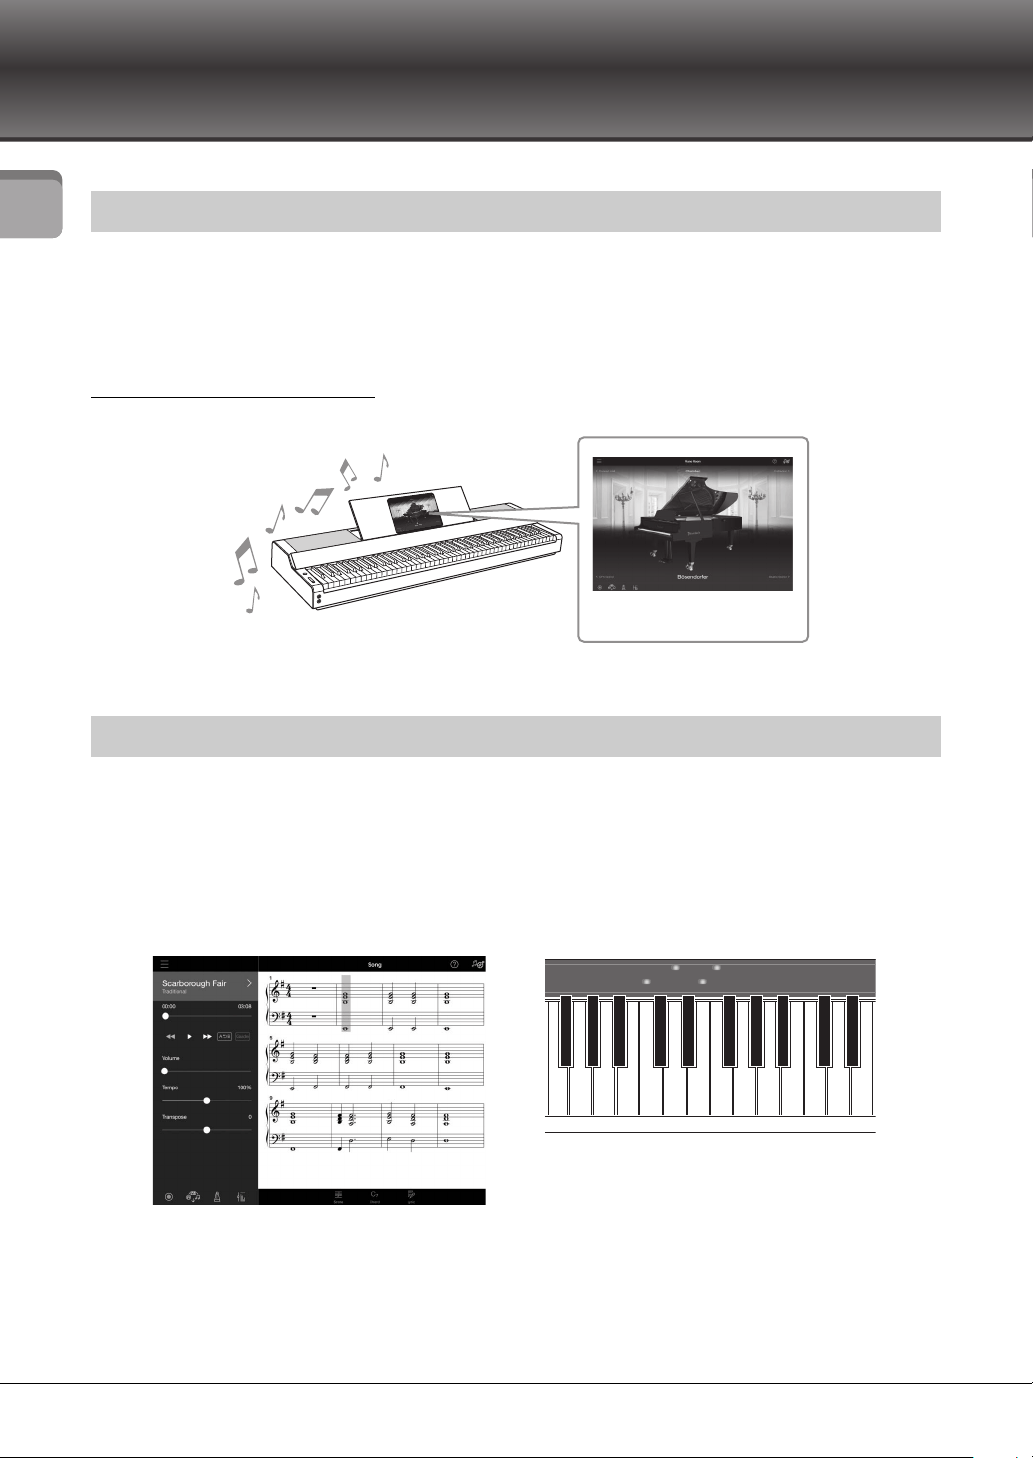
A number of songs, including popular, classical and lesson songs, are pre-installed to this instrument.
Smart Pianist allows you to view the music notation (score) of these songs. For people who have difficulty
reading notation, the Stream Lights function (page 27) shows which key to play next. Just press the keys at
the right time as indicated by the moving lights above the keys.
Moreover, by using the Guide function, you can practice at your own pace since Song playback pauses and
waits for you to play the correct notes. It also allows you to practice by one-hand, or repeatedly practice a
specified range of the song.
The app also includes an “Audio To Score” function, which automatically creates a piano accompaniment
score from songs on your smart device. Even without a score, you can enjoy playing piano accompaniment
to a song.
Get more fun out of your piano with Smart Pianist
Play your favorite songs right away
The Smart Pianist
smart device app
P-S500 Owner’s Manual
11
Main Features – A World of Piano Performance and Control with Smart Pianist –
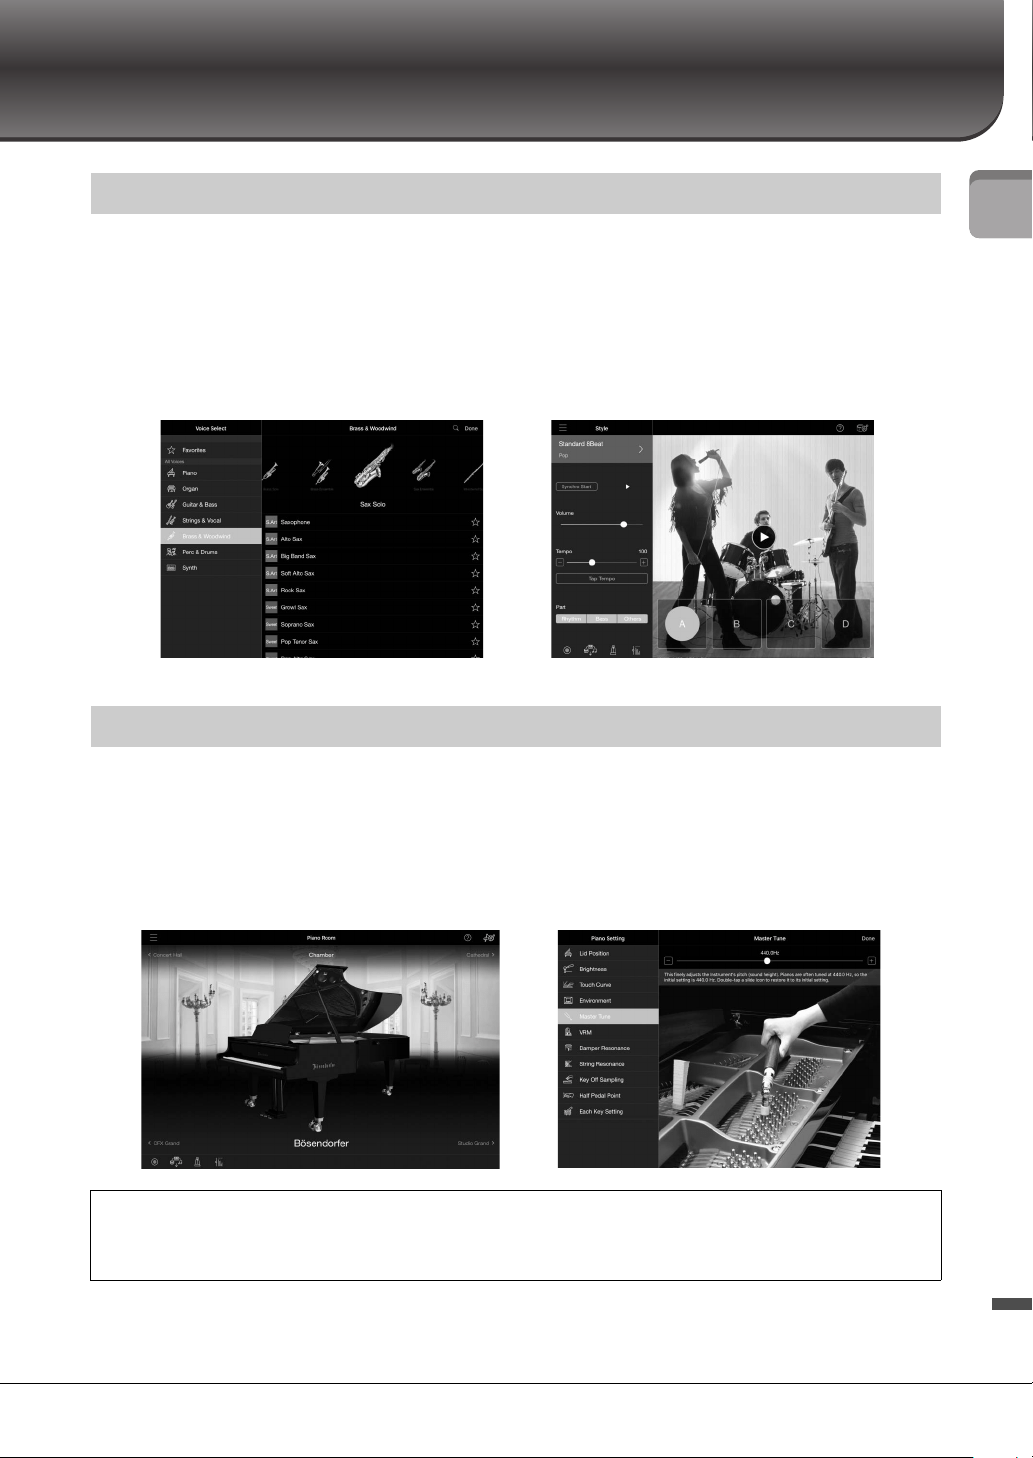
This instrument features a wide variety of instrumental Voices, including piano, organ, guitar, saxophone
and more. It also allows you to layer two Voices, or play different Voices in the right- and left- hand
sections. Moreover, the Style function provides dynamic backing band accompaniment, even when you’re
playing by yourself, and features a wide number of patterns in various genres to match your performance.
You can even connect a microphone and sing along with your own performance—and has luxurious
harmony functions that allow you to automatically create vocal chorus backing for yourself, even when
you’re singing alone.
The piano Voices have been created with samples of Yamaha’s flagship CFX concert grand piano and the
world renowned Bösendorfer* concert grand piano. On Smart Pianist, the Piano Room function
reproduces the way sound echoes based on the environment (such as a concert hall), and the subtle changes
in sound due to the opening or closing of the lid of a grand piano—letting you customize the piano sound
to your exact liking.
*Bösendorfer is a subsidiary company of Yamaha.
NOTE
All screen examples shown here have been captured from the app with the latest specifications as of the publishing date. The screens
and the specifications may be updated for improvement.
Enjoy backing band accompaniment and singing with your own performance
Playing with your favorite piano sound
Using Smart Pianist gives you access to many more convenient and powerful functions—such as recording,
adjusting volume balance among the keyboard parts/Song/Style, and transposing the pitch of the Song. (See
page 36 for these additional functions.)
P-S500 Owner’s Manual
12
Panel Controls and Terminals
Panel Controls and Terminals
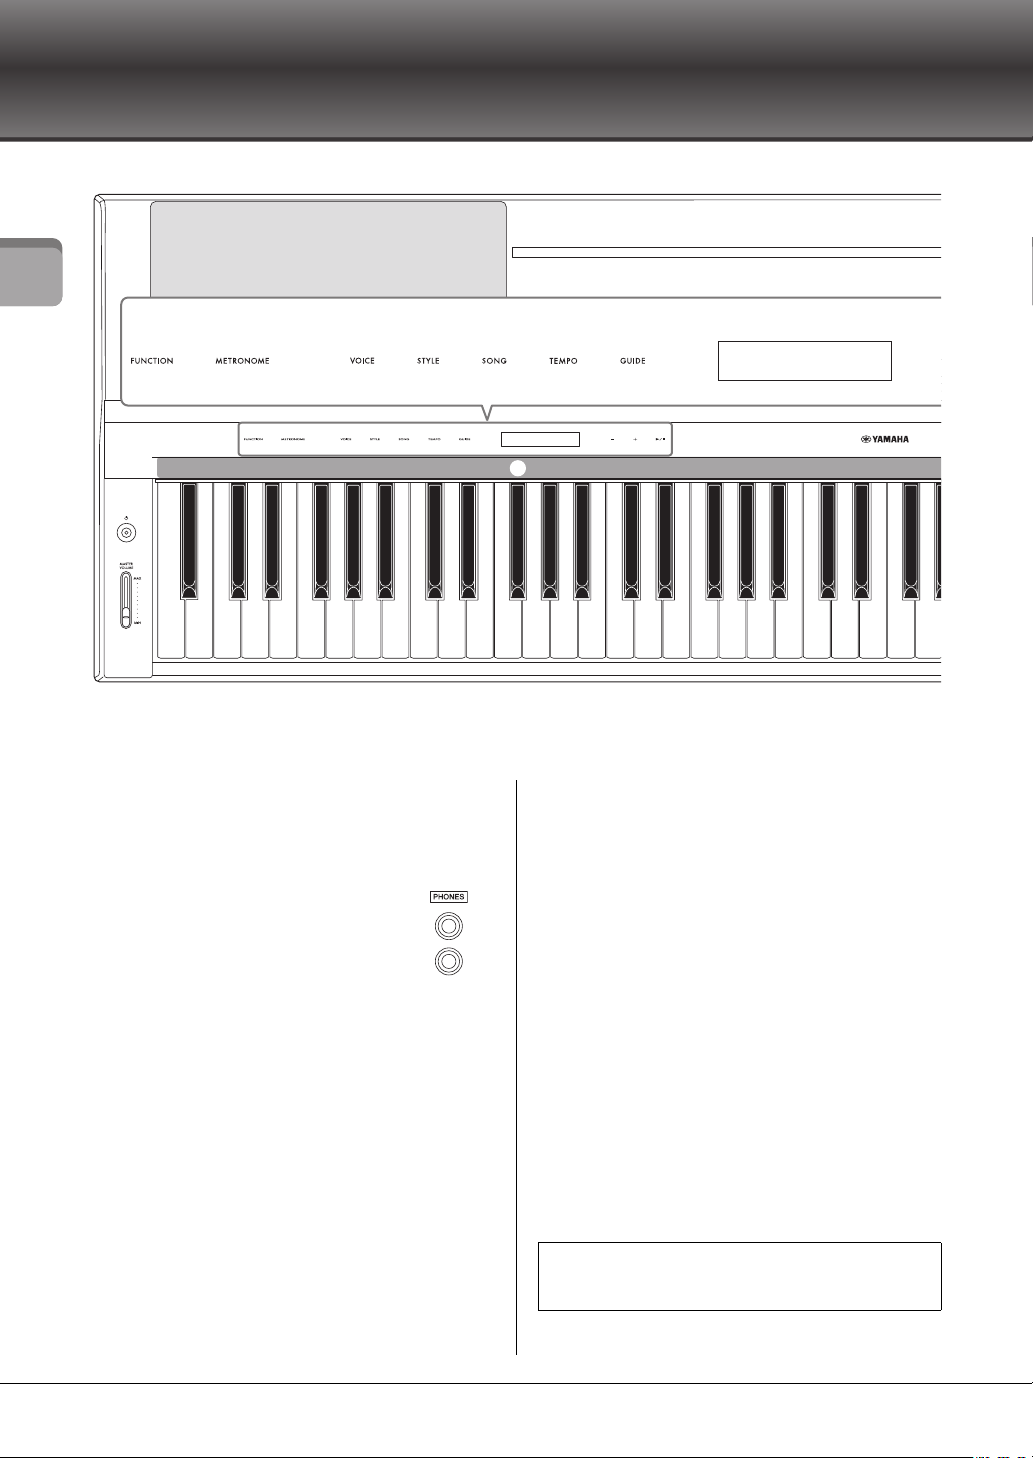
Top Panel
1 [P] (Standby/On) switch (page 14)
Turns on the instrument’s power or sets to standby.
2 [MASTER VOLUME] slider (page 15)
Adjusts the overall volume.
3 [PHONES] jacks (page 19)
For connecting headphones.
4 [FUNCTION] button (page 28)
Calls up the display for setting various functions,
such as transpose and tuning.
5 [METRONOME] button (page 27)
Turns the metronome on or off.
6 [VOICE] button (page 24)
Calls up the display for selecting Voices.
7 [STYLE] button (page 25)
Calls up the display for selecting Styles.
8 [SONG] button (page 26)
Calls up the display for selecting Songs.
9 [TEMPO] button (page 26)
Calls up the display for adjusting tempo.
) [GUIDE] button (page 27)
Calls up the display for setting the Guide function.
! Display
Indicates the current instrument’s setting.
@ [-]/[+] buttons (page 24)
For selecting a Voice or Style, or changing a
parameter value such as tempo. Holding one of
these buttons changes the value continuously.
Pressing both [-] and [+] buttons simultaneously
can reset the parameter to the default value.
# [R/J] (Start/Stop) button (page 24)
Starts or stops playback of the selected Song or Style.
$ Stream Lights (page 27)
Four lamps are embedded on top of each keys.
These lamps light in succession in a descending
pattern during Song playback to indicate the notes
you should play and when you should play them.
A-1 B-1 C0 D0 E0 F0 G0 A0 B0 C1 D1 E1 F1 G1 A1 B1 C2 D2 E2 F2 G2 A2 B2 C3 D3 E3 F3 G3
1
2
3
4 5 6 7 9 )
$
!
8
The control buttons and display are shown when the
power is turned on.
P-S500 Owner’s Manual
13
Panel Controls and Terminals
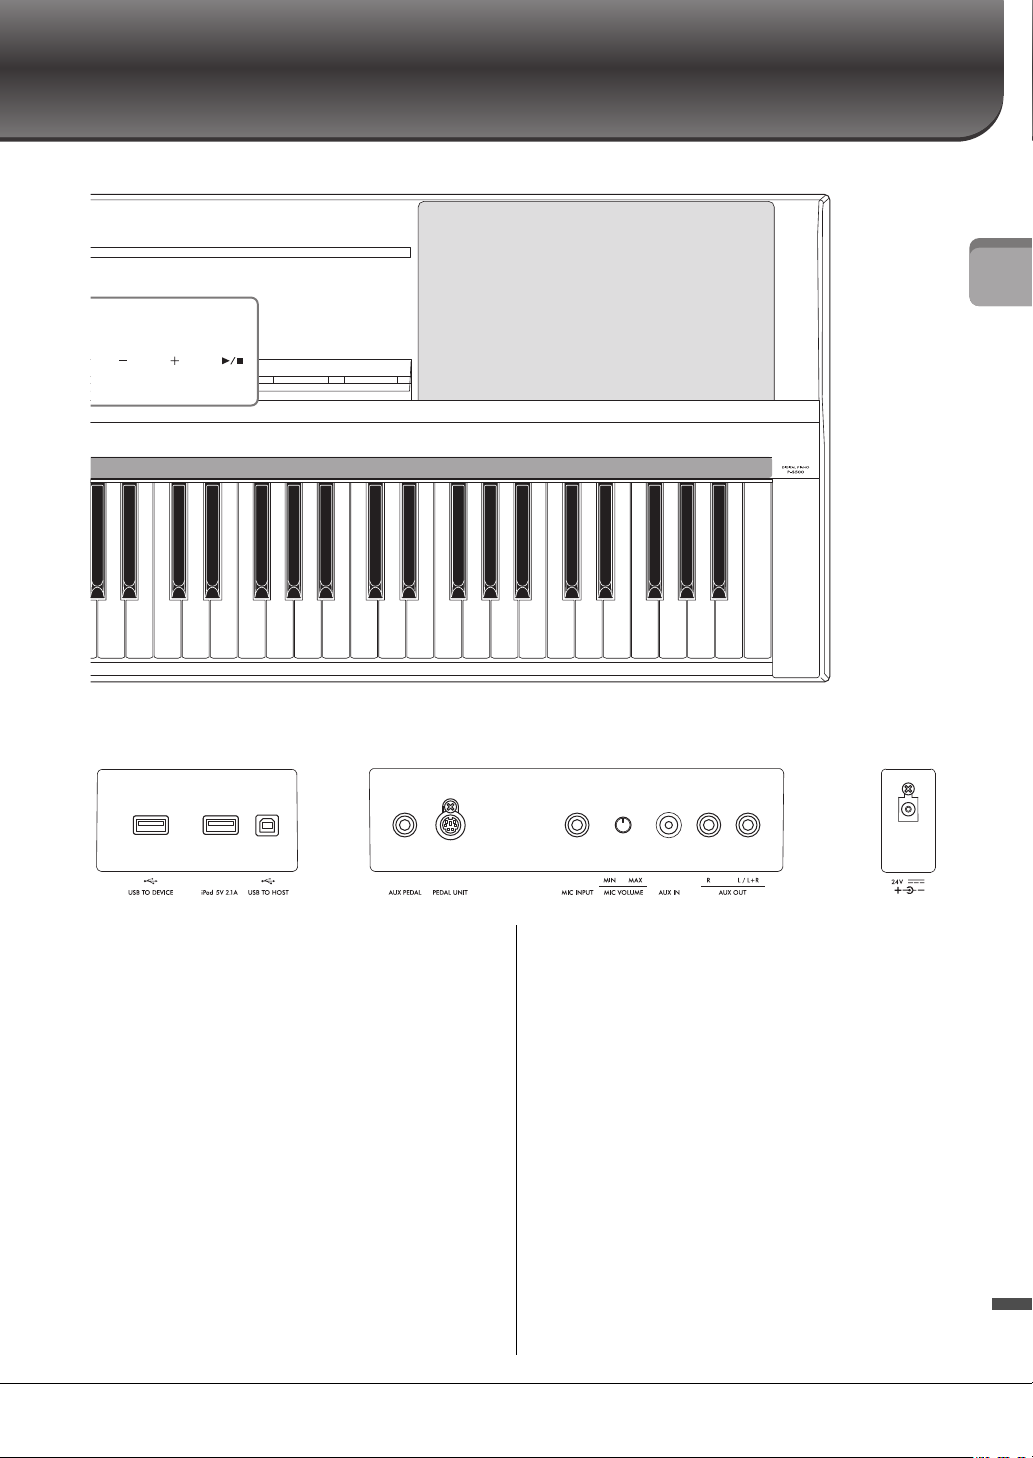
Rear Panel
% [USB TO DEVICE] terminal (page 22)
For connecting a USB wireless LAN adaptor (sold
separately).
^ [iPad] terminal (pages 21, 33)
For connecting a smart device with a Lightning
connector.
& [USB TO HOST] terminal (pages 21, 32, 33)
For connecting a smart device with a USB Type-C
connector or a computer.
* [AUX PEDAL] jack (page 17)
For connecting the included footswitch or
separately sold foot pedals.
( [PEDAL UNIT] jack (page 17)
For connecting a separately sold pedal unit.
A [MIC INPUT] jack (page 31)
For connecting a microphone.
B [MIC VOLUME] knob (page 31)
For adjusting the input level of the [MIC INPUT]
jack.
C [AUX IN] jack (page 30)
For connecting an external audio device, such as a
portable audio player. Audio playback by the
connected device can be output from this
instrument’s speaker.
D AUX OUT [R]/[L/L+R] jacks (page 31)
For connecting an audio device such as a speaker.
The sound played on this instrument can be output
from the connected external device’s speaker.
E DC IN jack (page 14)
For connecting the AC adaptor.
3A3B3C4D4E4 F4G4A4B4C5D5E5 F5G5A5B5C6D6E6 F6G6A6B6C7
@ #
%
^ &
* (
A
CB
D
E
P-S500 Owner’s Manual
14
Starting Up
Starting Up
This section explains how to set up and start using your instrument. Setup is so simple, you can start
playing right away.
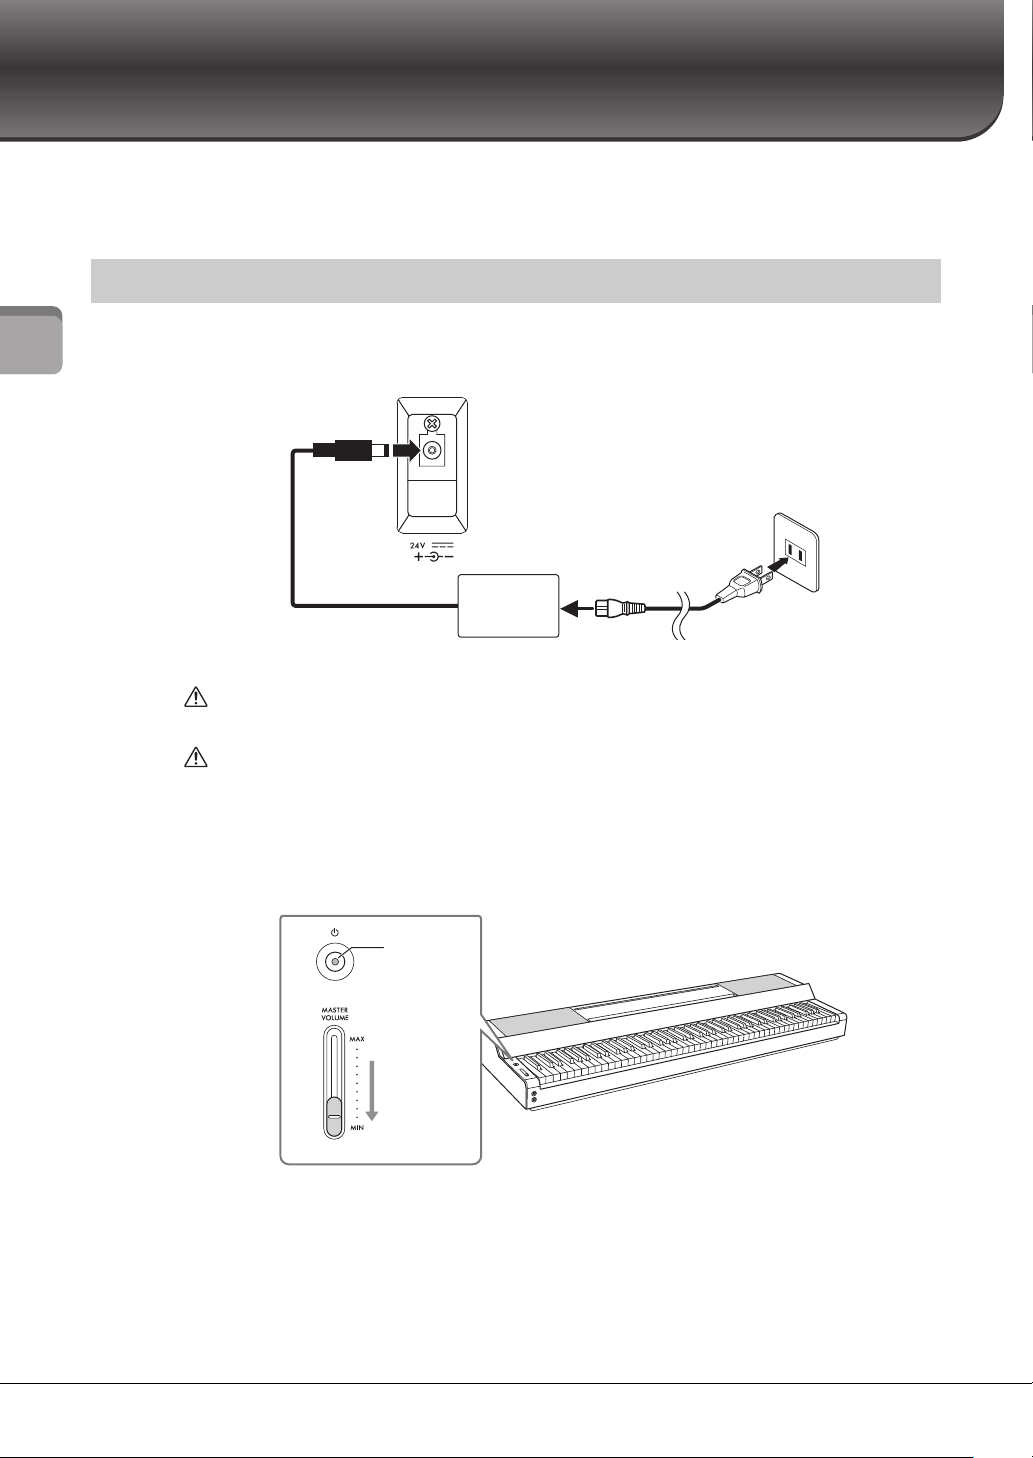
1 Connect the plugs of the AC adaptor and the power cord in the order shown in the
illustration.
WARNING
Use the specified AC adaptor (page 35) only. Using the wrong AC adaptor can result in damage to the instrument or
overheating.
CAUTION
When setting up the product, make sure that the AC outlet you are using is easily accessible. If some trouble or
malfunction occurs, immediately turn the power off and disconnect the plug from the outlet.
NOTE
When disconnecting the power cord/AC adaptor, first turn off the power, and then follow this procedure in reverse order.
2 Turn down the [MASTER VOLUME] slider to “MIN.”
3 Press the [P] (Standby/On) switch to turn the power on.
The power indicator on the [P] (Standby/On) switch lights up, and the control buttons appear.
4 Adjust the volume.
Play the keyboard to produce sound and turn up the [MASTER VOLUME] slider slowly while
you adjust the volume.
Turning the power on or off
DC IN jack (page 13)
The shape of the plug and outlet differ depending on the particular locale.
1-3
1-2
DC plug
AC adaptor
AC plug
AC outlet
1-1
Power cord
2
3
Power
indicator
P-S500 Owner’s Manual
15
Starting Up
5 After you finish using the instrument, turn off the power by pressing the
[P] (Standby/On) switch for a second.
The display, control buttons and power indicator are all turned off.
CAUTION
Even when the [P] (Standby/On) switch is in standby status, electricity is still flowing to the instrument at the
minimum level. Remove the electric plug from the outlet when the instrument is not to be used for extended
periods of time, or during electrical storms.
NOTICE
• Do not press any keys or pedals until the instrument has completely started up (the control buttons appear) after
turning on the switch. Doing so may cause malfunction.
• If you need to force-quit the instrument, hold down the [P] (Standby/On) switch for longer than three seconds.
Keep in mind that the force-quit operation might cause data loss and damage to the instrument.
Auto Power Off function
To prevent unnecessary power consumption, this instrument features an Auto Power Off function that
automatically turns the power off if the instrument is not operated for a specified period of time. The
amount of time that elapses before the power is automatically turned off is approximately 30 minutes by
default; however, you can change the setting from [Utility] → [System] on Smart Pianist.
NOTICE
Any data which are not saved will be lost if the power automatically turns off. Make sure to save your data before this happens.
NOTE
You can enable/disable the Auto Power Off function by using the [FUNCTION] button (page 29).
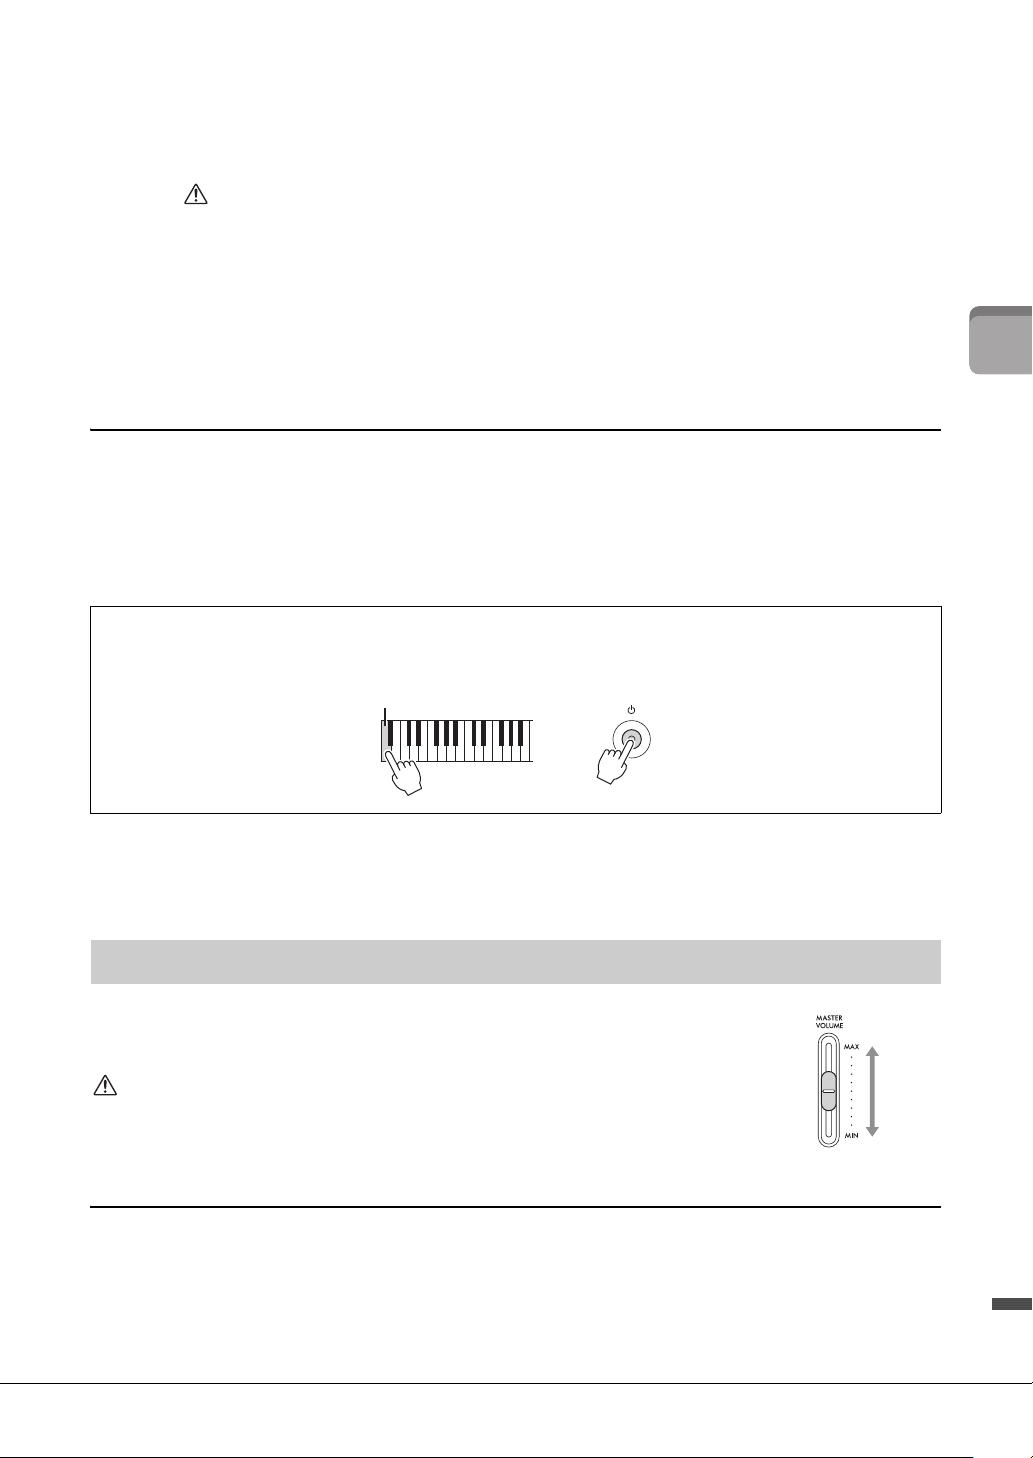
To adjust the volume of the entire keyboard sound, use the [MASTER VOLUME]
slider. Play the keyboard to check the sound while you adjust the volume.
CAUTION
Do not use the instrument for a long period of time at a high or uncomfortable volume level, since
this can cause permanent hearing loss.
Intelligent Acoustic Control (IAC)
IAC is a function which automatically adjusts and controls the sound quality according to the overall
volume of the instrument. Even when playing the instrument with the overall volume turned down, it
permits both low sounds and high sounds to be clearly heard. IAC is effective only from the sound output
of the instrument speakers. This function is set to on by default; however, you can turn it on or off, and set
the depth from [Utility] → [Sound Setting] on Smart Pianist.
Disabling Auto Power Off (simple method)
Turn the power on while holding down the lowest key on the keyboard. The instrument starts up with the Auto
Power Off function disabled.
Adjusting the Master Volume
+
Lowest key (A-1)
Increases
the level.
Decreases
the level.
P-S500 Owner’s Manual
16
Starting Up
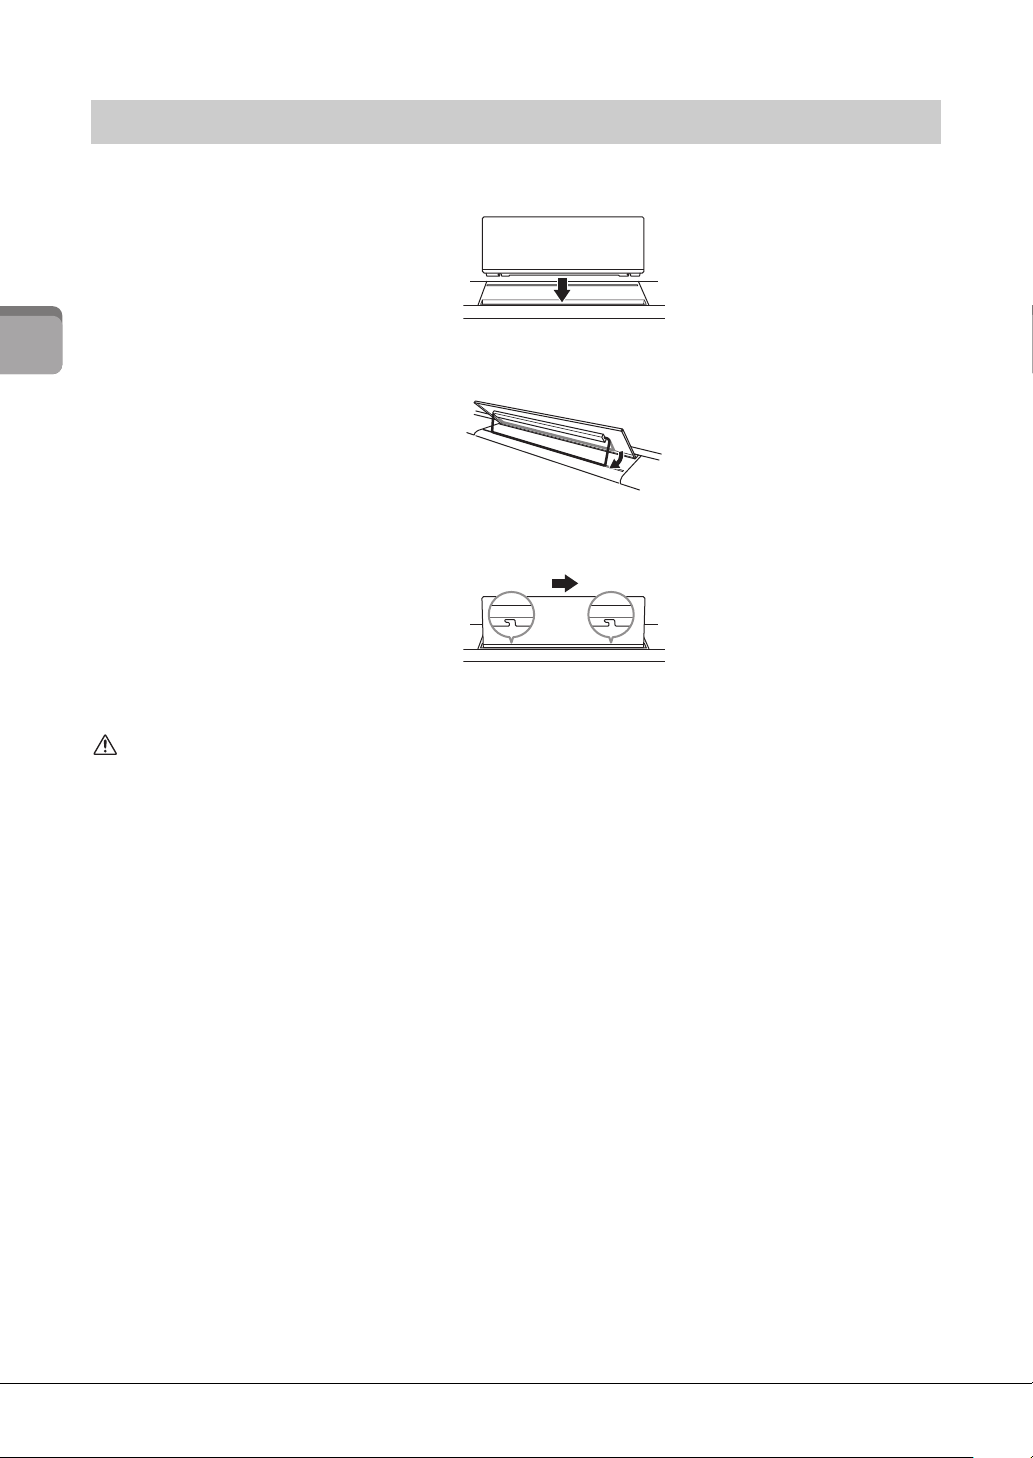
1 Insert the music rest into the slots.
2 Open the stand at the rear side of the music rest to fit into the groove.
3 Slide the music rest to the right so that it is securely fastened.
To detach the music rest, slide the music rest to the left and then lift it up.
CAUTION
•Before using the music rest, make sure that the stand fits into the groove and is fastened securely. Also, be sure to remove your
smart device, etc. from the music rest when moving the instrument. Failure to do so may result in damage to the instrument or
smart device, or even injury.
• Be careful to avoid catching your fingers when attaching or detaching the music rest.
Attaching the music rest
P-S500 Owner’s Manual
17
Starting Up
Connect the included footswitch to the [AUX PEDAL] jack. Just as with a damper pedal of a piano, pressing
the footswitch sustains notes even when you release your fingers from keyboards. Other separately sold
foot pedal FC3A or footswitch FC4A/FC5 can also be connected to this jack. The FC3A allows you to use
the Half Pedal function (page 18).
You can change the function of the pedal from [Utility] → [Pedal Setting] on Smart Pianist. Various
functions such as “Style Start/Stop” are available.
NOTE
• Make sure that the power is off when connecting or disconnecting the footswitch/foot pedal.
• Do not press the footswitch/foot pedal while turning the power on. Doing this changes the recognized polarity of the footswitch/foot
pedal, resulting in reversed operation.
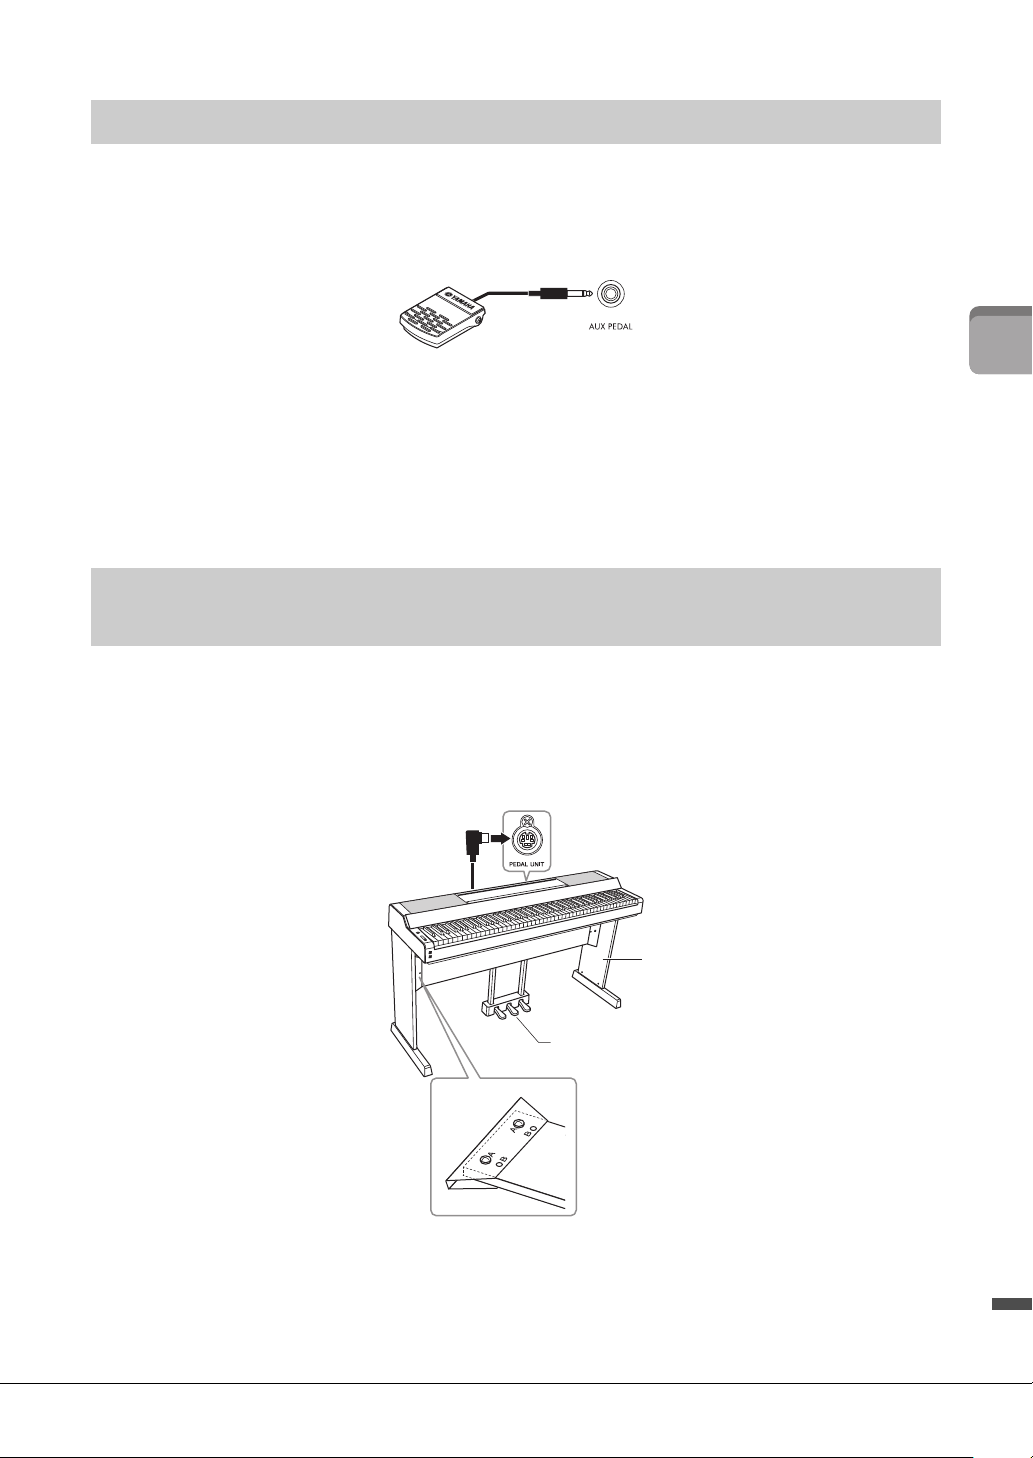
A separately sold LP-1B/LP-1WH pedal unit can be connected to the [PEDAL UNIT] jack. When
connecting the pedal unit, make sure to also assemble the unit on the separately sold L-300B/L-300WH
keyboard stand. On the metal brackets of the L-300B/L-300WH, there are screw holes “A” and “B.” When
assembling the keyboard stand for the P-S500, make sure to use the screw holes indicated by “A” on the
metal brackets of the stand. For details, refer to the assembly manual of the stand.
NOTE
• Make sure that the power is off when connecting or disconnecting the pedal unit.
• Do not press the pedals while turning the power on. Doing this changes the recognized polarity of the pedals, resulting in reversed
operation.
Using a pedal (footswitch) – [AUX PEDAL] jack
Using a pedal unit and keyboard stand (sold separately) – [PEDAL
UNIT] jack
L-300B/L-300WH
(sold separately)
LP-1B/LP-1WH
(sold separately)
Rear side
P-S500 Owner’s Manual
18
Starting Up
Pedal Unit functions
By default, the following functions are assigned to each pedal. You can also assign other functions such as
“Style Start/Stop” to the pedals from [Utility] → [Pedal Setting] on Smart Pianist.
Damper pedal (right pedal)
Pressing this pedal lets you sustain notes even after releasing the keys. You can
use the Half Pedal function (see below) with this pedal.
Sostenuto pedal (center pedal)
If you play a note or notes on the keyboard and press the sostenuto pedal while
the note(s) are held, those notes will sustain as long as you hold the pedal but
all subsequently played notes will not be sustained. This makes it possible to
sustain a note or notes, for example, while other notes are played staccato.
Soft pedal (left pedal)
The soft pedal reduces the volume and slightly changes the timbre of notes played while the pedal is
pressed. The soft pedal will not affect notes that are already playing when it is pressed. In order to apply this
effect, play notes after pressing the pedal.
Half Pedal function (for LP-1B/LP-1WH and FC3A)
The FC3A (page 17) and the right pedal of the LP-1B/LP-1WH have a Half Pedal function which allows you to use
half-damper techniques, in which the damper is pressed somewhere between all the way down and all the way up.
In this half-damper state (on a real piano), the damper felts only partially mute the strings. The Half Pedal function
lets you delicately and expressively control the damper muting, and create subtle nuances in your performance, by
finely controlling the point at which pressure on the pedal affects the damper muting. The point is called “Half
Pedal Point” and can be set in the [Piano Room] of Smart Pianist.
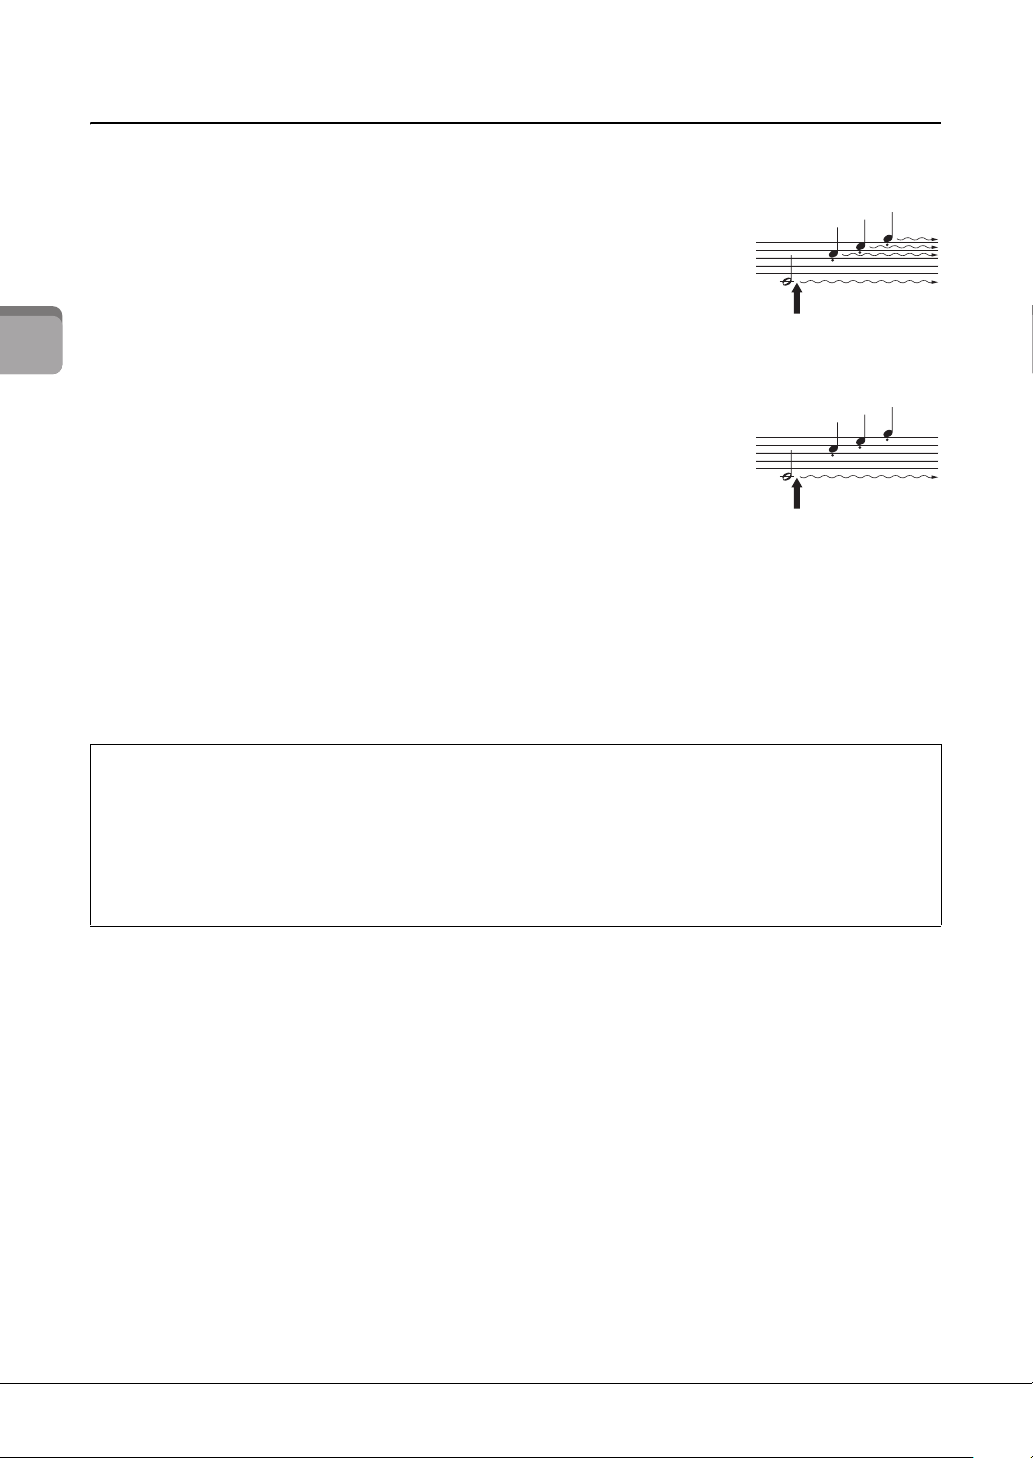
When you press the damper
pedal here, the notes you
play before you release the
pedal have a longer sustain.
When you press the sostenuto
pedal here while holding the
note(s), the notes will sustain
as long as you hold the pedal.
P-S500 Owner’s Manual
19
Starting Up
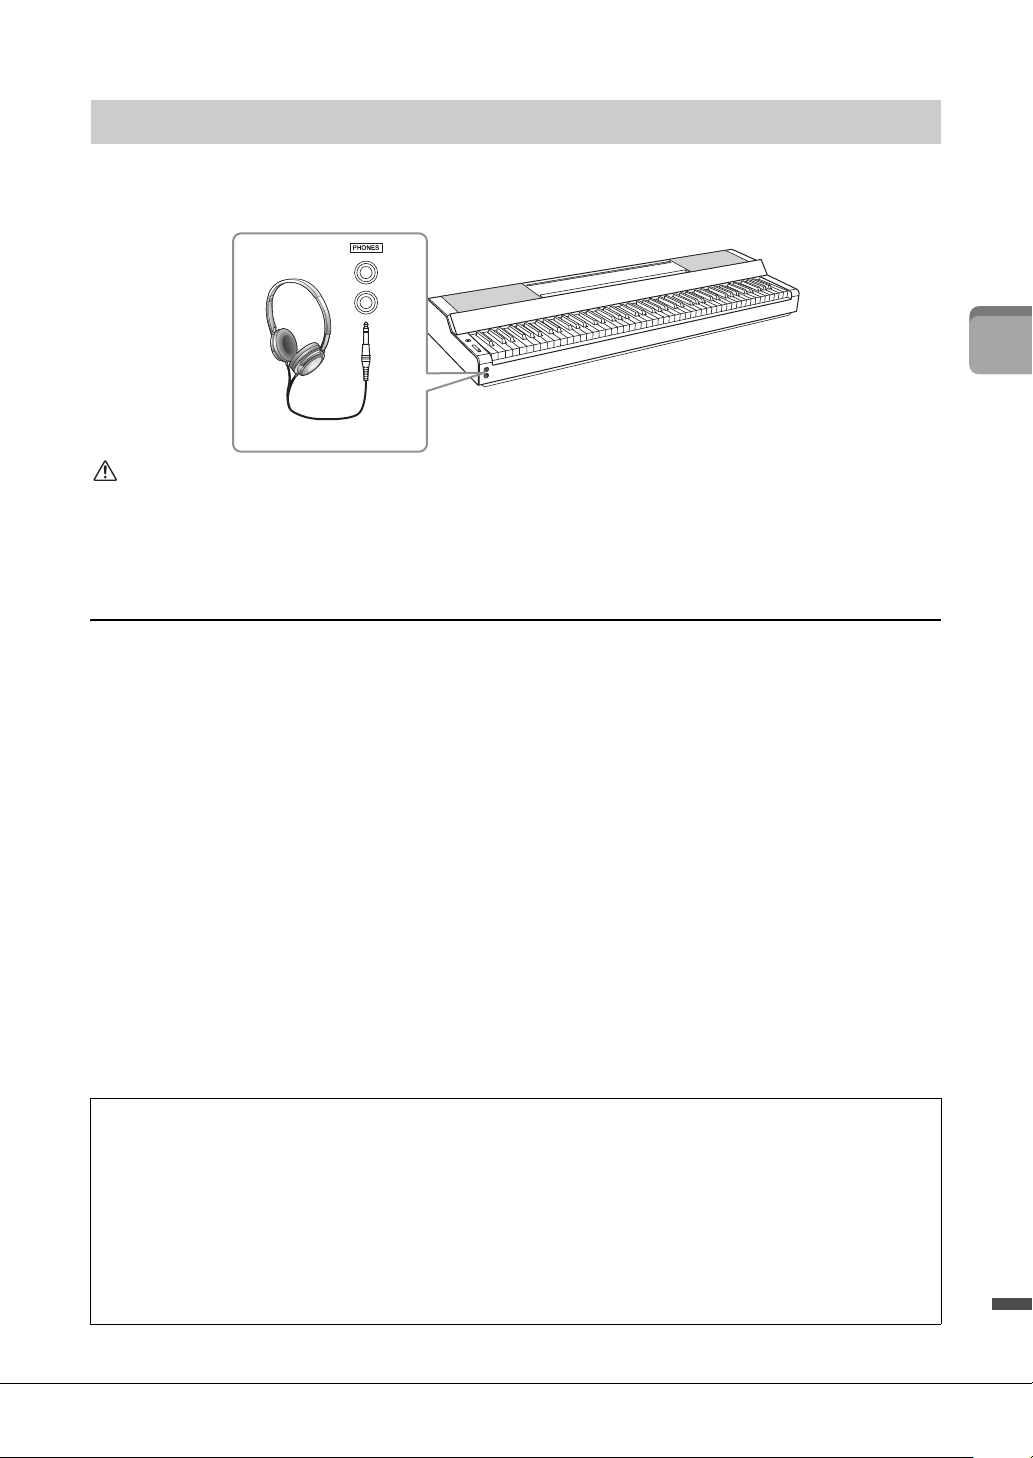
Connect a pair of headphones to the [PHONES] jacks. Since this instrument is equipped with two
[PHONES] jacks, you can connect two pairs of headphones.
CAUTION
Do not use the headphones for a long period of time at a hig h or uncomfortable volume level, since this can cause permanent
hearing loss.
Reproducing the natural sensation of sound distance (even when using headphones)
—Binaural Sampling and Stereophonic Optimizer
This instrument features two advanced technologies that allow you to enjoy exceptionally realistic, natural
sound, even though listening on headphones.
Binaural Sampling (“CFX Grand” Voice only)
Binaural Sampling is a method that uses two special microphones set at the ear position of a performer and
records the sound from a piano as it would actually be heard. Listening to the sound with this effect
through headphones gives the impression of being immersed in the sound, as if it was actually emanating
from the piano. Moreover, you can enjoy the sound naturally for a long time without ear fatigue. When the
“CFX Grand” Voice is selected, connecting the headphones automatically enables the binaural sampling
sound.
Sampling
A technology which records the sounds of an acoustic instrument and then stores them to the tone generator to be played based on
information received from the keyboard.
Stereophonic Optimizer (VRM Voices other than “CFX Grand”)
Stereophonic Optimizer is an effect which reproduces the natural sound distance, like with the sound of
Binaural Sampling, even though you are listening to it on headphones. When one of the VRM Voices other
than “CFX Grand” is selected, connecting the headphones automatically enables the Stereophonic
Optimizer. To see which Voices are VRM Voices, refer to the Data List on the website.
Using headphones – [PHONES] jacks
What is VRM?
On an actual acoustic piano, if you press the damper pedal and play a key, not only does the string of the pressed
key vibrate, it also causes other strings and the soundboard to vibrate, each influencing the rest and creating a rich
and brilliant resonance that sustains and spreads. The VRM (Virtual Resonance Modeling) technology featured in
this instrument reproduces the complicated interaction of both string and soundboard resonance faithfully using a
virtual musical instrument (physical modeling), and makes the sound more like a real acoustic piano. Since
instantaneous resonance is made at the moment according to the state of the keyboard or pedal, you can vary the
sound expressively by changing the timing of your pressing the keys, and the timing and depth of your pressing the
pedal.
Standard stereo phone plug
P-S500 Owner’s Manual
20
Playing with Smart Pianist
Playing with Smart Pianist
You can take greater advantage of this instrument and get even more enjoyment from it by connecting it to
your smart device and using the Smart Pianist smart device app. Smart Pianist gives you convenient and
powerful access to additional functions, such as recording and Registration Memory. Moreover, the display
gives you exceptionally intuitive visual control, making it even easier to control the instrument.
To see what you can do on the instrument by itself, or by using the Smart Pianist, refer to the list on page 36.
NOTICE
All settings on the instrument are replaced by the settings on Smart Pianist when the instrument is connected with Smart Pianist.
Get the Smart Pianist app and install it on your smart device!
• iPadOS/iOS: Available on the App Store
• Android: Available on Google Play
For details on the app and the compatible devices, see the website below.
https://www.yamaha.com/kbdapps/
This instrument can be connected to a smart device via a USB cable or Wi-Fi (wireless LAN). For
instructions on connecting the instrument with a smart device, the “Connection Wizard” of Smart Pianist
will guide you according to the condition of the instrument you are using.
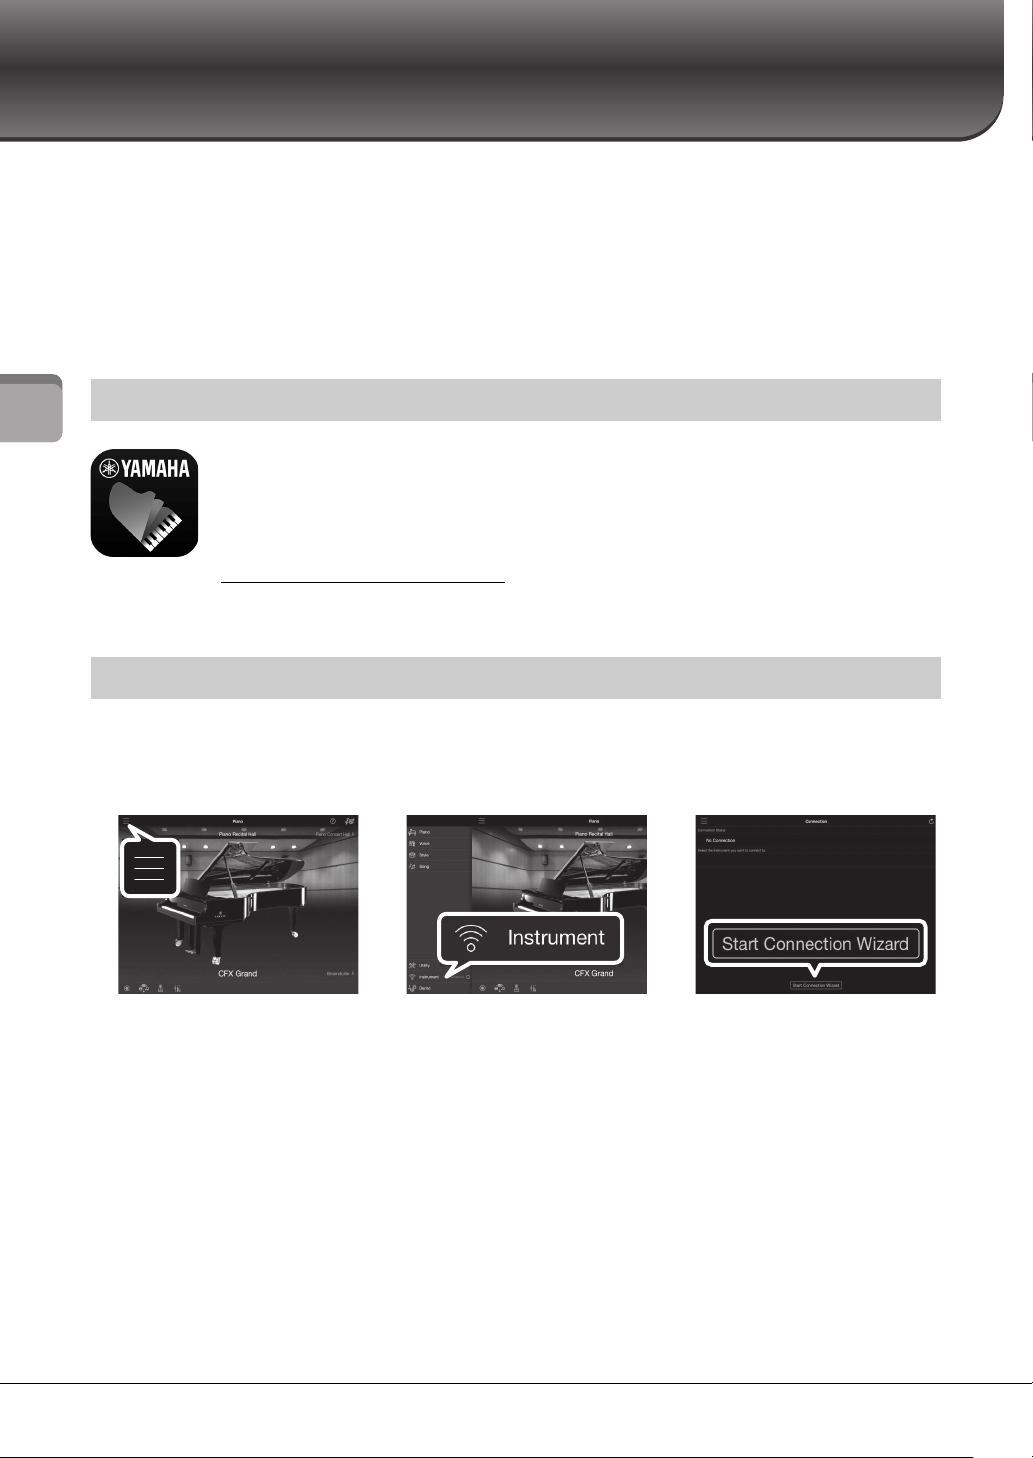
1
On Smart Pianist, tap the [
ⲷ
] icon located at the upper left on the display to open the
menu.
2 Tap [Instrument] to call up the Connection display.
3 Tap [Start Connection Wizard] at the bottom.
4 Follow the Connection Wizard.
When the connection is done successfully, “P-S500” is shown next to [Instrument] located at
the lower left on the display. When the instrument is connected with Smart Pianist, the control
buttons on the instrument are disabled, and all control over the instrument is done by using
Smart Pianist.
Installing Smart Pianist
Connecting with Smart Pianist
123
P-S500 Owner’s Manual
21
Playing with Smart Pianist
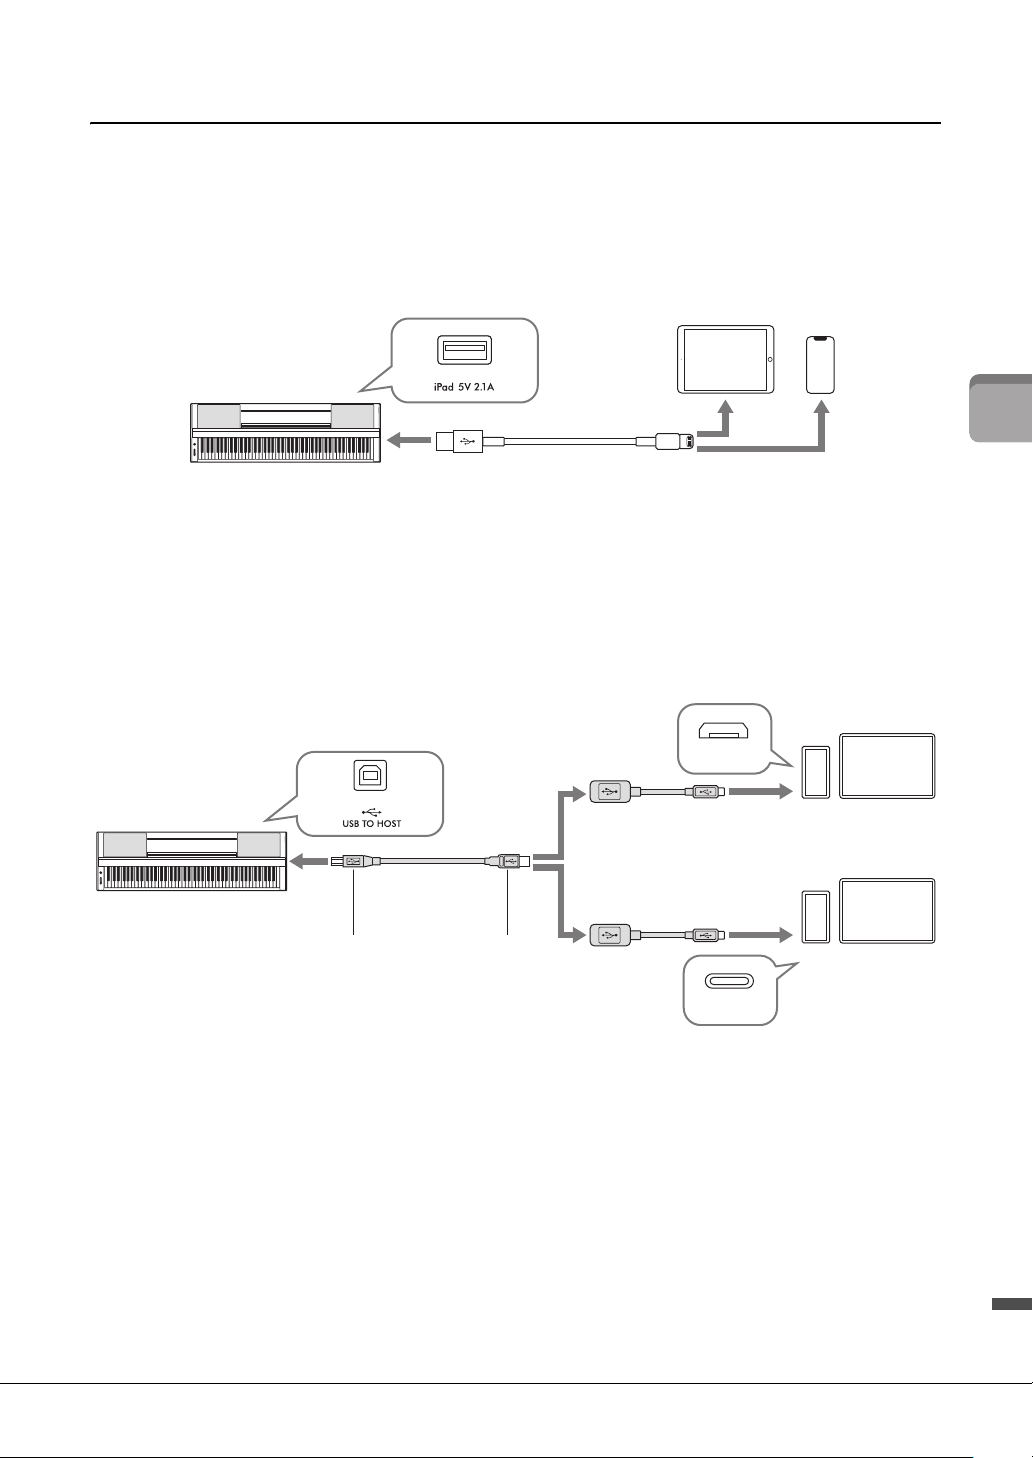
Examples of connection via cables
NOTE
The [iPad] terminal and [USB TO HOST] terminal cannot be used at the same time for connecting smart devices.
Lightning connector devices (iPhone, iPad, etc.)
Connect the device to the [iPad] terminal by using a Lightning ‒ USB cable. The iPhone or iPad connected
to this terminal is automatically charged during use.
NOTICE
• The [iPad] terminal is dedicated for connection with iOS or iPadOS devices. Do not connect other devices to the terminal.
• Use an Apple Lightning - USB cable of less than 3 meters.
Micro B or USB Type-C connector devices
Connect the device to the [USB TO HOST] terminal by using an appropriate USB conversion adaptor and
a USB cable. Before using the [USB TO HOST] terminal, be sure to read “Precautions when using the [USB
TO HOST] terminal” (page 22).
A USB type-C connector iPadOS device can also be connected by using the Apple USB-C Digital AV
Multiport Adapter or Apple USB-C VGA Multiport Adapter.
NOTE
• The smart device cannot be charged when it is connected to the [USB TO HOST] terminal.
• Not all commercially available USB conversion adaptors are compatible.
iPhone
iPad
12
Lightning – USB cable
Instrument
1
2
2
3
3
USB cable
Smart device
Smart device
USB conversion adaptor
(Type A female – Micro B male)
USB conversion adaptor
(Type A female –Type C male)
USB
(Type A male)
USB
(Type B male)
Instrument
Micro B
Type C
P-S500 Owner’s Manual
22
Playing with Smart Pianist
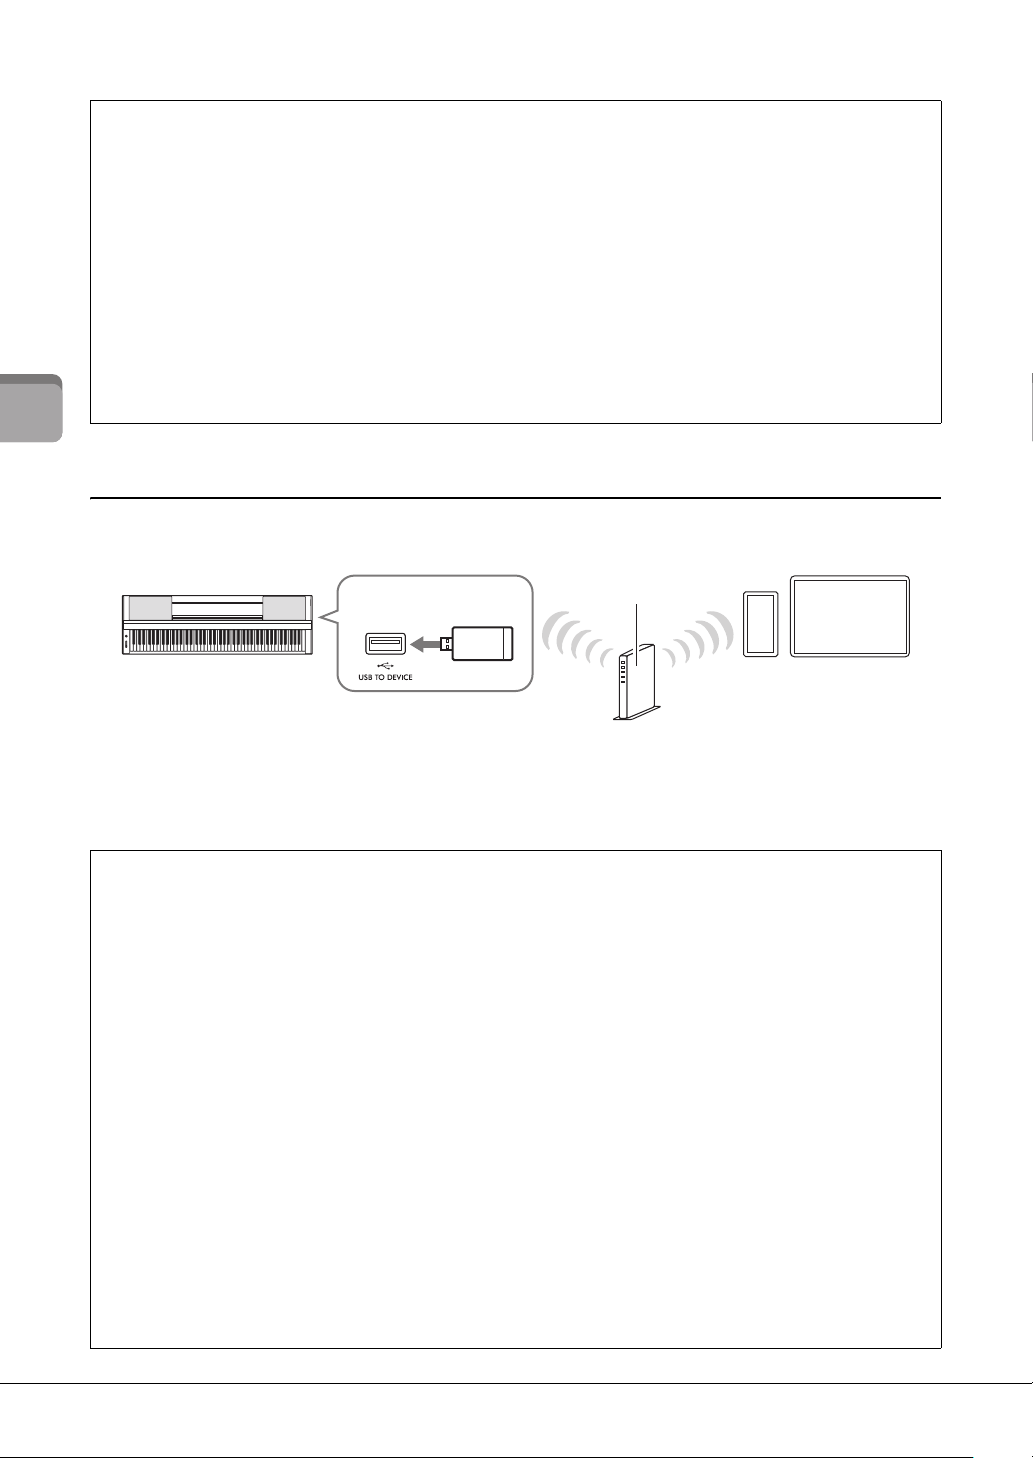
Examples of connection via Wi-Fi (Wireless LAN)
For Wi-Fi connection, you need a separately sold wireless LAN adaptor (UD-WL01). Before connecting the
wireless LAN adaptor, be sure to read “Precautions when using the [USB TO DEVICE] terminal” below.
NOTICE
Do not connect this product to a public Wi-Fi and/or Internet service directly. Only connect this product to the Internet through a
router with strong password protections. Consult your router manufacturer for information on optimum security practices.
NOTE
The instrument can be connected via Wi-Fi directly without need of an access point. However, in this condition Internet access will be
disabled on your smart device, and certain functions may be limited, such as mailing, searching and some functions of Smart Pianist.
Precautions when using the [USB TO HOST] terminal
When connecting the smart device to the [USB TO HOST] terminal, make sure to observe the following points to avoid
freezing the smart device/instrument and corrupting or losing the data.
NOTICE
• Use an AB type USB cable of less than 3 meters. USB 3.0 cables cannot be used.
• Execute the following before turning the power to the instrument on/off or plugging/unplugging the USB cable to/from the
[USB TO HOST] terminal.
- Quit any open app on the smart device.
- Make sure that data is not being transmitted from the instrument. (Data is transmitted even when the notes on the
keyboard are played or a Song is played back.)
• While the smart device is connected to the instrument, you should wait for six seconds or more between these operations:
(1) when turning the power of the instrument off then on again, or (2) when alternately connecting/disconnecting the USB
cable.
If the smart device or the instrument freezes, restart the app or the smart device, or turn the power to the instrument off
then on again.
Precautions when using the [USB TO DEVICE] terminal
This instrument features a built-in [USB TO DEVICE] terminal. When connecting a USB device to the terminal, be sure
to handle the USB device with care. Follow the important precautions below.
NOTE
For more information about the handling of USB devices, refer to the owner’s manual of the USB device.
Compatible USB devices
• USB wireless LAN adaptor (UD-WL01; sold separately)
• USB flash drive (can only be used to update the software; not for use in saving files, reading data, recording nor playing
back)
Other USB devices such as a USB hub, computer keyboard or mouse cannot be used.
NOTICE
The rating of the [USB TO DEVICE] terminal is a maximum of 5V/500mA. Do not connect USB devices having a rating above
this, since this can cause damage to the instrument itself.
Connecting a USB device
When connecting a USB device to the [USB TO DEVICE] terminal, make sure that the connector on the device is
appropriate and that it is connected in the proper direction.
NOTICE
• Avoid connecting or disconnecting the USB device when accessing the USB device. Failure to observe this may result in
“freezing” of the operation of the instrument or corruption of the USB device and the data.
• When connecting and then disconnecting the USB device (and vice versa), make sure to wait a few seconds between the
two operations.
• Do not use an extension cable when connecting a USB device.
Smart device
Instrument
USB wireless LAN adaptor
(UD-WL01)
Access point
Wireless
LAN
Wireless
LAN

P-S500 Owner’s Manual
23
Playing with Smart Pianist
Disconnecting Smart Pianist
You can disconnect the instrument from Smart Pianist by closing the app on the smart device, or by
following the operation steps below on the instrument itself.
Even if Smart Pianist is disconnected, you can use the instrument with the settings you’ve made on the app
maintained until the power of the instrument is turned off.
1 Press anywhere on the panel next to the display (where control buttons would
normally be shown).
A message is shown in the display.
2 To disconnect, press the [+] button.
To cancel, press the [-] button.
To reconnect with Smart Pianist:
On the menu of Smart Pianist, tap [Instrument] to call up the Connection display (steps 1 – 2 on page 20),
and then select “P-S500.” If “P-S500” is not shown in the Connection display, start the Connection Wizard
again.
P-S500 Owner’s Manual
24
Playing the Instrument Stand-alone
Playing the Instrument Stand-alone
This chapter explains about the functions that can be controlled by using this instrument alone (without
Smart Pianist). When the instrument is connected with Smart Pianist, the control buttons on the
instrument cannot be used. Disconnect the instrument from Smart Pianist (page 23) to use these buttons.
For the list of Voices, Styles and Songs, refer to the Data List on the website.
You can play the keyboard by using a wide variety of instrumental Voices. Voices 01 to 100 can be selected
by using the instrument.
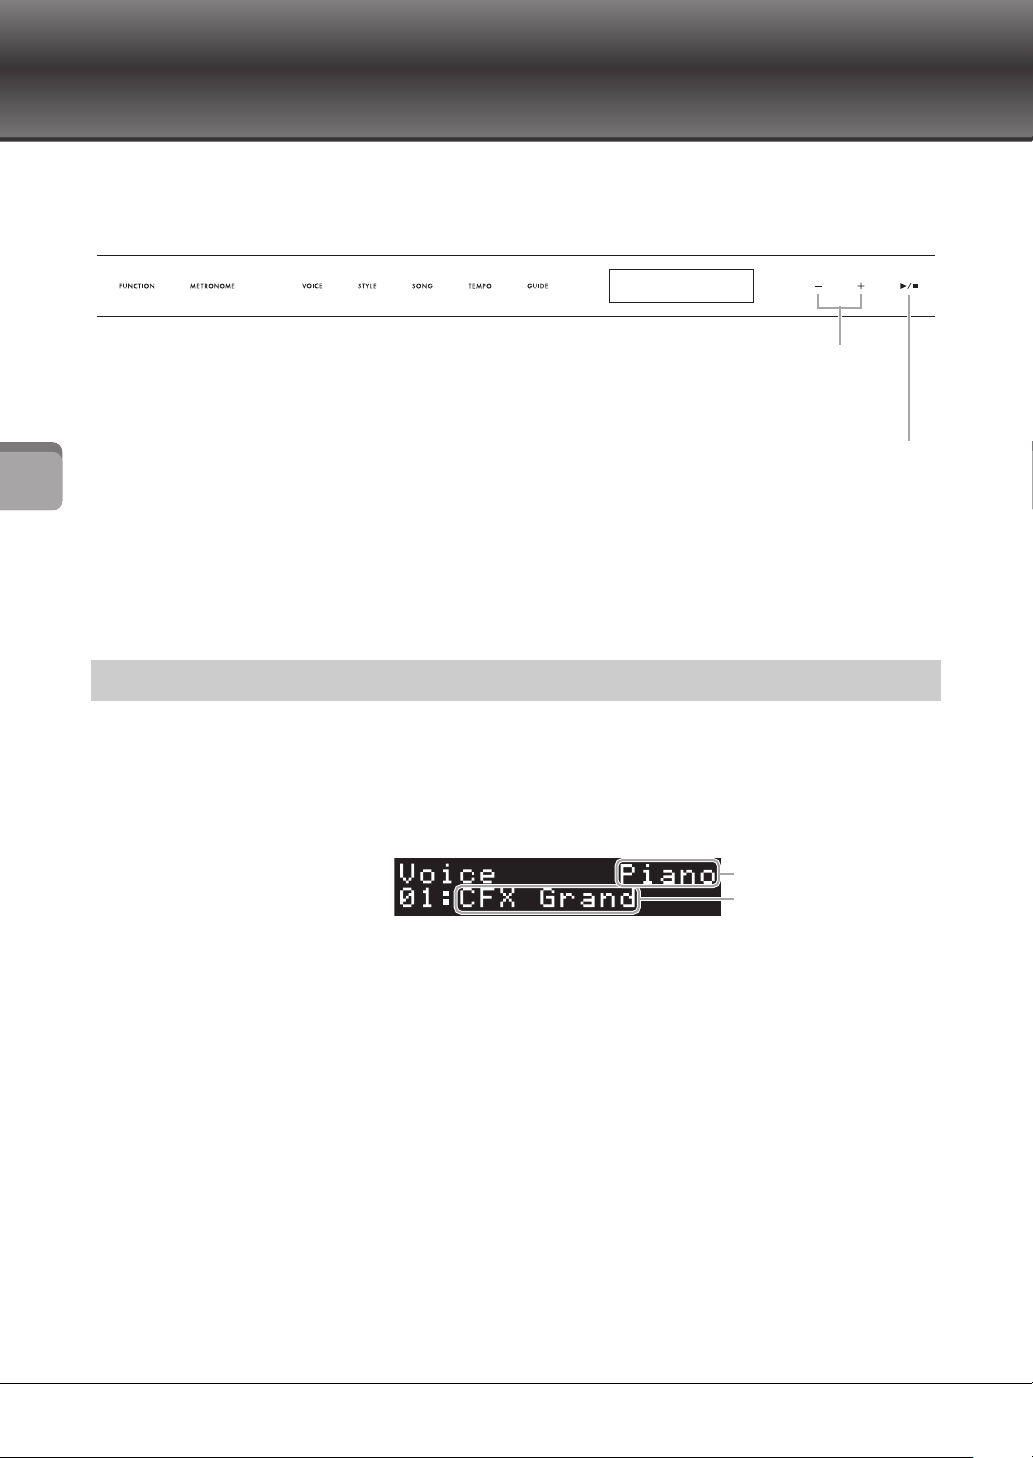
1 Press the [VOICE] button, and then use the [+] and [-] buttons to select the desired
Voi ce.
Pressing the [VOICE] button repeatedly alternates the Voice category.
2 Play the keyboard.
If you use Smart Pianist, the Voices can be played via three keyboard parts: Main, Layer and
Left. These playing modes allow you to play just one single Voice (Main) on entire keyboard,
layer a different Voice (Layer part) to the Main part, or play a different Voice in the left-hand
areas of the keyboard by turning the Left part on. When the Left part is turned on, the Stream
Lights lights up at the point which divides the keyboard into the left-hand and right-hand areas.
The point (called Split Point) can be changed in the Voice display on Smart Pianist.
Playing various musical instrument sounds (Voices) – [VOICE]
1 2
3
4
6
7
5
1 [FUNCTION]..................page 28
2 [METRONOME] ............page 27
3 [VOICE]...........................page 24
4 [STYLE] ...........................page 25
5 [SONG] ............................page 26
6 [TEMPO].........................page 26
7 [GUIDE] ..........................page 27
For changing the parameter value. Holding one of
these buttons changes the value continuously.
Pressing both [+] and [-] buttons simultaneously
can reset the parameter to the default value.
Starts/stops playback of the selected Style or Song.
Pressing this button without selecting a Style or Song,
the last selected one is played back.
Voice name
Voice category
P-S500 Owner’s Manual
25
Playing the Instrument Stand-alone
The instrument features various accompaniment and rhythmic backing patterns (called “Styles”) in a
variety of different musical genres including pop, jazz, and many others. The Style features Auto
Accompaniment which detects the “chords” automatically, and lets you produce automatic accompaniment
playback simply by playing the keyboard. This lets you automatically recreate the sound of a full band or
orchestra — even if you’re playing by yourself. Styles 01 to 100 can be selected by using the instrument.
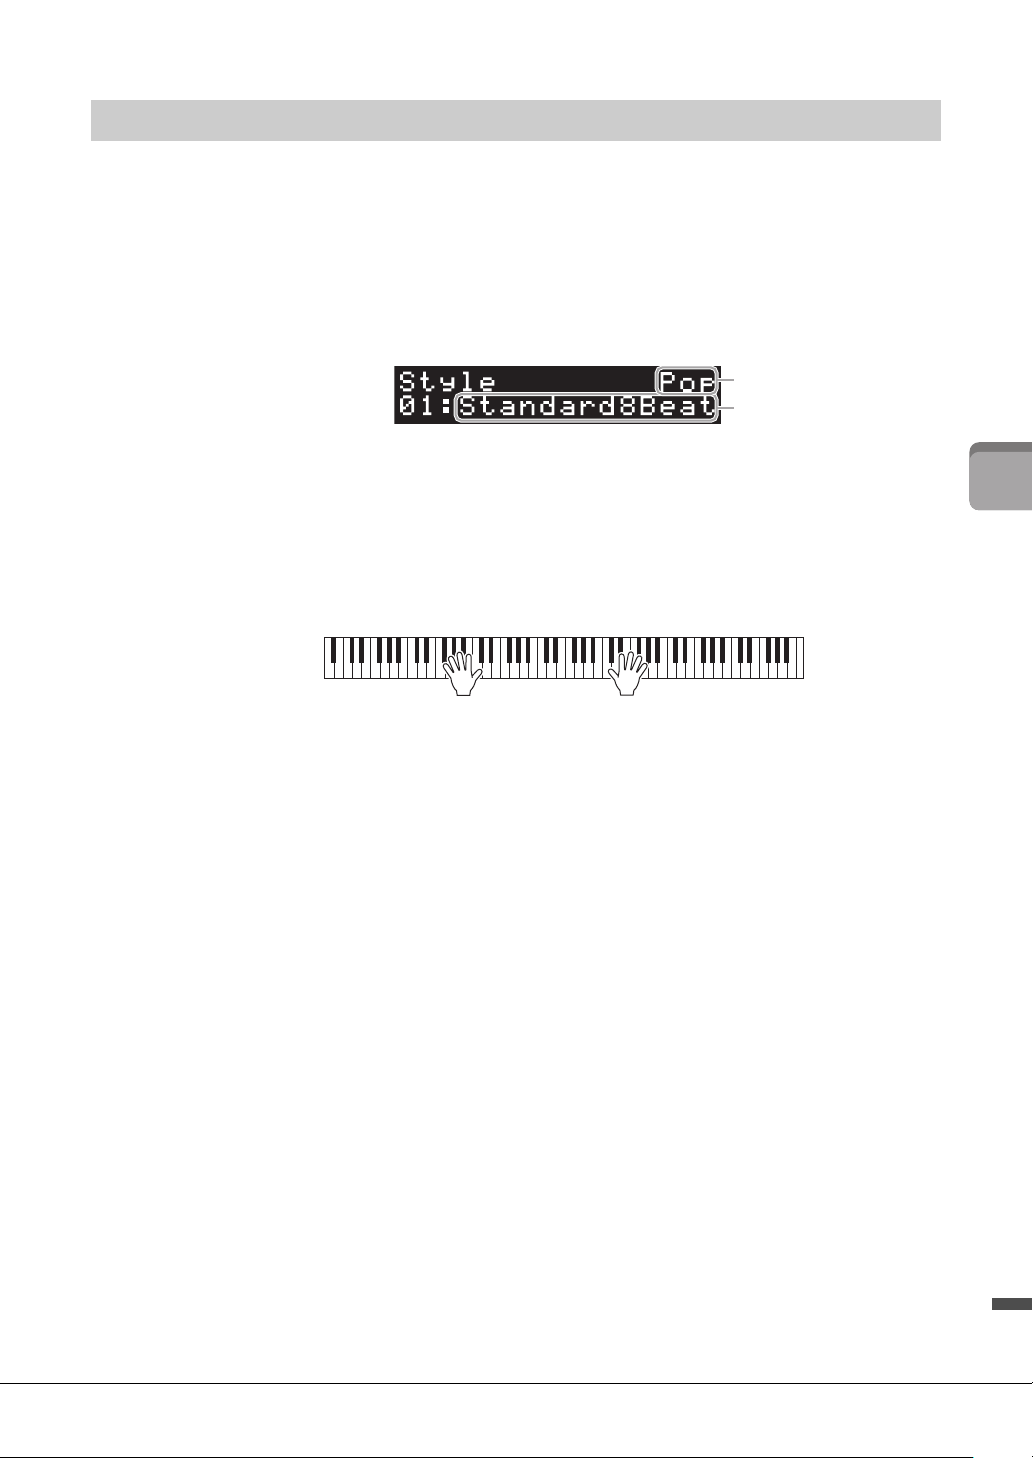
1 Press the [STYLE] button, and then use the [+] and [-] buttons to select the desired
Style.
Pressing the [STYLE] button repeatedly alternates the Style category.
2 Press the [R/J] (Start/Stop) button to start playback.
To adjust the tempo, use the [TEMPO] button (page 26).
3 As you play the keyboard using both hands, the auto accompaniment changes
along with your performance.
By default, just playing anywhere on the keyboard using both hands as you like, the instrument
detects the chords and plays the accompaniment along with your performance automatically.
If you set the Chord Detection Area to “Lower” by using Smart Pianist, a specifically assigned
left-hand section of the keyboard is used to specify chords, and chords played in this section are
detected and used as a basis for automatic accompaniment with the selected Style. To restore
the default setting, select “Full” as the Chord Detection Area.
4 After you finish your performance, press the [R/J] (Start/Stop) button to stop
playback.
Playing a Style with the auto accompaniment – [STYLE]
Style name
Style category
P-S500 Owner’s Manual
26
Playing the Instrument Stand-alone
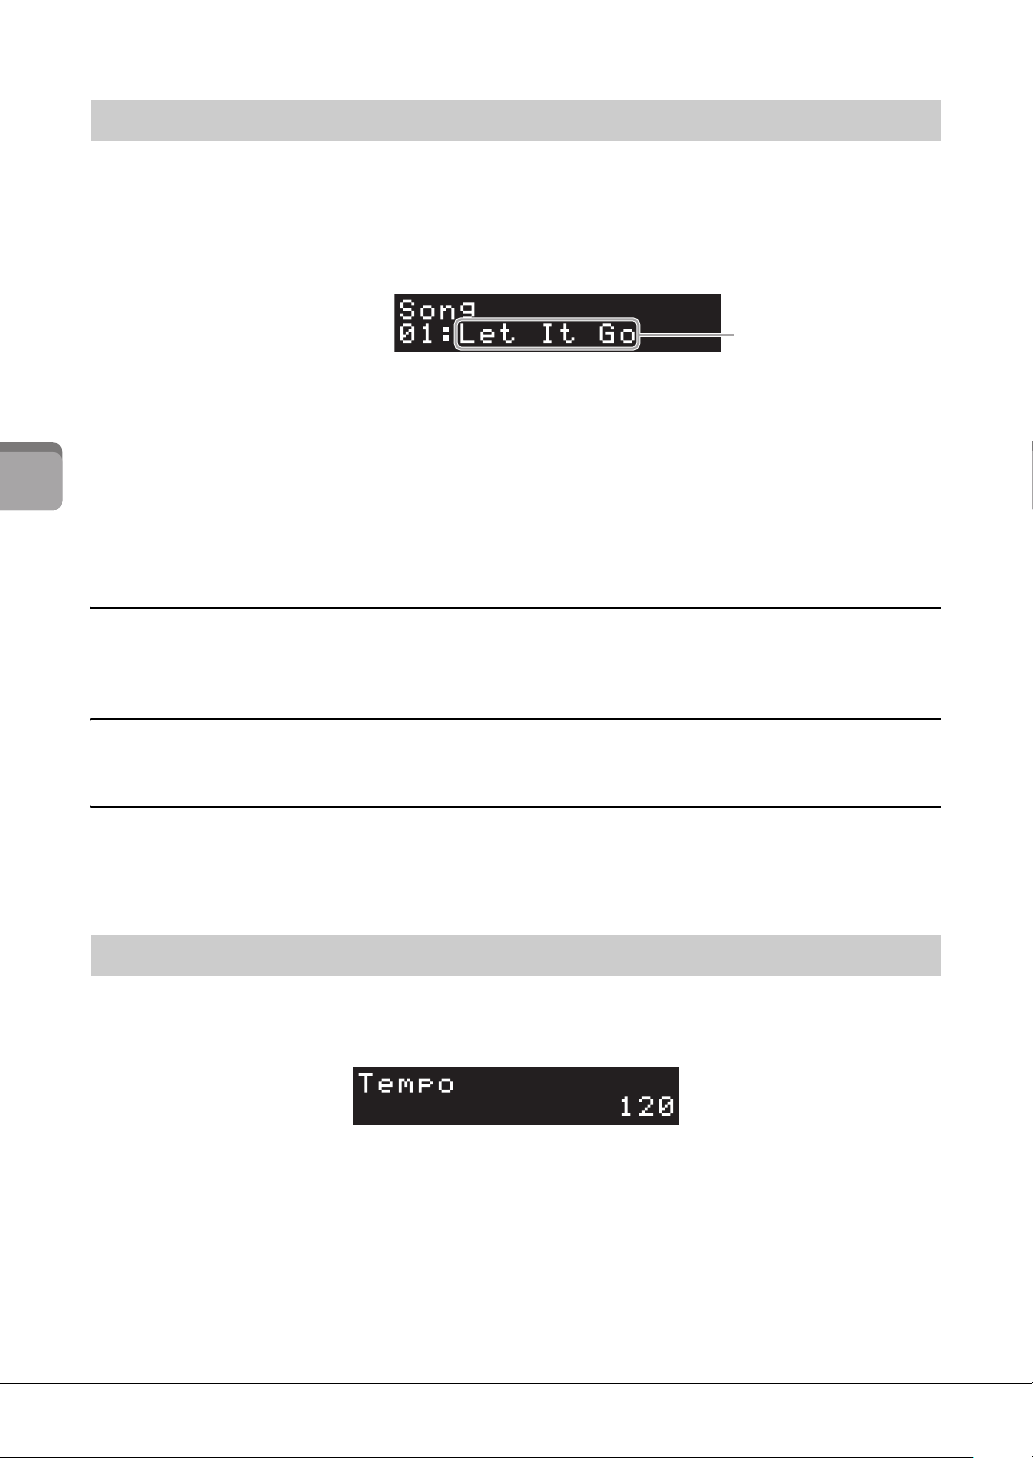
This section explains how to play the preset Songs. Songs 00 to 100 (No. 00 is the Demo Song) can be
selected by using the instrument.
1 Press the [SONG] button, and then use the [+] and [-] buttons to select the desired
Song.
Holding down the [SONG] button starts playback of “00:Clocks (Demo).”
2 Press the [R/J] (Start/Stop) button to start playback.
During Song playback, the playback position (current measure/total number of measures) is
shown in the display, and the Stream Lights (page 27) start lighting in succession.
3 To stop playback of the Song, press the [R/J] (Start/Stop) button.
Fast forward/rewind
Press the [+] or [-] button during playback of the Song. Pressing either of them once moves forward/
backward one measure. Holding either of them scrolls forward/backward continuously.
Returning to the top of the Song
Press the [+] and [-] buttons simultaneously to return to the top of the Song during playback.
Repeat playback
Call up “Song Repeat” by using the [FUNCTION] button (page 28) to select the type of Song Repeat. Then,
select the desired Song and start playback to start repeat playback in the selected type.
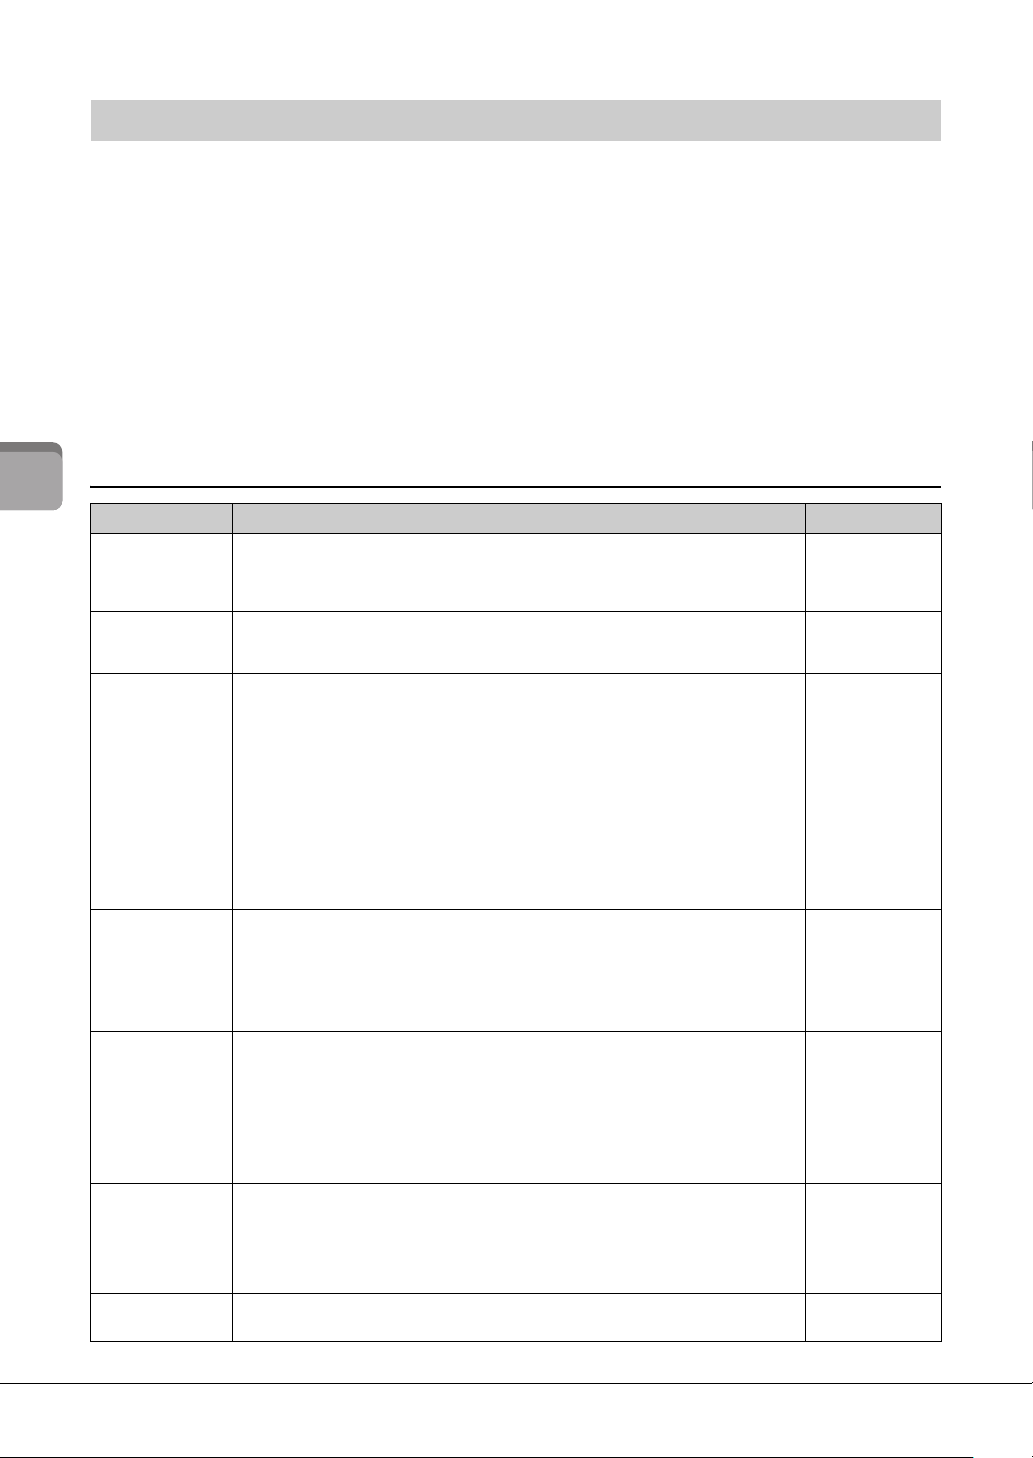
The [TEMPO] button lets you change the playback tempo of metronome (page 27), Style (page 25) and
Song (page 26). Press the [TEMPO] button, and then use the [+] and [-] buttons to adjust the tempo.
You can change the tempo by tapping the [TEMPO] button twice or more at the desired tempo.
Playing back a Song – [SONG]
Adjusting the tempo – [TEMPO]
Song name
P-S500 Owner’s Manual
27
Playing the Instrument Stand-alone
You can mute the right and/or left-hand part of the Song to try practicing that part on your own. The
Stream Lights indicate the notes you should play and when you should play them.
1 Select the desired Song (page 26).
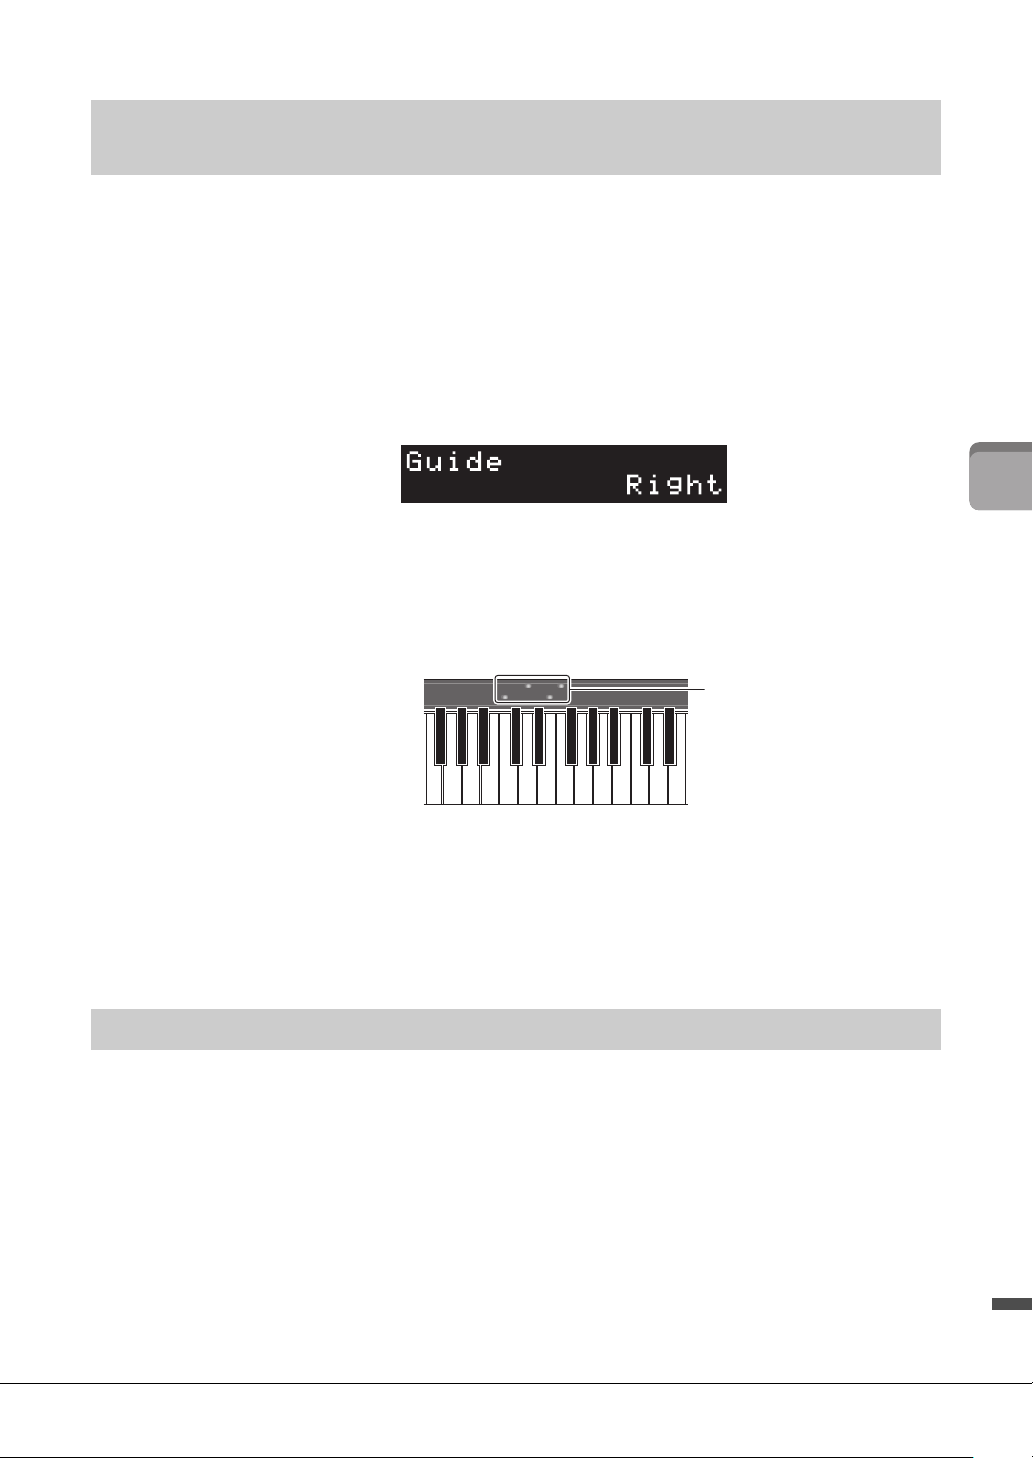
2 Press the [GUIDE] button, and then use the [+] and [-] buttons to select the desired
part to practice.
(Right: For right-hand practice, Left: For left-hand practice, Right & Left: For both-hand
practice, Off: Turns the Guide function off)
3 Press the [R/J] (Start/Stop) button to start playback.
The part selected in step 2 is muted and the Stream Lights indicate the notes you should play
and when you should play them. As the lights “descend,” play the indicated key when the light
reaches the bottom, nearest the key. You can also practice at your own pace — since the
playback of other parts will wait for you to play the notes correctly.
4 After your practice, select “Off” on the display in step 2 to turn the Guide function
off.
The Stream Lights speed and the on/off status can be set from [Song] → (Song select) →
[Setting] → [Playback] on Smart Pianist.
The [METRONOME] button lets you start or stop the metronome. The metronome provides a click sound,
giving you an accurate tempo guide when you practice, or letting you hear and check how a specific tempo
sounds. To adjust the tempo, use the [TEMPO] button (page 26).
Practice along with the Stream Lights by using the Guide function –
[GUIDE]
Using the metronome – [METRONOME]
Stream Lights
• Red: White keys
• Blue: Black keys
P-S500 Owner’s Manual
28
Playing the Instrument Stand-alone
1 Press the [FUNCTION] button repeatedly to select the setting display.
For details on each setting display, see “Function List” below.
NOTE
You can also select the next or previous setting display by pressing the [+] or [-] button while holding down the
[FUNCTION] button.
2 Use the [+] and [-] buttons to change the setting value.
To reset to the default setting, press the [+] and [-] buttons simultaneously.
3 To exit from the setting display, press any button other than [+]/[-] buttons.
Function List
Make settings of various functions – [FUNCTION]
Setting display Description Default setting
Transpose
Shifts the pitch of the entire keyboard up or down in semitone steps to facilitate playing in
difficult key signatures, and to let you easily match the pitch of the keyboard to the range of
a singer or other instruments.
Setting range: -12 – 0 – +12
0
Tuning*
Fine tunes the pitch of the entire instrument in 0.2 Hz steps. This function is useful when
you play this instrument along with other instruments or CD music.
Setting range: 414.8 – 466.8 Hz
440.0
Reverb
Determines the Reverb type which is applied to the entire sound including the keyboard
performance, Style/Song playback and MIDI data input from an external MIDI device.
• Recital Hall: Simulates clear reverberation in a mid-sized hall suitable for piano recital.
• Concert Hall: Simulates brilliant reverberation in a large hall for public orchestra
performances.
• Chamber: Simulates the elegant reverberation in a small room suitable for chamber
music.
• Cathedral: Simulates the solemn reverberation in a high-ceiling stone-made cathedral.
• Club: Simulates the lively reverberation in a jazz club or a small bar.
• No Effect: No reverb effect is applied.
When a Style or Song is selected, the ideal Reverb type is aut
omatically called up. If the
type which cannot be selected on this instrument is called up, “(Auto)” is shown on the
display.
Differs depending
on the Style/Song
Reverb Depth
Adjusts the Reverb depth. When the Reverb above is set to “No Effect” or the depth is set
to 0, no effect is produced.
Setting range: 0 – 127
If you change the setting value while a VRM Voice (page 19) is selected, this setting is
applied to all VRM Voices, including the VRM Voices contained in Songs and Styles, as
well as the keyboard performance.
Differs depending
on the Voice
To uch Response*
Determines how the sound responds to your playing strength. This setting does not
change the weight of the keyboard.
• Soft 2: Produces relatively high volume even with light playing strength.
• Soft 1: Produces high volume with moderate playing strength.
• Medium: Standard Touch Sensitivity.
• Hard 1: Requires moderately strong playing for high volume.
• Hard 2: Requires strong playing to produce high volume.
• Fixed: The volume level will be the same regardless of how hard you play the keys.
Medium
Time Signature
Selects the time signature of the metronome. The Metronome plays back according to the
selected Time Signature with the Bell sound on the first beat of each measure. When “Bell
Off” is selected, the Bell does not sound. When the time signature is set to a value other
than “Bell Off,” changing the Style or Song sets the time signature to the default value for
each Style or Song automatically.
Setting range: Bell Off, 2/4, 3/4, 4/4, 5/4, 6/4
Bell Off
Metronome
Volume*
Sets the volume of metronome.
Setting range: 0 – 127
100
P-S500 Owner’s Manual
29
Playing the Instrument Stand-alone
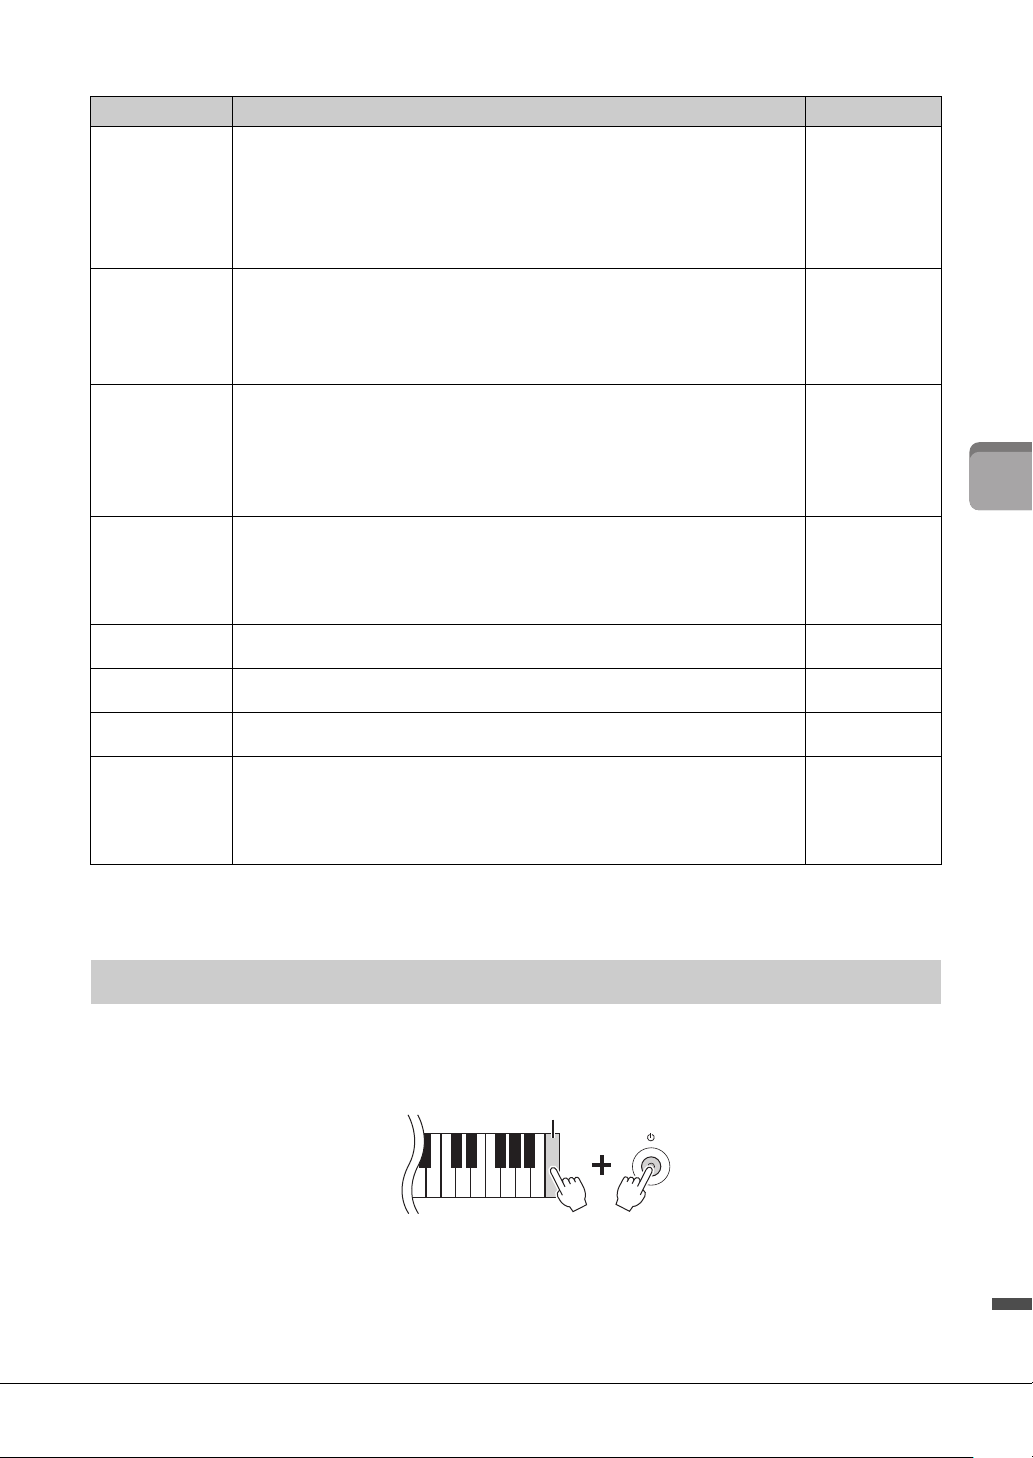
The settings marked with “*” are backed up even when the power of the instrument is turned off.
While holding the C7 key (right-most key on the keyboard), turn the power on. This restores (or initialize)
all of the settings to their factory defaults, with the exception of “Language” in the Function List above.
Style Part
Selects the Style parts to be played back.
• All: All parts (1 – 8 channels)
• Rhythm & Bass: Rhythm parts and Bass part (1 – 3 channels)
• Rhythm: Only Rhythm part (1 – 2 channels)
Changing the Style sets this value to “All” automatically.
When the playback parts are changed by MIDI data input from Smart Pianist or other
external device, “(Changed)” is shown in the display.
All
Song Repeat
Selects the type of Song Repeat.
• Off: Disables repeat playback. When the currently selected Song reaches to the end,
playback stops automatically.
• Single: Plays through the currently selected Song repeatedly.
• All: Continuously plays back all Songs (from 01 to 100) in order.
• Random: Continuously plays back all Songs (from 01 to 100) in random order.
Off
MIDI Channel
Determines the MIDI channel over which the MIDI messages generated via the keyboard
performance will be transmitted to the external device. When the Layer and/or Left part is
on (page 24), the MIDI channels are assigned as follows.
• Main part = n (setting value: 1 – 8)
• Layer part = n+1
• Left part = n+2
* The value after 8 is 1. Style parts are transmitted via the 9 – 16 channels regardless of the setting here.
1
Audio Loopback*
Determines whether audio sound input from the connected computer or smart device is
output to a computer or a smart device or not along with the performance played on the
instrument. For example, if you want to record the audio input sound as well as the sound
played on the instrument by using the computer or the smart device, set this to “On.” If you
intend to record only the sound played on the instrument by using the compu ter or the
smart device, set this to “Off.”
On
Button Sound*
Determines whether a sound is made when a control button on the panel is pressed (the
“On” setting), or whether no sound is heard (the “Off” setting).
On
Auto Power Off*
Turns on (the “Enabled” setting) or off (the “Disabled” setting) the Auto Power Off function
(page 15).
Enabled
Language*
Selects the language (English/Japanese) for the display. This setting will be enabled after
exiting from this setting display.
English
Version
Shows the firmware version of this instrument.
Yamaha may from time to time update firmware of the product without notice for
improvement in functions and usability. To take full advantage of this instrument, we
recommend that you upgrade your instrument to the latest version. The latest firmware
can be downloaded from the website below:
https://download.yamaha.com/
–
Restoring the factory-programmed settings (initializing)
Setting display Description Default setting
Highest key (C7)
P-S500 Owner’s Manual
30
Connecting to other devices
Connecting to other devices
External devices can be connected to the jacks and terminals, and you can enjoy playing this instrument
with these devices. For the [AUX PEDAL] jack and the [PEDAL UNIT] jack, refer to page 17. This section
explains connections with other connectors.
CAUTION
Before connecting the instrument to other electronic components, turn off the power of all the components. Also, before turning
any components on or off, make sure to set all volume levels to minimum (0). Otherwise, damage to the components, electrical
shock, or even permanent hearing loss may occur.
NOTICE
Do not place any external devices in an unstable position. Doing so may cause the device to fall and result in damage.
By connecting to a smart device and using the compatible smart device app, you can get more enjoyment
out of this instrument. For information about the compatible apps and smart devices, access the web page
of the respective apps on the following page:
https://www.yamaha.com/kbdapps/
For information on connecting with Smart Pianist, refer to page 20. To use other apps, check the
connection method in the web page of the respective apps shown above.
NOTE
The [iPad] terminal and [USB TO HOST] terminal cannot be used at the same time for connecting smart devices.
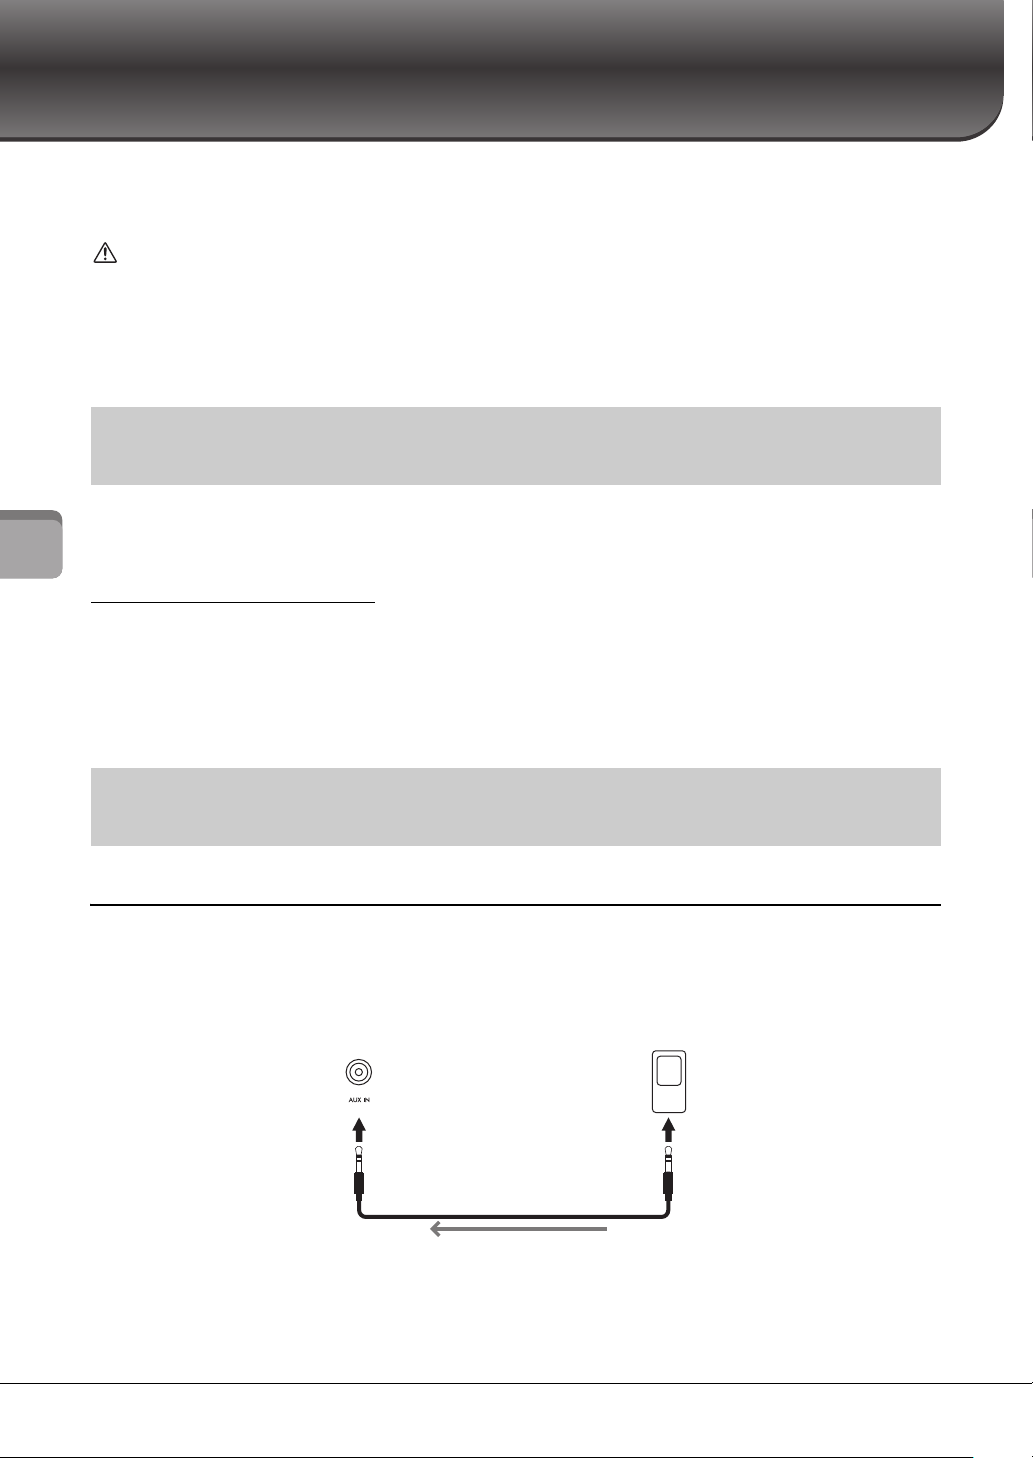
Listening to playback on an audio player through the instrument’s speaker
You can connect the headphone jack of an audio player such as a smartphone to the instrument’s [AUX IN]
jack. Audio playback on the connected device is output from the built-in speakers of this instrument.
NOTICE
To avoid damage to the devices, first turn on the power to the external device, and then to the instrument. When turning off the
power, first turn off the power to the instrument, and then to the external device.
NOTE
• Use audio cables and adaptor plugs having no (zero) resistance.
• The USB Audio Interface function gives you direct, clear sound in which the sound quality has less noise and deterioration than that
from the [AUX IN] jack (page 33).
Connecting with a smart device for using an app – [iPad] terminal,
[USB TO DEVICE] terminal, [USB TO HOST] terminal
Connecting to an external audio device – [AUX IN] jack, AUX OUT
[R]/[L/L+R] jacks
Instrument Audio player
Phone plug
(stereo mini)
Phone plug
(stereo mini)
Audio cable
Audio signal
Headphone jack
P-S500 Owner’s Manual
31
Connecting to other devices
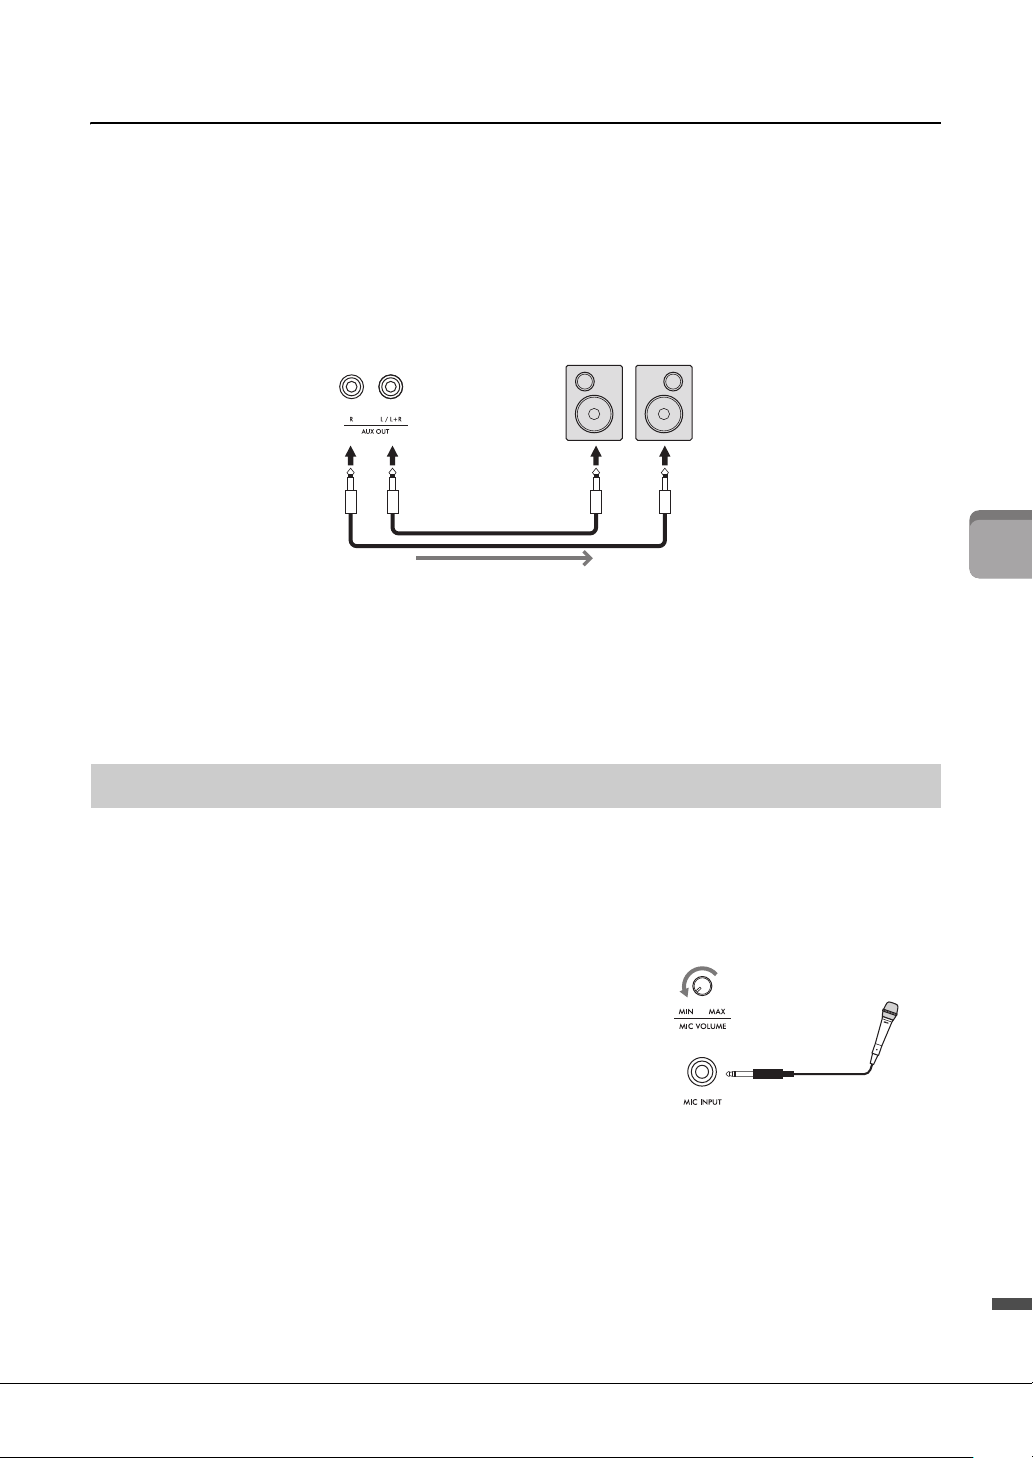
Using an external speaker system for listening to sounds from the instrument
You can connect a stereo system to amplify the instrument’s sound by using the AUX OUT [R]/[L/L+R]
jacks. The sound input from the [AUX IN] jack and the [MIC INPUT] jack is output at the same time.
NOTICE
• To avoid possible damage, first turn on the power to the instrument, and then to the external device. When turning off the
power, first turn off the power to the external device, and then to the instrument. Since this instrument’s power may
automatically be turned off due to the Auto Power Off function (page 29), turn off the power to the external device, or disable
Auto Power Off when you do not intend to operate the instrument.
• Do not route the output from the AUX OUT jacks to the [AUX IN] jacks. If you make this connection, the signal input at the [AUX
IN] jacks is output from the AUX OUT jacks. These connections could result in a feedback loop that will make normal
performance impossible, and may even damage the equipment.
NOTE
• Use only the [L/L+R] jack for connection with a monaural device.
• Use an appropriate adaptor plug if the input jack of the powered speaker does not match the phone plug of the audio cable.
• Use audio cables and adaptor plugs having no (zero) resistance.
• When you are monitoring the sound output via the AUX OUT jacks from headphones connected to the instrument, we recommend that
you set the Binaural Sampling and Stereophonic Optimizer functions (page 19) to off. These can be turn on or off from [Utility]
[Sound Setting] [Binaural] on Smart Pianist.
By connecting a microphone to the [MIC INPUT] jack (standard mono phone jack), you can enjoy singing
along with your keyboard performance or with Song playback. The instrument outputs your vocals
through the built-in speakers. Moreover, you can apply various harmony effects (called Vocal Harmony) to
your singing voice from [Utility] → [Mic Setting] on Smart Pianist.
1 Before turning on the power of the instrument,
set the [MIC VOLUME] knob to the minimum
position.
2 Connect the microphone to the [MIC INPUT]
jack.
NOTE
Make sure you have a conventional dynamic microphone.
3 Turn on the power of the instrument.
4 (If necessary, turn on the microphone.) Adjust the [MIC VOLUME] knob while
singing into the microphone.
5 After you finish your performance, turn the [MIC VOLUME] knob to the
minimum position, and then disconnect the microphone.
Connecting a microphone – [MIC INPUT] jack
Instrument Powered speaker
Standard phone plug (1/4")
Standard phone plug (1/4")
Audio cable
Audio signal
Input jack
1
2
Standard mono
phone plug (1/4")
P-S500 Owner’s Manual
32
Connecting to other devices
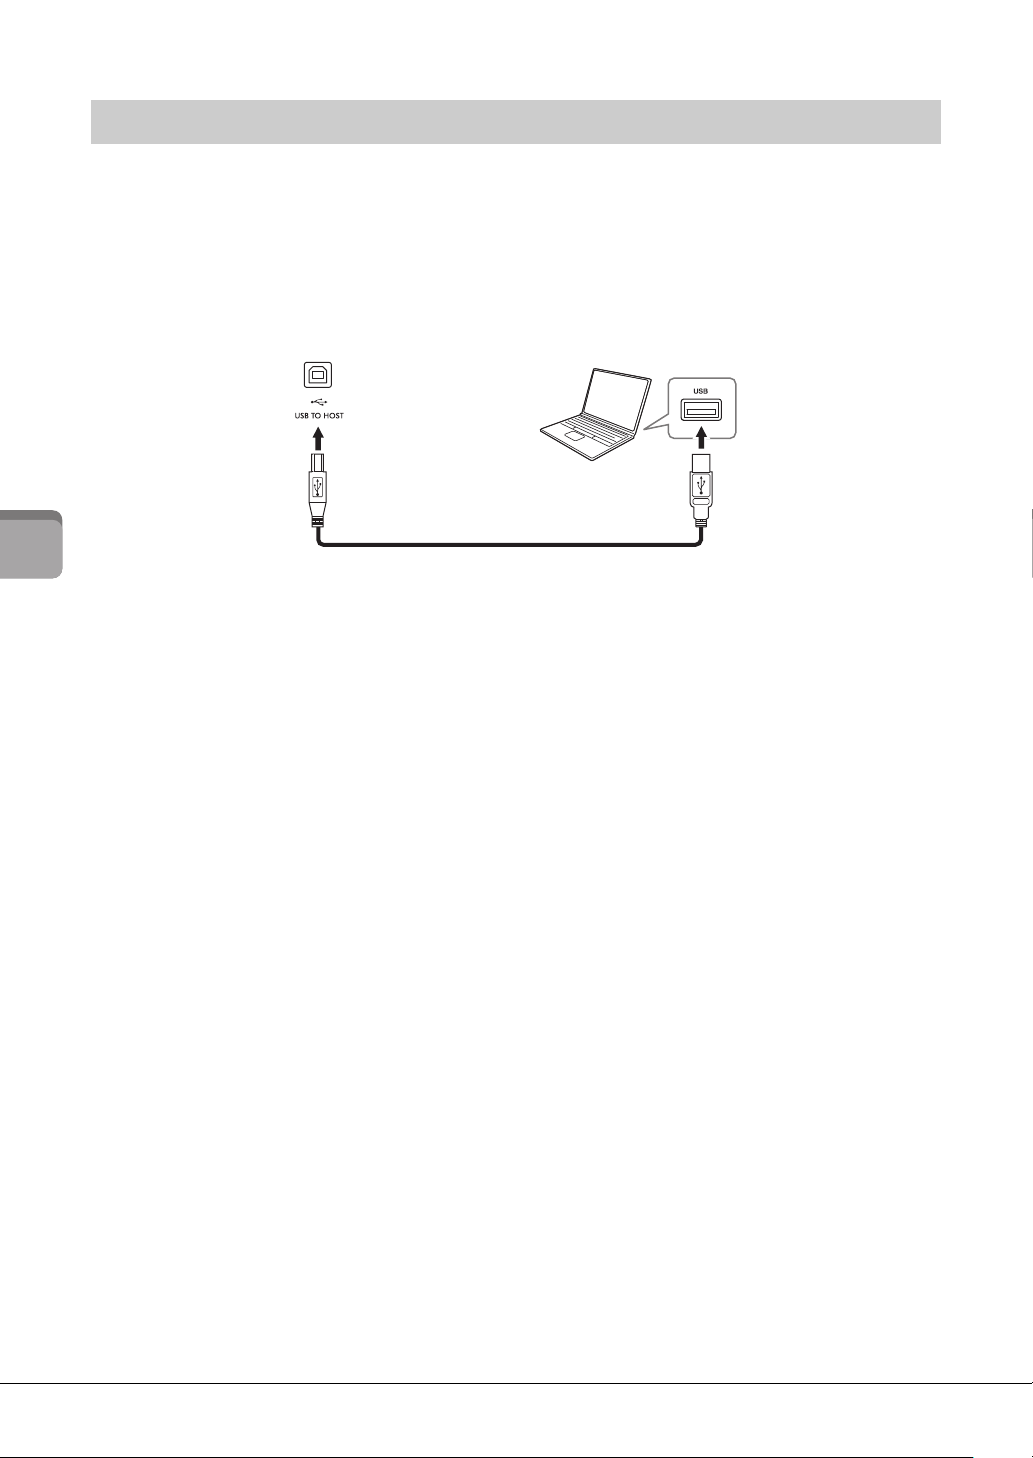
By connecting a computer to the [USB TO HOST] terminal, you can transmit or receive data between the
instrument and the computer. For details on using a computer with this instrument, refer to the
“Computer-related Operations” on the website.
NOTICE
• Use an AB type USB cable of less than 3 meters. USB 3.0 cables cannot be used.
• If you are using a DAW (digital audio workstation) application with this instrument, set the Audio Loopback function (page 33)
to off. Otherwise, a loud sound may occur, depending on the settings of the computer or the application software.
NOTE
• When using a USB cable to connect the instrument to your computer, make the connection directly without passing through a USB hub.
• You cannot connect a computer to this instrument with a USB wireless LAN adaptor.
• The instrument will begin transmission a short time after the USB connection is made.
• For information on setting up your sequence software, refer to the owner’s manual of the relevant software.
• The instrument does not transmit any MIDI messages when connected with Smart Pianist.
• The [USB TO HOST] terminal and [iPad] terminal cannot be used at the same time for connecting a computer and a smart device.
Connecting to a computer – [USB TO HOST] terminal
Computer
USB cable
Instrument

P-S500 Owner’s Manual
33
Connecting to other devices
By connecting a computer or a smart device to the instrument via the [iPad] or [USB TO HOST] terminal,
digital audio data can be transmitted/received. This USB Audio Interface function provides the following
advantages:
Playing back audio data with high sound quality
This gives you direct, clear sound in which the sound quality has less noise and deterioration than that
from the [AUX IN] jack.
Recording performance on the instrument as audio data by using a recording software or a
music production software
The recorded audio data can be played back on the computer or smart device.
For details on connecting to a computer, refer to the “Computer-related Operations” on the website. For
instructions on connecting to a smart device, refer to the examples of connection via cables on page 21.
NOTE
When using a computer running Windows, the Yamaha Steinberg USB Driver should be installed to the computer.
Turning Audio Loopback on/off
This allows you to set whether audio sound input from the computer or smart device via the USB Audio
Interface function above, or the Wi-Fi connection (page 22) is output to a computer or a smart device or
not along with the performance played on the instrument. To output the audio input sound, set the Audio
Loopback to “On.” For example, if you want to record the audio input sound as well as the sound played on
the instrument by using the connected computer or smart device, set this to “On.” If you intend to record
only the sound played on the instrument by using the computer or smart device, set this to “Off.” The
setting can be made via the [FUNCTION] button (page 29).
NOTE
• The Audio Loopback function does not affect the input sound from the [AUX IN] jack.
• When Audio Recording by using Smart Pianist, the audio input sound from the connected computer or smart device is recorded when
this is set to “On,” and not recorded when set to “Off.”
Transmitting/receiving audio data (USB Audio Interface function) –
[iPad] terminal, [USB TO HOST] terminal
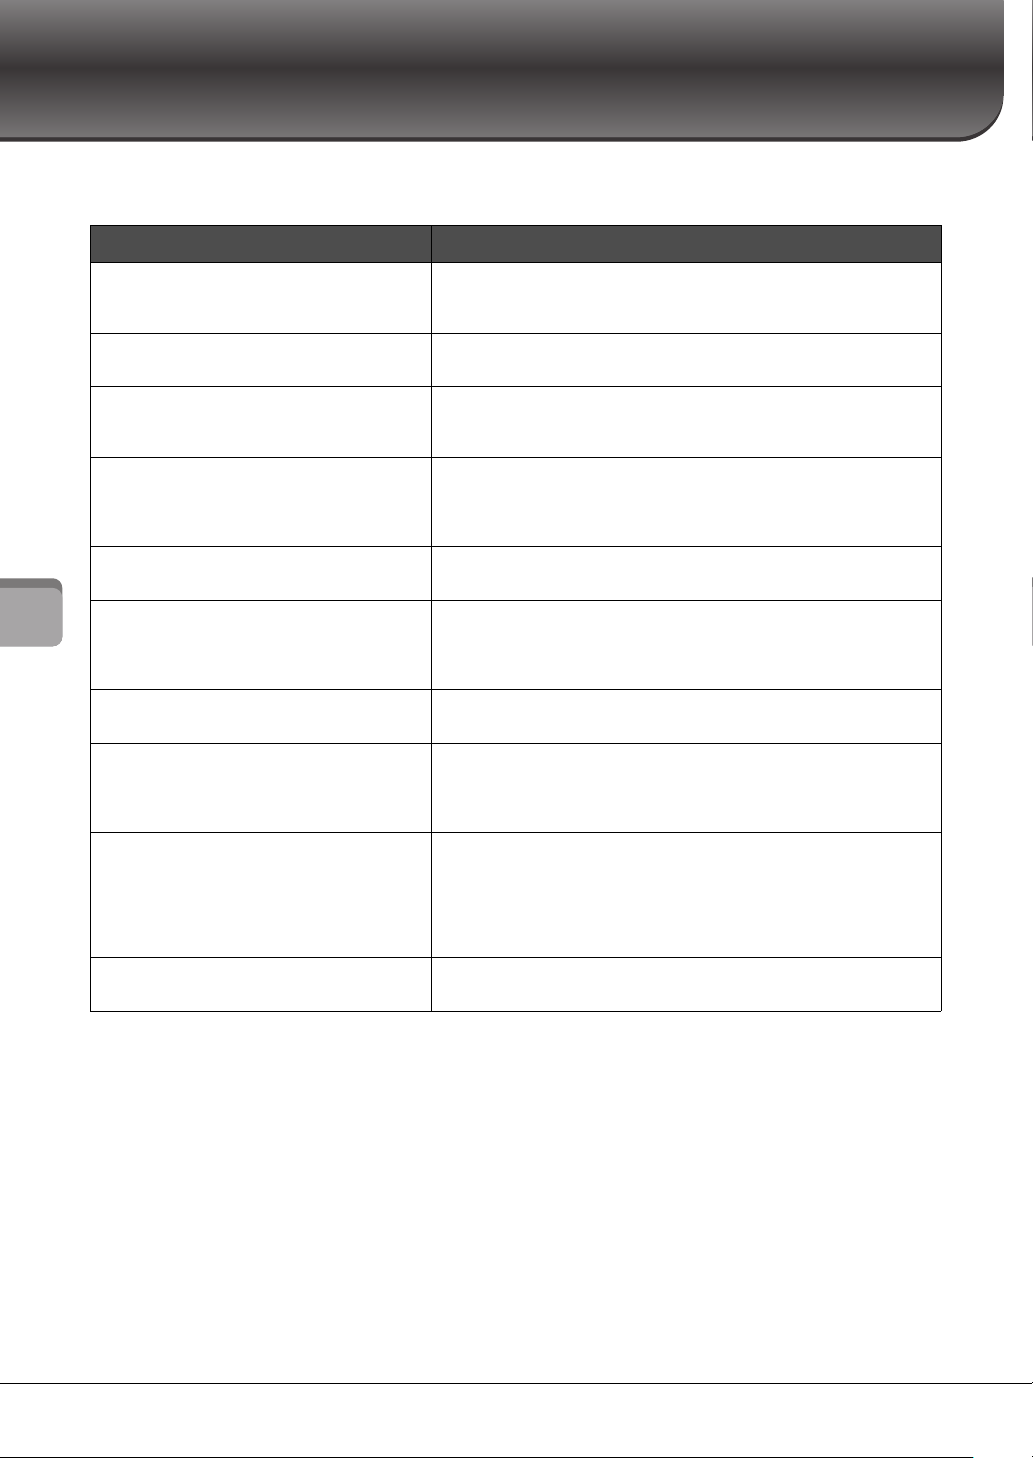
P-S500 Owner’s Manual
34
Troubleshooting
Troubleshooting
For troubleshooting information on the app settings, refer to the included Help within the app. On Smart Pianist, tap
the [ⲷ] (Menu) icon located upper left on the display, and then call up [Utility] → [System] → [FAQ].
Problem Possible Cause and Solution
The instrument does not turn on.
The plugs are not properly connected. Make sure that the DC plug is
securely inserted into the DC IN jack on the instrument, and that the AC
plug is securely inserted to the AC outlet (page 14).
The power is automatically turned off.
This is normal and due to the Auto Power Off function. If necessary, set the
parameter of the Auto Power Off function (page 15).
Noise is heard from the speakers or
headphones.
The noise may be due to interference caused by the use of a mobile phone
in close proximity to the instrument. Turn off the mobile phone, or use it
further away from the instrument.
Noise is heard from the instrument’s
speakers or headphones when using the
instrument with your smart device.
When you use the instrument along with your smart device, we
recommend that you connect with a cable, or set your device to not emit
radio waves (such as with “Airplane Mode”), turn on Wi-Fi only, and
connect to the instrument.
The overall volume is low, or no sound is
heard.
The Master Volume is set too low; set it to an appropriate level using the
[MASTER VOLUME] slider (page 15).
Pedals do not function.
The pedal plug may not be properly connected. Make sure to securely
insert the pedal plug into the [AUX PEDAL] or [PEDAL UNIT] jack. Be sure
to insert the pedal cord all the way until the metal part of the cord plug
disappears from view.
The keyboard volume is lower than the
metronome volume.
The volume level for the metronome is set too loud. Adjust the metronome
volume (page 28).
Higher or lower notes do not sound
correctly when the transpose setting is
made.
The instrument can cover a key range of C-2 – G8 when you set the
transposition. If notes lower than C-2 are played, the actual resulting
sound is one octave higher. If notes higher than G8 are played, the
resulting sound is one octave lower.
The sound output from the external
speaker or the sound of Song playback
recorded in audio format is not the usual.
This is because the “Binaural” setting is turned on. When “Binaural” is on
and headphones are connected, the VRM Voices (including the sound
outside the headphones) automatically change to the sound of Binaural
Sampling or the sound enhanced with the Stereophonic Optimizer. This is
turned on by default. You can turn it on or off from [Utility] [Sound
Setting] [Binaural] of Smart Pianist.
The error message does not disappear
even when the problem has been solved.
Press the [+] button.
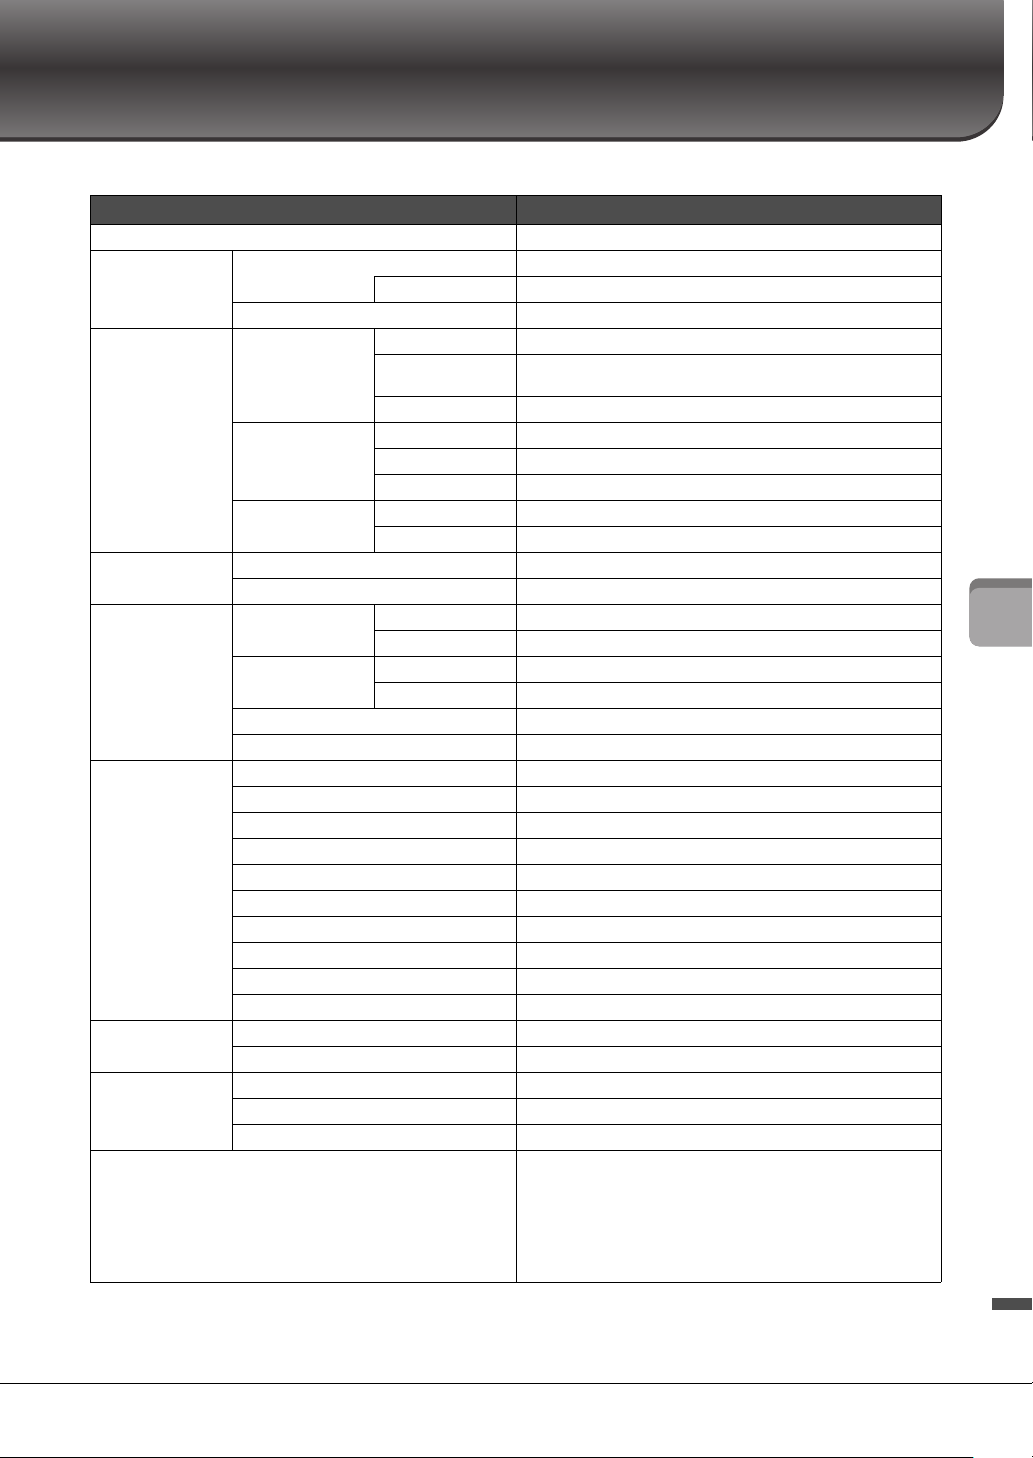
P-S500 Owner’s Manual 35
Specifications
Specifications
P-S500
P-S500
Product Name Digital Piano
Size/Weight Dimensions (W × D × H) 1,329 mm × 410 mm × 167 mm (52-5/16" × 16-1/8" × 6-9/16")
with music rest 1,329 mm × 410 mm × 283 mm (52-5/16" × 16-1/8" × 11-1/8")
Weight 21.8 kg (48 lb, 1 oz)
Control Interface Keyboard Number of Keys 88
Type GHS (Graded Hammer Standard) keyboard
with matte black keytops
Touch Response Soft2/Soft1/Medium/Hard1/Hard2/Fixed
Display Type Full dot LCD
Size 80 × 16 dots
Language English, Japanese
Panel Type To uch sensors
Language English
Function USB Audio Interface 44.1 kHz, 16 bit, stereo
Lesson/Guide Yes (with Stream Lights)
Voices Tone Generation Piano Sound Yamaha CFX, Bösendorfer Imperial
Binaural Sampling Yes (“CFX Grand” only)
Piano Effect VRM Ye s
Key-off Samples Ye s
Polyphony (max.) 256
Compatibility XG, GS, GM, GM2
Connectivity DC IN 24 V
Headphones Standard stereo phone jack (× 2)
Microphone Mic input (standard mono phone jack), input volume
AUX PEDAL Ye s
PEDAL UNIT Ye s
AUX IN Stereo mini jack
AUX OUT Standard phone jack (R, L/L+R)
USB TO DEVICE Ye s
USB TO HOST Ye s
iPad 5V, 2.1A
Sound System Amplifiers (20 W + 6 W) × 2
Speakers (Oval (1
2 cm
× 6 cm) + 2.5 cm (dome)) × 2
Power Supply AC Adaptor PA-500 (O utput: DC 24 V, 2.5 A)
Power Consumption 40 W
Auto Power Off Ye s
Included Accessories •Owner’s Manual
• Online Member Product Registration
•Power cord*/AC adaptor PA-500*
•Music Rest
• Footswitch
*May not be included depending on your area. Check with your Yamaha
dealer.
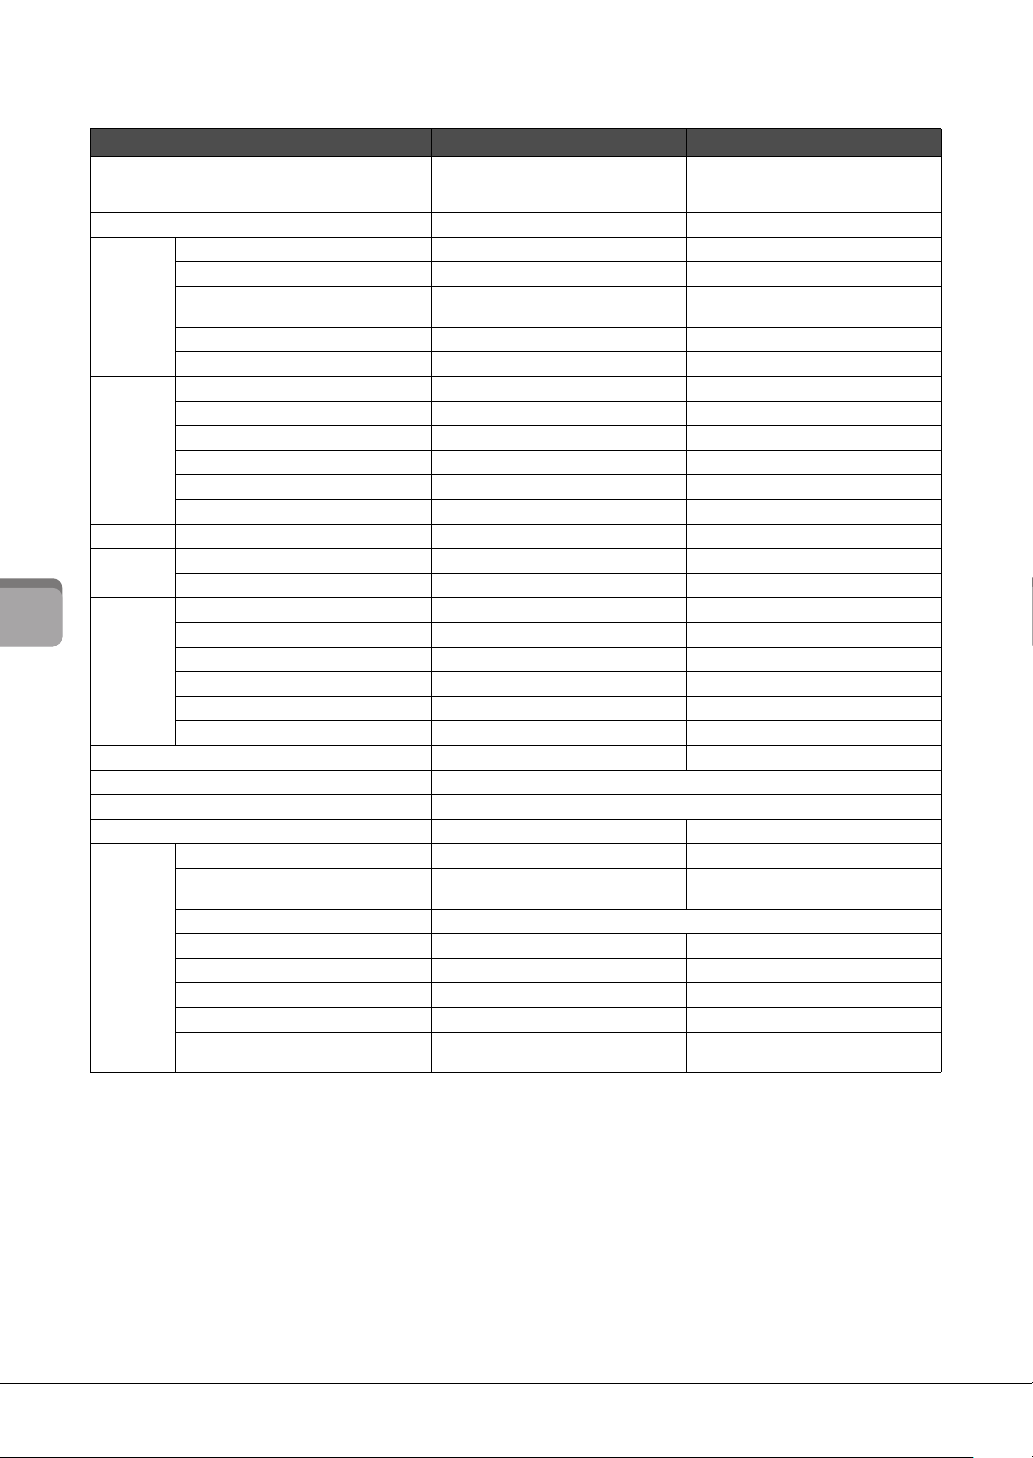
P-S500 Owner’s Manual
36
Specifications
What you can do with the P-S500 stand-alone and when connected with Smart Pianist
There are many more parameters that can be set on Smart Pianist. Check and try them out on the app.
Separately Sold Accessories
*May not be available depending on your area.
•Keyboard Stand L-300B, L-300WH
• Pedal Unit LP-1B, LP-1WH
• Foot Pedal FC3A
•Footswitch FC4A, FC5
• Headphones HPH-150, HPH-100, HPH-50
• AC adaptor PA-500
• USB Wireless LAN Adaptor UD-WL01
• Wireless MIDI Adaptor UD-BT01
The contents of this manual apply to the latest specifications as of the publishing date. To obtain the latest manual, access the Yamaha
website then download the manual file. Since specifications, equipment or separately sold accessories may not be the same in every
locale, please check with your Yamaha dealer.
P-S500 P-S500 + Smart Pianist
Language English/Japanese Menu: English/German/French/
Spanish/Japanese/Chinese
Messages and Help: 26 languages
Piano Room (various settings for piano sound) –Yes
Voices Number of Voices 100 660
Layer (layering two Voices) –Yes
Left (playing two different Voices by
right- and left-hand)
–Yes
Split Point Change –Yes
Octave –Yes
Styles Number of Styles 100 370
Chord Detection Area Full (cannot be changed) Full/Lower
Intro/Ending On (cannot be changed) On/Off
Section Change –Main × 4
Synchro Start –Yes
Playback Parts All/Rhythm&Bass/Rhythm 8 parts, independent on/off control
Effects Reverb Types 5 types 58 types
Recording MIDI – Yes (SMF format 0)
Audio – Yes (WAV, AAC)
Songs Number of Songs for playback 100 403
Stream Lights Setting On (cannot be changed) On/Off, Speed
Guide Type Correct Key (Cannot be changed) Correct Key/Any Key/Your Tempo
Score/Chord/Lyrics Display Function –Yes
Audio To Score –Yes
A-B Repeat –Yes
Registration Memory –Yes
Metronome Ye s
Tempo 5 – 500, Tap Tempo
Balance (volume balance among par
ts) –Yes
Ut
ility Transpose Keyboard Keyboard/Style, Song
Tuning 414.8 – 440.0 – 466.8 Hz
(0.2 Hz increments)
414.8 – 440.0 – 466.8 Hz
(0.2 Hz increments), 9 scale types
Keyboard Setting (Touch Curve) Soft2/Soft1/Medium/Hard1/Hard2/Fixed
Pedal Setting –Yes (functions can be selected)
Mic Setting – Yes (Vocal Harmony, etc.)
Master EQ –Yes
Sound Setting –Yes (Binaural, IAC, etc.)
Auto Power Off Disabled/Enabled Disabled/Enabled
(elapsed time can be set)

P-S500 Owner’s Manual 37
Index
Index
A
Accompaniment ............................................................. 25
App ................................................................................... 30
Audio device ................................................................... 30
Audio Loopback ....................................................... 29, 33
Audio To Score ............................................................... 10
Auto Power Off ........................................................ 15, 29
B
Binaural Sampling .......................................................... 19
Button Sound .................................................................. 29
C
Computer ........................................................................ 32
Connection (external devices) ...................................... 30
Connection (Smart Pianist) .......................................... 20
Connection Wizard ....................................................... 20
F
Footswitch ....................................................................... 17
Functions ......................................................................... 28
G
Guide ................................................................................ 27
H
Half pedal ........................................................................ 18
Headphones .................................................................... 19
I
IAC (Intelligent Acoustic Control) ............................. 15
Initializing ....................................................................... 29
Intelligent Acoustic Control (IAC) ............................. 15
K
Keyboard stand ............................................................... 17
L
Language ......................................................................... 29
M
Master Volume ............................................................... 15
Metronome ..................................................................... 27
Microphone .................................................................... 31
MIDI Channel ................................................................ 29
Music rest ........................................................................ 16
P
Part (Style) .......................................................................29
Pedal .................................................................................17
Pedal unit .........................................................................17
Power ................................................................................14
R
Repeat playback ...............................................................29
Reverb ...............................................................................28
S
Smart Pianist ...................................................................20
Song ..................................................................................26
Song Repeat .....................................................................29
Stand .................................................................................17
Stereophonic Optimizer .................................................19
Stream Lights ...................................................................27
Style ...................................................................................25
Style Part ..........................................................................29
T
Tempo ..............................................................................26
Time Signature ................................................................28
Touch Response ..............................................................28
Transpose .........................................................................28
Tuning ..............................................................................28
U
USB Audio Interface ......................................................33
V
Version .............................................................................29
Voice .................................................................................24
Volume (master volume) ...............................................15
Volume (metronome) ....................................................28
VRM .................................................................................19
P-S500 Owner’s Manual
38
Information for users on collection and disposal of old equipment:
This symbol on the products, packaging, and/or accompanying documents means that used electrical and
electronic products should not be mixed with general household waste.
For proper treatment, recovery and recycling of old products, please take them to applicable collection
points, in accordance with your national legislation.
By disposing of these products correctly, you will help to save valuable resources and prevent any potential
negative effects on human health and the environment which could otherwise arise from inappropriate
waste handling.
For more information about collection and recycling of old products, please contact your local municipality, your waste
disposal service or the point of sale where you purchased the items.
For business users in the European Union:
If you wish to discard electrical and electronic equipment, please contact your dealer or supplier for further information.
Information on Disposal in other Countries outside the European Union:
This symbol is only valid in the European Union. If you wish to discard these items, please contact your local authorities or
dealer and ask for the correct method of disposal.
(weee_eu_en_02)

Credits and Copyrights for the pre-installed Songs
All I Want For Christmas Is You
Words and Music by Mariah Carey and Walter Afanasieff
Copyright © 1994 BEYONDIDOLIZATION, SONY/ATV MUSIC
PUBLISHING LLC, TAMAL VISTA MUSIC, WALLYWORLD
MUSIC and KOBALT MUSIC COPYRIGHTS SARL
All Rights for BEYONDIDOLIZATION Controlled and Administered by
UNIVERSAL TUNES, A Division of SONGS OF UNIVERSAL, INC.
All Rights for SONY/ATV MUSIC PUBLISHING LLC, TAMAL VISTA
MUSIC and WALLYWORLD MUSIC Administered by SONY/ATV
MUSIC PUBLISHING LLC, 424 Church Street, Suite 1200,
Nashville, TN 37219
All Rights Reserved Used by Permission
All The Things You Are
Lyrics by Oscar Hammerstein II
Music by Jerome Kern
Copyright © 1939 UNIVERSAL - POLYGRAM INTERNATIONAL
PUBLISHING, INC.
Copyright Renewed
All Rights Reserved Used by Permission
Autumn Leaves
English lyric by Johnny Mercer
French lyric by Jacques Prevert
Music by Joseph Kosma
© 1947, 1950 (Renewed) ENOCH ET CIE
Sole Selling Agent for U.S. and Canada: MORLEY MUSIC CO.,
by agreement with ENOCH ET CIE
All Rights Reserved
Back For Good
Words and Music by Gary Barlow
Copyright © 1995 Sony/ATV Music Publishing(UK) Limited
All Rights Administered by Sony/ATV Music Publishing LLC,
424 Church Street, Suite 1200, Nashville, TN 37219
International Copyright Secured All Rights Reserved
Billie Jean
Words and Music by Michael Jackson
Copyright © 1982 Mijac Music
All Rights Administered by Sony/ATV Music Publishing LLC,
424 Church Street, Suite 1200, Nashville, TN 37219
International Copyright Secured All Rights Reserved
Can’t Take My Eyes Off Of You
Words and Music by Bob Crewe and Bob Gaudio
Copyright © 1967 EMI Longitude Music and Seasons Four Music
Copyright Renewed
All Rights on behalf of EMI Longitude Music Administered by Sony/ATV
Music Publishing LLC, 424 Church Street, Suite 1200, Nashville,
TN 37219
International Copyright Secured All Rights Reserved
Candle In The Wind
Words and Music by Elton John and Bernie Taupin
Copyright © 1973 UNIVERSAL/DICK JAMES MUSIC LTD.
Copyright Renewed
All Rights in the United States and Canada Controlled and Administered
by UNIVERSAL - SONGS OF POLYGRAM INTERNATIONAL,
INC.
All Rights Reserved Used by Permission
Clocks
Words and Music by Guy Berryman, Jon Buckland, Will Champion and
Chris Martin
Copyright © 2002 by Universal Music Publishing MGB Ltd.
All Rights in the United States Administered by Universal Music - MGB
Songs
International Copyright Secured All Rights Reserved
Dancing Queen
Words and Music by Benny Andersson, Bjorn Ulvaeus and Stig Anderson
Copyright © 1976, 1977 UNIVERSAL/UNION SONGS MUSIKFORLAG
AB
Copyright Renewed
All Rights Administered by UNIVERSAL - POLYGRAM
INTERNATIONAL PUBLISHING, INC. and EMI GROVE PARK
MUSIC, INC.
All Rights Reserved Used by Permission
Eternal Flame
Words and Music by Billy Steinberg, Tom Kelly and Susanna Hoffs
Copyright © 1988 Sony/ATV Music Publishing LLC and Bangophile
Music
All Rights on behalf of Sony/ATV Music Publishing LLC Administered by
Sony/ATV Music Publishing LLC, 424 Church Street, Suite 1200,
Nashville, TN 37219
All Rights on behalf of Bangophile Music Controlled and Administered by
Songs Of Universal, Inc.
International Copyright Secured All Rights Reserved
Every Breath You Take
Music and Lyrics by Sting
Copyright © 1983 G.M. Sumner
All Rights Administered by Sony/ATV Music Publishing LLC,
424 Church Street, Suite 1200, Nashville, TN 37219
International Copyright Secured All Rights Reserved
Fields Of Gold
Music and Lyrics by Sting
Copyright © 1993 Steerpike Ltd.
All Rights Administered by Sony/ATV Music Publishing LLC,
424 Church Street, Suite 1200, Nashville, TN 37219
International Copyright Secured All Rights Reserved
Final Countdown
Words and Music by Joey Tempest
Copyright © 1986 EMI Music Publishing Ltd.
All Rights Administered by Sony/ATV Music Publishing LLC,
424 Church Street, Suite 1200, Nashville, TN 37219
International Copyright Secured All Rights Reserved
The Girl From Ipanema (Garôta De Ipanema)
Music by Antonio Carlos Jobim
English Words by Norman Gimbel
Original Words by Vinicius De Moraes
Copyright © 1963 ANTONIO CARLOS JOBIM and VINICIUS DE
MORAES, Brazil
Copyright Renewed 1991 and Assigned to SONGS OF UNIVERSAL,
INC. and WORDS WEST LLC
English Words Renewed 1991 by NORMAN GIMBEL for the World and
Assigned to WORDS WEST LLC (P.O. Box 15187, Beverly Hills,
CA 90209 USA)
All Rights Reserved Used by Permission
Hallelujah
Words and Music by Leonard Cohen
Copyright © 1985 Sony/ATV Music Publishing LLC
A
l
l Rights Administered by Sony/ATV Music Publishing LLC,
424 Church Street, Suite 1200, Nashville, TN 37219
International Copyright Secured All Rights Reserved
Hey Jude
Words and Music by John Lennon and Paul McCartney
Copyright © 1968 Sony/ATV Music Publishing LLC
Copyright Renewed
All Rights Administered by Sony/ATV Music Publishing LLC,
424 Church Street, Suite 1200, Nashville, TN 37219
International Copyright Secured All Rights Reserved
The House Of The Rising Sun
Words and Music by Alan Price
Copyright © 1964 Keith Prowse Music Publishing Co., Ltd. and ole
Cantaloupe Music Copyright Renewed
All Rights Administered by Sony/ATV Music Publishing LLC,
424 Church Street, Suite 1200, Nashville, TN 37219
International Copyright Secured All Rights Reserved
I Will Always Love You
Words and Music by Dolly Parton
Copyright © 1973 Velvet Apple Music
Copyright Renewed
All Rights Administered by Sony/ATV Music Publishing LLC,
424 Church Street, Suite 1200, Nashville, TN 37219
International Copyright Secured All Rights Reserved
In The Mood
By Joe Garland
Copyright © 1939, 1960 Shapiro, Bernstein & Co., Inc., New York
Copyright Renewed

International Copyright Secured All Rights Reserved
Used by Permission
It Must Have Been Love
Words and Music by Per Gessle
Copyright © 1990 JIMMY FUN MUSIC
All Rights Administered in the United States and Canada
by UNIVERSAL - SONGS OF POLYGRAM INTERNATIONAL, INC.
All Rights Reserved Used by Permission
Just The Way You Are
Words and Music by Billy Joel
Copyright © 1977 IMPULSIVE MUSIC
Copyright Renewed
All Rights Administered by ALMO MUSIC CORP.
All Rights Reserved Used by Permission
La Bamba
By Richard Valenzuela
Copyright © 1959 EMI Longitude Music and Valens Heirs Designee
Copyright Renewed
All Rights Administered by Sony/ATV Music Publishing LLC,
424 Church Street, Suite 1200, Nashville, TN 37219
International Copyright Secured All Rights Reserved
Let It Go
from FROZEN
Music and Lyrics by Kristen Anderson-Lopez and Robert Lopez
© 2013 Wonderland Music Company, Inc.
All Rights Reserved. Used by Permission.
Let There Be Love
Lyric by Ian Grant
Music by Lionel Rand
Copyright © 1940 Shapiro, Bernstein & Co., Inc., New York
Copyright Renewed
International Copyright Secured
All Rights Reserved Used by Permission
Moon River
from the Paramount Picture BREAKFAST AT TIFFANY’S
Words by Johnny Mercer
Music by Henry Mancini
Copyright © 1961 Sony/ATV Music Publishing LLC
Copyright Renewed
All Rights Administered by Sony/ATV Music Publishing LLC,
424 Church Street, Suite 1200, Nashville, TN 37219
International Copyright Secured All Rights Reserved
Moves Like Jagger
Words and Music by Adam Levine, Benjamin Levin, Ammar Malik and
Shellback
Copyright © 2010, 2011 by Universal Music - Careers, Sudgee Music,
Matza Ball Music, Where Da Kasz At, Maru Cha Cha and MXM
All Rights for Sudgee Music Administered by Universal Music - Careers
All Rights for Matza Ball Music Administered by DTCM Blvd.
All Rights for Where Da Kasz At and Maru Cha Cha Administered
Worldwide by Song of Kobalt Music Publishing
All Rights for MXM Administered Worldwide by Kobalt Songs Music
Publishing
International Copyright Secured All Rights Reserved
My Heart Will Go On (Love Theme From 'Titanic')
from the Paramount and Twentieth Century Fox Motion Picture
TITANIC
Music by James Horner
Lyric by Will Jennings
Copyright © 1997 Sony/ATV Harmony, Sony/ATV Melody, T C F Music
Publishing, Inc., Fox Film Music Corporation and Blue Sky Rider
Songs
All Rights on behalf of Sony/ATV Harmony and Sony/ATV Melody
Administered by Sony/ATV Music Publishing LLC, 424 Church
Street, Suite 1200, Nashville, TN 37219
All Rights on behalf of Blue Sky Rider Songs Administered by Irving
Music, Inc.
International Copyright Secured All Rights Reserved
Poker Face
Words and Music by Stefani Germanotta and RedOne
Copyright © 2008 Sony/ATV Music Publishing LLC, House Of Gaga
Publishing Inc. and RedOne Productions, LLC
All Rights Administered by Sony/ATV Music Publishing LLC,
424 Church Street, Suite 1200, Nashville, TN 37219
International Copyright Secured All Rights Reserved
Someone Like You
Words and Music by Adele Adkins and Dan Wilson
Copyright © 2011 MELTED STONE PUBLISHING LTD., BMG
MONARCH and SUGAR LAKE MUSIC
All Rights for MELTED STONE PUBLISHING LTD. in the U.S. and
Canada Controlled and Administered by UNIVERSAL - SONGS OF
POLYGRAM INTERNATIONAL, INC.
All Rights for BMG MONARCH and SUGAR LAKE MUSIC
Administered by BMG RIGHTS MANAGEMENT (US) LLC
All Rights Reserved Used by Permission
Spanish Eyes
Words by Charles Singleton and Eddie Snyder
Music by Bert Kaempfert
Copyright © 1965 Bert Kaempfert Music
Copyright Renewed
All Rights Administered by Sony/ATV Music Publishing LLC,
424 Church Street, Suite 1200, Nashville, TN 37219
International Copyright Secured All Rights Reserved
Unchained Melody
Lyric by Hy Zaret
Music by Alex North
© 1955 (Renewed) North Melody Publishing (SESAC) and HZUM
Publishing (SESAC) c/o Unchained Melody Publishing, LLC
All Rights Reserved Used by Permission
Up Where We Belong
from the Paramount Picture AN OFFICER AND A GENTLEMAN
Words by Will Jennings
Music by Buffy Sainte-Marie and Jack Nitzsche
Copyright © 1982 Sony/ATV Music Publishing LLC
All Rights Administered by Sony/ATV Music Publishing LLC,
424 Church Street, Suite 1200, Nashville, TN 37219
International Copyright Secured All Rights Reserved
What A Wond erful World
Words and Music by George David Weiss and Bob Thiele
Copyright © 1967 by Range Road Music Inc., Quartet Music and Abilene
Music, Inc.
Copyright Renewed
All Rights for Rang Road Music Inc. Administered by Round Hill Carlin,
LLC
All Rights for Quartet Music Administered by BMG Rights Management
(US) LLC
All Ri
gh
ts for Abilene Music, Inc. Administered Worldwide by Imagem
Music LLC
International Copyright Secured All Rights Reserved
Used by Permission
White Christmas
from the Motion Picture Irving Berlin's HOLIDAY INN
Words and Music by Irving Berlin
© Copyright 1940, 1942 by Irving Berlin
Copyright Renewed
International Copyright Secured All Rights Reserved
Wonderful Tonight
Words and Music by Eric Clapton
Copyright © 1977 by Eric Patrick Clapton
Copyright Renewed
International Copyright Secured All Rights Reserved
Wond e r wa l l
Words and Music by Noel Gallagher
Copyright © 1995 SM Music Publishing UK Limited and Oasis Music
All Rights Administered by Sony/ATV Music Publishing LLC,
424 Church Street, Suite 1200, Nashville, TN 37219
International Copyright Secured All Rights Reserved
You’ve Lost That Lovin’ Feelin’
Words and Music by Barry Mann, Cynthia Weil and Phil Spector
Copyright © 1964, 1965 Screen Gems-EMI Music Inc. and Mother Bertha
Music
Copyright Renewed
All Rights Administered by Sony/ATV Music Publishing LLC,
424 Church Street, Suite 1200, Nashville, TN 37219
International Copyright Secured All Rights Reserved
Apache License 2.0
Copyright (c) 2009-2018 Arm Limited. All rights reserved.
SPDX-License-Identifier: Apache-2.0
Licensed under the Apache License, Version 2.0 (the License); you may not use this file except in compliance with the License.
You may obtain a copy of the License at
www.apache.org/licenses/LICENSE-2.0
Unless required by applicable law or agreed to in writing, software distributed under the License is distributed on an AS IS BASIS,
WITHOUT WARRANTIES OR CONDITIONS OF ANY KIND, either express or implied.
See the License for the specific language governing permissions and limitations under the License.
Modified BSD license
COPYRIGHT(c) 2016 STMicroelectronics
Redistribution and use in source and binary forms, with or without modification, are permitted provided that the following conditions are
met:
1. Redistributions of source code must retain the above copyright notice, this list of conditions and the following disclaimer.
2. Redistributions in binary form must reproduce the above copyright notice, this list of conditions and the following disclaimer in the
documentation and/or other materials provided with the distribution.
3. Neither the name of STMicroelectronics nor the names of its contributors may be used to endorse or promote products derived from this
software without specific prior written permission.
THIS SOFTWARE IS PROVIDED BY THE COPYRIGHT HOLDERS AND CONTRIBUTORS "AS IS" AND ANY EXPRESS OR IMPLIED
WARRANTIES, INCLUDING, BUT NOT LIMITED TO, THE IMPLIED WARRANTIES OF MERCHANTABILITY AND FITNESS FOR A
PARTICULAR PURPOSE ARE DISCLAIMED. IN NO EVENT SHALL THE COPYRIGHT HOLDER OR CONTRIBUTORS BE LIABLE FOR
ANY DIRECT, INDIRECT, INCIDENTAL, SPECIAL, EXEMPLARY, OR CONSEQUENTIAL DAMAGES (INCLUDING, BUT NOT LIMITED
TO, PROCUREMENT OF SUBSTITUTE GOODS OR SERVICES; LOSS OF USE, DATA, OR PROFITS; OR BUSINESS
INTERRUPTION) HOWEVER CAUSED AND ON ANY THEORY OF LIABILITY, WHETHER IN CONTRACT, STRICT LIABILITY, OR
TORT (INCLUDING NEGLIGENCE OR OTHERWISE) ARISING IN ANY WAY OUT OF THE USE OF THIS SOFTWARE, EVEN IF
ADVISED OF THE POSSIBILITY OF SUCH DAMAGE.
Important Notice:
U.S. LIMITED WARRANTY for Customers in the United States
For detailed information about this Yamaha product and warranty service,
please either visit the following website address (printable file is available at our website)
or contact Customer Service at the address or telephone number identified below.
Website Address:
yamaha.io/PSeriesWarranty
Customer Service:
Yamaha Corporation of America
6600 Orangethorpe Avenue, Buena Park, CA 90620-1273
Telephone: 800-854-1569
For details of products, please contact your nearest Yamaha
representative or the authorized distributor listed below.
Pour plus de détails sur les produits, veuillez-vous adresser à Yamaha
ou au distributeur le plus proche de vous figurant dans la liste suivante.
Die Einzelheiten zu Produkten sind bei Ihrer unten aufgeführten
Niederlassung und bei Yamaha Vertragshändlern in den jeweiligen
Bestimmungsländern erhältlich.
Para detalles sobre productos, contacte su tienda Yamaha más
cercana o el distribuidor autorizado que se lista debajo.
CANADA
Yamaha Canada Music Ltd.
135 Milner Avenue, Toronto, Ontario M1S 3R1,
Canada
Tel: +1-416-298-1311
U.S.A.
Yamaha Corporation of America
6600 Orangethorpe Avenue, Buena Park, CA 90620,
U.S.A.
Tel: +1-714-522-9011
MEXICO
Yamaha de México, S.A. de C.V.
Av. Insurgentes Sur 1647 Piso 9, Col. San José
Insurgentes, Delegación Benito Juárez, México,
D.F., C.P. 03900, México
Tel: +52-55-5804-0600
BRAZIL
Yamaha Musical do Brasil Ltda.
Praça Professor José Lannes, 40, Cjs 21 e 22, Brooklin
Paulista Novo CEP 04571-100 – São Paulo – SP,
Brazil
Tel: +55-11-3704-1377
ARGENTINA
Yamaha Music Latin America, S.A.,
Sucursal Argentina
Olga Cossettini 1553, Piso 4 Norte,
Madero Este-C1107CEK,
Buenos Aires, Argentina
Tel: +54-11-4119-7000
PANAMA AND OTHER LATIN
AMERICAN REGIONS/
CARIBBEAN REGIONS
Yamaha Music Latin America, S.A.
Edificio Torre Davivienda, Piso: 20
Avenida Balboa, Marbella, Corregimiento de Bella
Vista, Ciudad de Panamá, Rep. de Panamá
Tel: +507-269-5311
THE UNITED KINGDOM/IRELAND
Yamaha Music Europe GmbH (UK)
Sherbourne Drive, Tilbrook, Milton Keynes,
MK7 8BL, U.K.
Tel: +44-1908-366700
GERMANY
Yamaha Music Europe GmbH
Siemensstrasse 22-34, 25462 Rellingen, Germany
Tel: +49-4101-303-0
SWITZERLAND/LIECHTENSTEIN
Yamaha Music Europe GmbH, Branch
Switzerland in Thalwil
Seestrasse 18a, 8800 Thalwil, Switzerland
Tel: +41-44-3878080
AUSTRIA/CROATIA/
CZECH REPUBLIC
/
HUNGARY/ROMANIA/SLOVAKIA/
SLOVENIA
Yamaha Music Europe GmbH, Branch Austria
Schleiergasse 20, 1100 Wien, Austria
Tel: +43-1-60203900
POLAND
Yamaha Music Europe
Sp.z o.o. Oddział w Polsce
ul. Wielicka 52, 02-657 Warszawa, Poland
Tel: +48-22-880-08-88
BULGARIA
Dinacord Bulgaria LTD.
Bul.Iskarsko Schose 7 Targowski Zentar Ewropa
1528 Sofia, Bulgaria
Tel: +359-2-978-20-25
MALTA
Olimpus Music Ltd.
Valletta Road, Mosta MST9010, Malta
Tel: +356-2133-2093
NETHERLANDS/BELGIUM/
LUXEMBOURG
Yamaha Music Europe, Branch Benelux
Clarissenhof 5b, 4133 AB Vianen, The Netherlands
Tel: +31-347-358040
FRANCE
Yamaha Music Europe
7 rue Ambroise Croizat, Zone d'activités de Pariest,
77183 Croissy-Beaubourg, France
Tel: +33-1-6461-4000
ITALY
Yamaha Music Europe GmbH, Branch Italy
Via Tinelli N.67/69 20855 Gerno di Lesmo (MB),
Italy
Tel: +39-039-9065-1
SPAIN/PORTUGAL
Yamaha Music Europe GmbH Ibérica, Sucursal
en España
Ctra. de la Coruña km. 17,200, 28231
Las Rozas de Madrid, Spain
Tel: +34-91-639-88-88
GREECE
Philippos Nakas S.A. The Music House
19th klm. Leof. Lavriou 190 02 Peania – Attiki,
Greece
Tel: +30-210-6686260
SWEDEN
Yamaha Music Europe GmbH Germany filial
Scandinavia
JA Wettergrensgata 1, 400 43 Göteborg, Sweden
Tel: +46-31-89-34-00
DENMARK
Yamaha Music Denmark,
Fillial of Yamaha Music Europe GmbH, Tyskland
Generatorvej 8C, ST. TH., 2860 Søborg, Denmark
Tel: +45-44-92-49-00
FINLAND
F-Musiikki Oy
Antaksentie 4
FI-01510 Vantaa, Finland
Tel: +358 (0)96185111
NORWAY
Yamaha Music Europe GmbH Germany -
Norwegian Branch
Grini Næringspark 1, 1332 Østerås, Norway
Tel: +47-6716-7800
ICELAND
Hljodfaerahusid Ehf.
Sidumula 20
IS-108 Reykjavik, Iceland
Tel: +354-525-5050
CYPRUS
Nakas Music Cyprus Ltd.
Nikis Ave 2k
1086 Nicosia
Tel: + 357-22-511080
Major Music Center
21 Ali Riza Ave. Ortakoy
P.O.Box 475 Lefkoşa, Cyprus
Tel: (392) 227 9213
RUSSIA
Yamaha Music (Russia) LLC.
Room 37, entrance 7, bld. 7, Kievskaya street,
Moscow, 121059, Russia
Tel: +7-495-626-5005
OTHER EUROPEAN REGIONS
Yamaha Music Europe GmbH
Siemensstrasse 22-34, 25462 Rellingen, Germany
Tel: +49-4101-303-0
Yamaha Music Gulf FZE
JAFZA-16, Office 512, P.O.Box 17328,
Jebel Ali FZE, Dubai, UAE
Tel: +971-4-801-1500
TURKEY
Yamaha Music Europe GmbH
Merkezi Almanya Türkiye İstanbul Şubesi
Mor Sumbul Sokak Varyap Meridian Business
1.Blok No:1 113-114-115
Bati Atasehir Istanbul, Turkey
Tel: +90-216-275-7960
ISRAEL
RBX International Co., Ltd.
P.O Box 10245, Petach-Tikva, 49002
Tel: (972) 3-925-6900
OTHER REGIONS
Yamaha Music Gulf FZE
JAFZA-16, Office 512, P.O.Box 17328,
Jebel Ali FZE, Dubai, UAE
Tel: +971-4-801-1500
THE PEOPLE’S REPUBLIC OF CHINA
Yamaha Music & Electronics (China) Co., Ltd.
2F, Yunhedasha, 1818 Xinzha-lu, Jingan-qu,
Shanghai, China
Tel: +86-400-051-7700
HONG KONG
Tom Lee Music Co., Ltd.
11/F., Silvercord Tower 1, 30 Canton Road,
Tsimshatsui, Kowloon, Hong Kong
Tel: +852-2737-7688
INDIA
Yamaha Music India Private Limited
P-401, JMD Megapolis, Sector-48, Sohna Road,
Gurugram-122018, Haryana, India
Tel: +91-124-485-3300
INDONESIA
PT. Yamaha Musik Indonesia (Distributor)
Yamaha Music Center Bldg. Jalan Jend. Gatot
Subroto Kav. 4, Jakarta 12930, Indonesia
Tel: +62-21-520-2577
KOREA
Yamaha Music Korea Ltd.
11F, Prudential Tower, 298, Gangnam-daero,
Gangnam-gu, Seoul, 06253, Korea
Tel: +82-2-3467-3300
MALAYSIA
Yamaha Music (Malaysia) Sdn. Bhd.
No.8, Jalan Perbandaran, Kelana Jaya, 47301
Petaling Jaya, Selangor, Malaysia
Tel: +60-3-78030900
SINGAPORE
Yamaha Music (Asia) Private Limited
Block 202 Hougang Street 21, #02-00,
Singapore 530202, Singapore
Tel: +65-6740-9200
TAIWAN
Yamaha Music & Electronics Taiwan Co., Ltd.
2F., No.1, Yuandong Rd., Banqiao Dist.,
New Taipei City 22063, Taiwan (R.O.C.)
Tel: +886-2-7741-8888
THAILAND
Siam Music Yamaha Co., Ltd.
3, 4, 15, 16th Fl., Siam Motors Building,
891/1 Rama 1 Road, Wangmai,
Pathumwan, Bangkok 10330, Thailand
Tel: +66-2215-2622
VIETNAM
Yamaha Music Vietnam Company Limited
15th Floor, Nam A Bank Tower, 201-203 Cach
Mang Thang Tam St., Ward 4, Dist.3,
Ho Chi Minh City, Vietnam
Tel: +84-28-3818-1122
OTHER ASIAN REGIONS
https://asia-latinamerica-mea.yamaha.com/
index.html
AUSTRALIA
Yamaha Music Australia Pty. Ltd.
Level 1, 80 Market Street, South Melbourne,
VIC 3205 Australia
Tel: +61-3-9693-5111
NEW ZEALAND
Music Works LTD
P.O.BOX 6246 Wellesley, Auckland 4680,
New Zealand
Tel: +64-9-634-0099
REGIONS AND TRUST
TERRITORIES IN PACIFIC OCEAN
https://asia-latinamerica-mea.yamaha.com/
index.html
NORTH AMERICA
CENTRAL & SOUTH AMERICA
EUROPE
AFRICA
MIDDLE EAST
ASIA
OCEANIA
DMI28
Head Office/Manufacturer: Yamaha Corporation 10-1, Nakazawa-cho, Naka-ku, Hamamatsu, 430-8650, Japan
(For Europe) Importer: Yamaha Music Europe GmbH Siemensstrasse 22-34, 25462 Rellingen, Germany

Manual Development Group
© 2020 Yamaha Corporation
Published 10/2020 MWMA*.*- **A0
Yamaha Global Site
https://www.yamaha.com/
Yamaha Downloads
https://download.yamaha.com/
VDQ8160