
Loading ...
Loading ...
Loading ...
12
ASSEMBLY
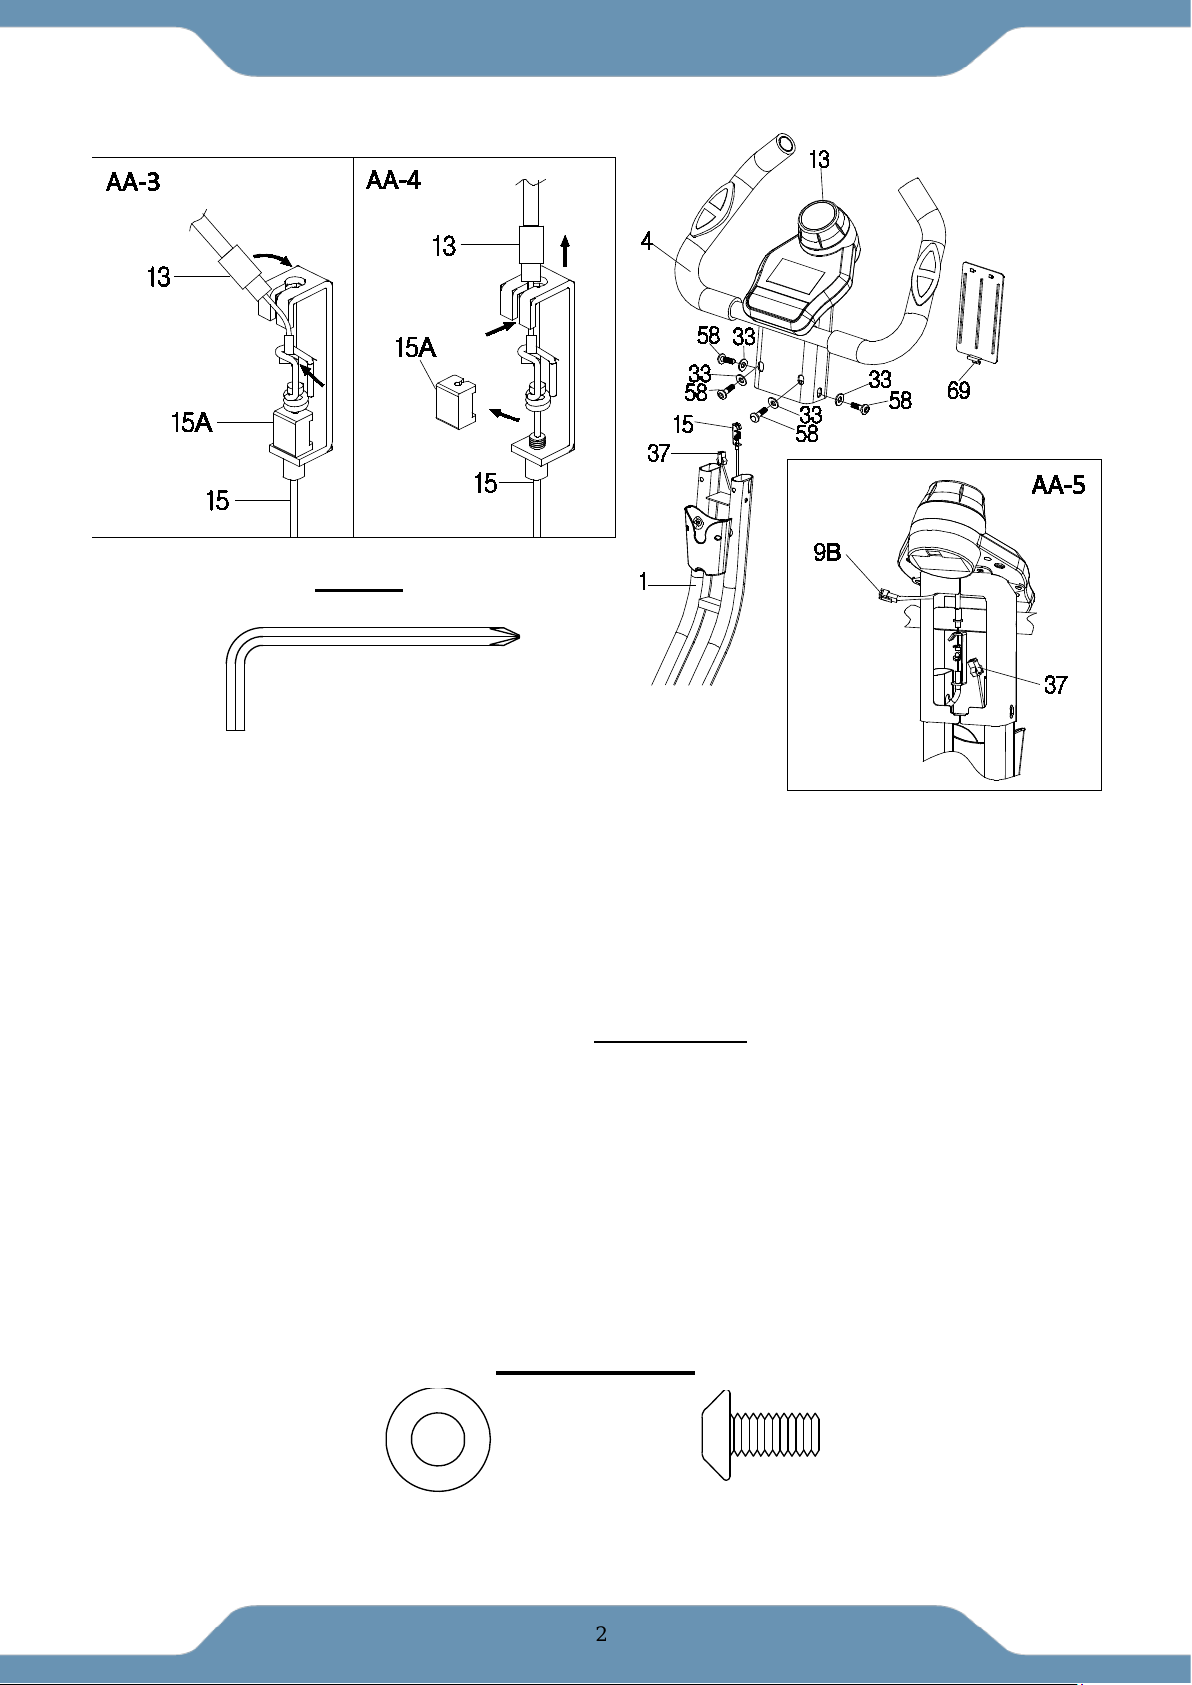
Step 4
Tip: If you need more room to install, lift the handlebars up.
4A Installing the Tension Control Knob: Place the Handlebar (4) onto the Front Frame (1), and
remove the Console Cover (69) from the back of the Handlebar (4). Turn the Tension Control
Knob (13) to the highest tension by turning it CLOCKWISE. Hook the tension cable from the
Tension Control Knob (13) into the cable lock of the Tension Cable (15) coming from the Front
Frame (1). See Figure AA-3. Remove the Clip (15A) after the two cables have been locked. See
AA-4. See Figure AA-5 for an example of how the cable lock should look like.
4B Connecting the Computer Wire to the Sensor Wire: Connect the Computer Wire (9B) to the
Sensor Wire (37). See Figure AA-5. Then re-attach the Console Cover (69) onto the back side of
the Handlebar (4). Secure the Handlebar (4) onto the Front Frame (1) with four Flat Washers (33)
and four Hexagon Socket Bolts (58). Tighten the Hexagon Socket Bolts (58) by using the 5mm
Allen Wrench with Phillips Screwdriver provided.
HARDWARE:
(58) Hexagon Socket Bolt
4PCS
(33) Flat Washer
4PCS
5mm Allen Wrench with
Phillips Screwdriver
1PC
TOOL
Loading ...
Loading ...
Loading ...