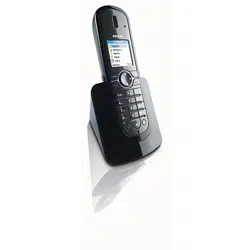
Welcome
Quick start guide
1
Connect
2
Install
3
Enjoy
Philips
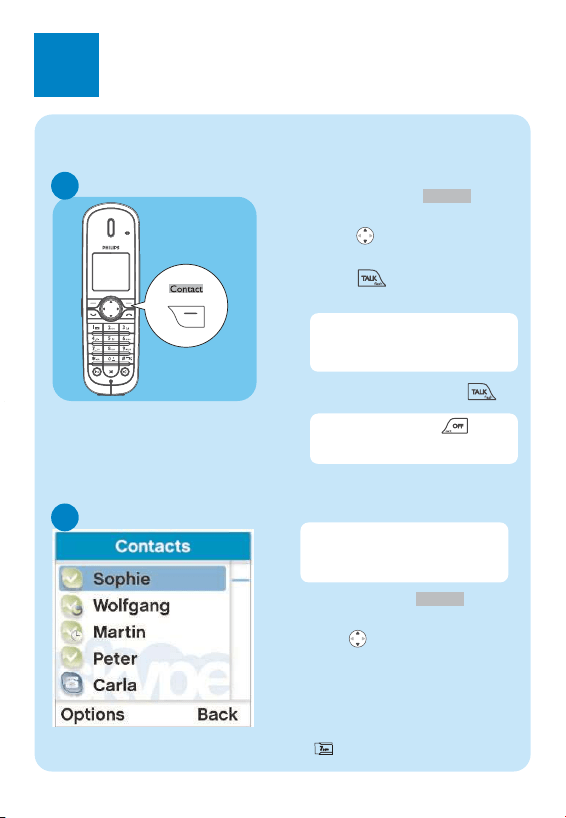
Make and answer calls
A
●
Enter the phone number.
●
Press and scroll to
Landline.
●
Press .
Select
Options
3
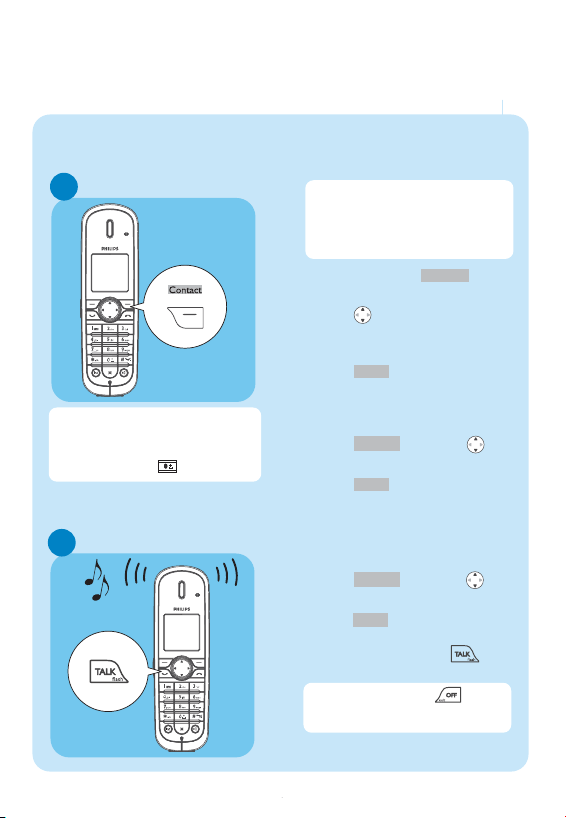
Enjoy
To end a call press or
place the phone on the charger.
Landline calls
Make and answer calls
A
●
Press the softkey to
access your Skype Contacts list.
●
Press (Up or Down) to select
the Skype contact.
●
Press to call the selected
contact.
Contact
Use the contact list
B
●
Press the softkey to
access your Skype Contacts list.
●
Press (Up or Down) to select
the contact you want to call.
OR
●
Search by letter: Enter the first
letter of the contact using the key-
pad, e.g. to search for “Sam”, press
four times.
Contact
Skype calls
C
Call a SkypeOut number
When an incoming call arrives,
the phone will ring and the LED
on the phone will flash quickly.
●
To answer the call press .
The contacts list shows the
Skype contacts and the online
status.
For details about how to get a
SkypeOut account, please visit:
http://www.skype.com/products/
skypeout
To end a call press or
place the phone on the charger.
●
Press the softkey to
access your Skype Contacts list.
●
Press (Up or Down) to select
the SkypeOut contact you want
to call.
●
Press to call the contact.
OR
●
Use the keypad to dial the
number you want to call.*
●
Press and scroll to
SkypeOut.
●
Press .
Select
Options
Select
Contact
●
To answer a call press .
*Warning: to make a SkypeOut call you
must dial the country prefix first (ex:
0033 or +33 for France).
Tip: Long press on key to dial "+".
WARNING
Never use non-rechargeable batteries.
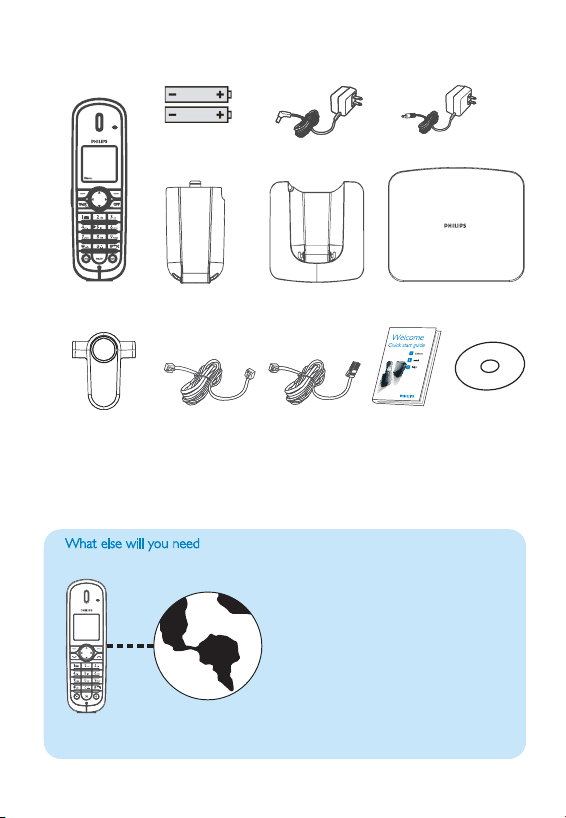
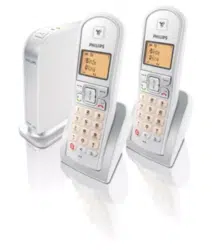
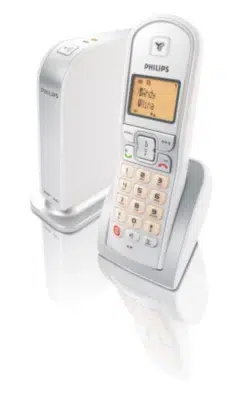
What’s in the box
e w y n
Handset
Charger
Power supply for base
Quick start
guide
Belt clip
●
Internet connection (high speed
Internet connection)
●
A Skype account
●
Internet connection with an
ADSL/Cable modem router or a
router connected to an ADSL/Cable
modem. Need at least one Ethernet
LAN plug available.
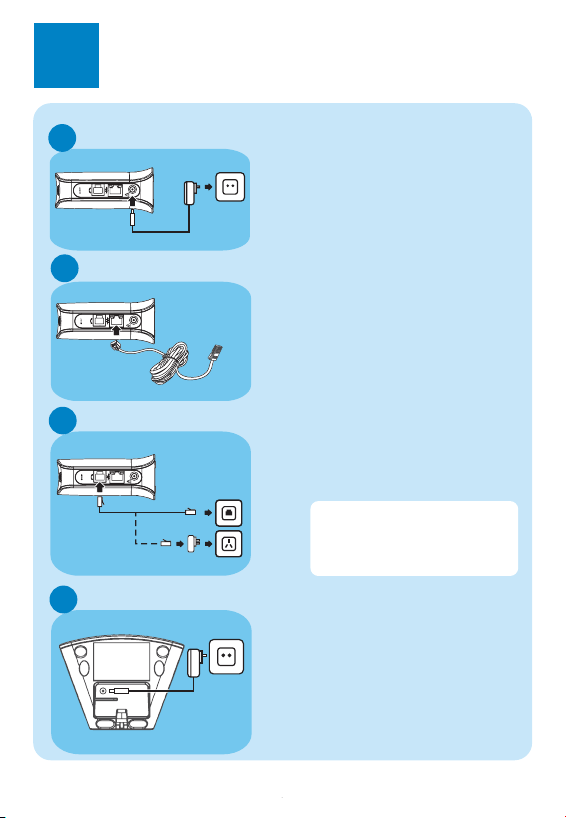
1
Connect
Connect the Ethernet cable
●
Connect one end of the Ethernet
cable to the Ethernet socket on
the side of the base unit.
●
Connect the other end of the
ethernet cable to an available
ethernet LAN plug of your
ADSL/modem (or a router
connected to Internet).
2
Install
Insert batteries
A
●
Place the 2 rechargeable NiMH
AAA batteries, observing their
polarities, into the battery
compartment on the handset.
●
Slide the battery door firmly into
place.
3111 285 32052
Battery door
Two 750mAh
AAA NiMH
batteries
Base station
Line cord
Charge handset
14
B
●
Before first use, put the handset
on the charger and charge
batteries for 14 hours.
Settings before first use
C
At first start up, you will be asked
to set the language, accept an agree-
ment, select the country where the
phone is to be used and set the
area code.
Set the display language:
●
Scroll to the language you
want.
●
Press to confirm.
Review the agreement
●
Press (Up or Down) to scroll
through the agreement.
●
Press to accept the
agreement and proceed.
Accept
Select
A telephone line
Connect the line
C
●
Connect the telephone line cord to
the phone socket on the side of the
base unit and the wall phone
socket.
Connect to main supply
●
Insert the plug of the base power
adapter into the socket on the
side of the base unit.
●
Plug the base power adapter into
your power outlet.
A
B
Power supply for
charger
Ethernet cable
(blue cable)
User manual
on CD
Connect the charger
D
●
Insert the plug of the charger
power adapter into the socket on
the bottom of the charger.
●
Plug the power adapter into your
power outlet.
Select your country:
●
Scroll to your country name.
If you don’t see your country name,
select “OTHERS” on the bottom of the
list and enter your international calling
code (i.e.“
1
” for Canada or “
61
” for
Australia), see section “
8.10
Country
codes list” in the user manual.
●
Press to confirm.
Set your area code:
●
Enter the area code.
Area code is depending of the country,
if you are not using area code press
.
Use to correct typing
errors.
●
Press to confirm.
OK
Clear
OK
Select
If using ADSL subcription, an
ADSL filter should be inserted
between the phone plug and the
wall socket.
What’s in the box
e w y n
Handset
Charger
Power supply for base
Quick start
guide
Belt clip
●
Internet connection (high speed
Internet connection)
●
A Skype account
●
Internet connection with an
ADSL/Cable modem router or a
router connected to an ADSL/Cable
modem. Need at least one Ethernet
LAN plug available.
1
Connect
Connect the Ethernet cable
●
Connect one end of the Ethernet
cable to the Ethernet socket on
the side of the base unit.
●
Connect the other end of the
ethernet cable to an available
ethernet LAN plug of your
ADSL/modem (or a router
connected to Internet).
2
Install
Insert batteries
A
●
Place the 2 rechargeable NiMH
AAA batteries, observing their
polarities, into the battery
compartment on the handset.
●
Slide the battery door firmly into
place.
3111 285 32052
Battery door
Two 750mAh
AAA NiMH
batteries
Base station
Line cord
Charge handset
14
B
●
Before first use, put the handset
on the charger and charge
batteries for 14 hours.
Settings before first use
C
At first start up, you will be asked
to set the language, accept an agree-
ment, select the country where the
phone is to be used and set the
area code.
Set the display language:
●
Scroll to the language you
want.
●
Press to confirm.
Review the agreement
●
Press (Up or Down) to scroll
through the agreement.
●
Press to accept the
agreement and proceed.
Accept
Select
A telephone line
Connect the line
C
●
Connect the telephone line cord to
the phone socket on the side of the
base unit and the wall phone
socket.
Connect to main supply
●
Insert the plug of the base power
adapter into the socket on the
side of the base unit.
●
Plug the base power adapter into
your power outlet.
A
B
Power supply for
charger
Ethernet cable
(blue cable)
User manual
on CD
Connect the charger
D
●
Insert the plug of the charger
power adapter into the socket on
the bottom of the charger.
●
Plug the power adapter into your
power outlet.
Select your country:
●
Scroll to your country name.
If you don’t see your country name,
select “OTHERS” on the bottom of the
list and enter your international calling
code (i.e.“
1
” for Canada or “
61
” for
Australia), see section “
8.10
Country
codes list” in the user manual.
●
Press to confirm.
Set your area code:
●
Enter the area code.
Area code is depending of the country,
if you are not using area code press
.
Use to correct typing
errors.
●
Press to confirm.
OK
Clear
OK
Select
If using ADSL subcription, an
ADSL filter should be inserted
between the phone plug and the
wall socket.
Welcome
Quick start guide
1
Connect
2
Install
3
Enjoy
Philips
Make and answer calls
A
●
Enter the phone number.
●
Press and scroll to
Landline.
●
Press .
Select
Options
3
Enjoy
To end a call press or
place the phone on the charger.
Landline calls
Make and answer calls
A
●
Press the softkey to
access your Skype Contacts list.
●
Press (Up or Down) to select
the Skype contact.
●
Press to call the selected
contact.
Contact
Use the contact list
B
●
Press the softkey to
access your Skype Contacts list.
●
Press (Up or Down) to select
the contact you want to call.
OR
●
Search by letter: Enter the first
letter of the contact using the key-
pad, e.g. to search for “Sam”, press
four times.
Contact
Skype calls
C
Call a SkypeOut number
When an incoming call arrives,
the phone will ring and the LED
on the phone will flash quickly.
●
To answer the call press .
The contacts list shows the
Skype contacts and the online
status.
For details about how to get a
SkypeOut account, please visit:
http://www.skype.com/products/
skypeout
To end a call press or
place the phone on the charger.
●
Press the softkey to
access your Skype Contacts list.
●
Press (Up or Down) to select
the SkypeOut contact you want
to call.
●
Press to call the contact.
OR
●
Use the keypad to dial the
number you want to call.*
●
Press and scroll to
SkypeOut.
●
Press .
Select
Options
Select
Contact
●
To answer a call press .
*Warning: to make a SkypeOut call you
must dial the country prefix first (ex:
0033 or +33 for France).
Tip: Long press on key to dial "+".
WARNING
Never use non-rechargeable batteries.
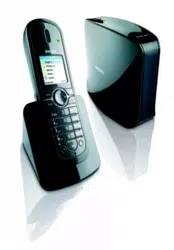