Loading ...
Loading ...
Loading ...
User Manual Page 19
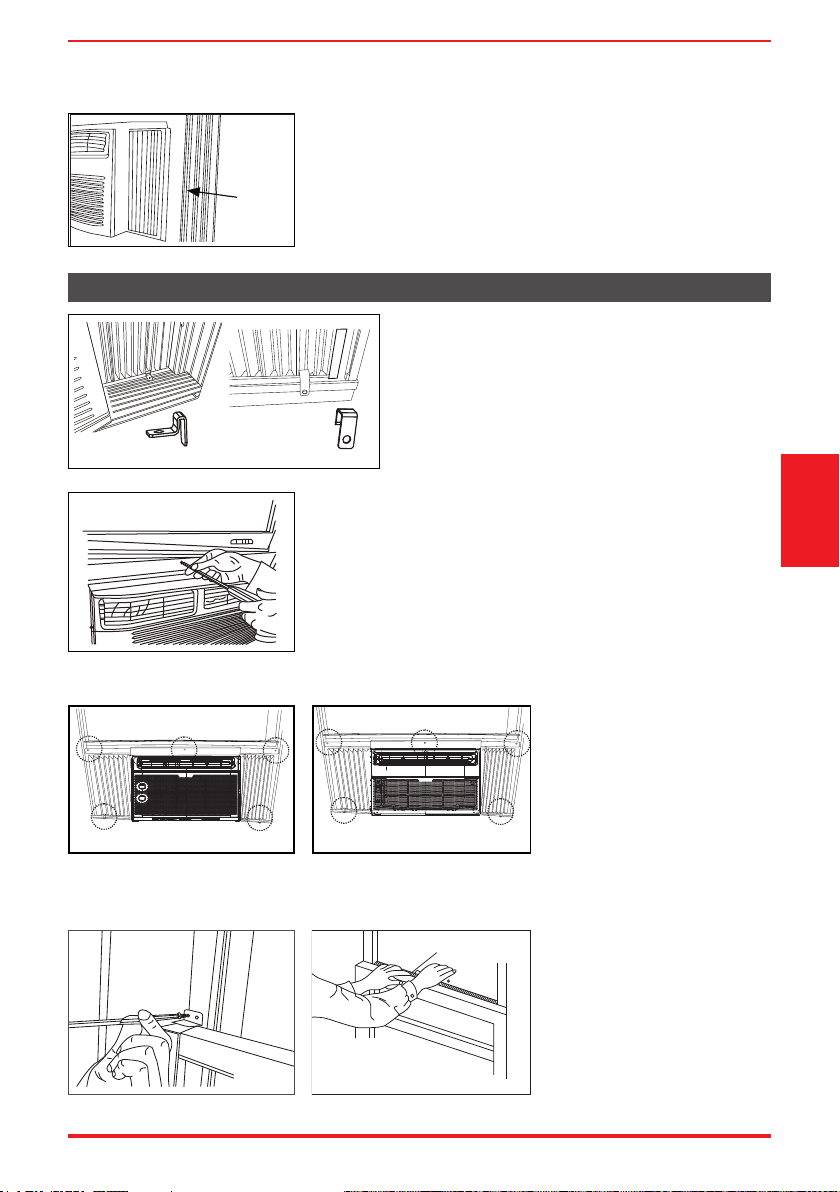
window
frame
Fig. 6
Fig. 7A Fig. 7B
Fig. 9
Fig. 9
FOAM SEAL
Fig. 10
A. Place the frame lock between the frame extensions
and the window sill as shown (Fig. 7A for Wooden
windows), (Fig. 7B for Vinyl-Clad windows).
Drive 3/4” (19 mm) or 1/2” (12.7 mm) locking
screws through the frame lock and into the sill.
B1: For wooden windows:
Drive 1/2” (12.7 mm) locking screws through the top rail and into
the window sash (Fig. 8A).
NOTE: To prevent window sill from splitting, drill 1/8” (3mm)
pilot holes before driving screws. Drive 1/2” (12.7mm) locking
screws through frame holes into window sash (Fig. 8B/8C).
B2: For Vinyl-Clad windows:
Drive 1/2” (12.7 mm) locking
screws through the top rail
and into the window sash
(Fig. 8B/8C).
NOTE: Before driving the
screws, drill 5 holes into the
window through the holes
of the top rail and side panel
frames as shown (Fig. 8B/8C).
B. Extend the side panels out against
the window frame (Fig. 6).
5. Secure Air Conditioner
Fig.8
Fig. 8B
Fig.8
Fig. 8C
RAC-WK05/06 only Models RAC-WK08/10/12/15
Fig. 8A
C. Secure lower sash in place
by attaching the sash lock
with the 3/4” (19 mm) or
1/2” (12.7 mm) screw as
shown (Fig. 9).
D. Cut Window sash seal foam
and insert it in the space
between the upper and
lower sashes (Fig. 10).
Installation
Instructions
Loading ...
Loading ...
Loading ...