
Loading ...
Loading ...
Loading ...
- 8
the directions provided by the manufacturer
of the charger.
Danger
Charge the battery only with an appropriate
charger.
Disconnect battery.
Connect positive terminal cable from
the charger to the positive pole connec-
tion on the battery.
Connect negative terminal cable from
the charger to the negative pole con-
nection on the battery.
Plug in mains connector and switch on
charger.
Note: When the battery is charged, first re-
move the charger from the mains and then
disconnect it from the battery.
Remove the tail panel.
Disconnect pole terminal to negative
pole (-).
Disconnect pole terminal to positive
pole (+).
Remove the battery from the battery
holder.
Used batteries are to be disposed ac-
cording to the EC guideline 91/ 157
EWG or the corresponding national
regulations in an environment-friendly
manner.
Park the sweeper on an even surface.
Connect air pressure testing device to
tyre valve.
Check air pressure and adjust if re-
quired.
For permissible tyre inflation pressure
see Chapter "Technical specifications".
Park the sweeper on an even surface.
Remove ignition key.
Check stability of ground. Lock the ap-
pliance to ensure that it does not roll off.
Position vehicle jack at the appropriate
mounting point for the front or rear
wheel.
NOTICE
Use a suitable commercially available vehi-
cle jack.
Loosen the wheel nuts by approx. 1 ro-
tation using a suitable tool.
Replace the rear wheel
1 Axle
2 Rear wheel
3 Locking plate
4 Safety disc
Raise slightly the waste container on
the appropriate side and pull it out.
Raise machine using vehicle jack.
Remove the lock washer and locking
plate.
Remove wheel.
Have the defective wheel repaired by a
specialised repair shop.
Push the wheel all the way onto the ax-
le.
Mount the locking plate and lock wash-
er.
Lower machine using vehicle jack.
Push in the waste container and lock it.
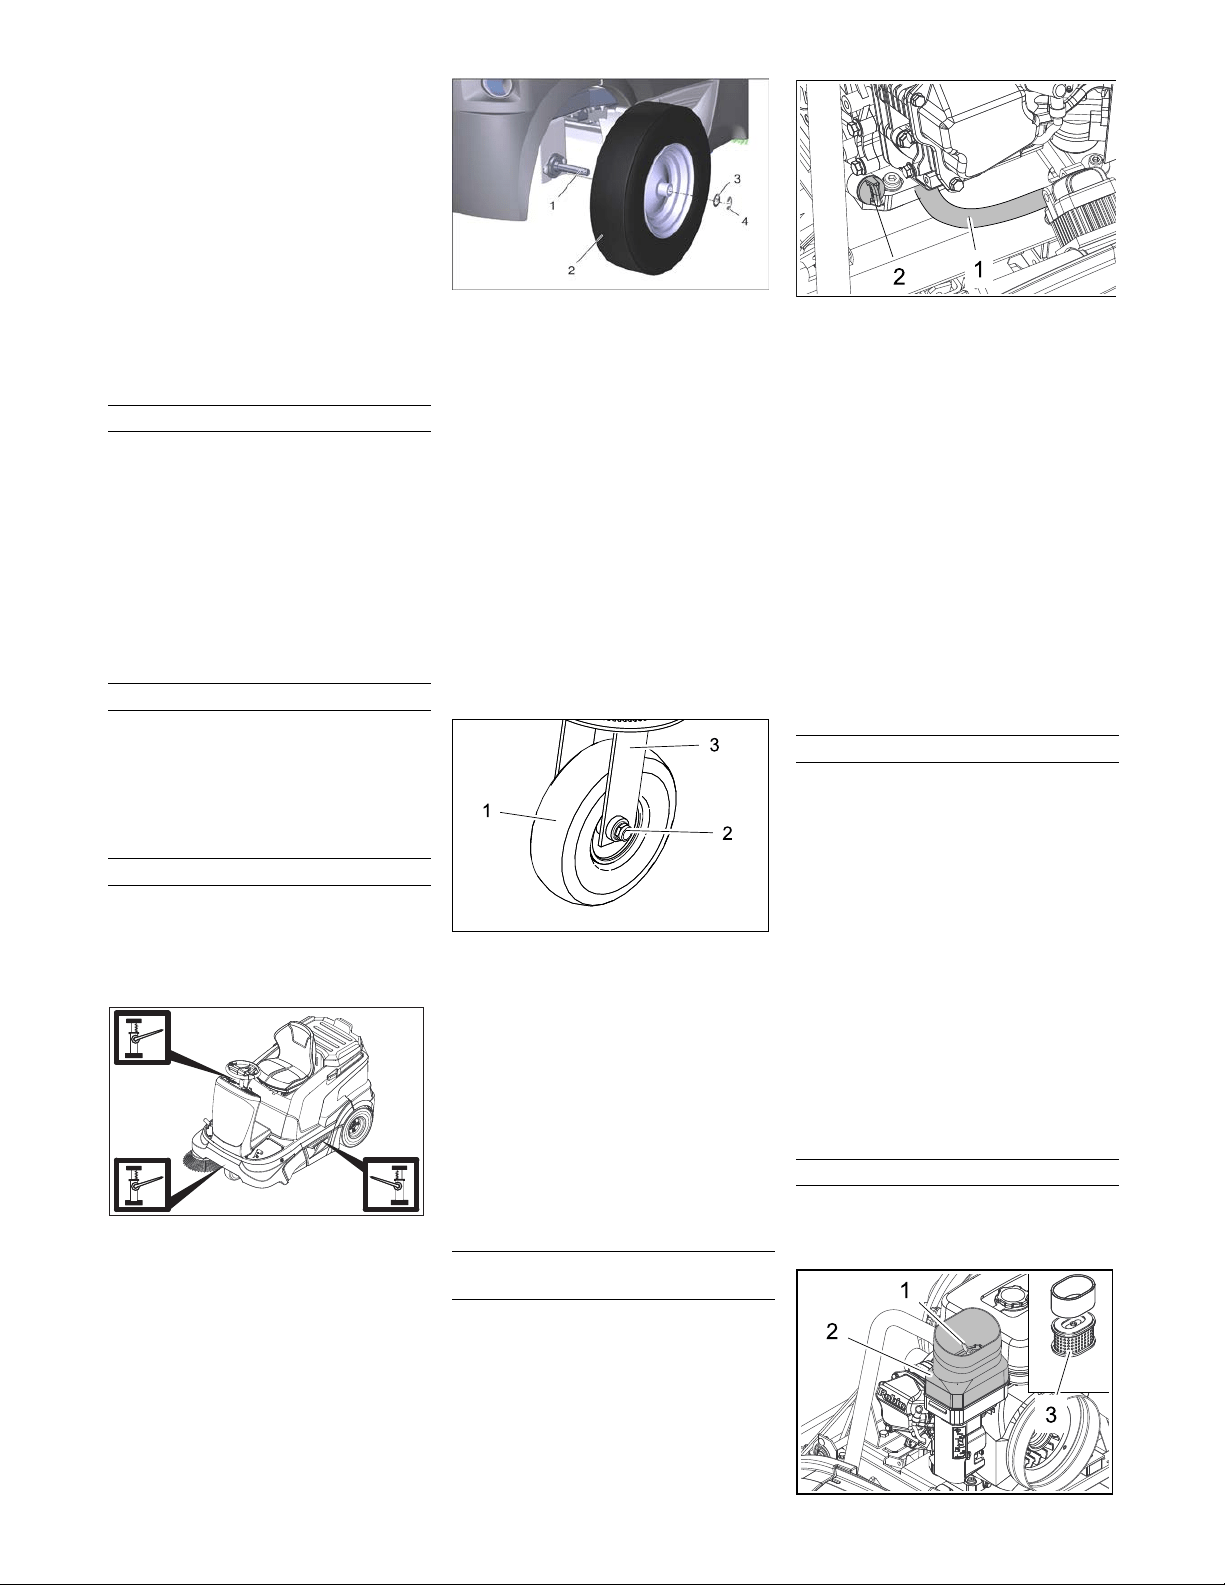
Replace the front wheel
1 Front wheel
2 Nut
3 Intake
Raise machine using vehicle jack.
Loosen both screws on the wheel axle
by 1-2 rotations. If necessary, hold up a
second wrench to loosen them.
Remove the wheel together with the ax-
le.
Have the defective wheel repaired by a
specialised repair shop.
Tighten the repaired front wheel with
the axle and nut to the retainer.
Lower machine using vehicle jack.
DANGER
Risk of burns on account of hot surfaces!
Allow engine to cool down.
Wait for at least 5 minutes after switch-
ing off the engine before checking the
engine oil fill level.
Open the device hood.
1
Oil drain hose
2 Oil dipstick
Unscrew and withdraw oil dipstick.
Wipe off and insert the oil dipstick (do
not turn it in).
Remove the oil dip one more time and
check the oil level.
– The oil level must lie between “MIN“
and “MAX“ marking.
– Add motor oil if the oil level is below the
"MIN" marking.
– Do not fill oil above the "MAX" marking.
Fill motor oil into the oil fill neck.
Note: For filling in the motor oil, use ac-
cessories such as a bent funnel tube or
an oil-change pump 6.491-538.
For oil type refer to Chapter "Technical
specifications".
Wait at least 5 minutes.
If the engine oil level is correct, screw in
the oil dipstick.
Danger
Risk of burns due to hot oil!
Allow engine to cool down.
Open the device hood.
Ready a catch bin for appr. 1 litre oil.
Unscrew the locking screw of the oil
drain hose and drain the oil.
Screw in the locking screw and tighten
it again.
Unscrew and withdraw oil dipstick.
Fill motor oil into the oil fill neck.
For oil type and filling quantity refer to
Chapter "Technical specifications".
Wait at least 5 minutes.
Check engine oil level.
If the engine oil level is correct, screw in
the oil dipstick.
Deliver the old oil to the respective col-
lection centres.
DANGER
Risk of burns on account of hot surfaces!
Allow engine to cool down.
1 Wing bolt
Remove the battery
Check the tyre pressure
Replacing wheel
Tightening torque (Nm) 56 Nm
Check engine oil level and top up, if
required
Change the engine oil
Change the air filter
24 EN
Loading ...
Loading ...
Loading ...